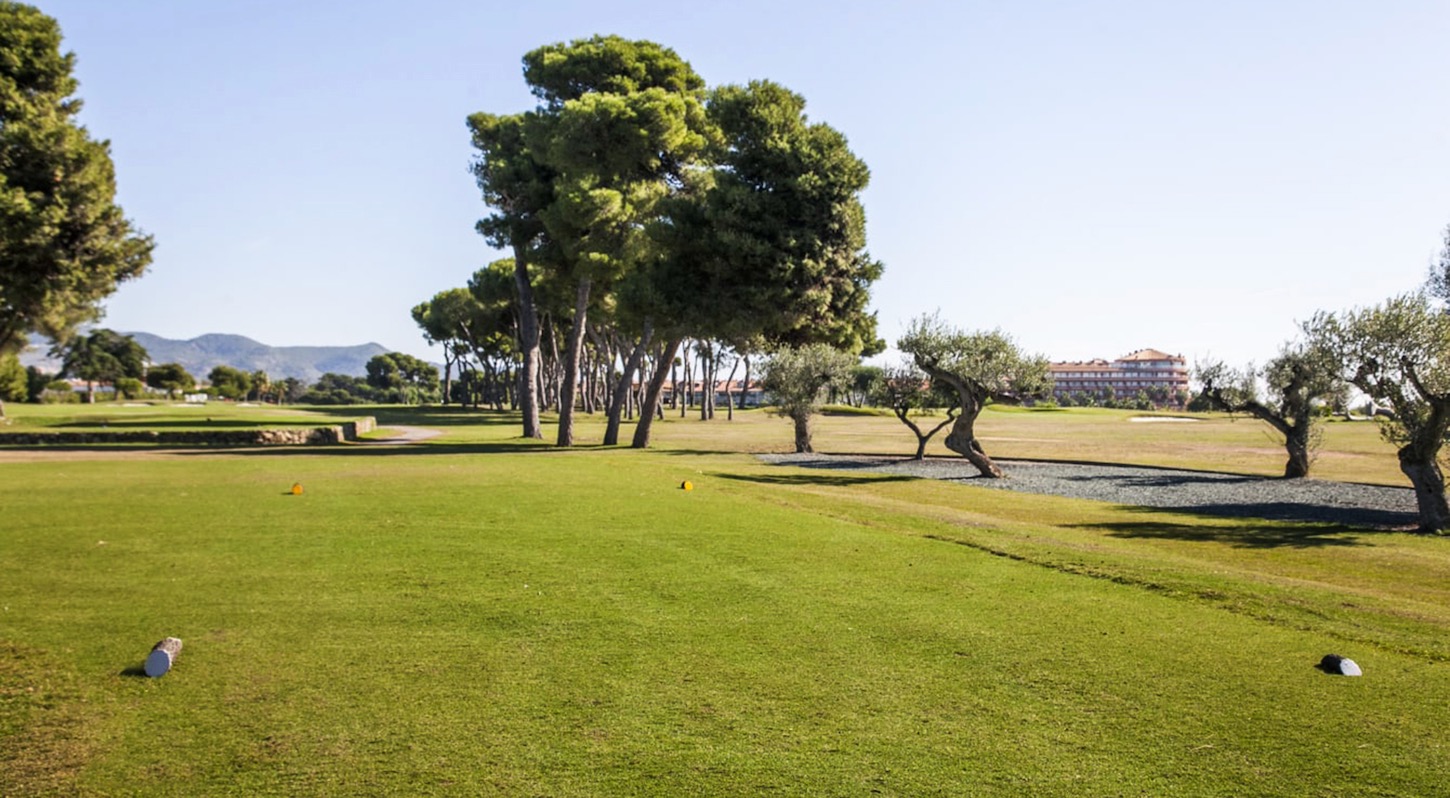

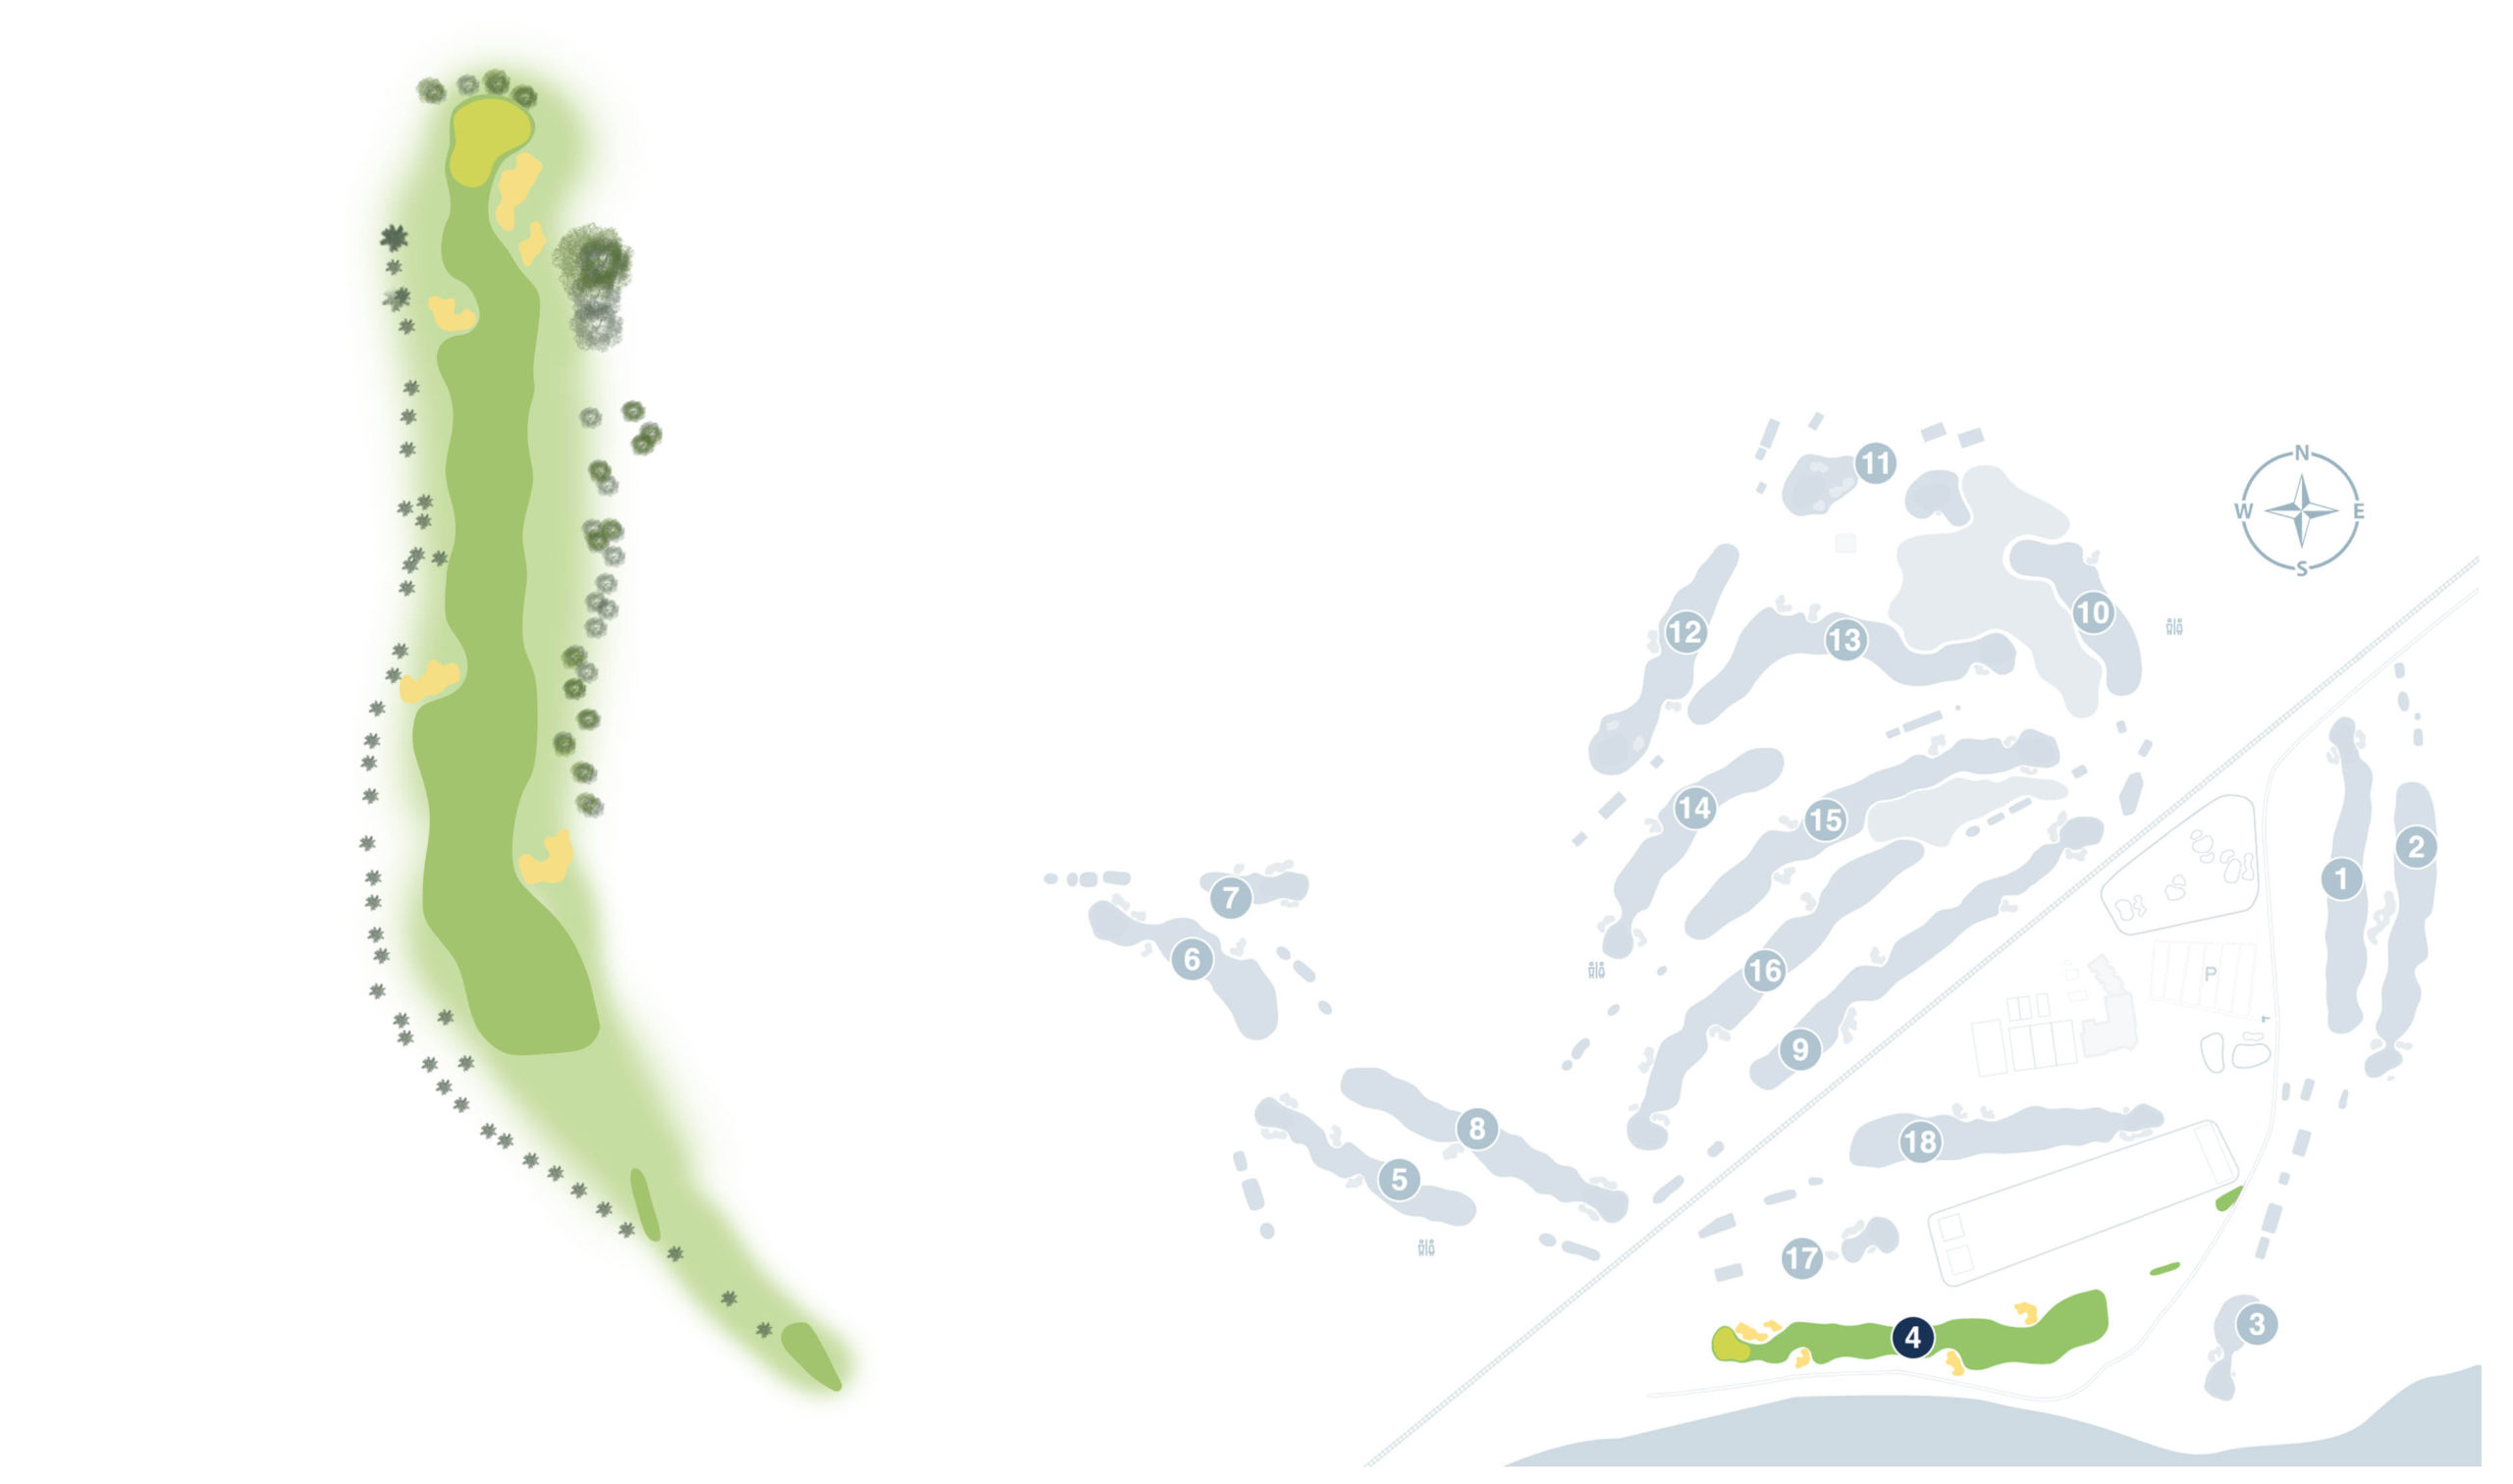
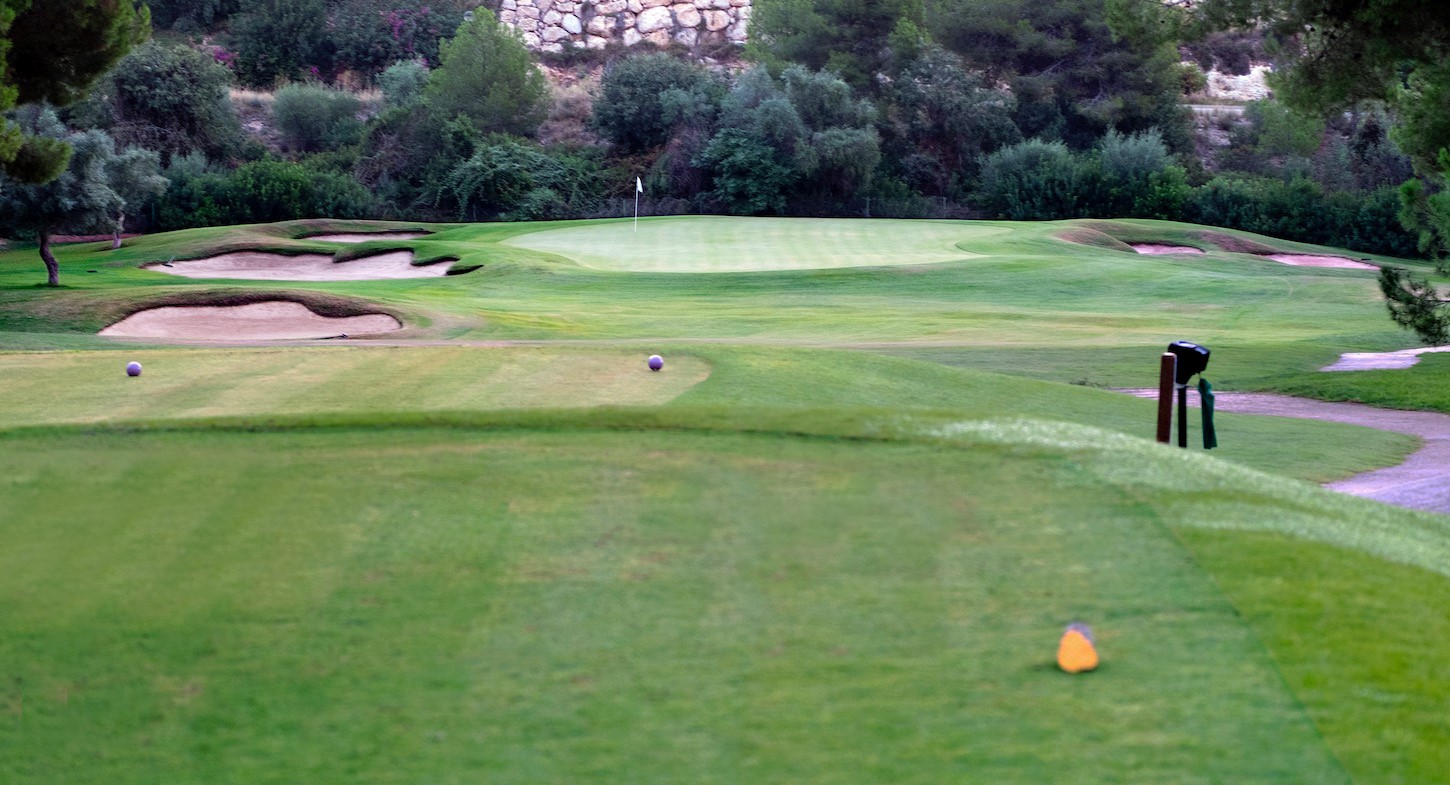
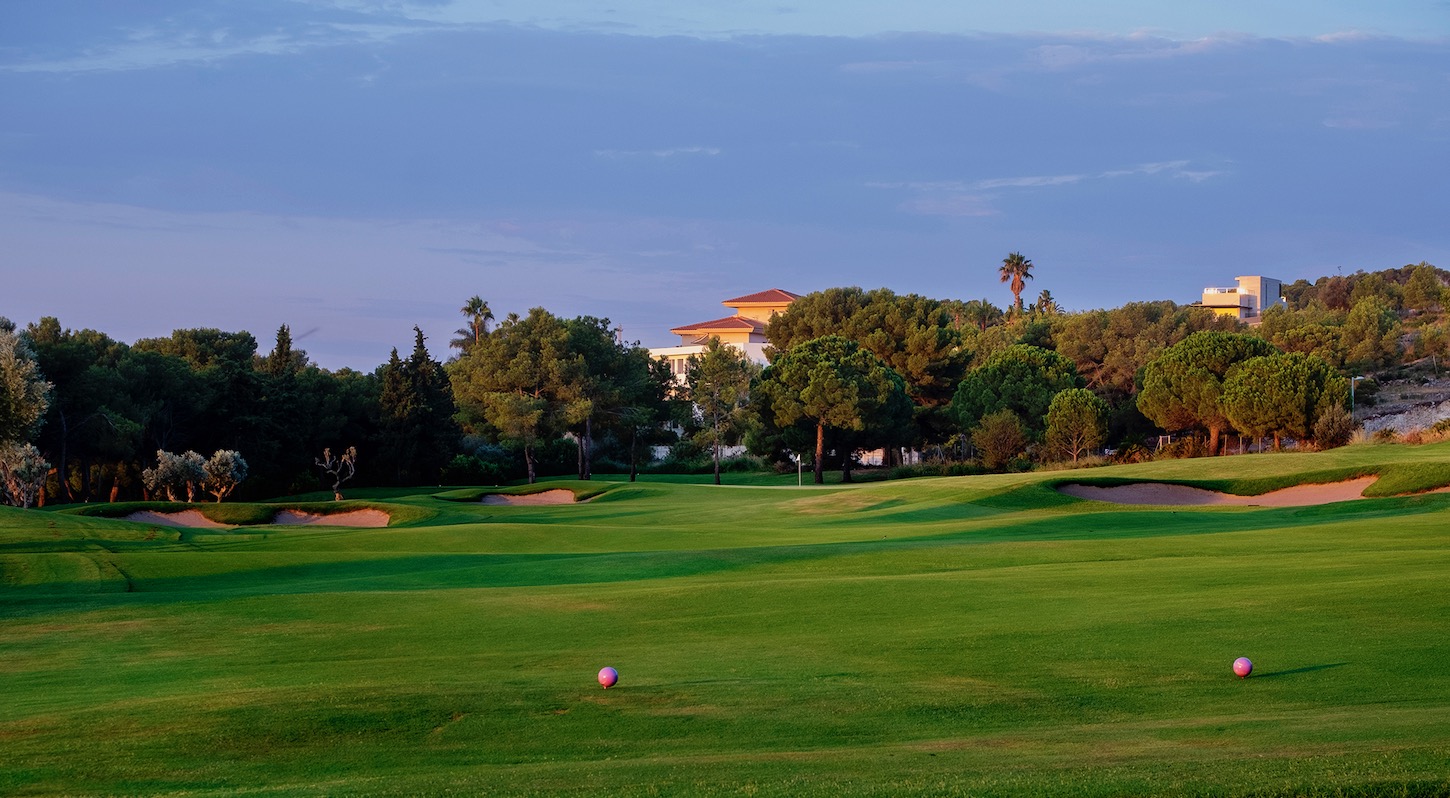
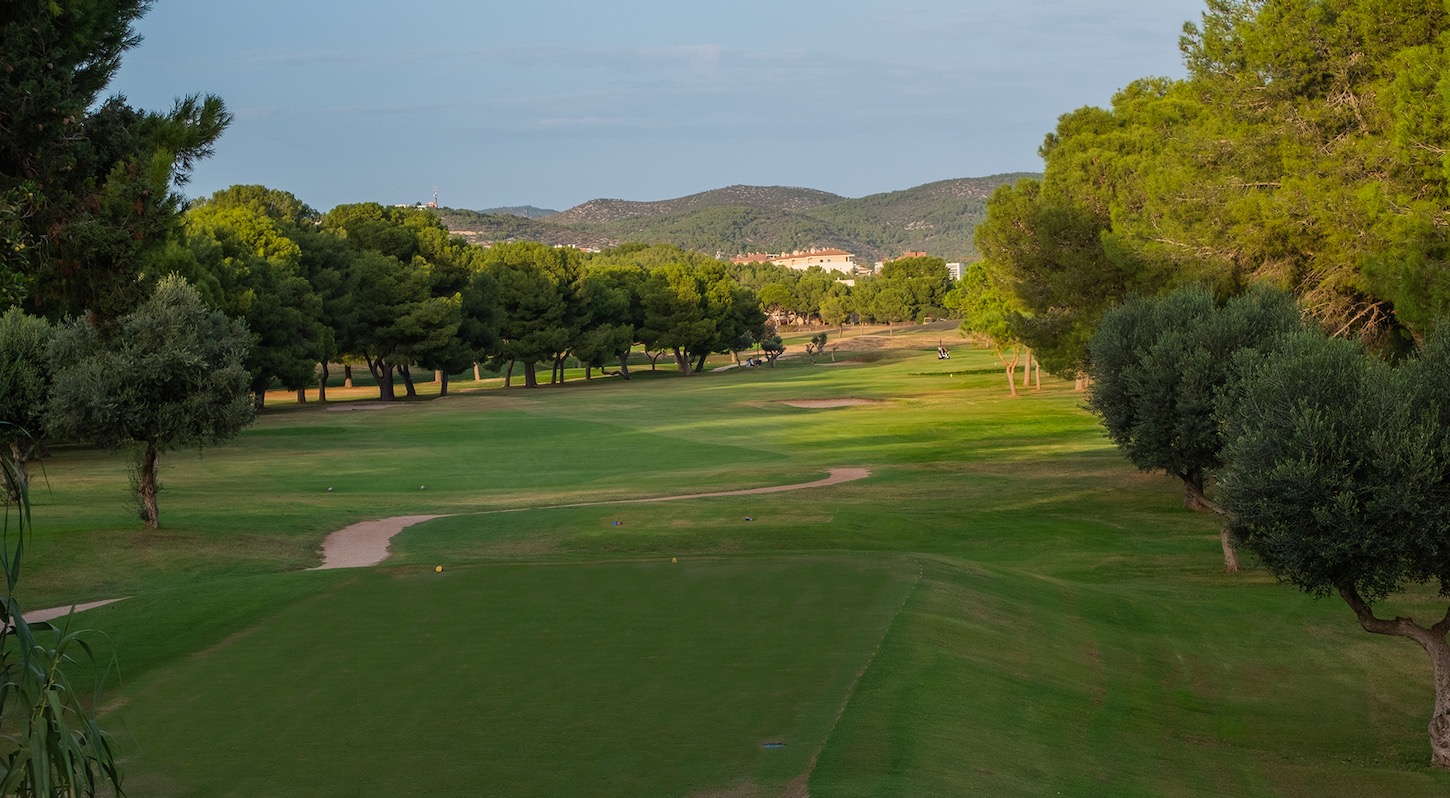
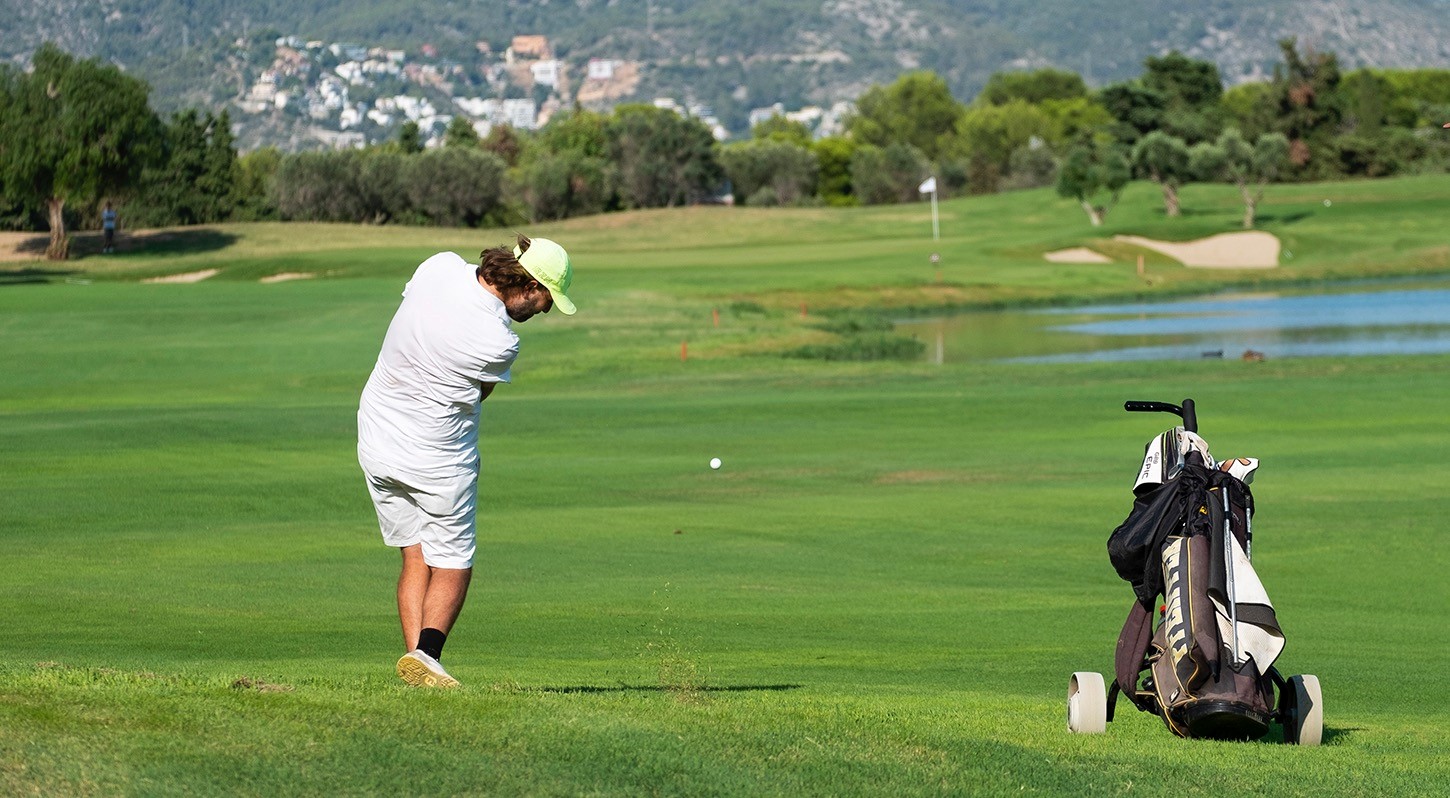
Handicap: 4
Whites: 383
Yellows: 364
Blues: 357
Reds: 318
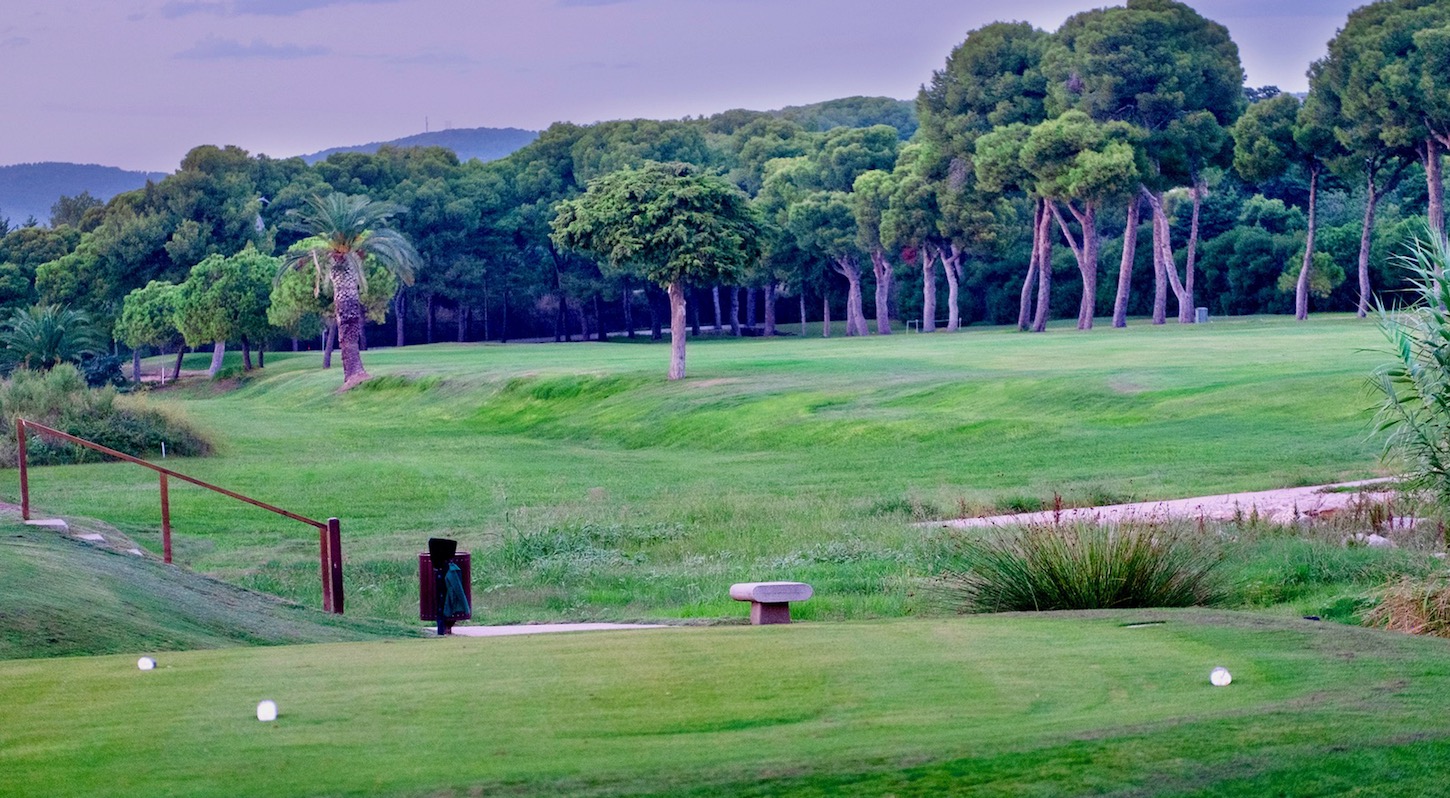
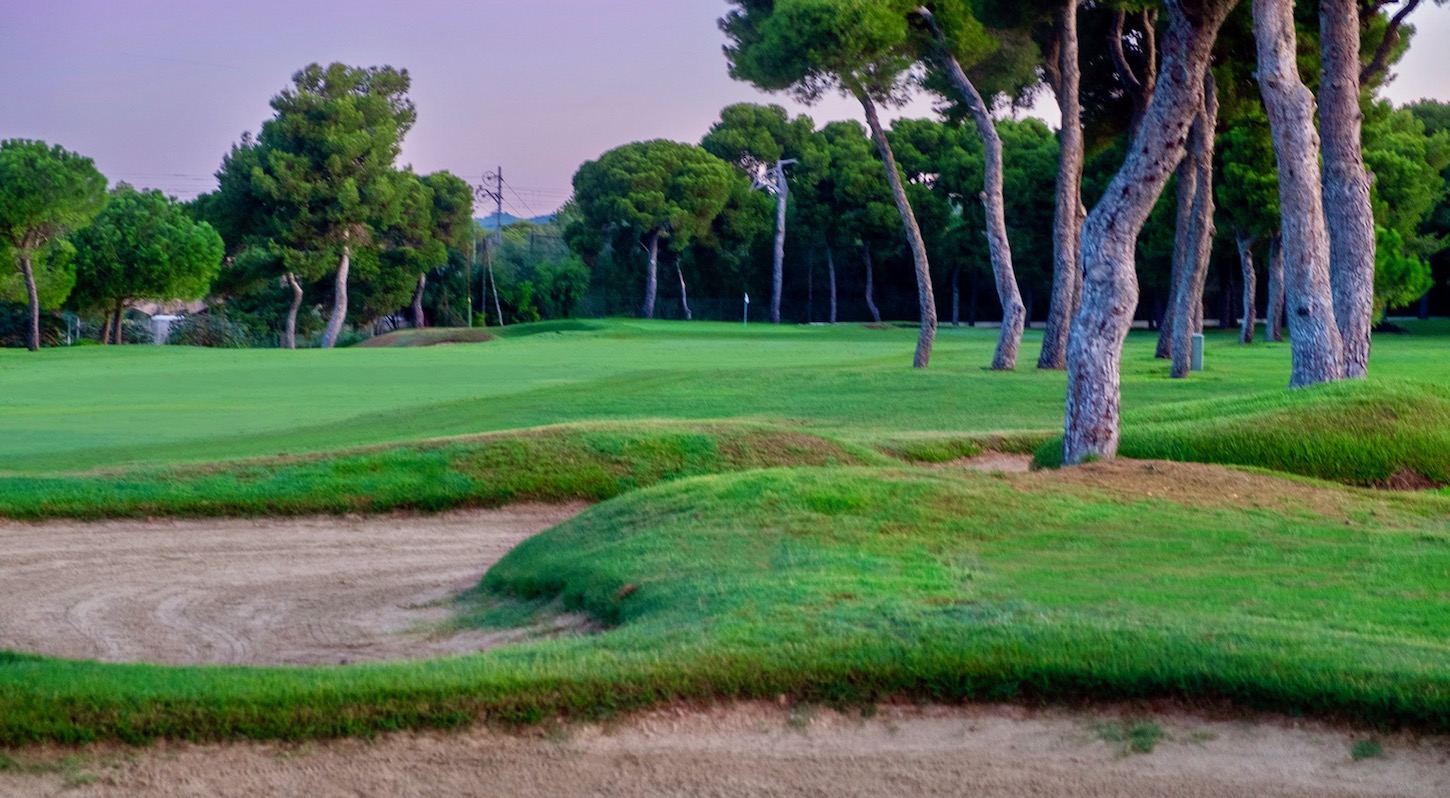
Oranges: 240

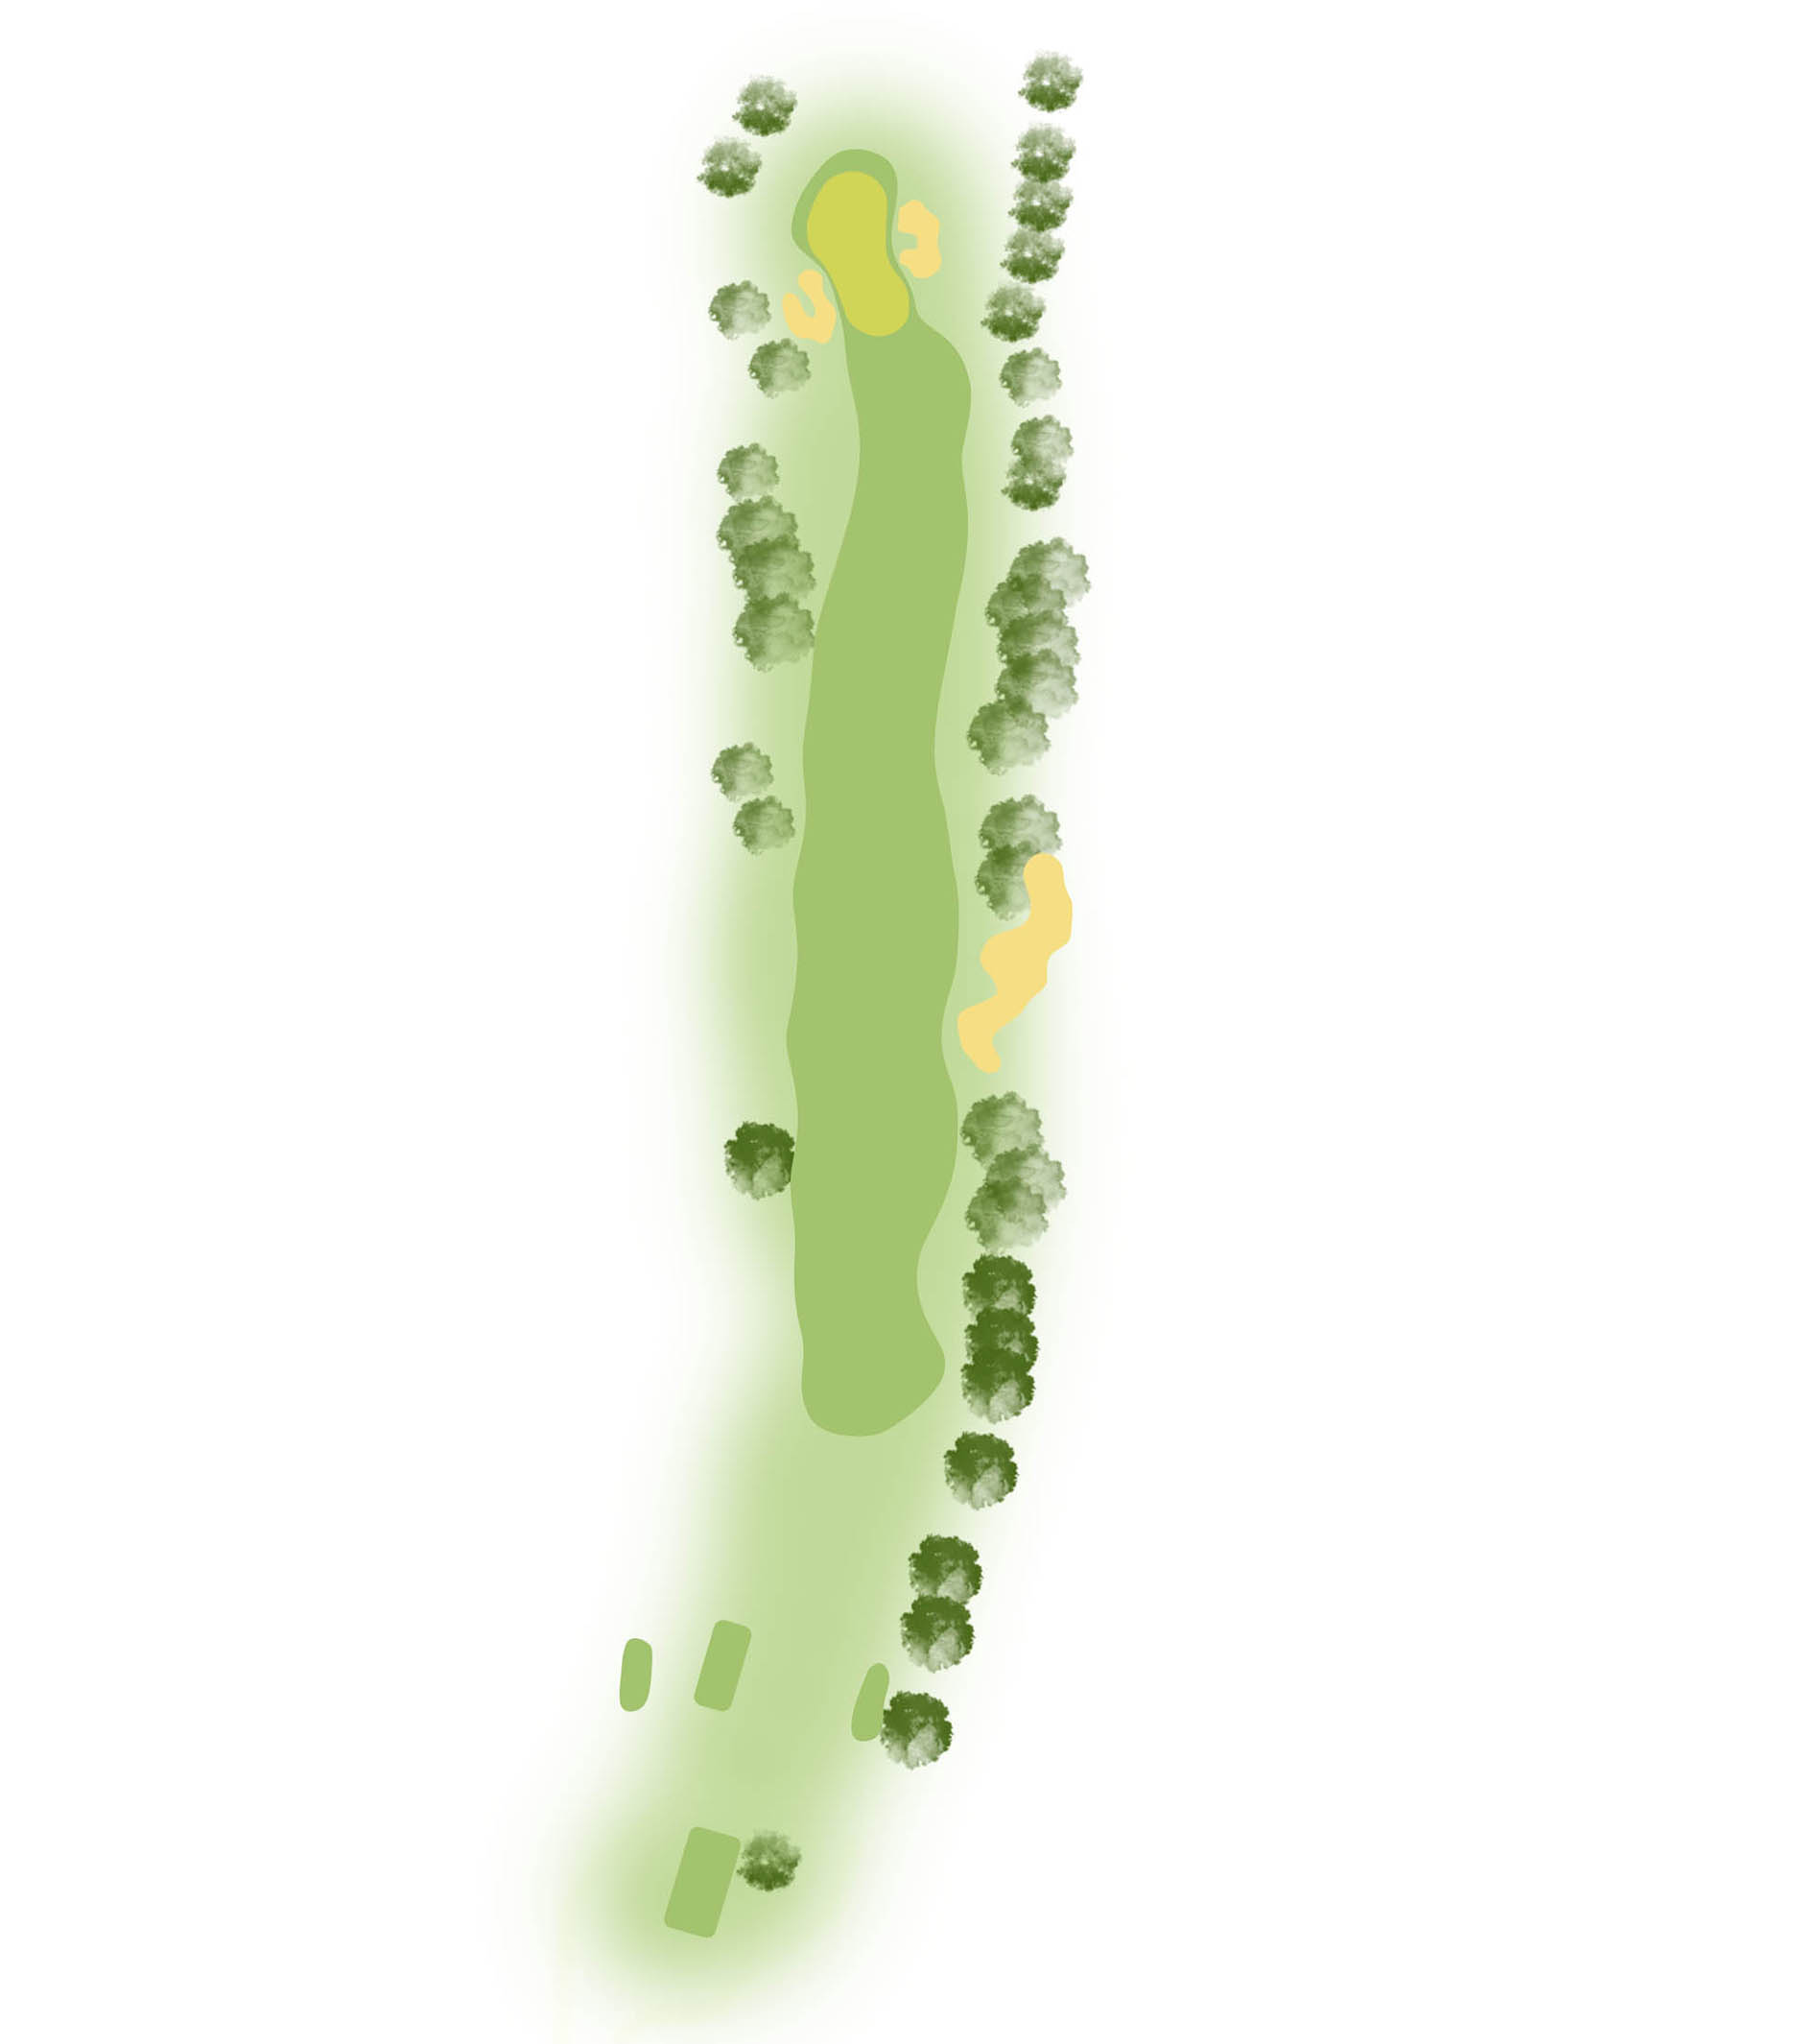
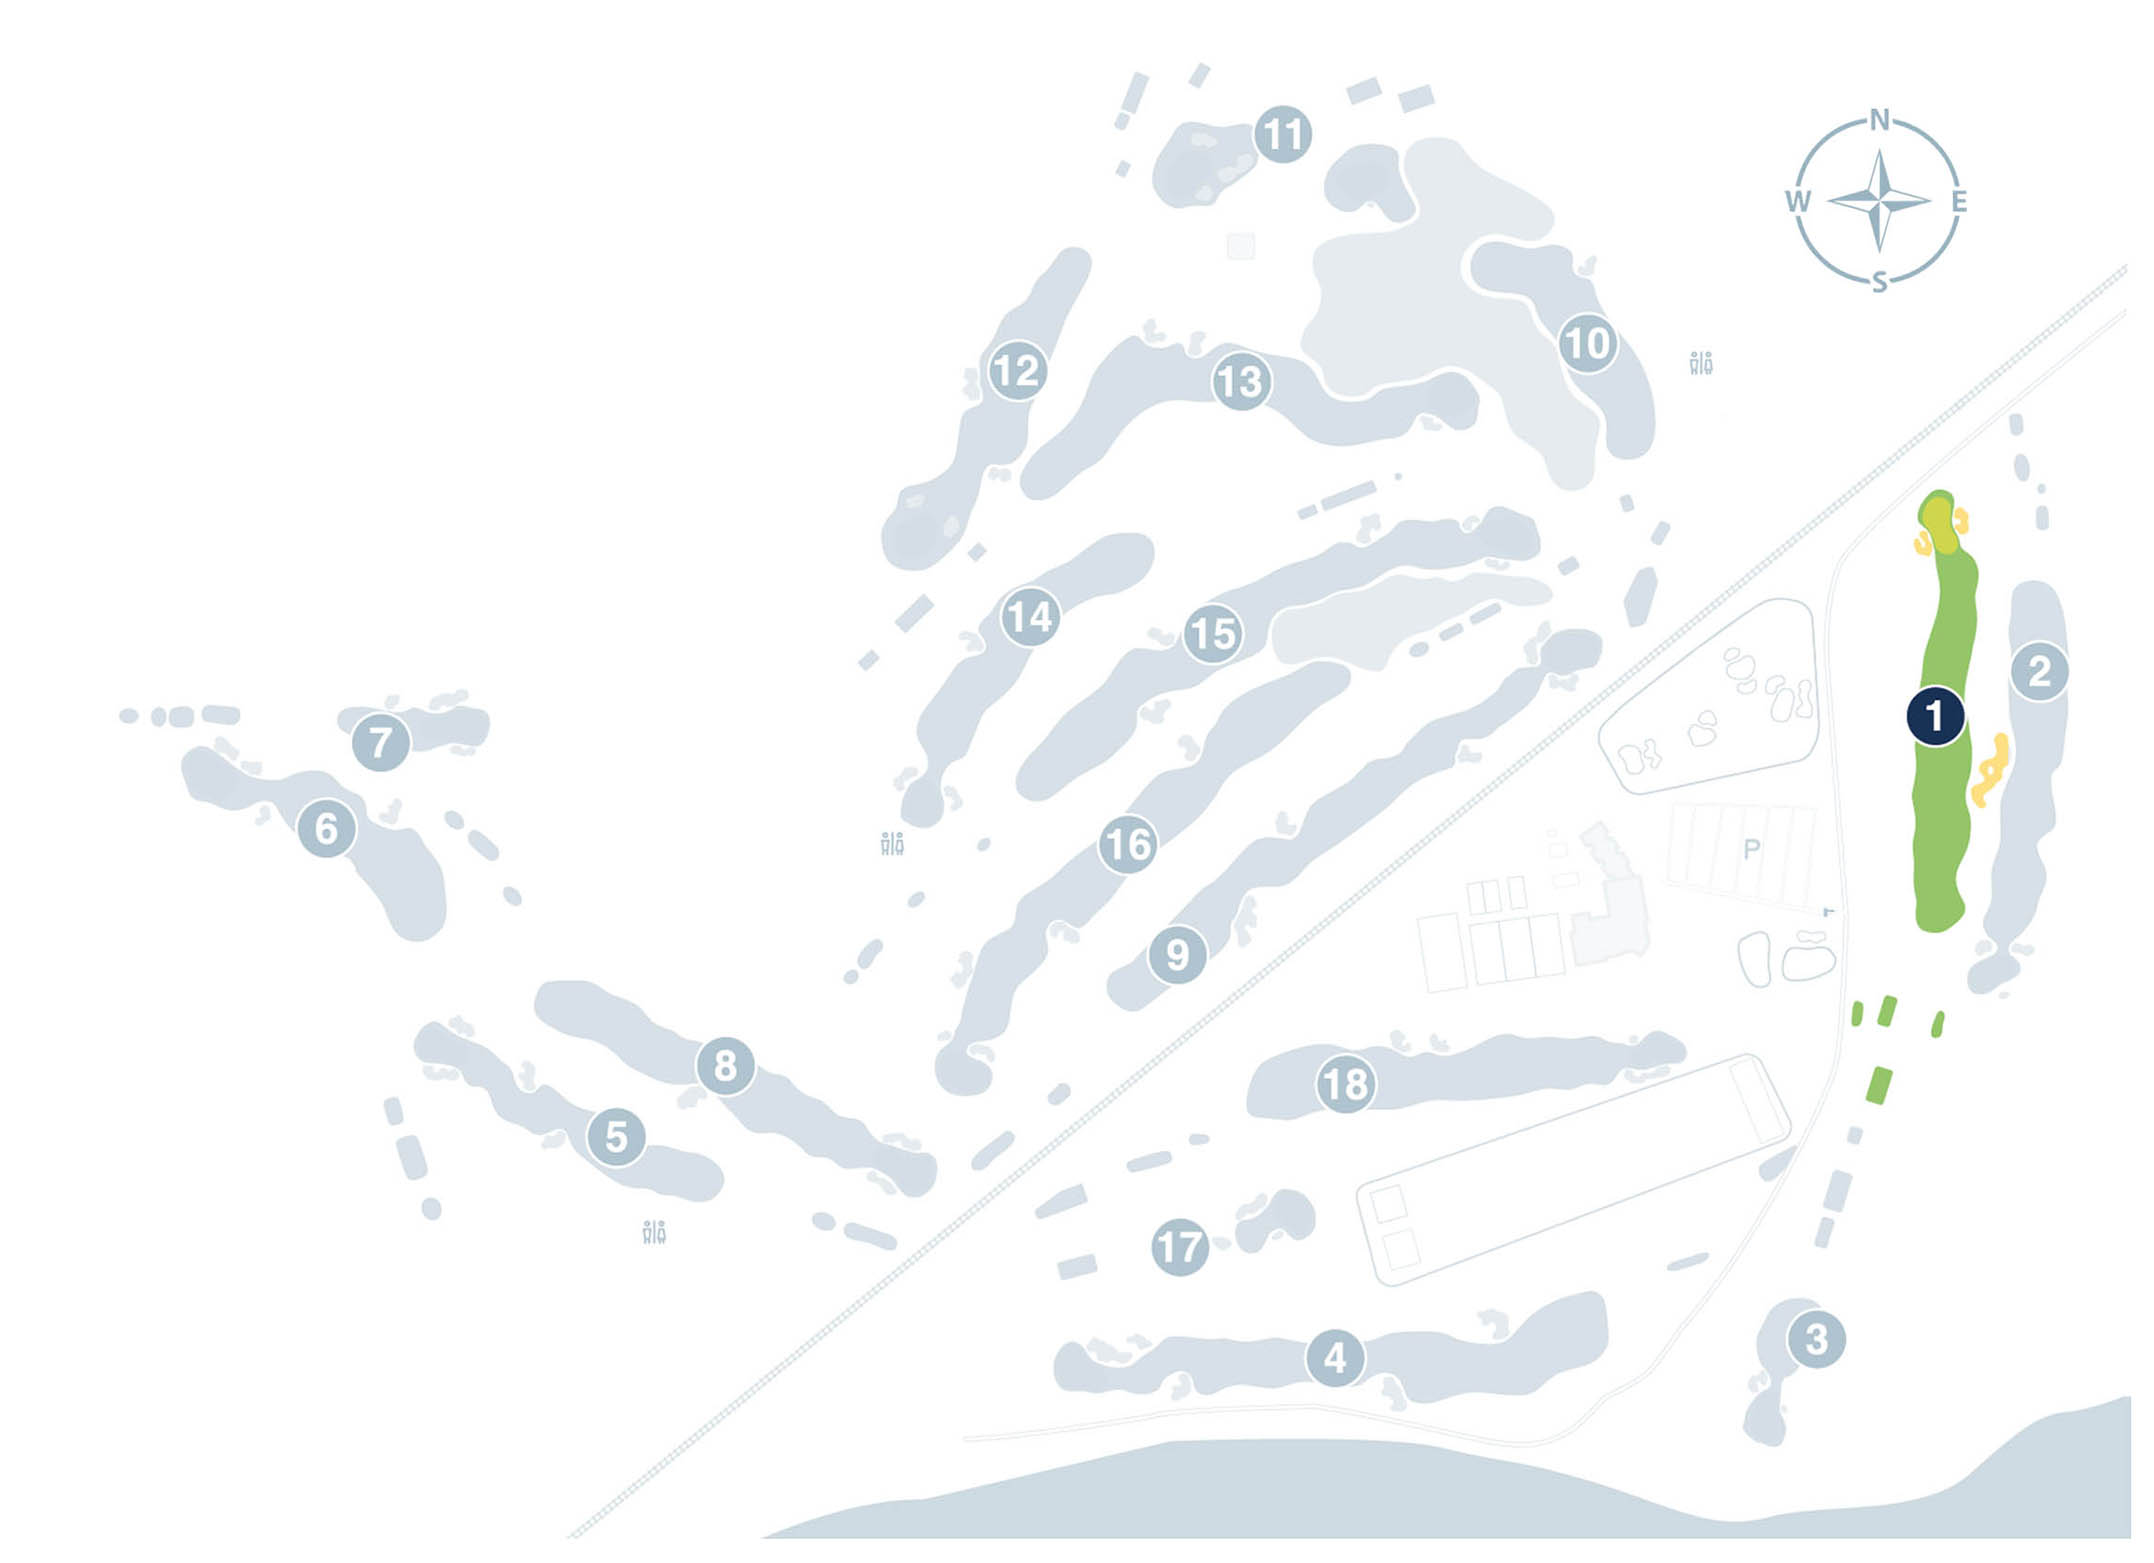
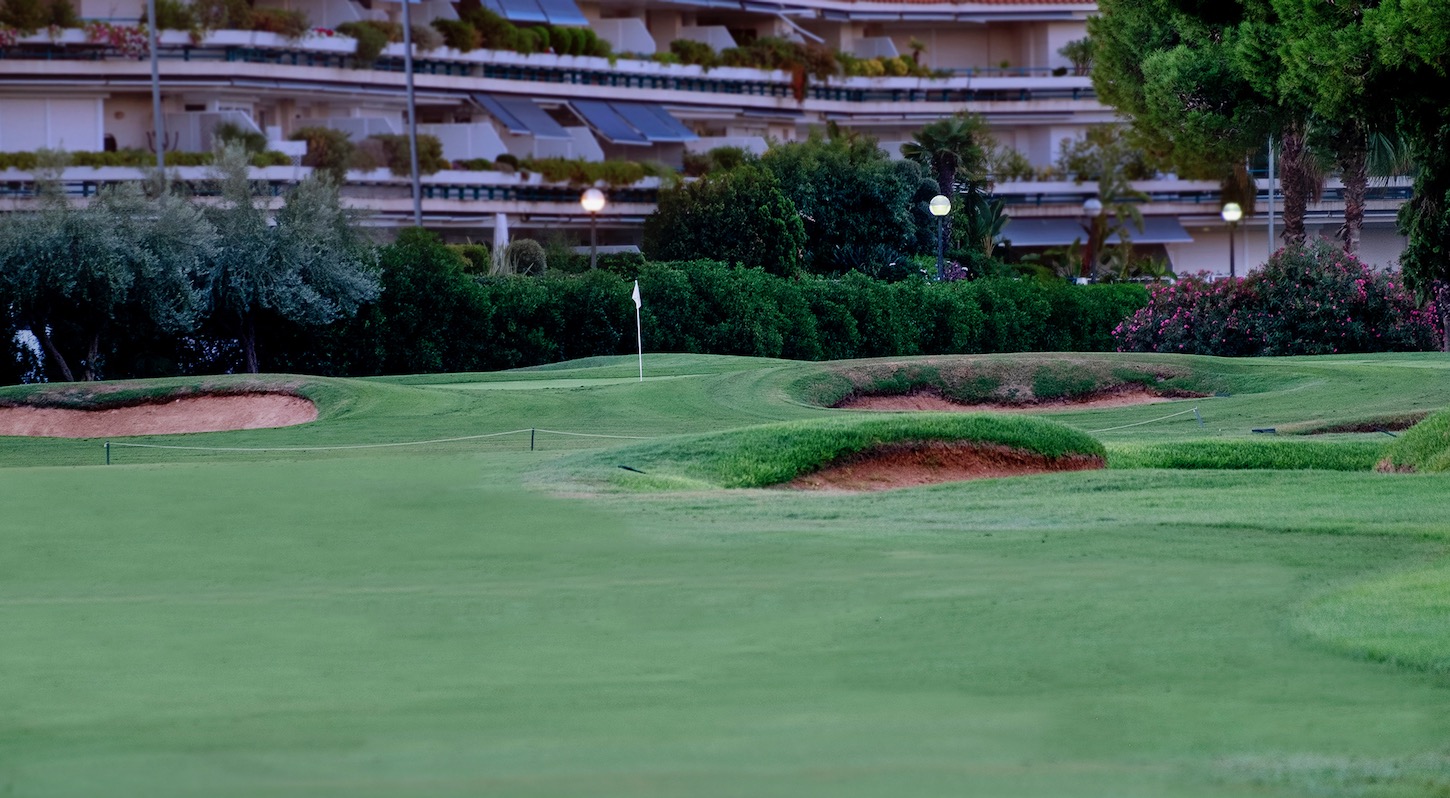
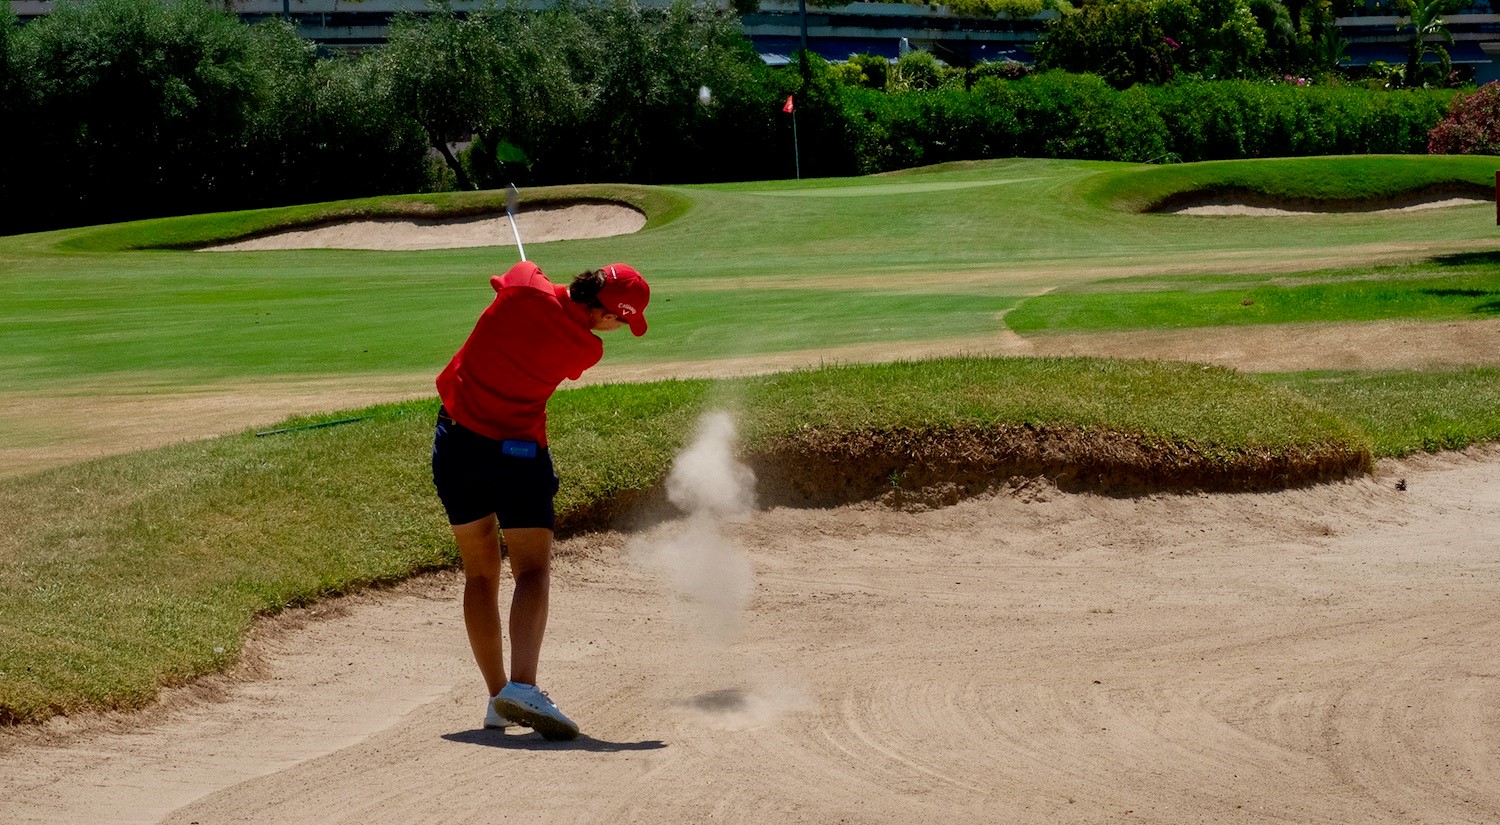
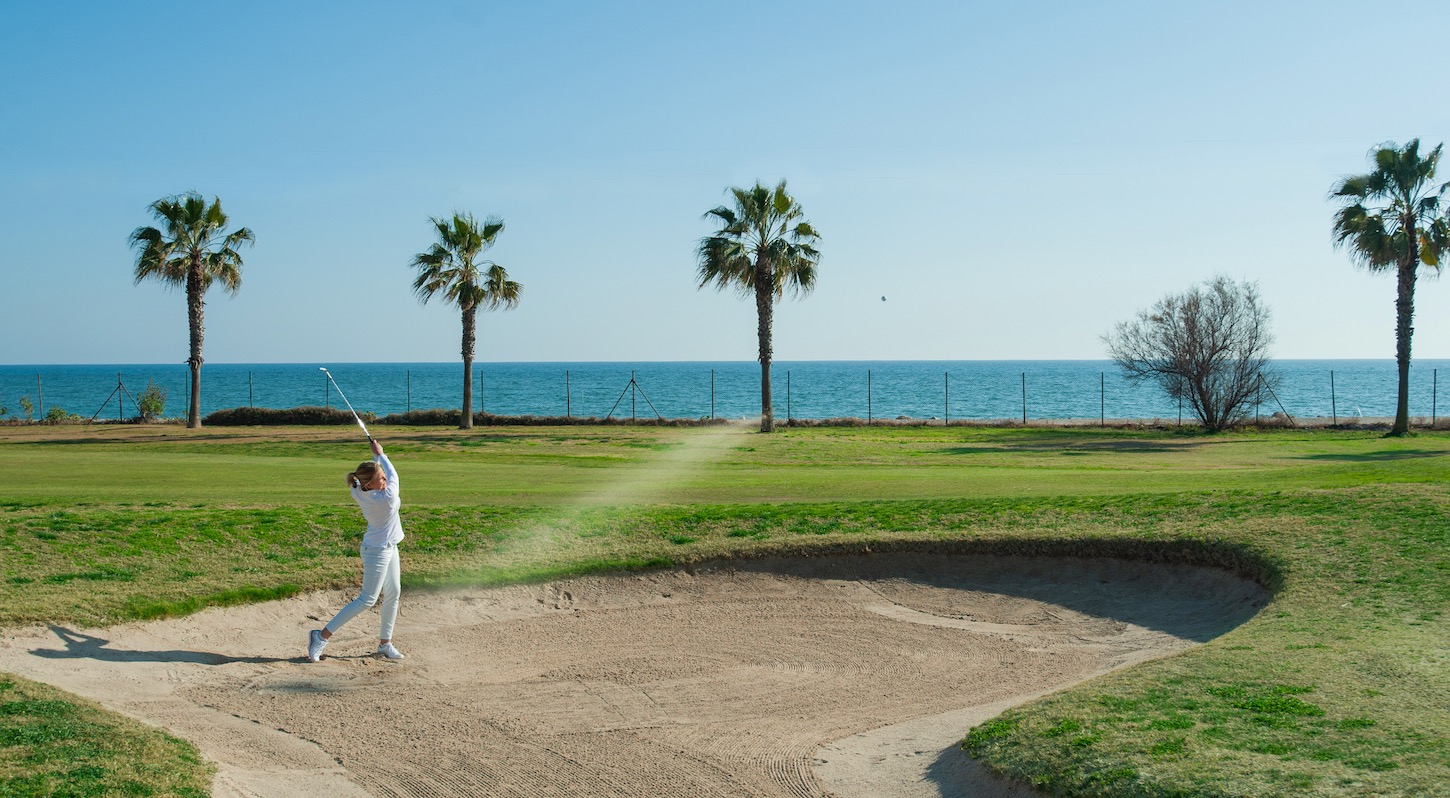
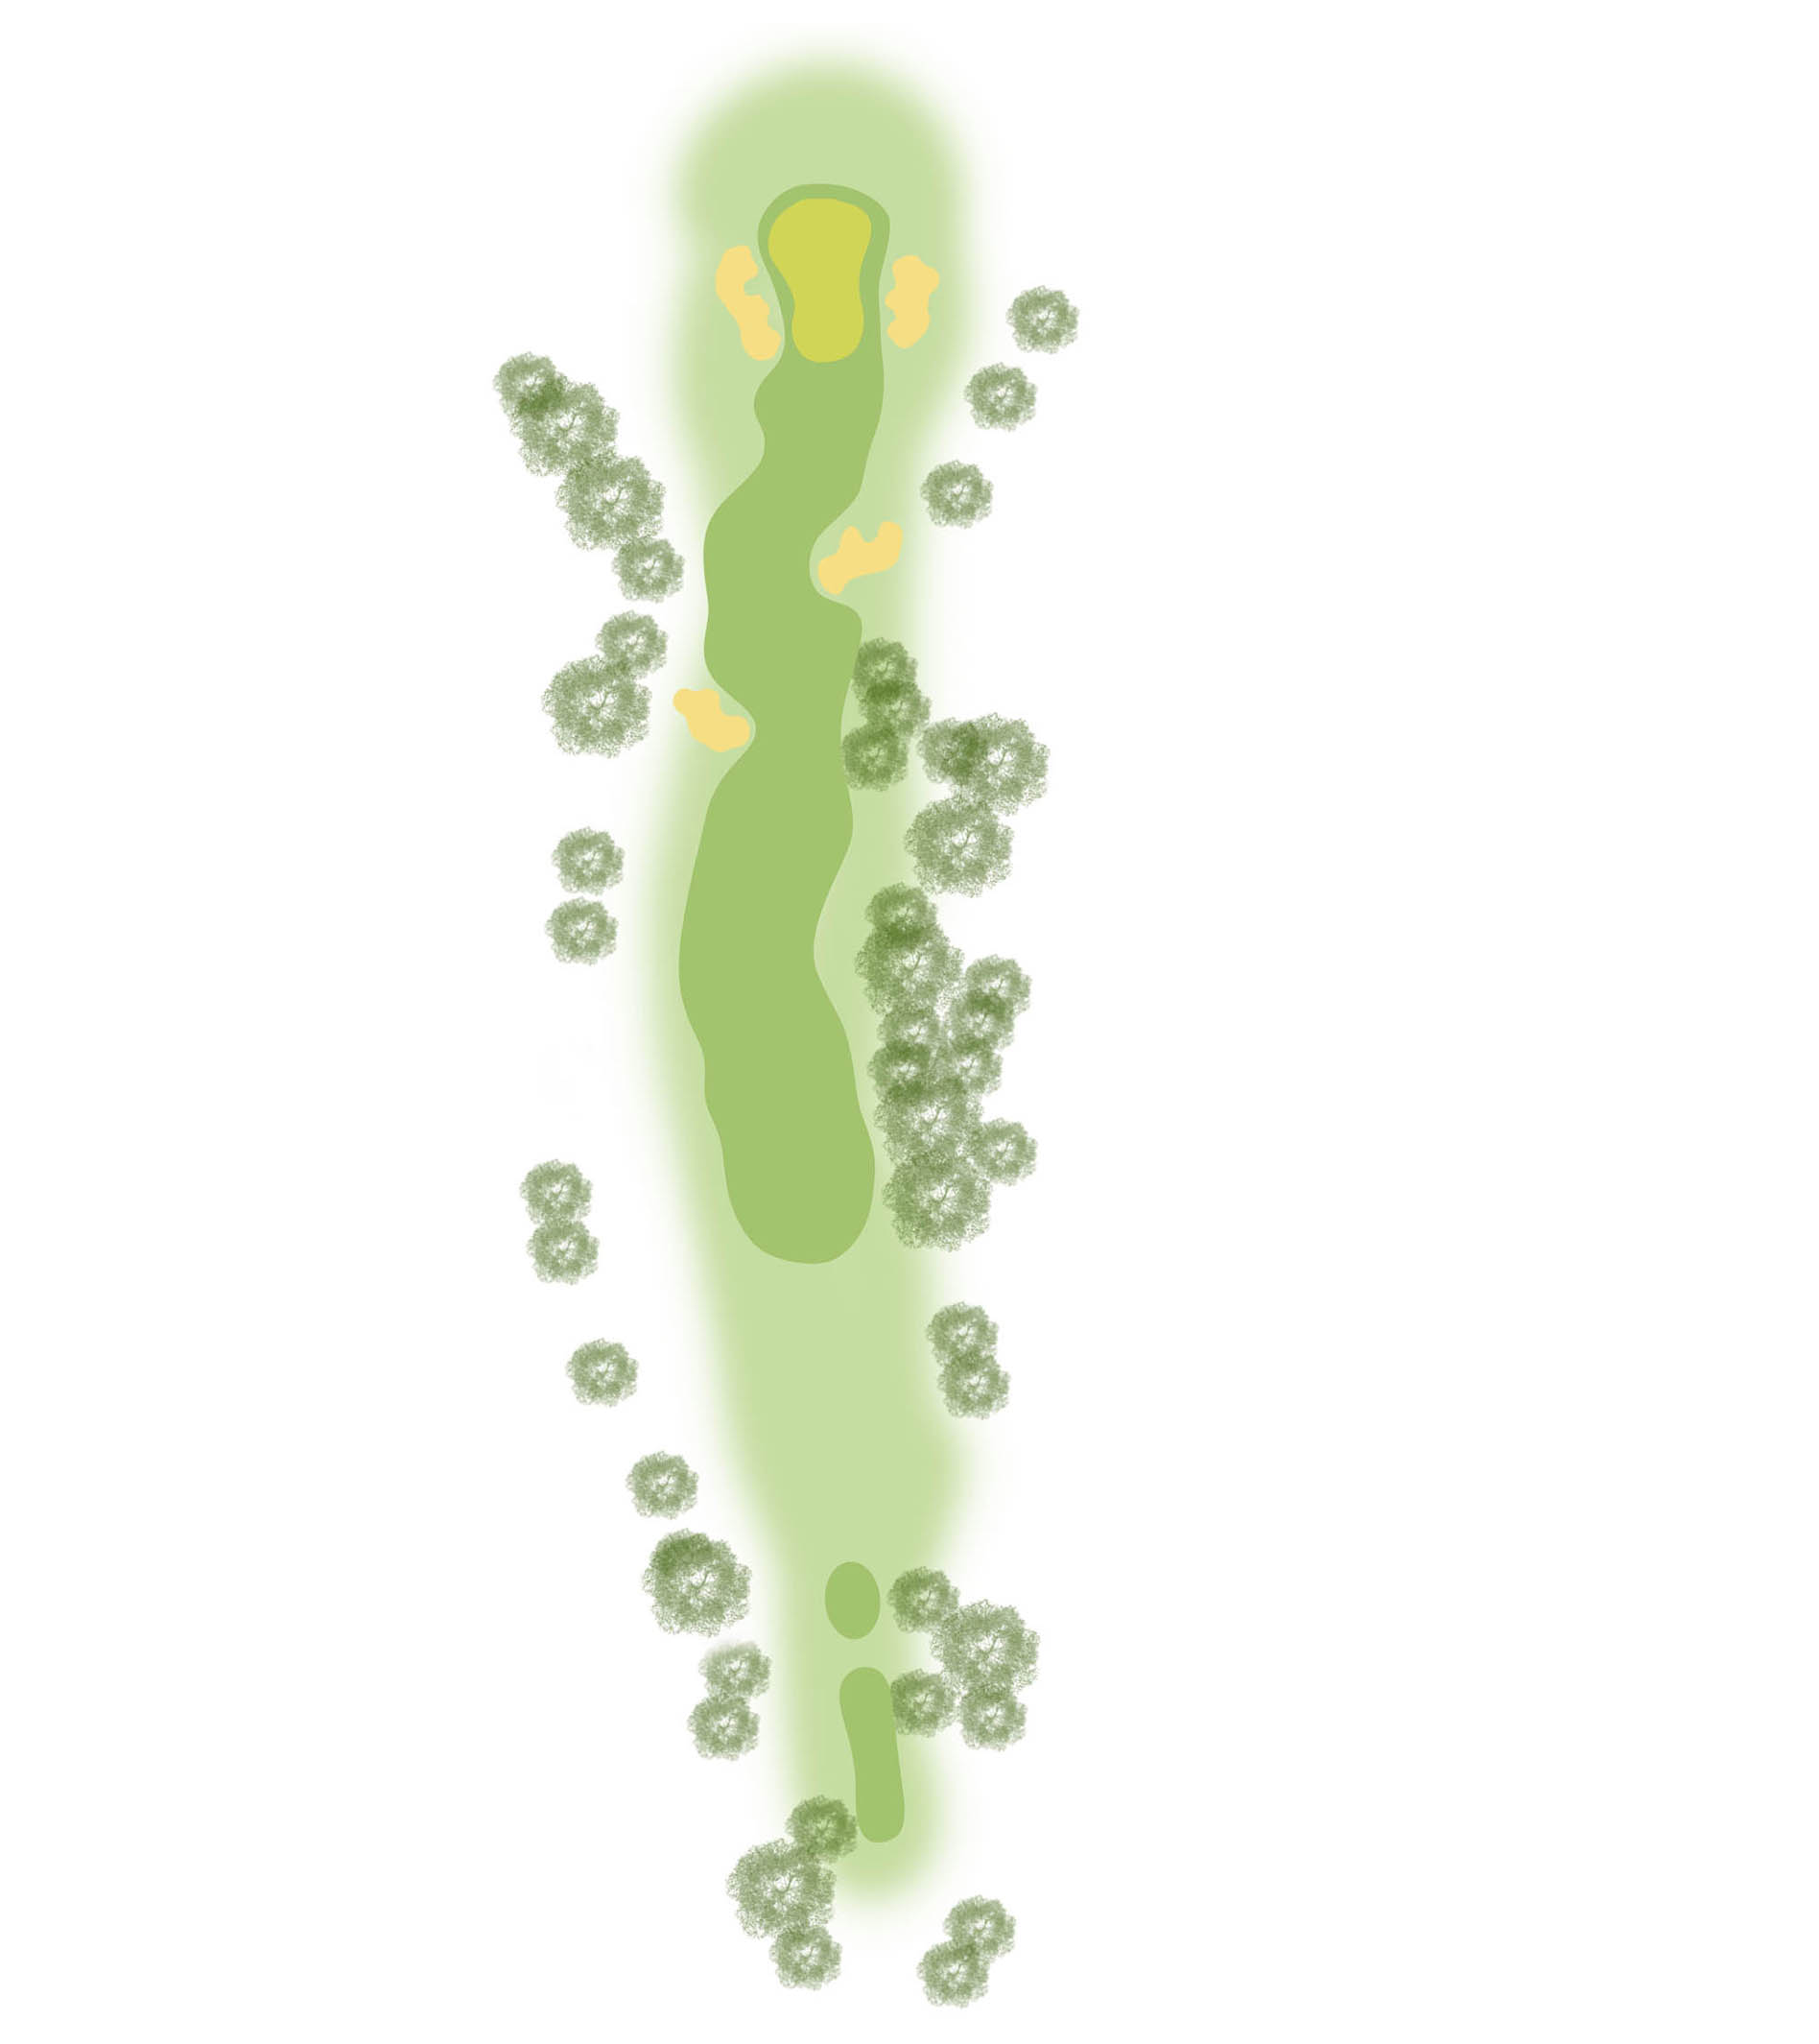
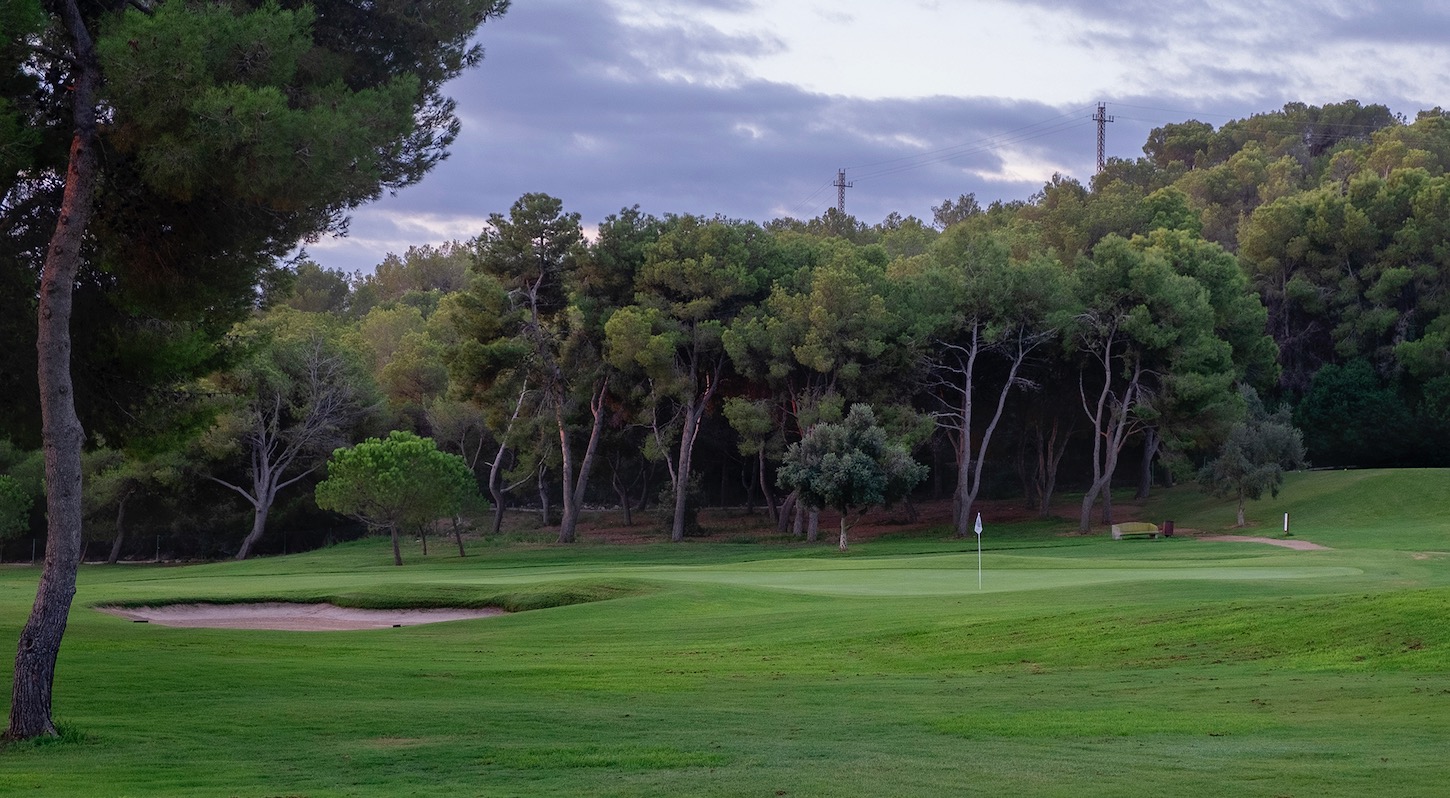
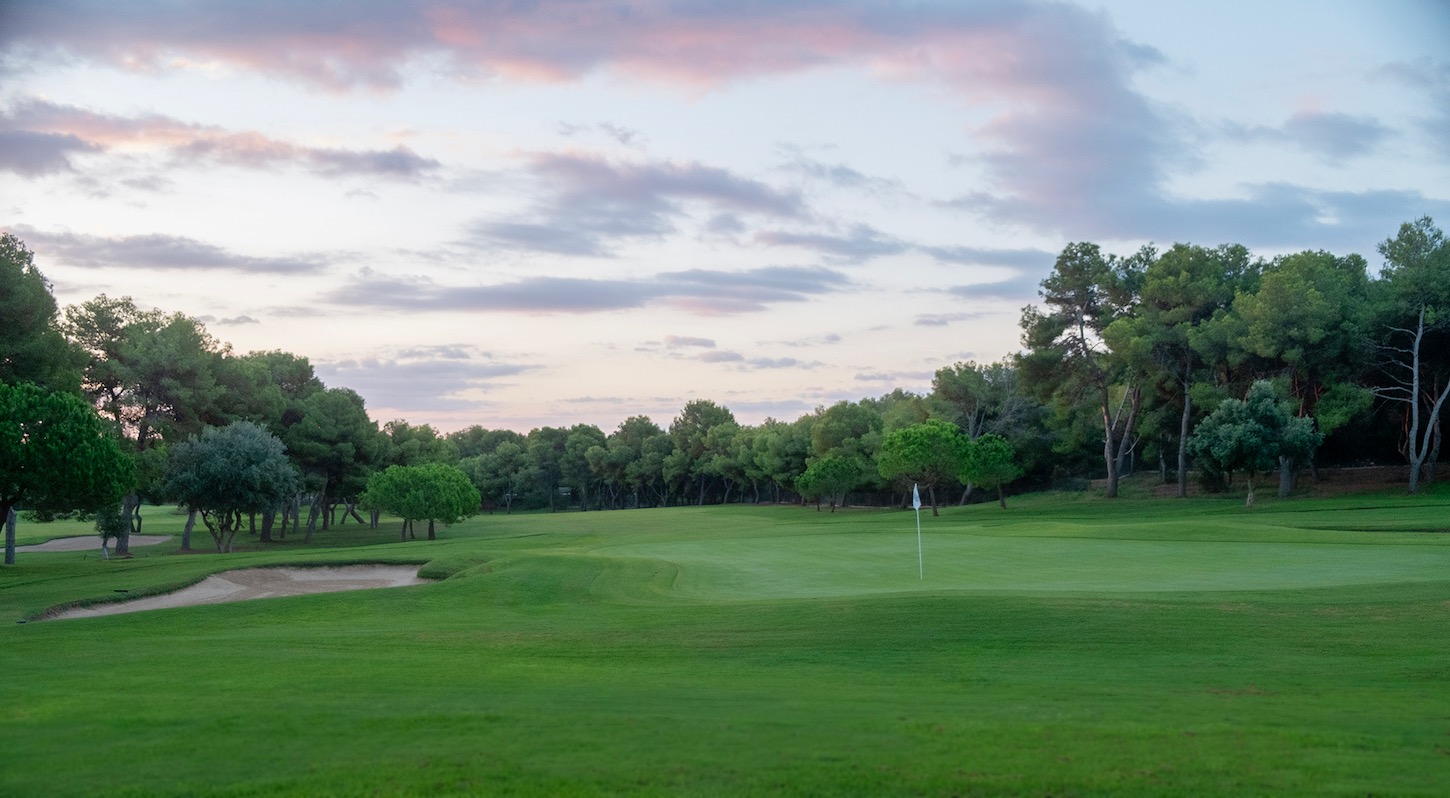
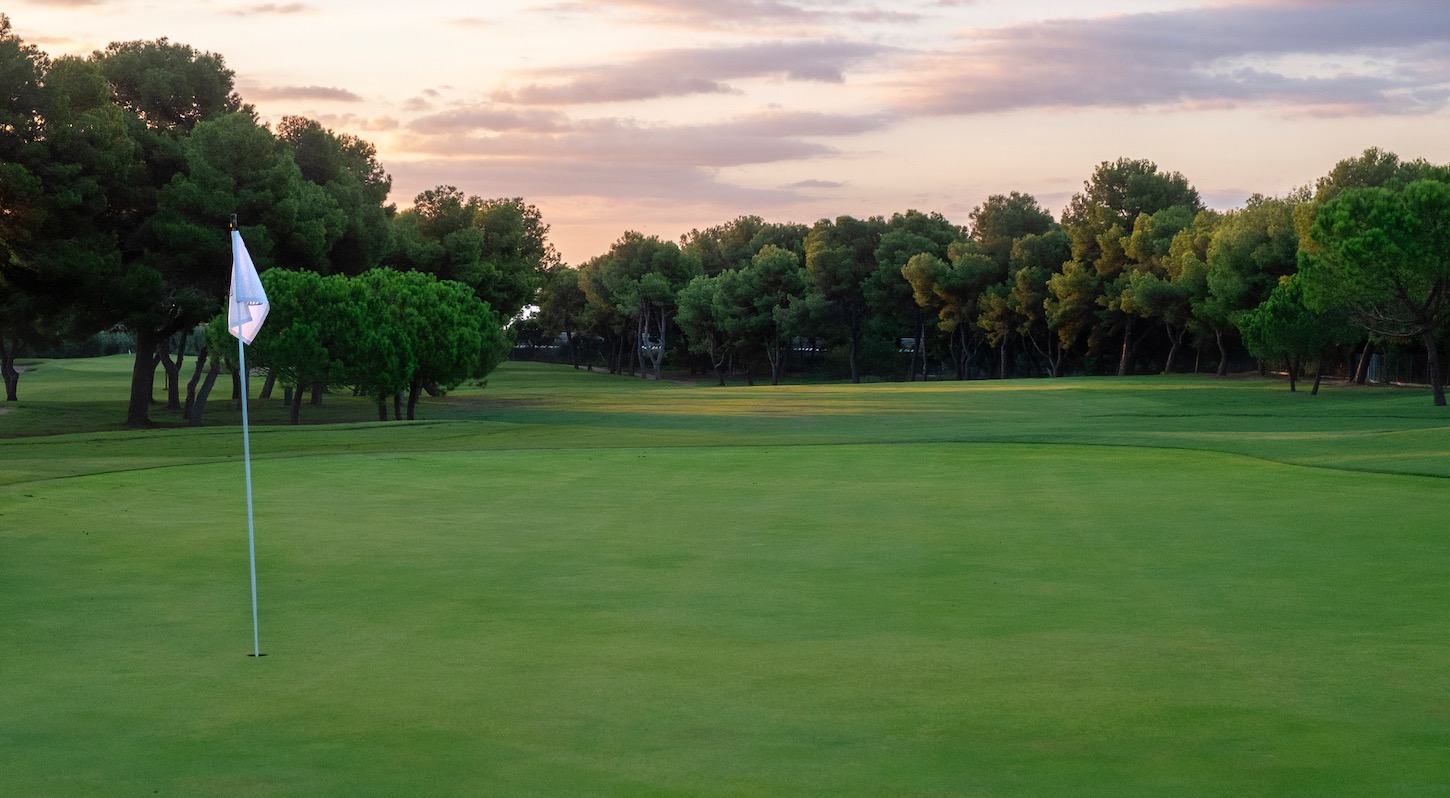
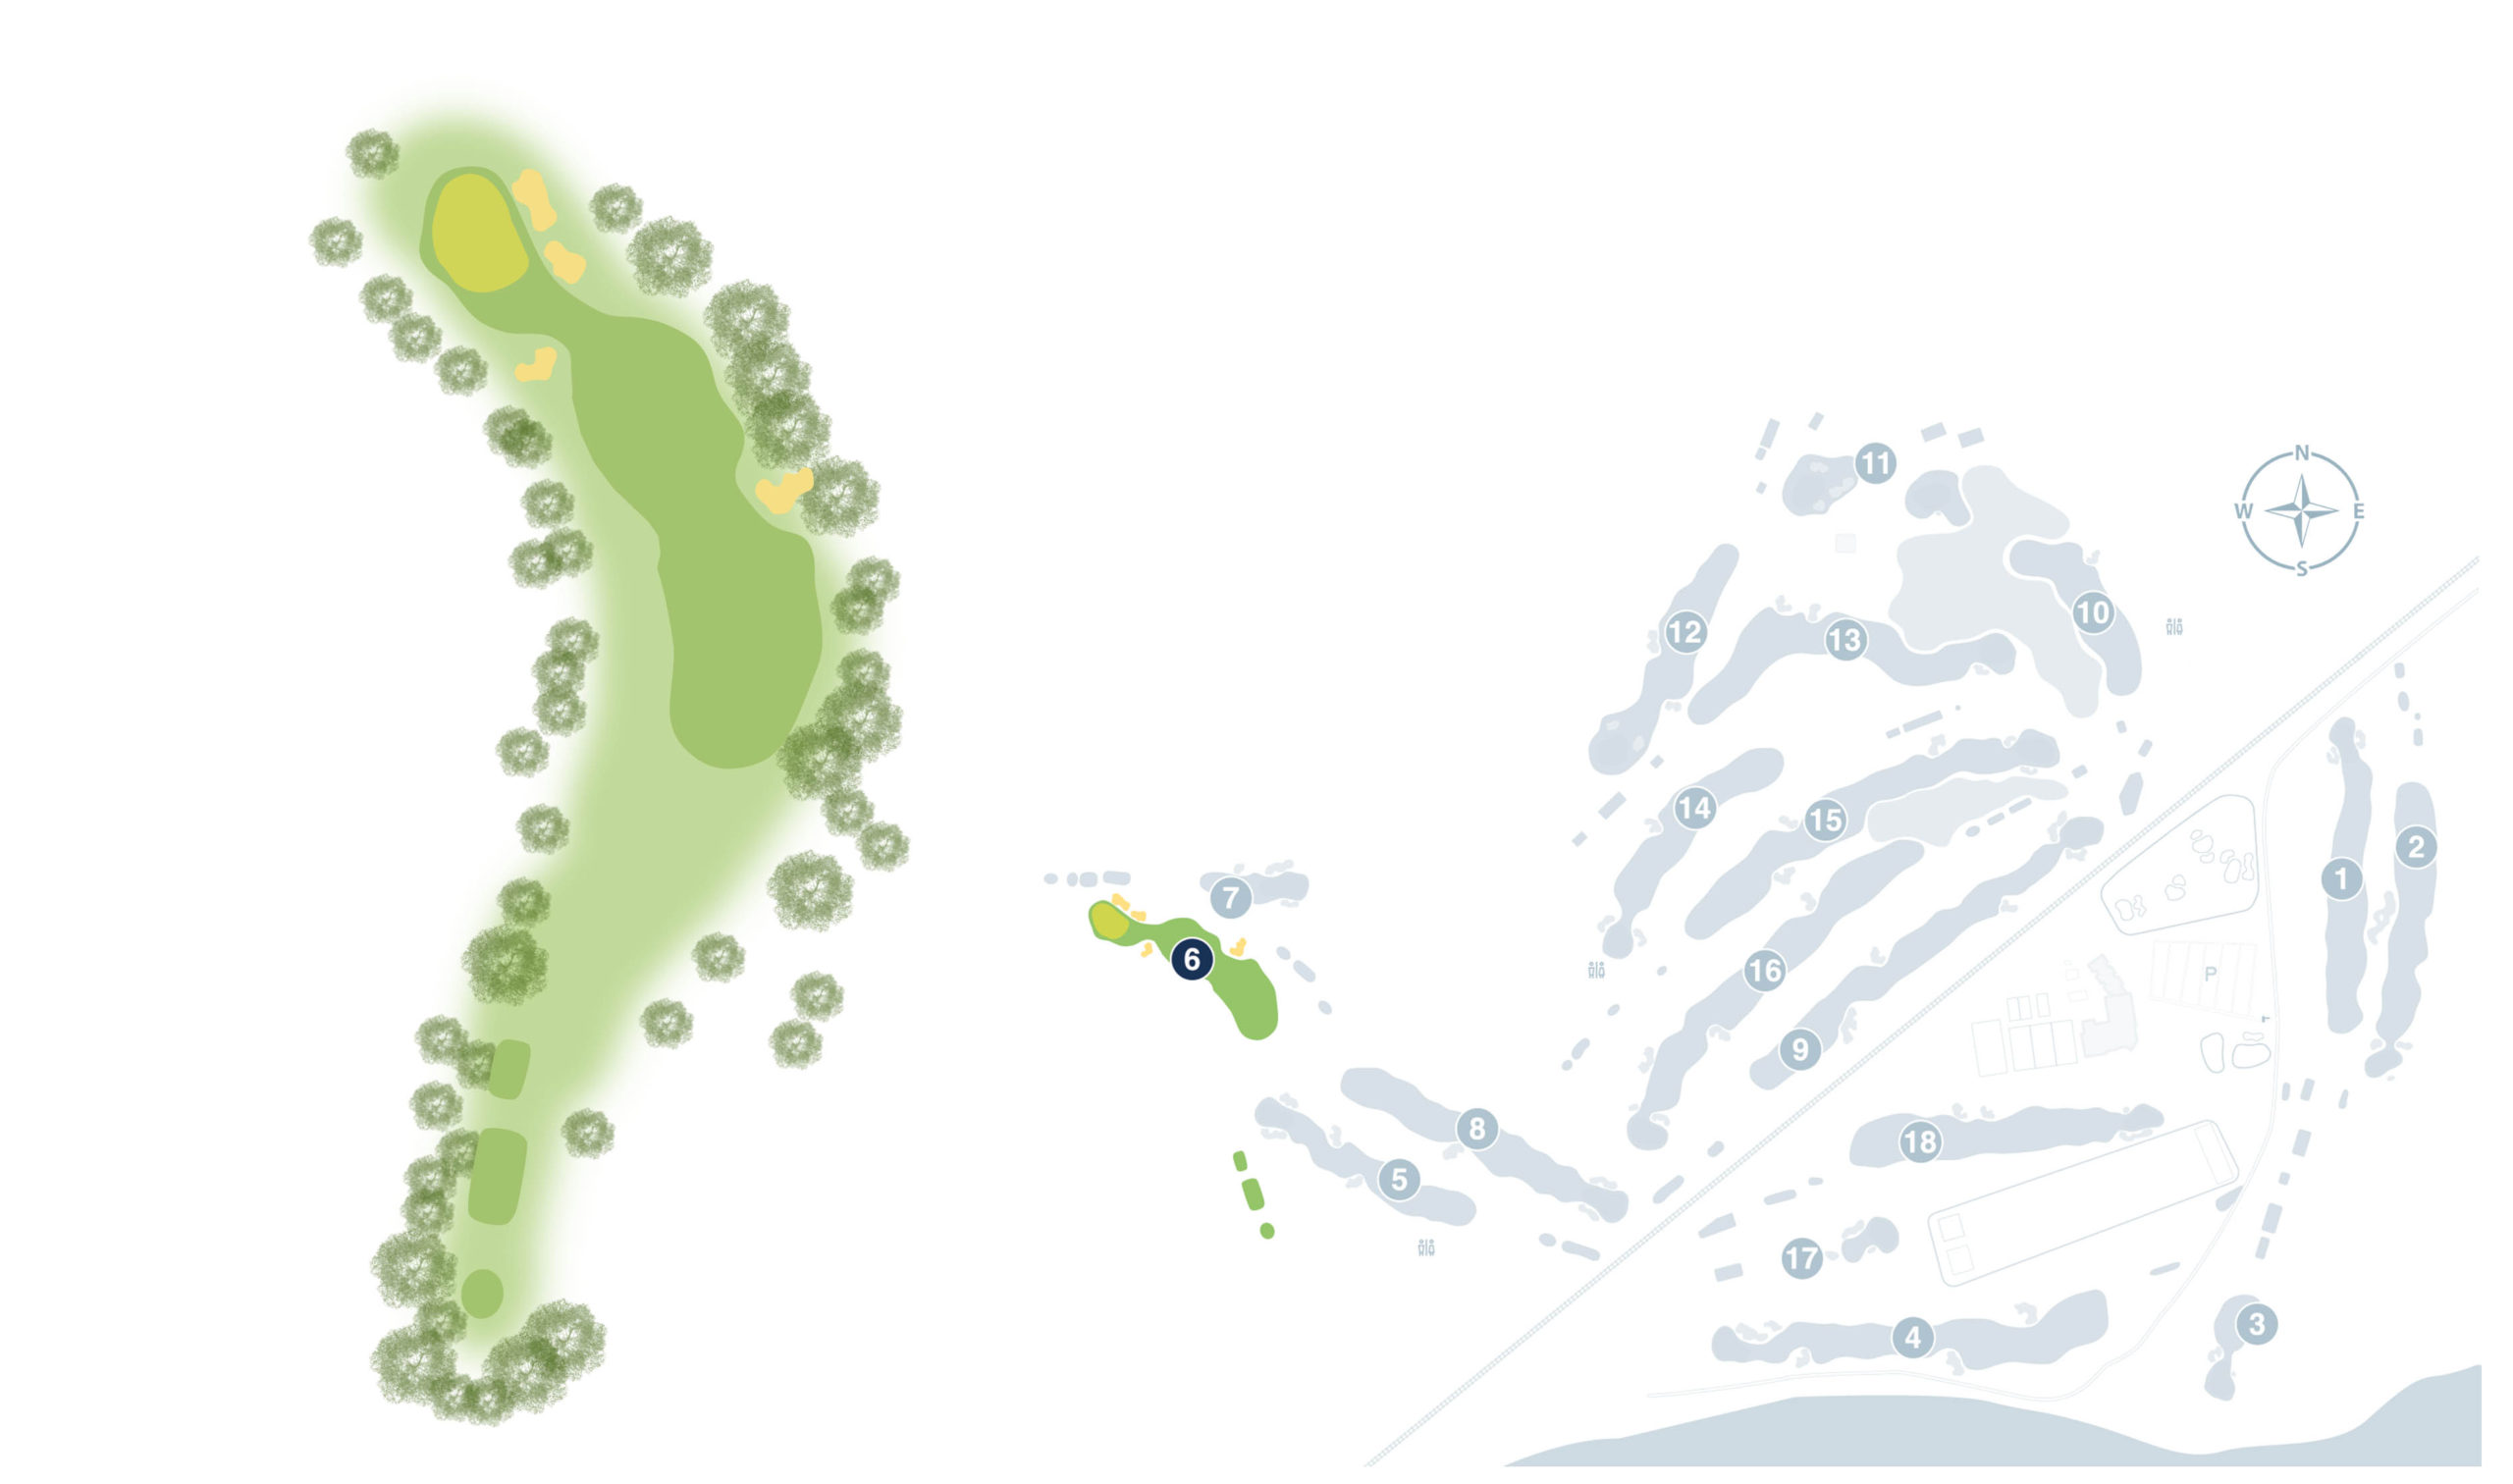
A demanding par 4 to start the course. It is very important to secure the fairway from the tee, as it is protected by the stream on the left and pine trees on the right. The shot to the green also requires precision since it is a long and narrow green with bunkers on both sides. We will always have to favor the right side, to avoid the deep bunkers on the left, which complicate the approach shot.

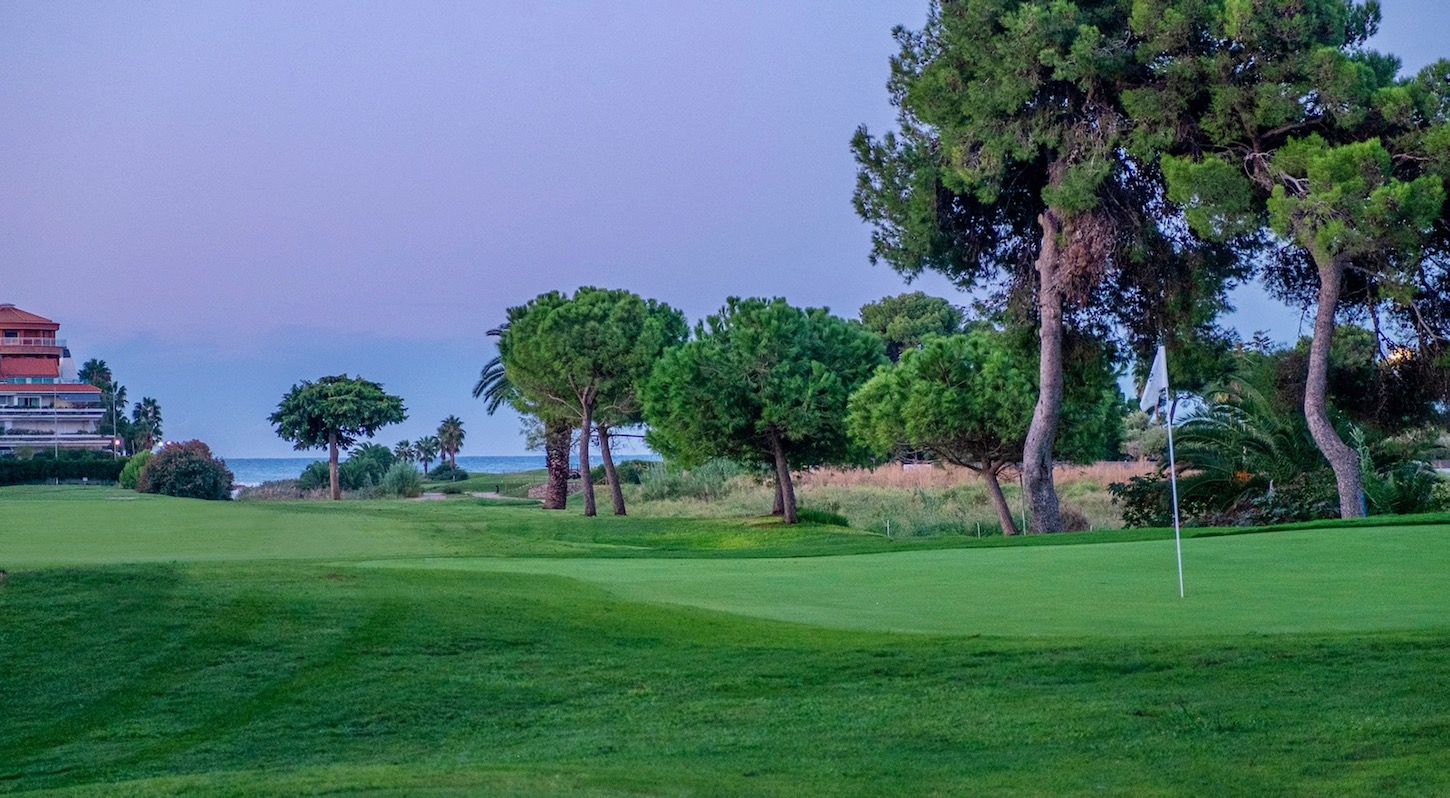


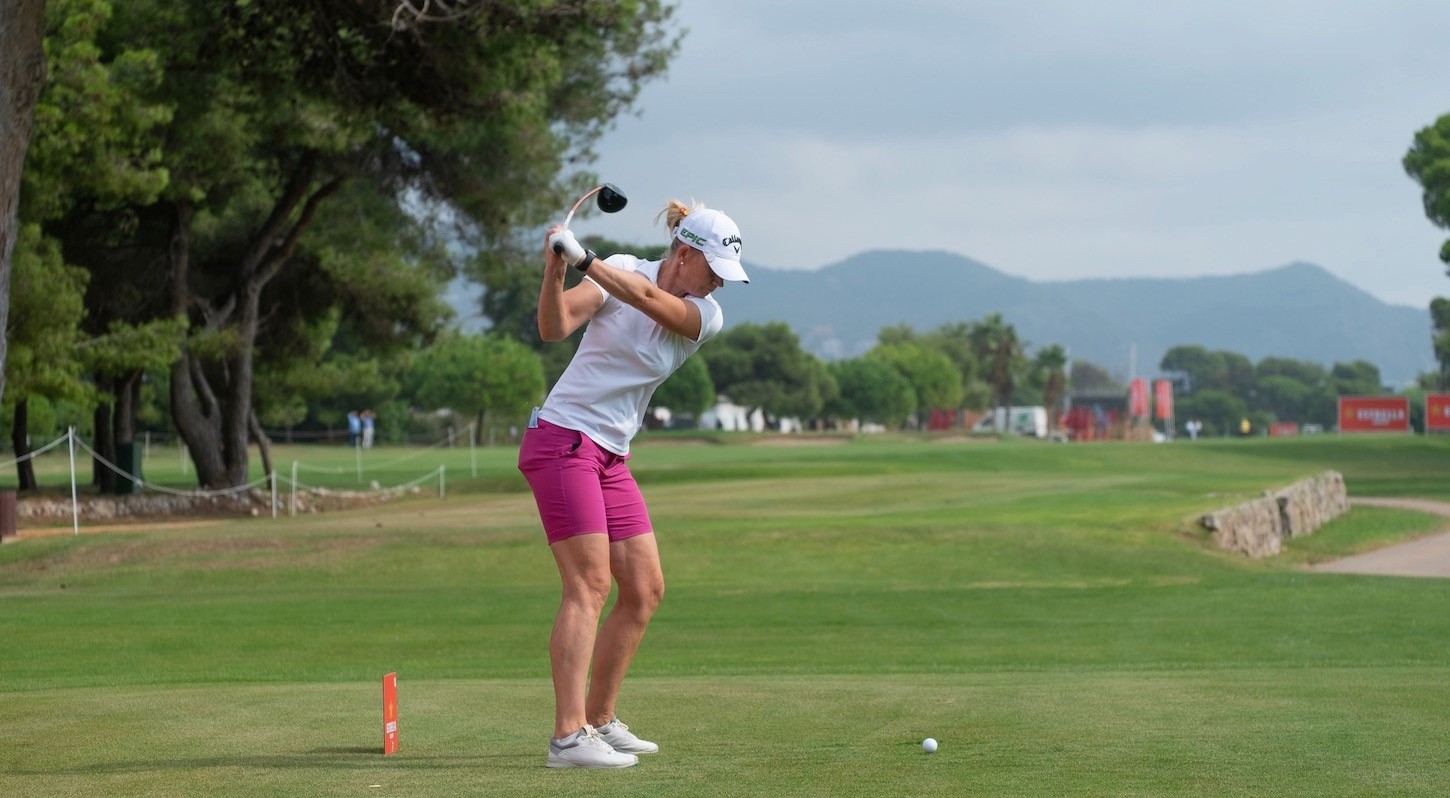
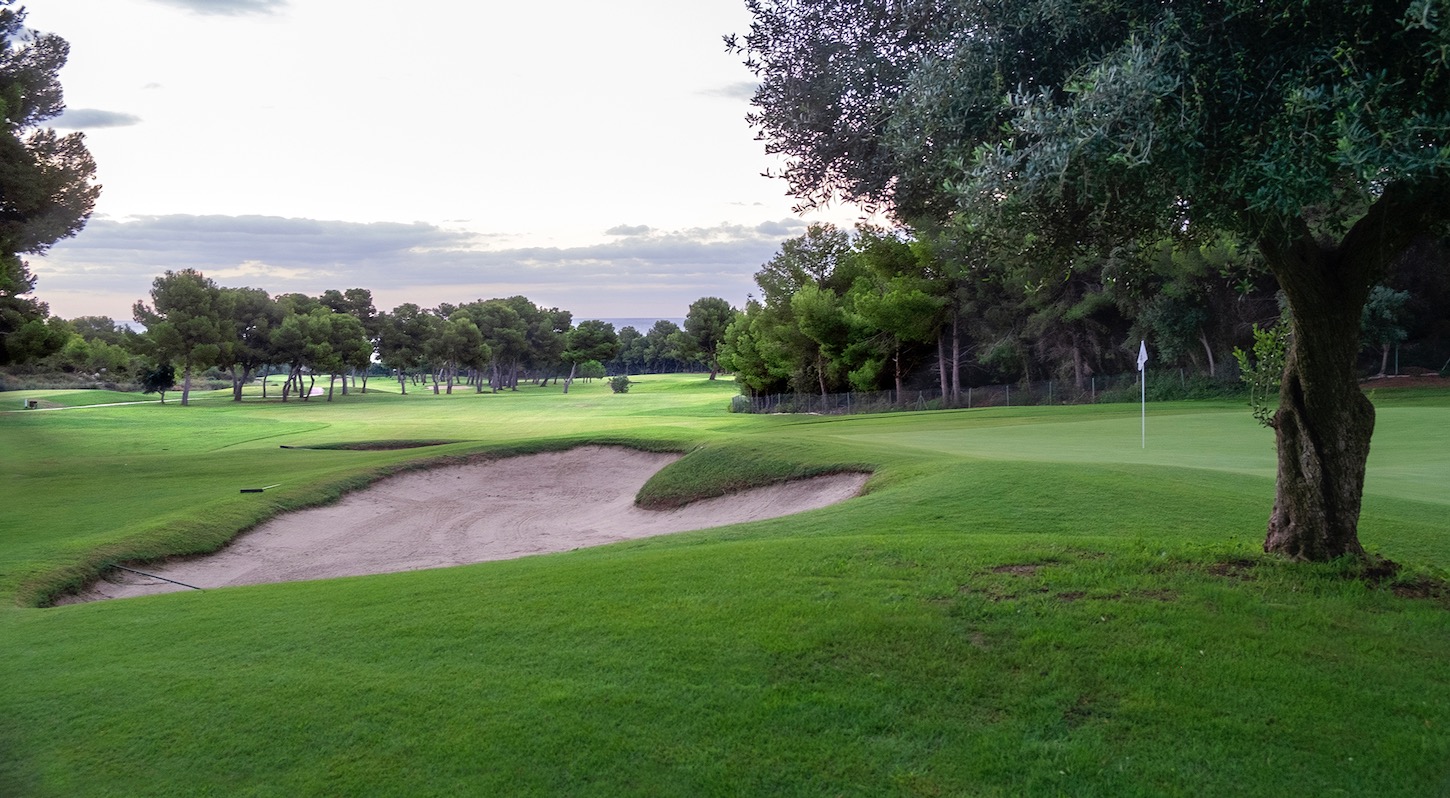
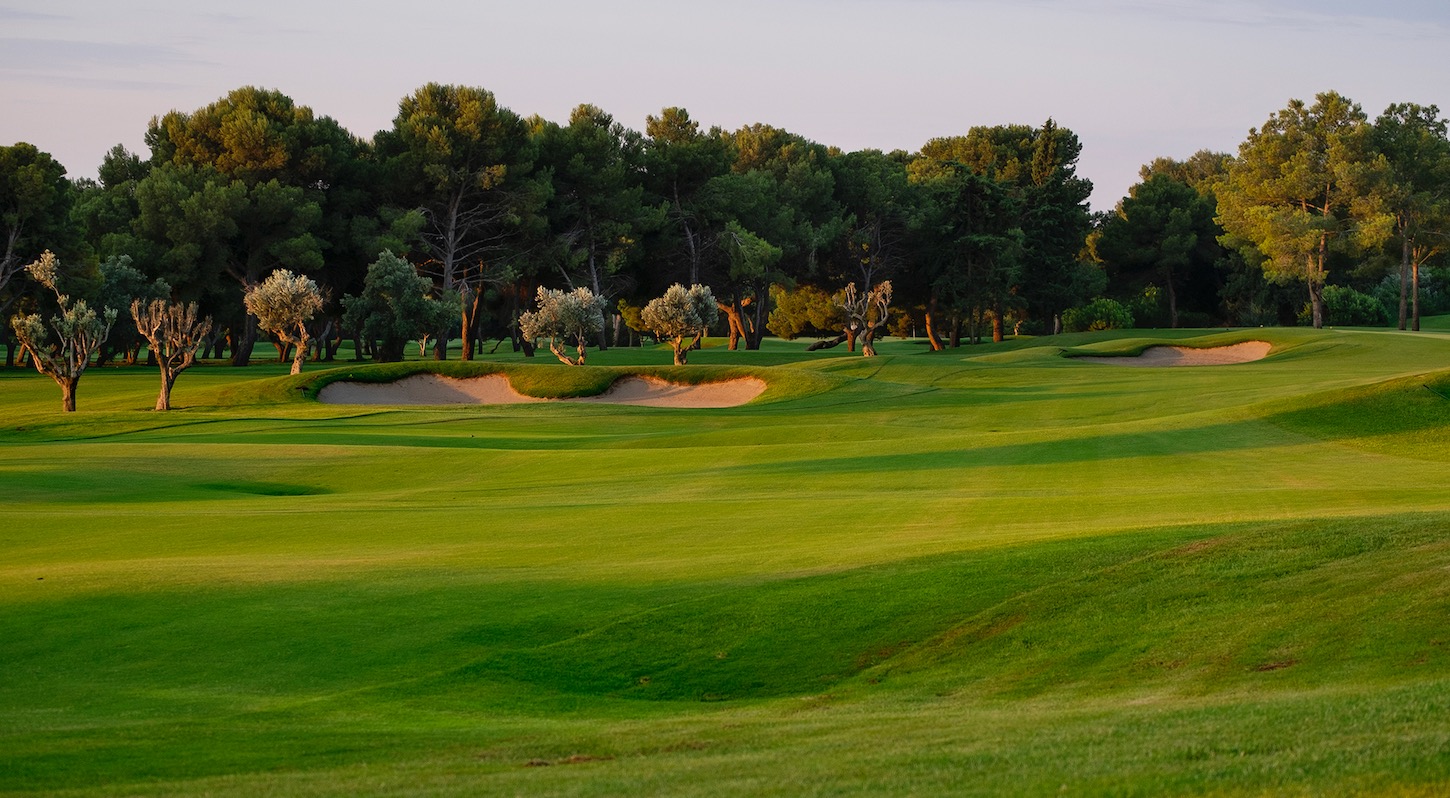
Handicap: 8
Whites: 337
Yellows: 331
Blues: 295
Reds: 279
Oranges: 235

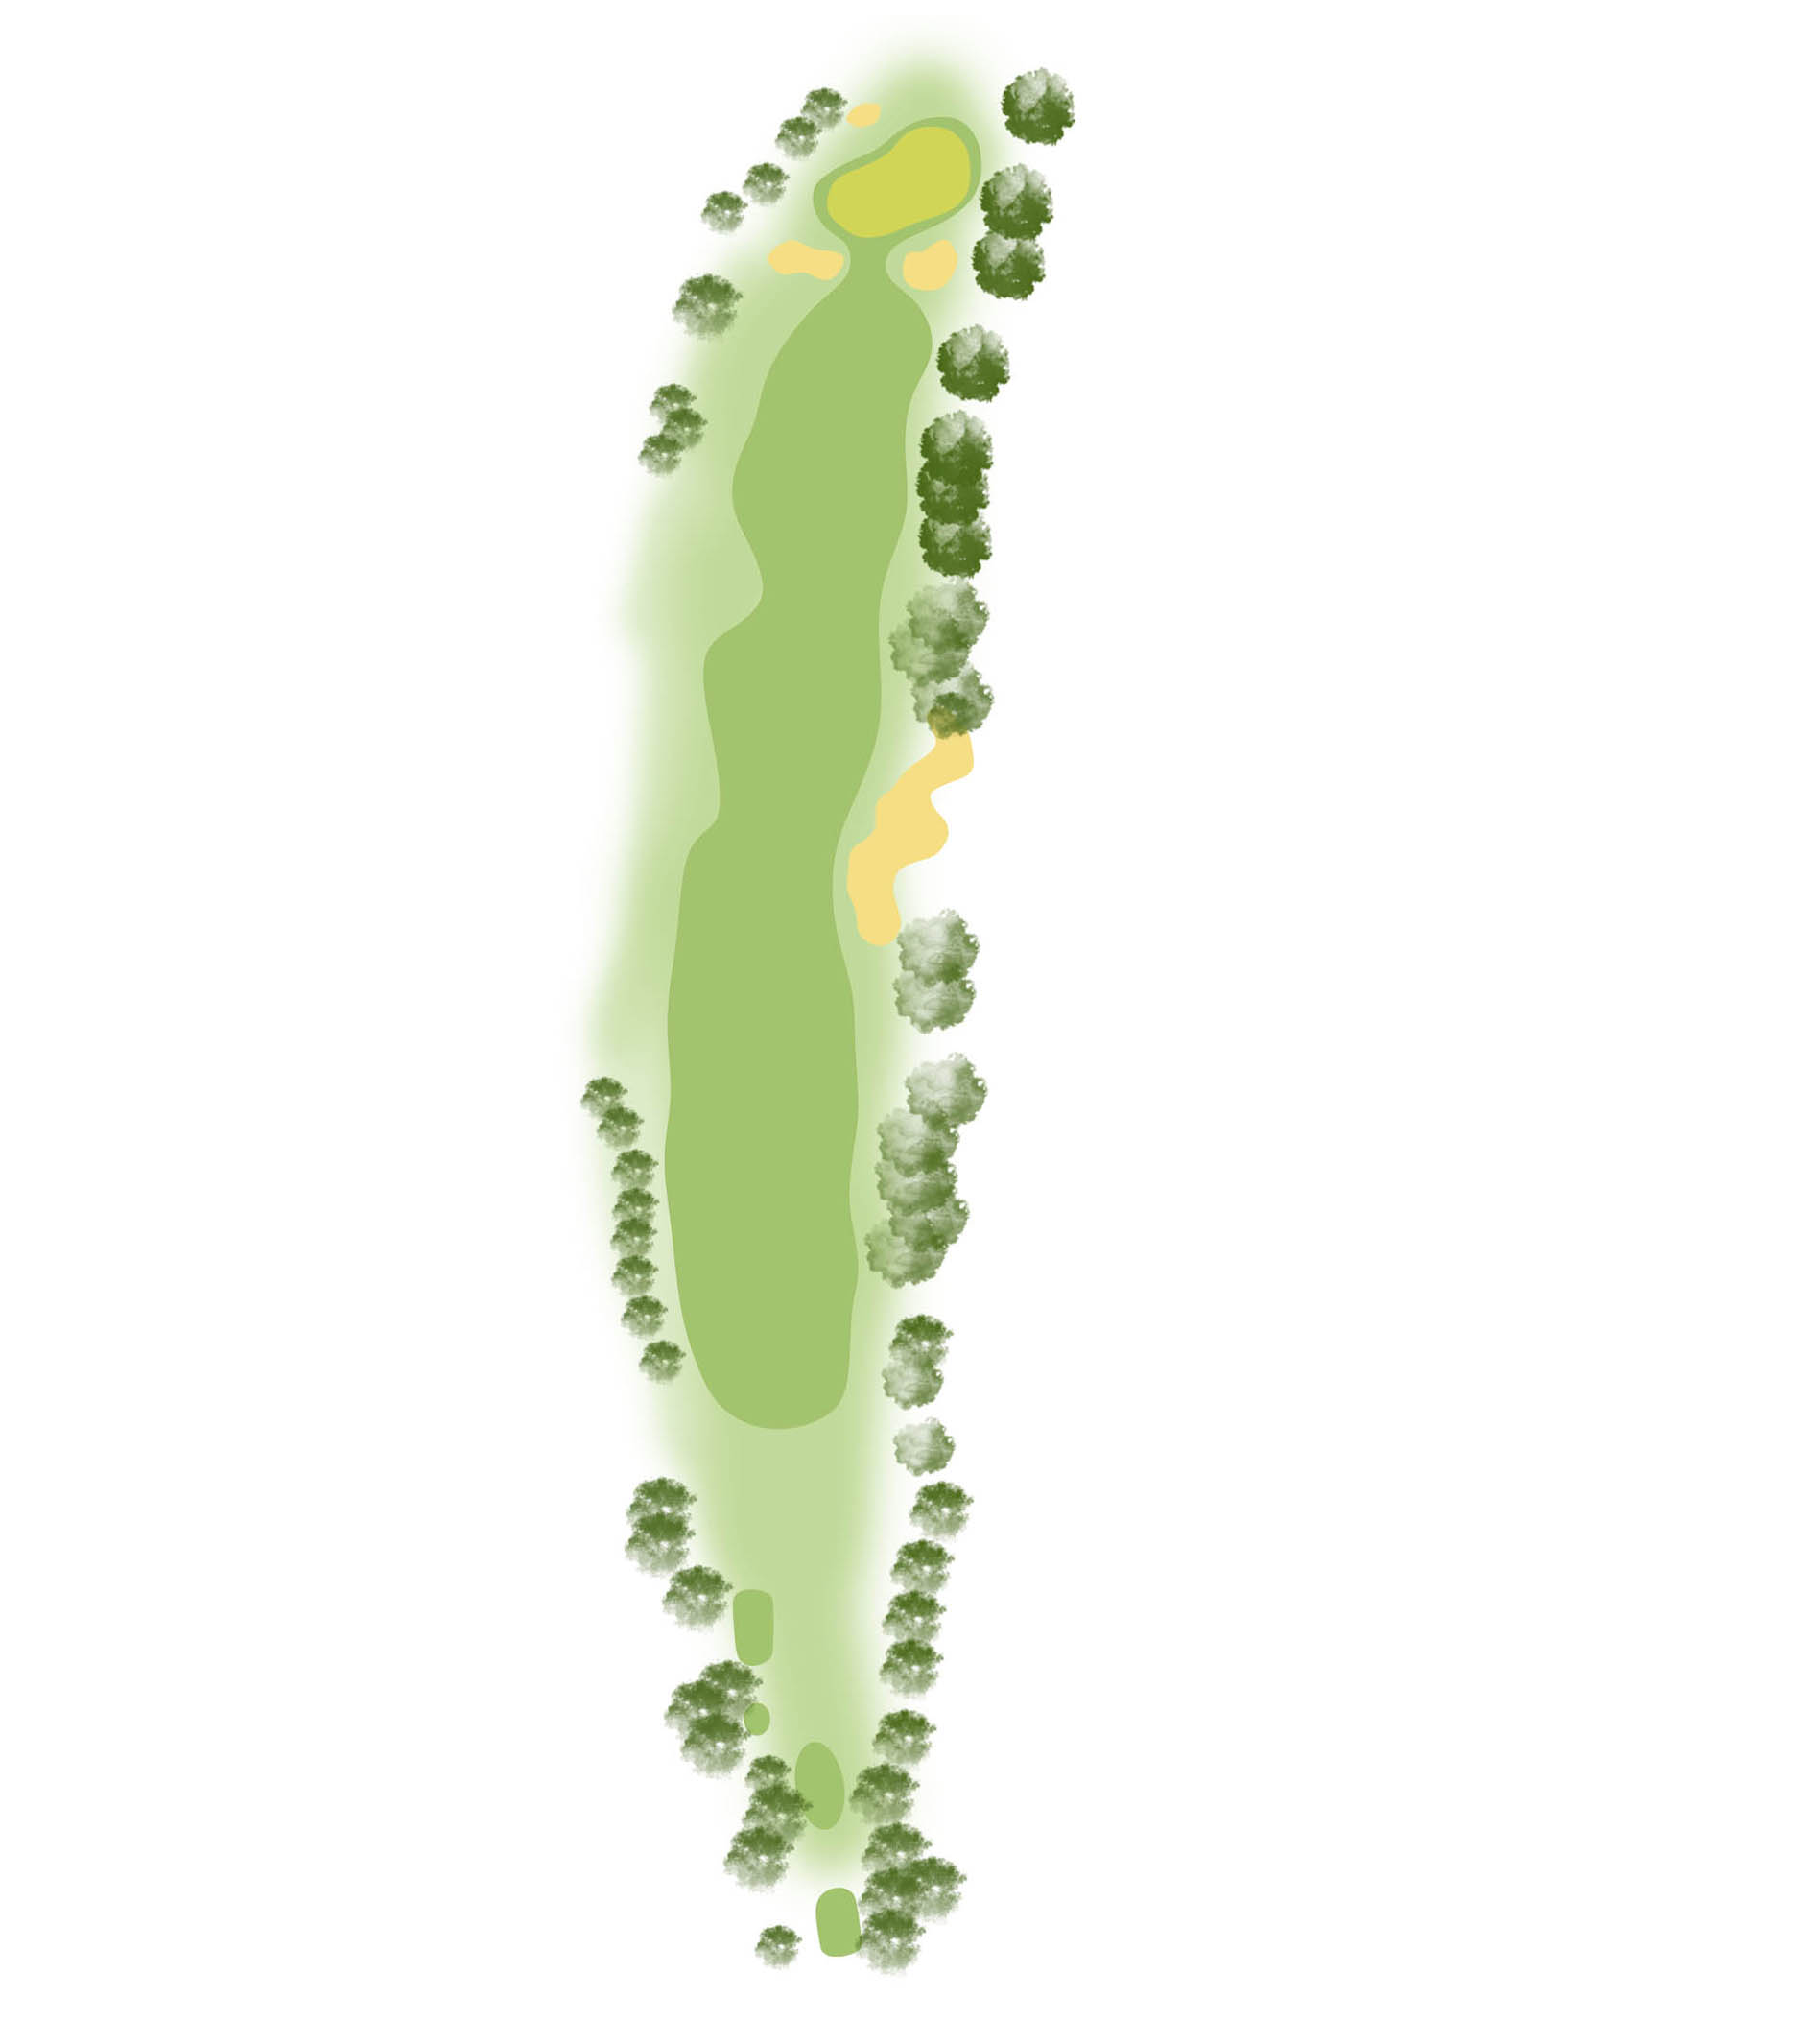
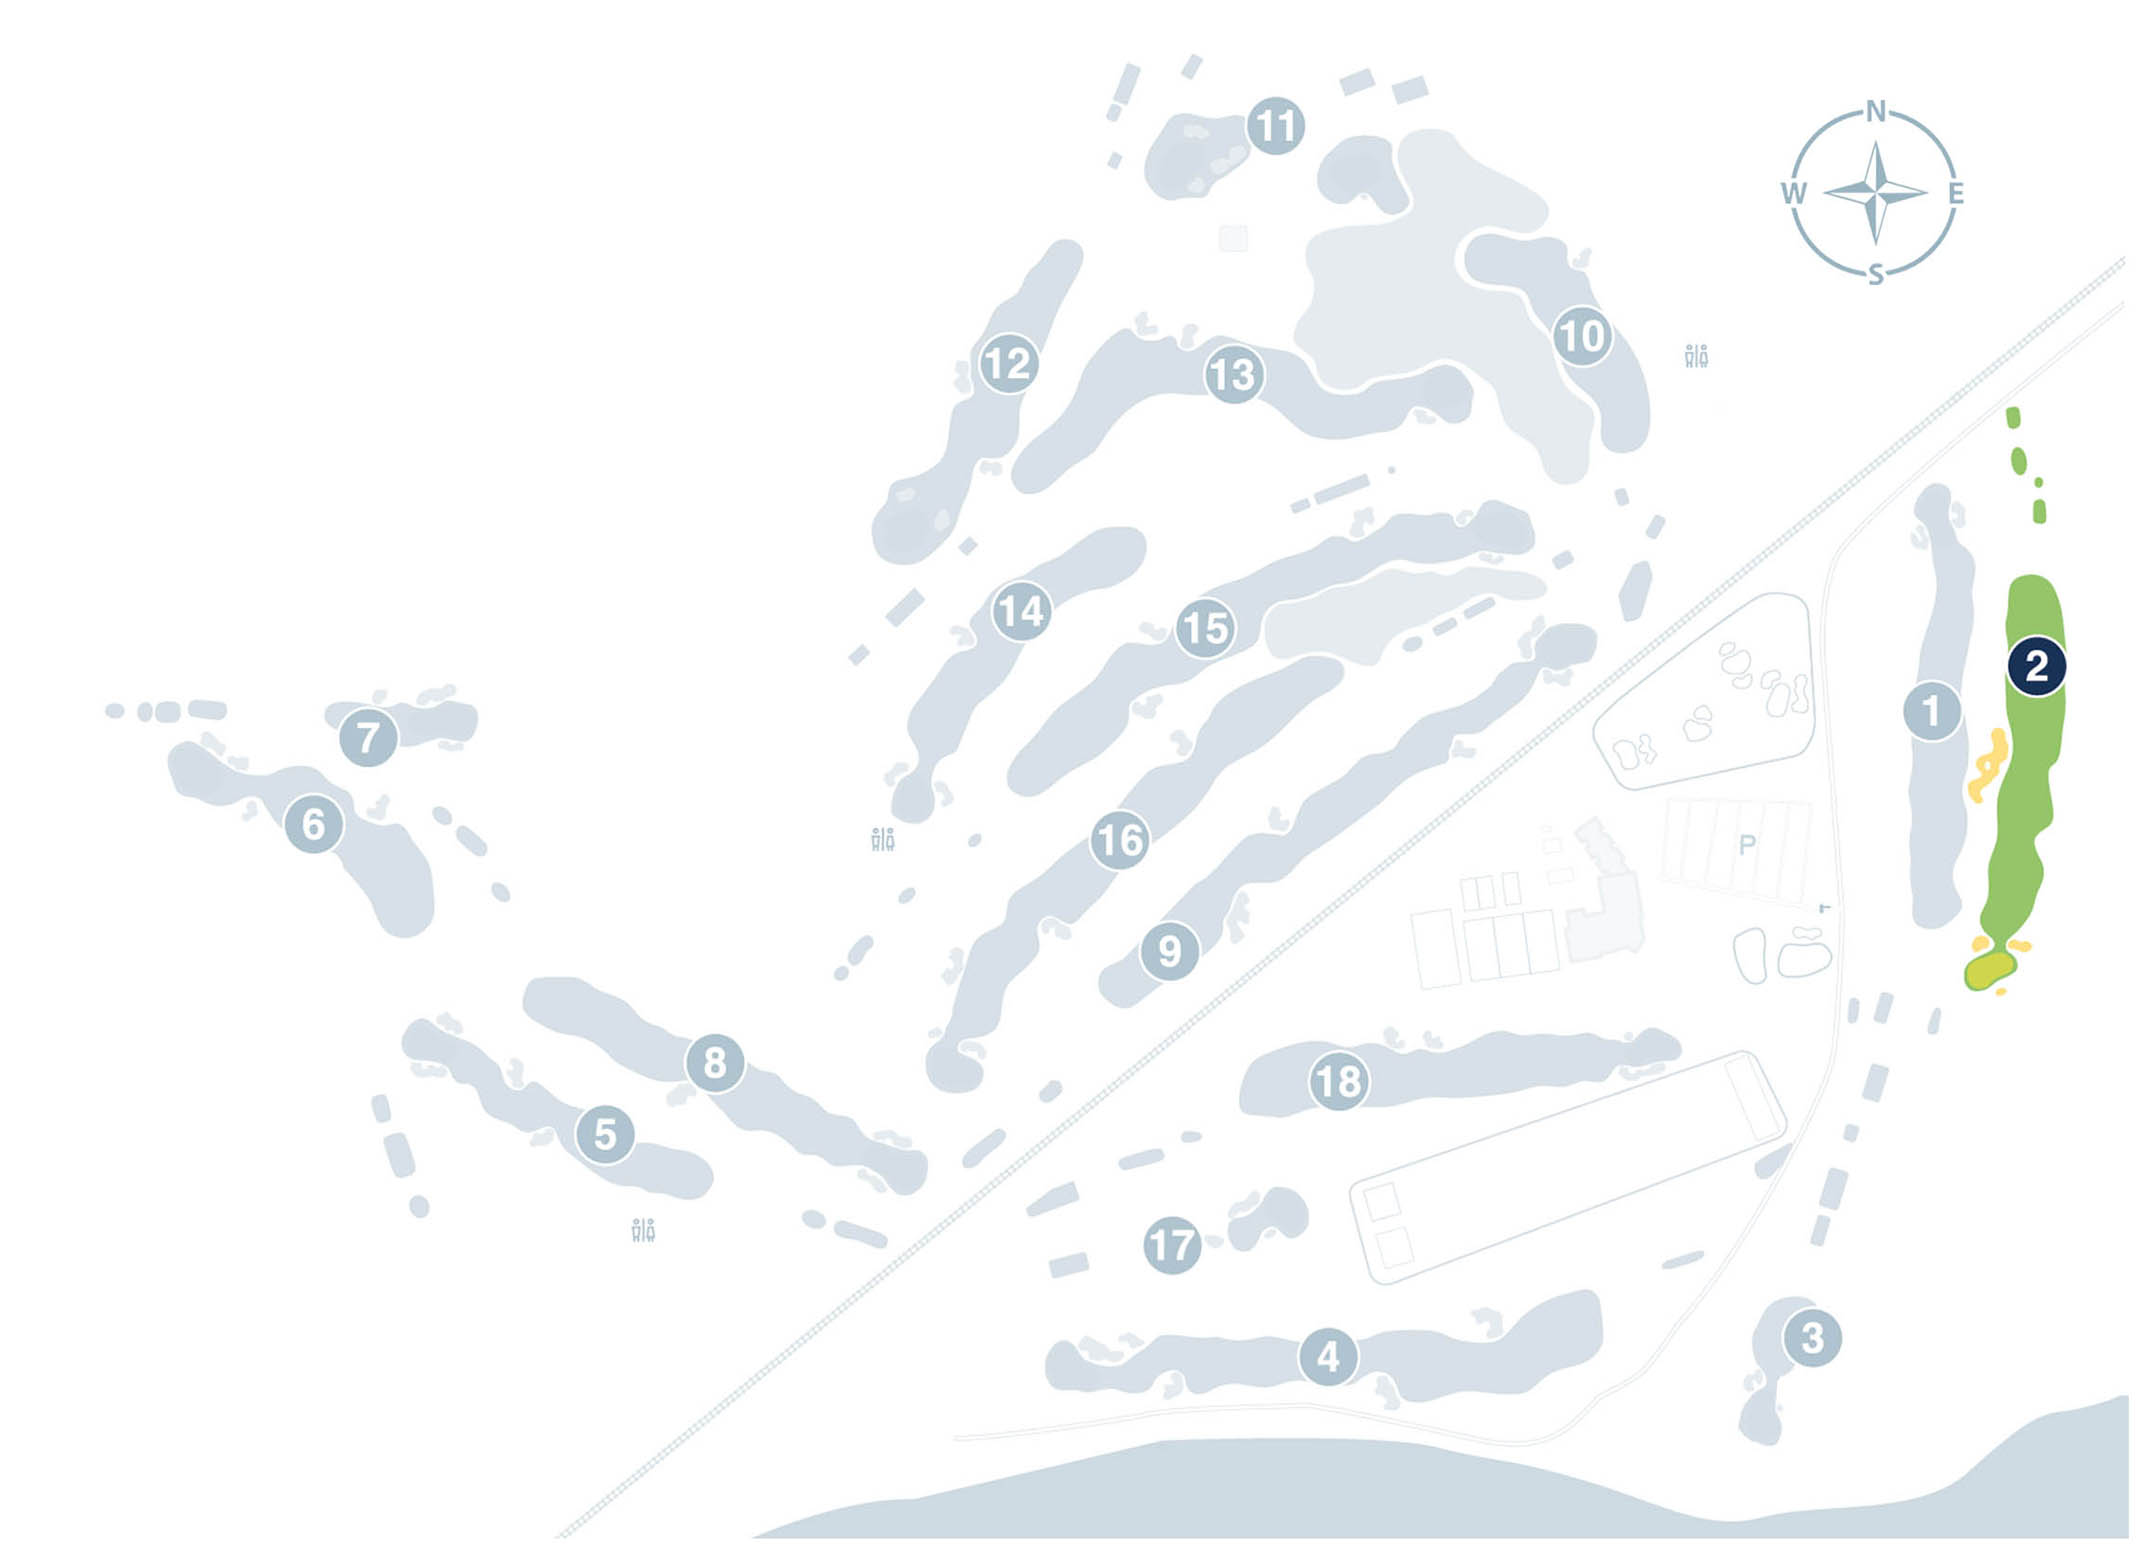
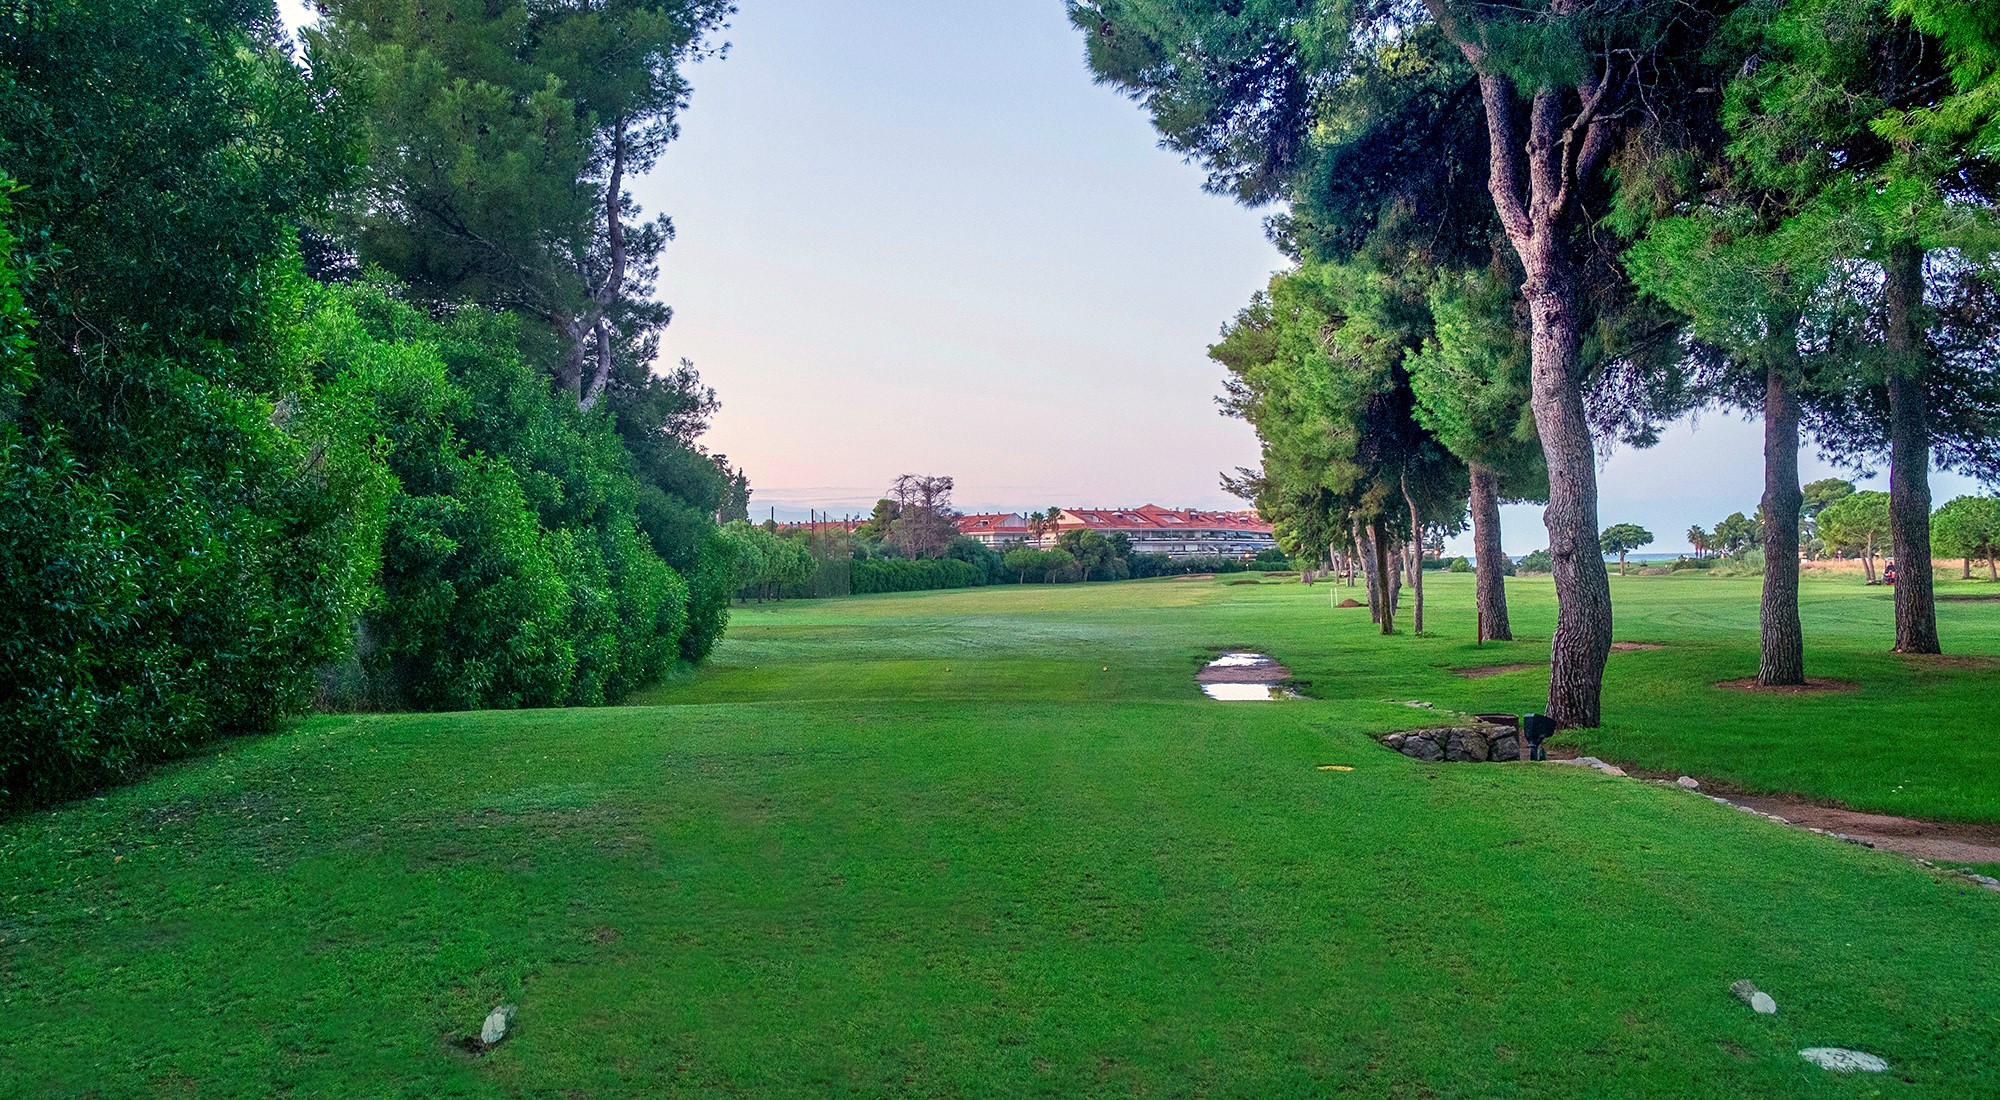
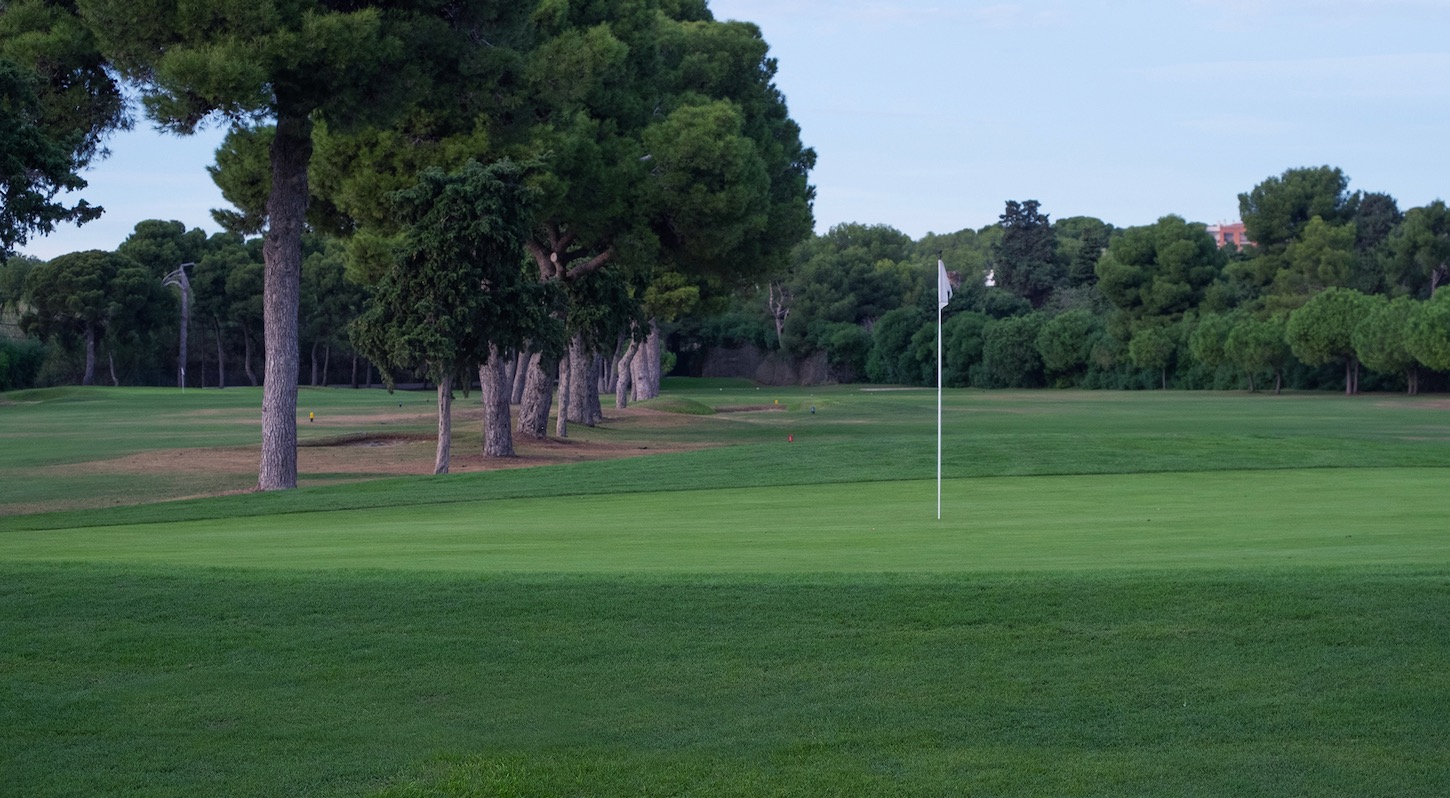
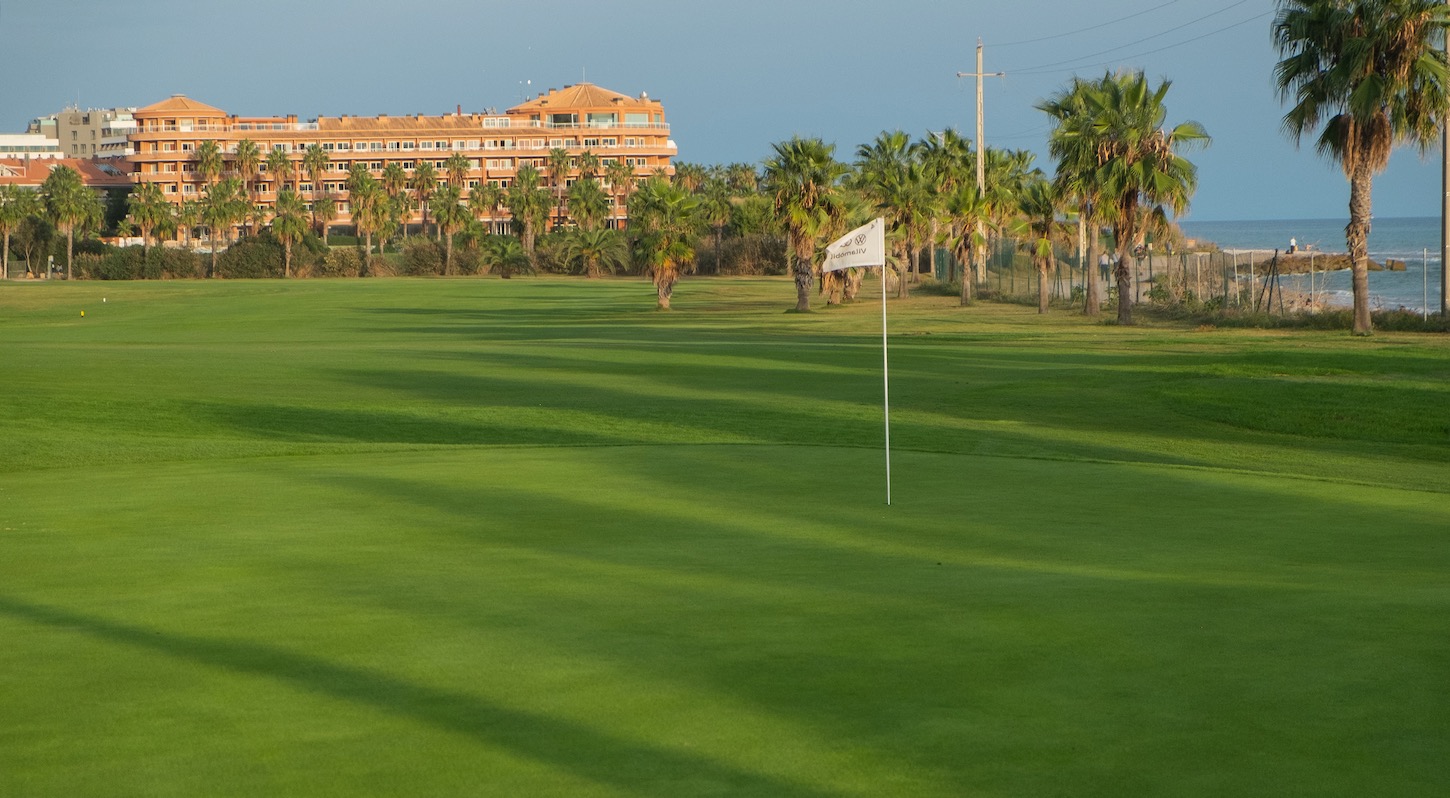
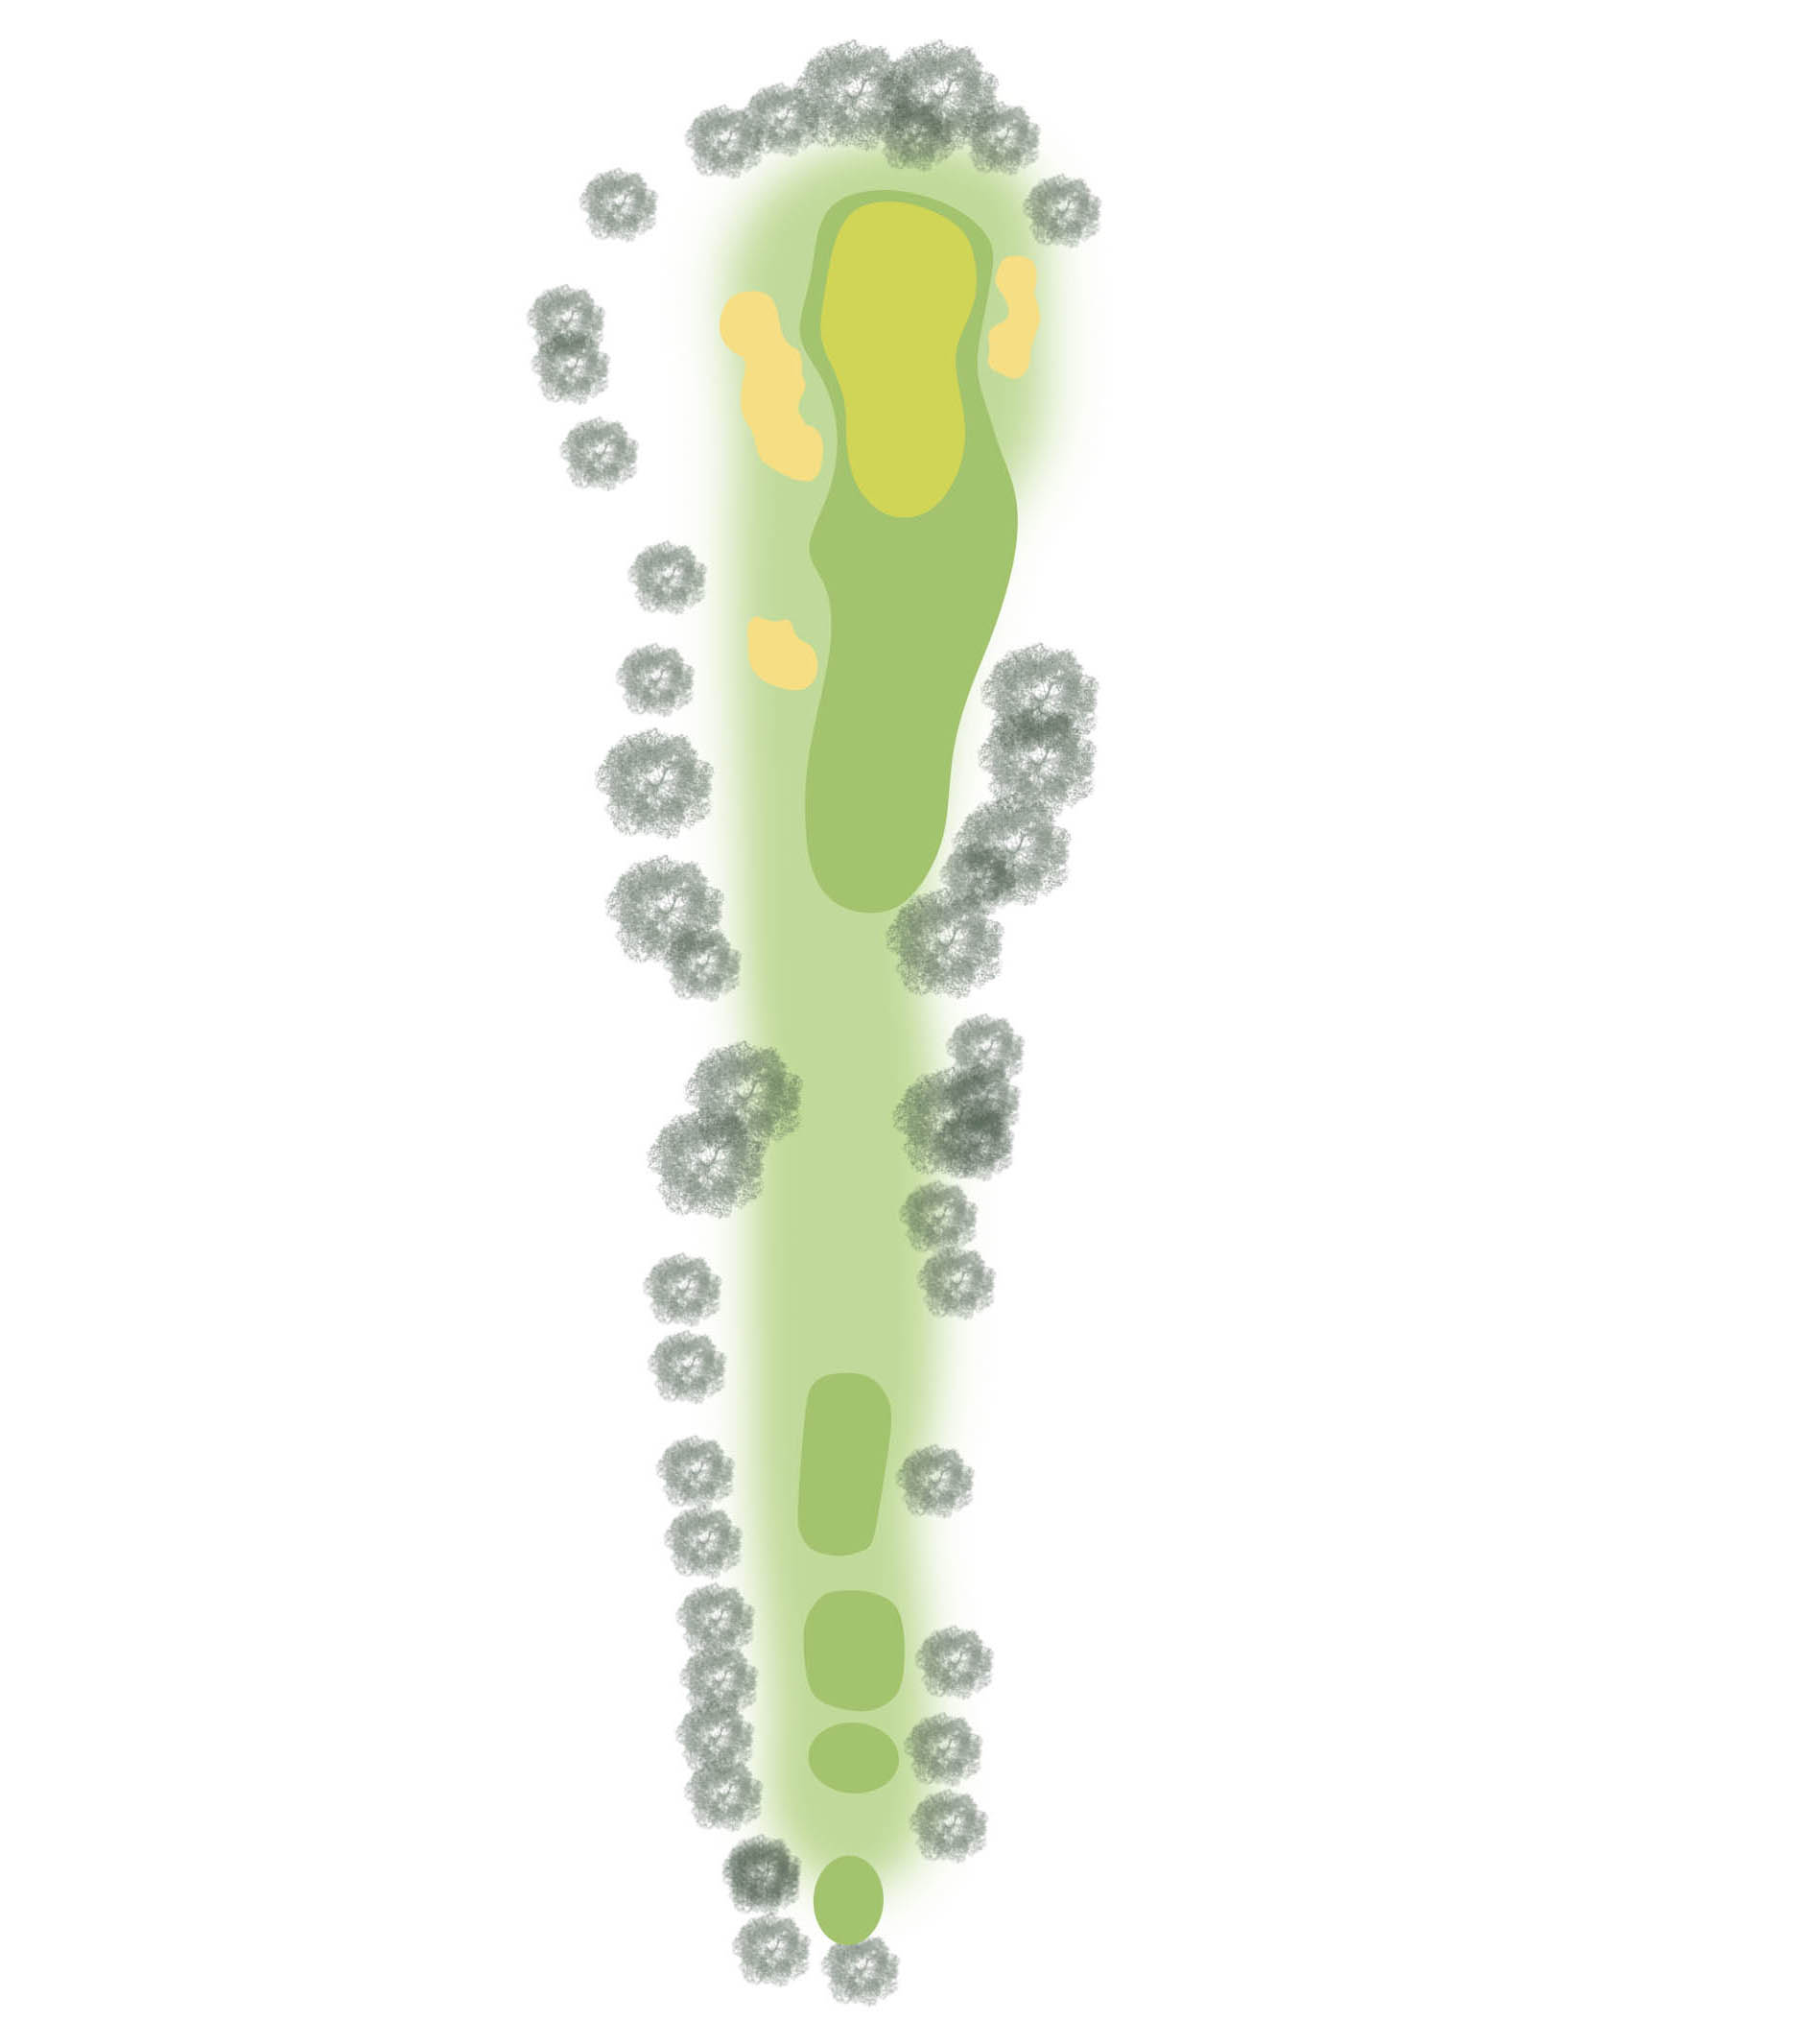
Very straight hole with out of bounds to the left and a bunker and pine trees to the right. If we manage to stay on the left side of the fairway, we will have a much better shot to the green. When in doubt, always hit a longer club into the green, since it is slightly elevated and very well protected by two front bunkers. This green is very wide but also quite flat, so my tip would be that a second shot to the center of the green will always be good.

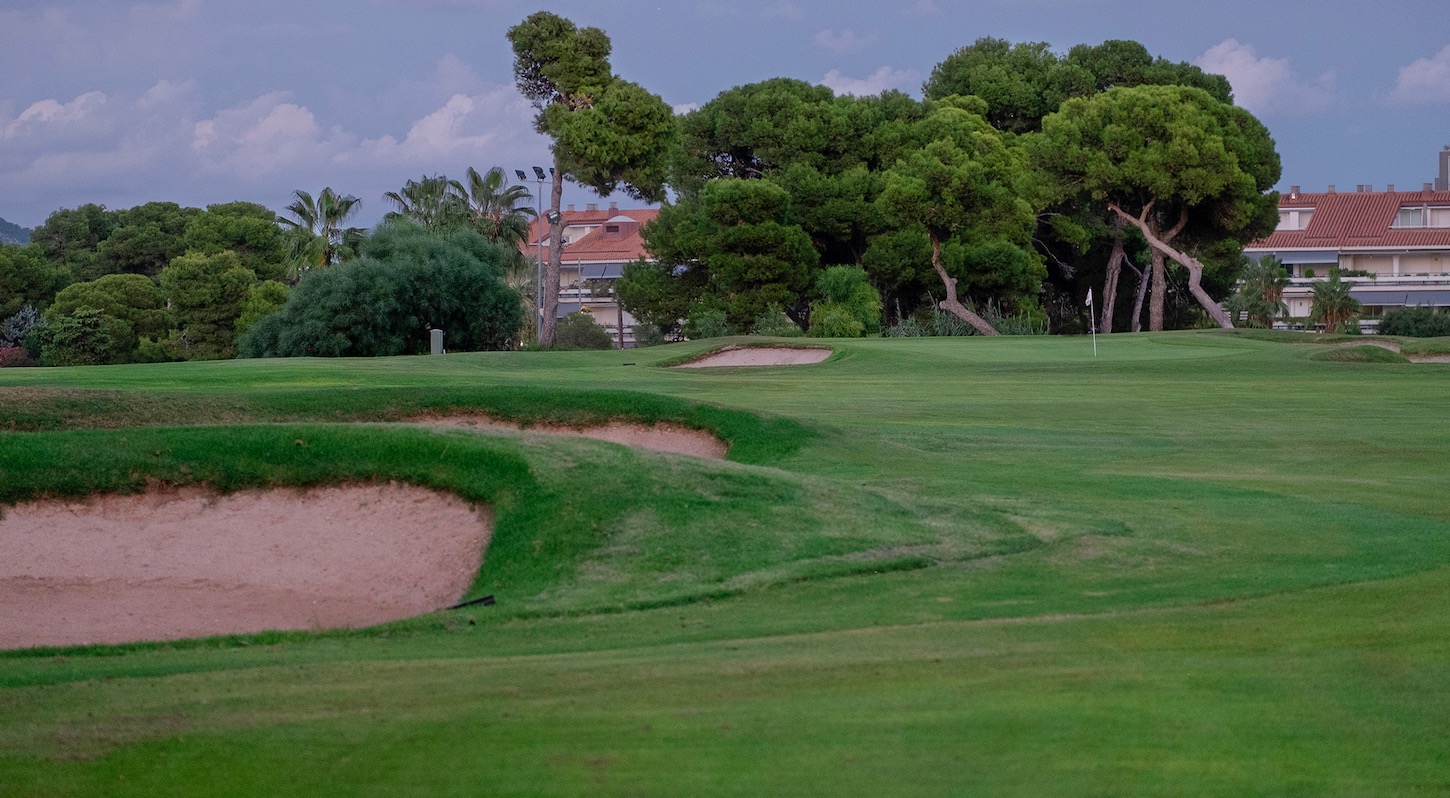
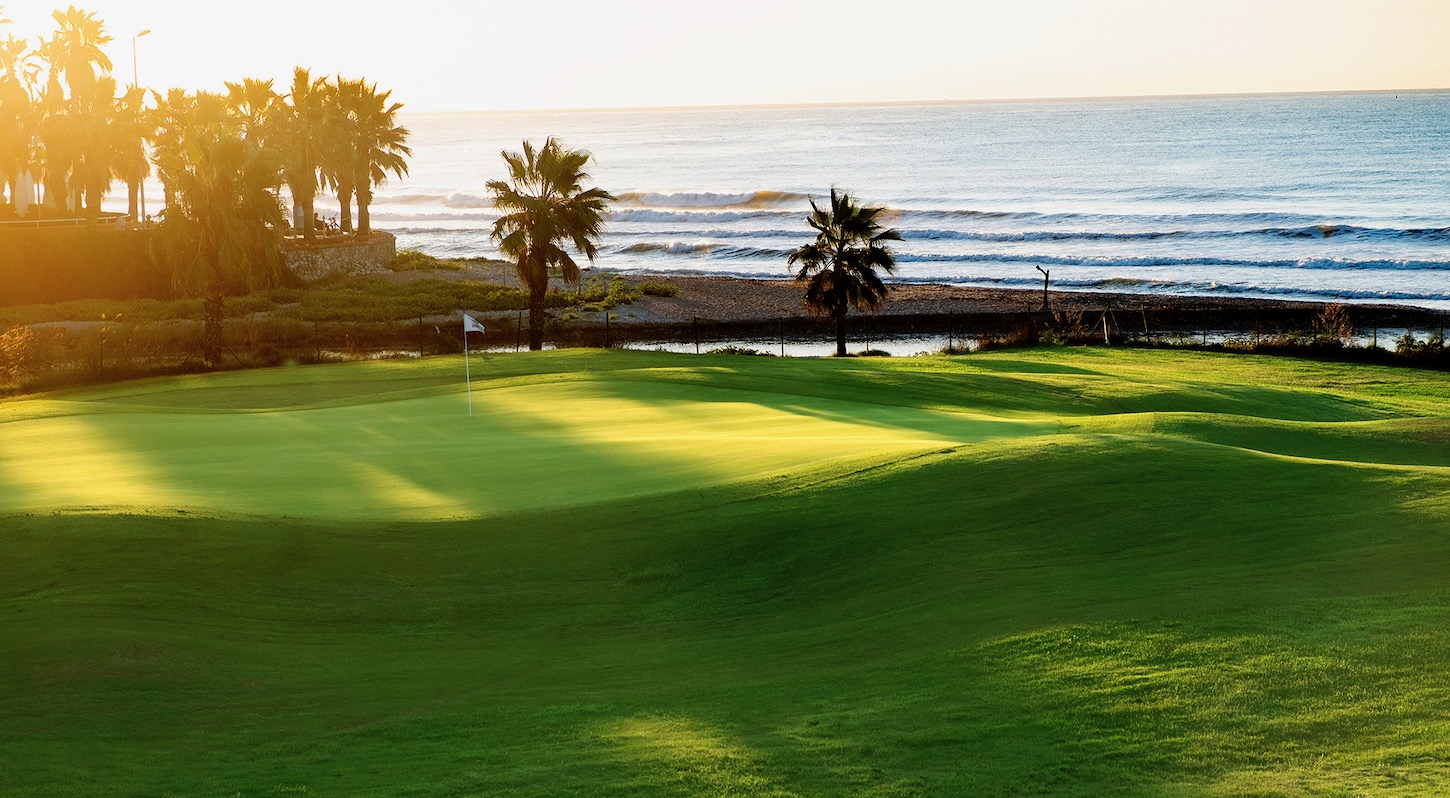
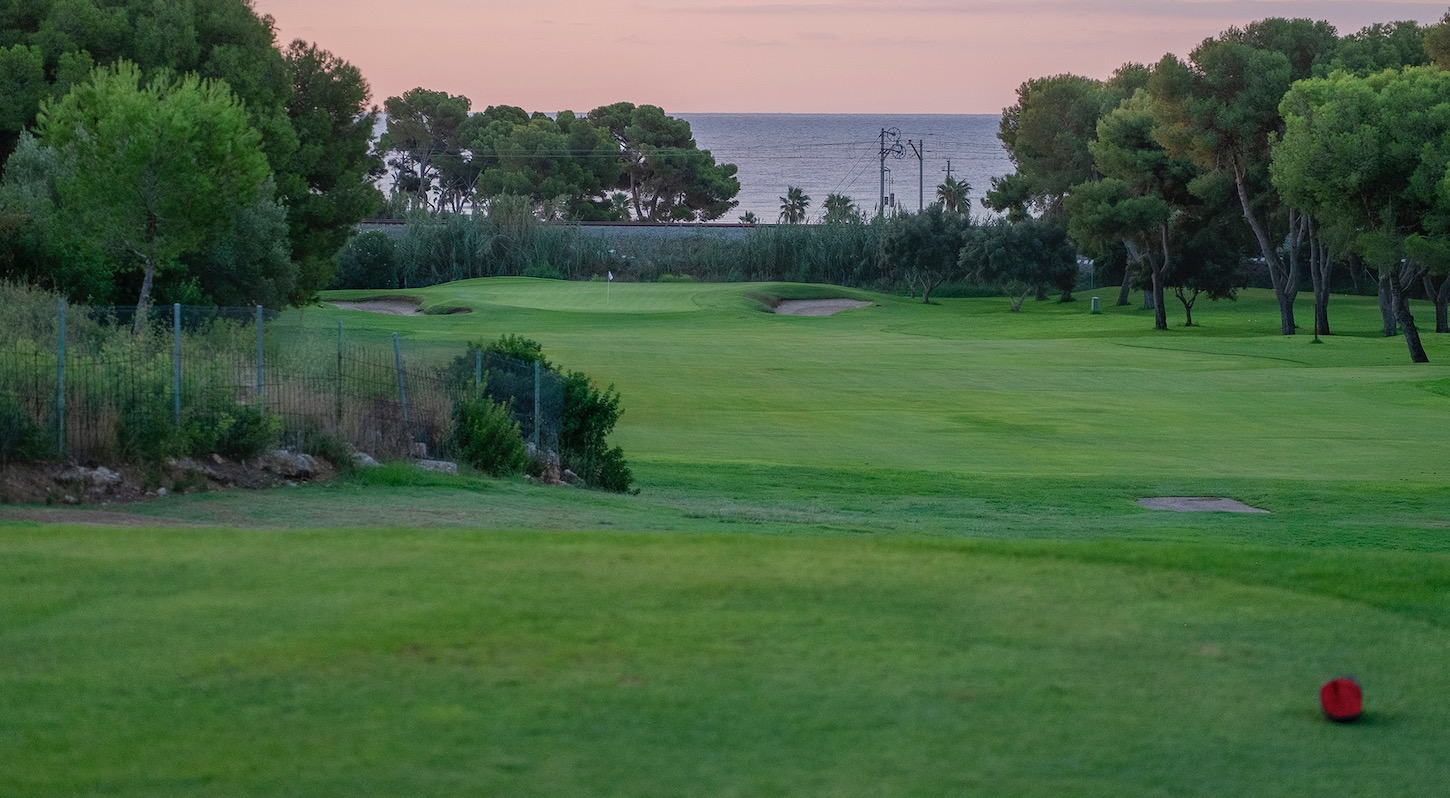
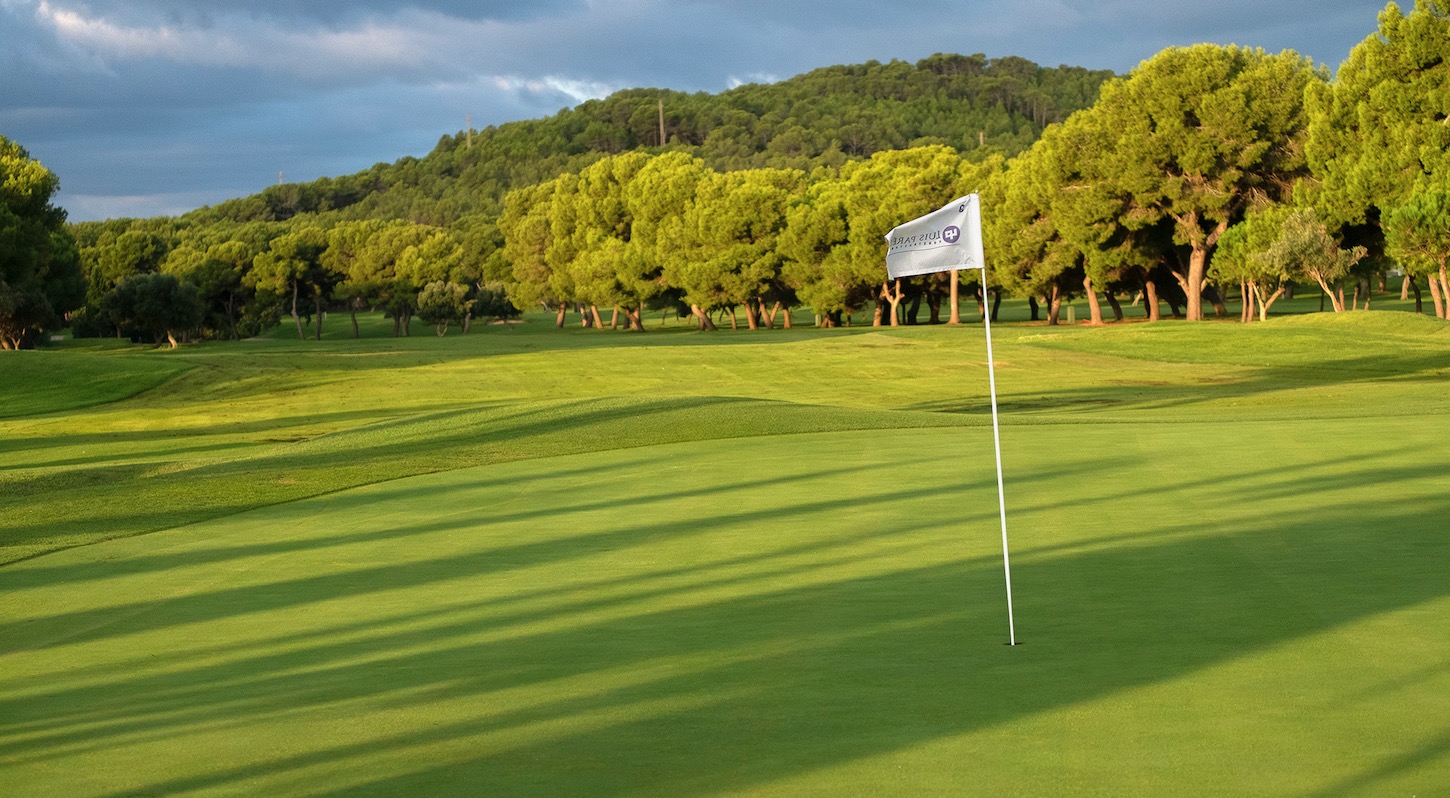
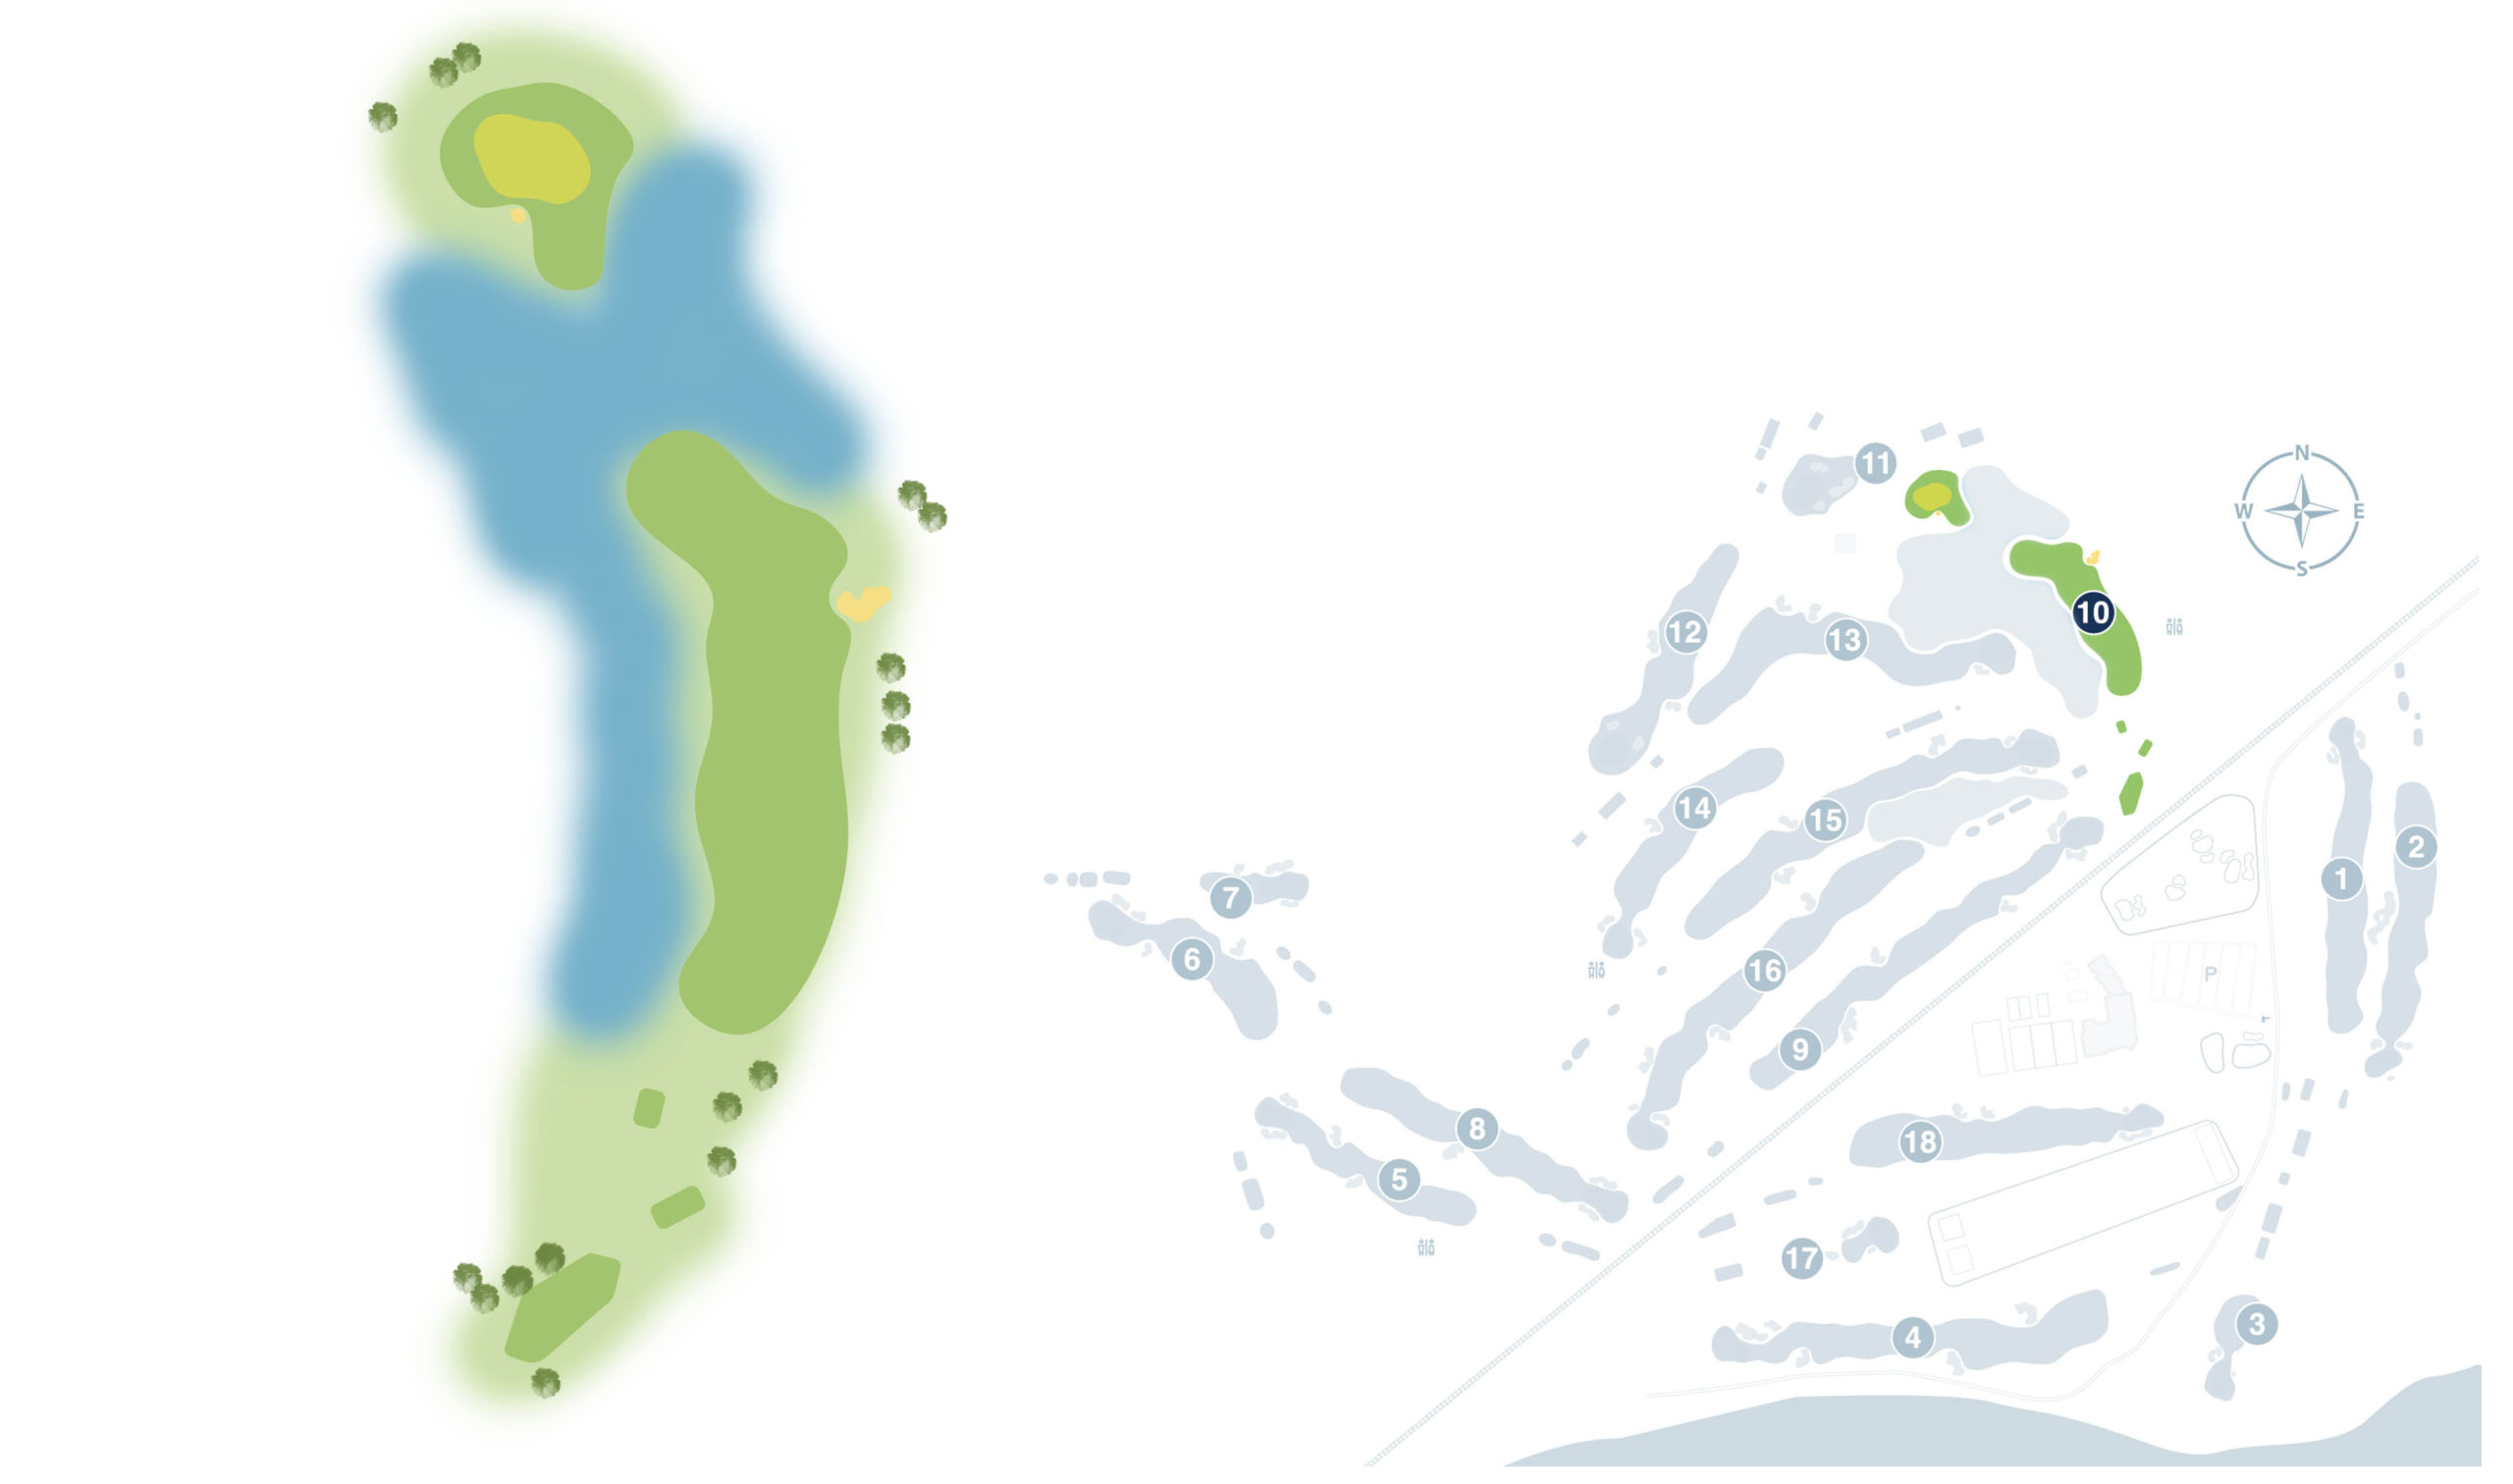
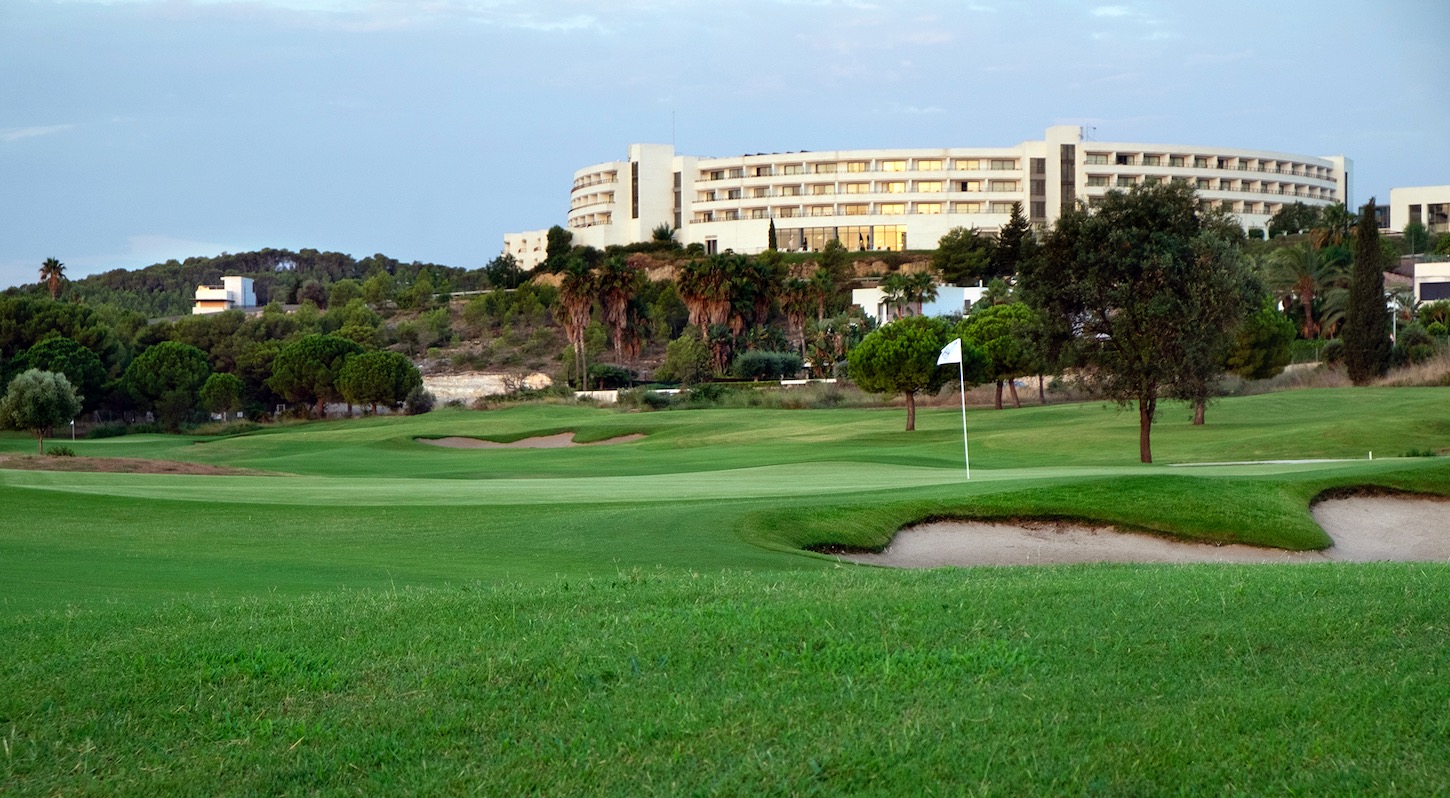
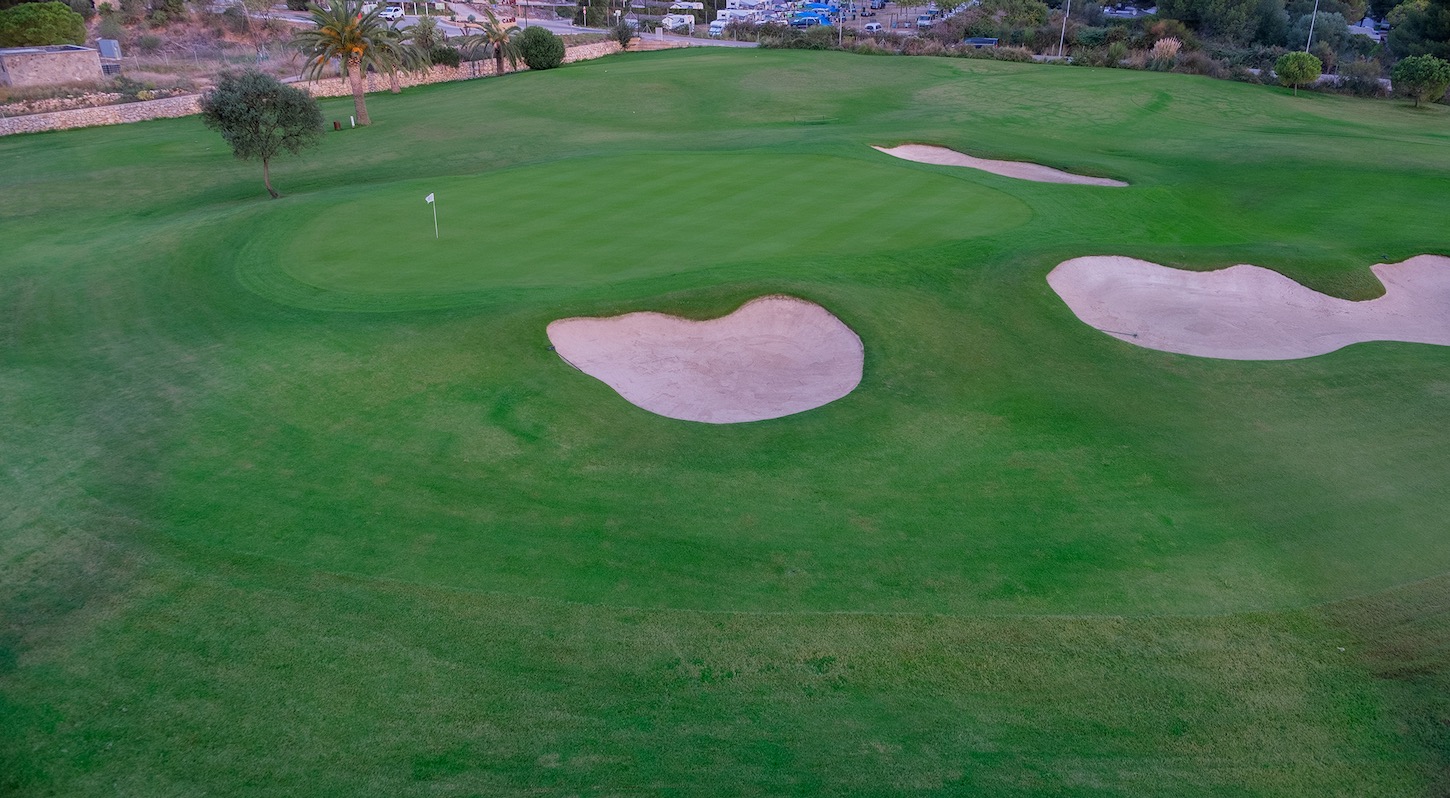
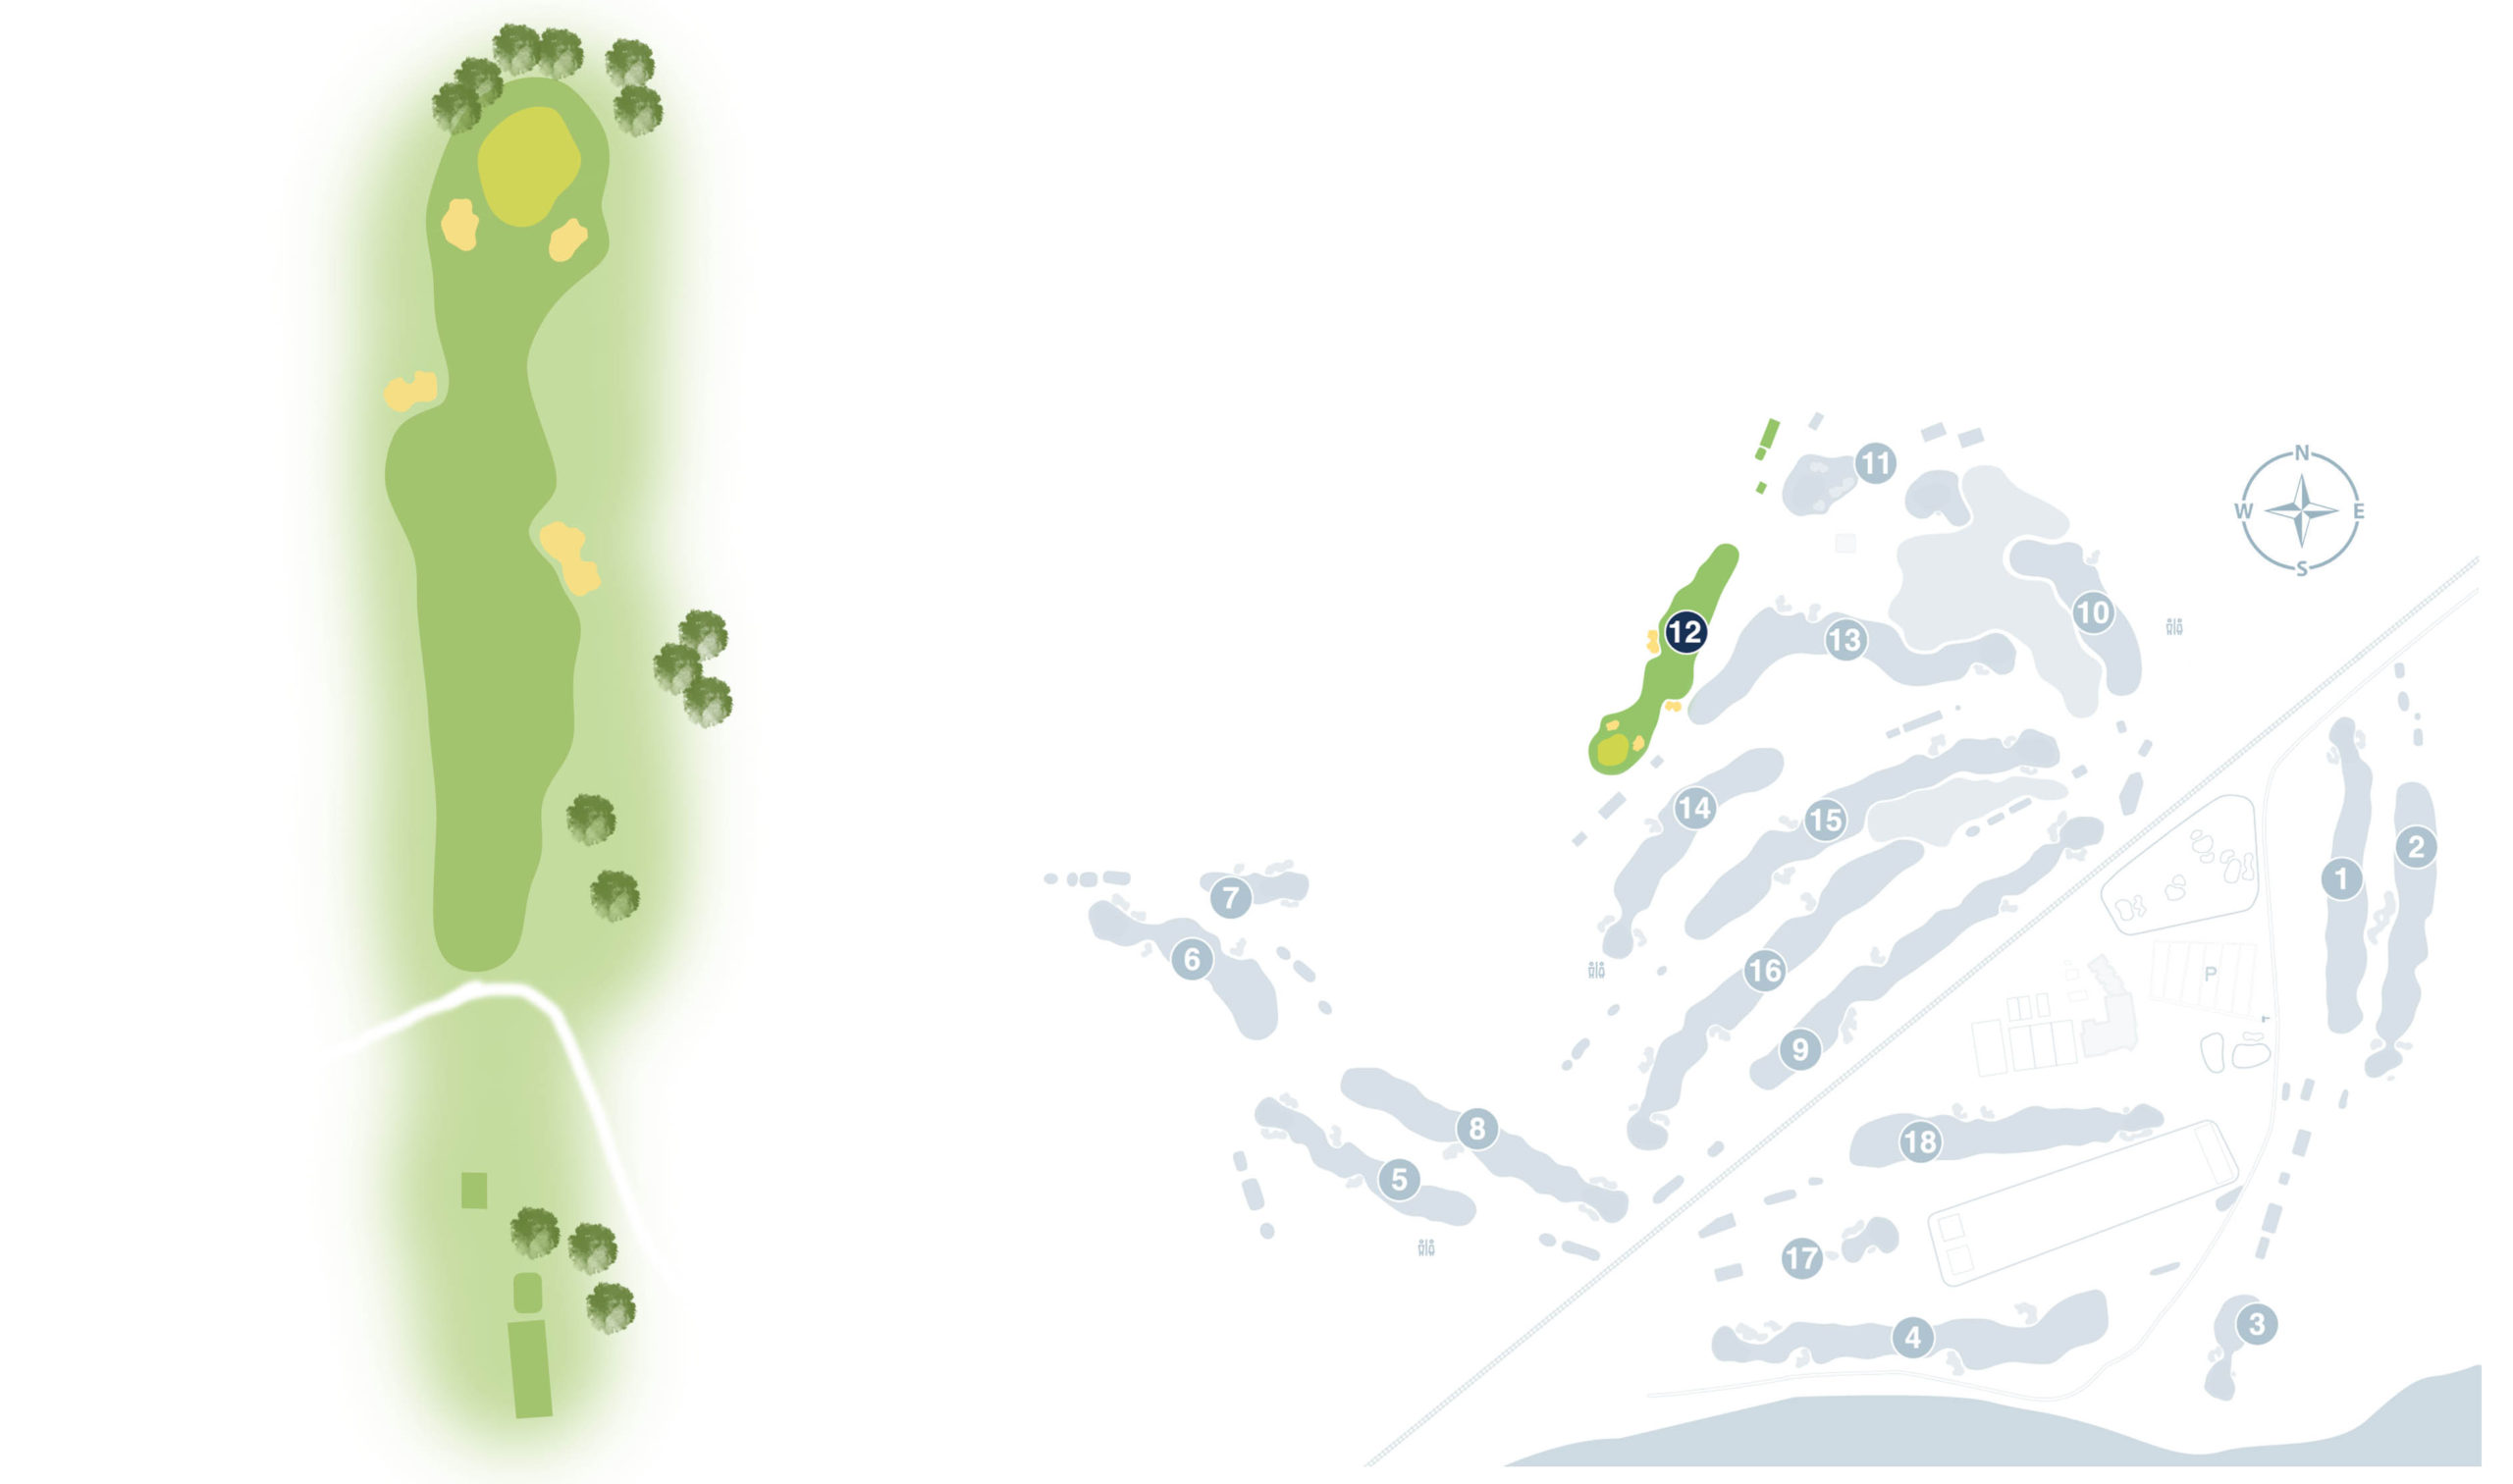
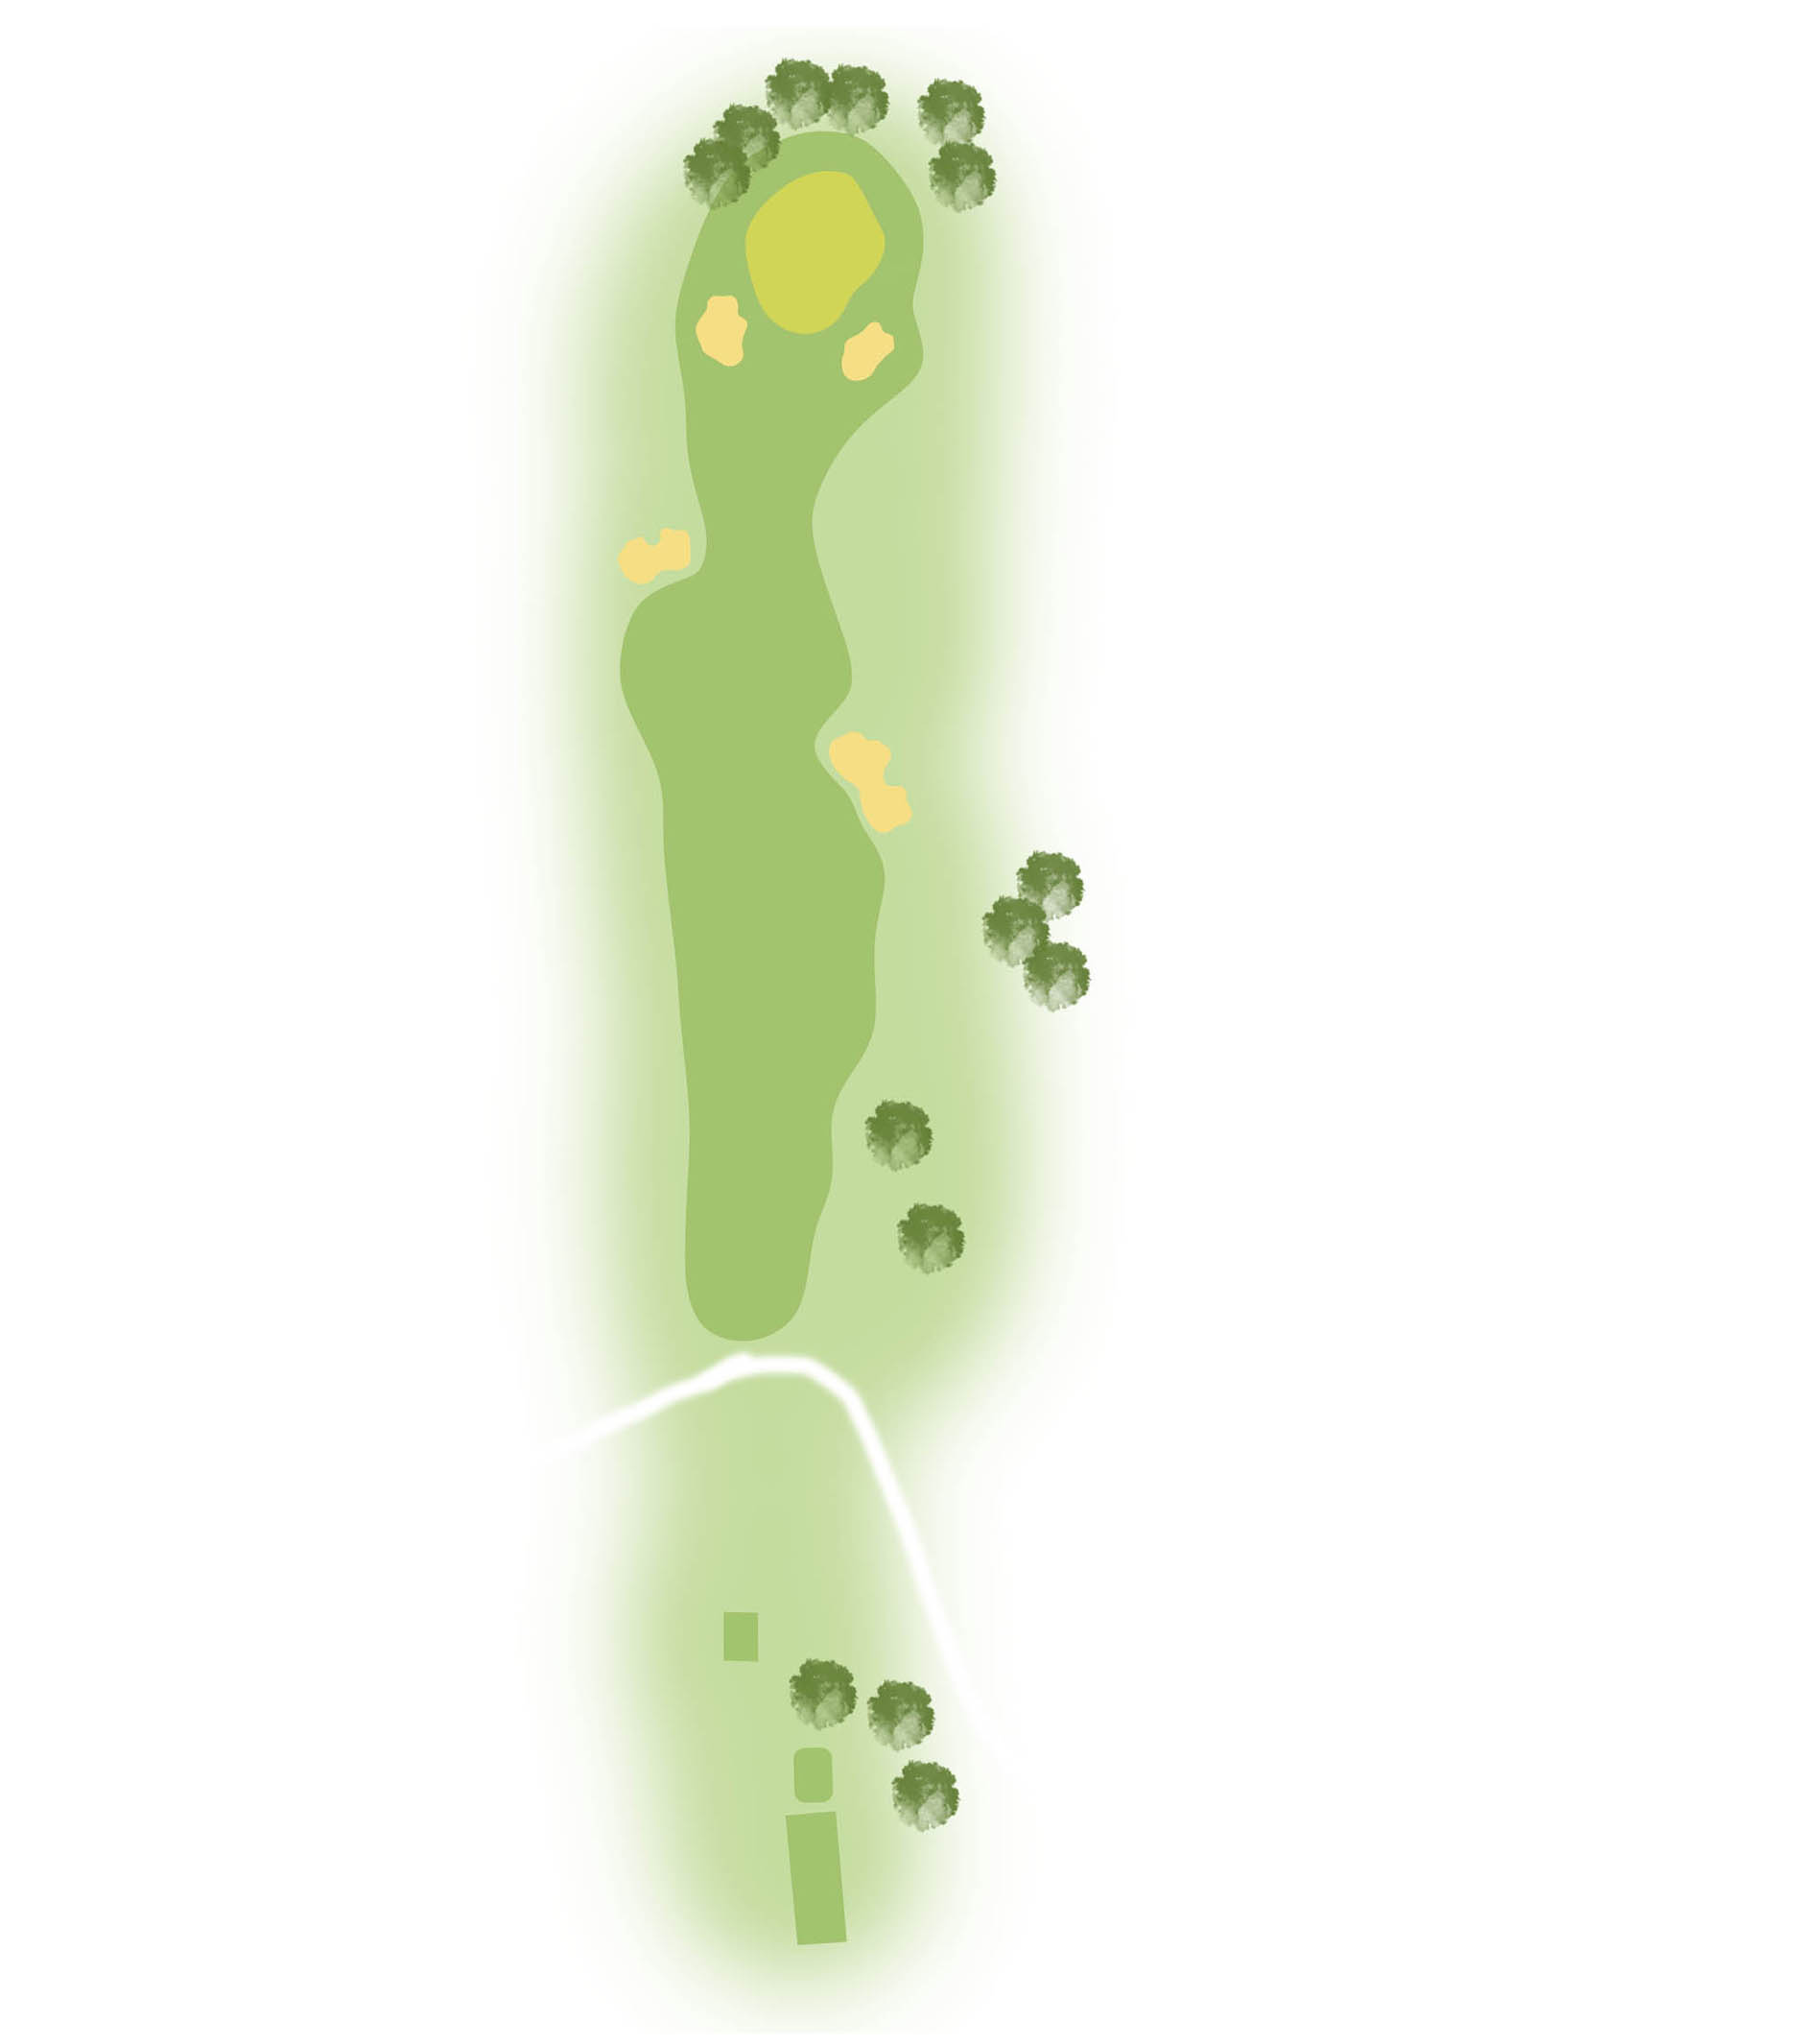
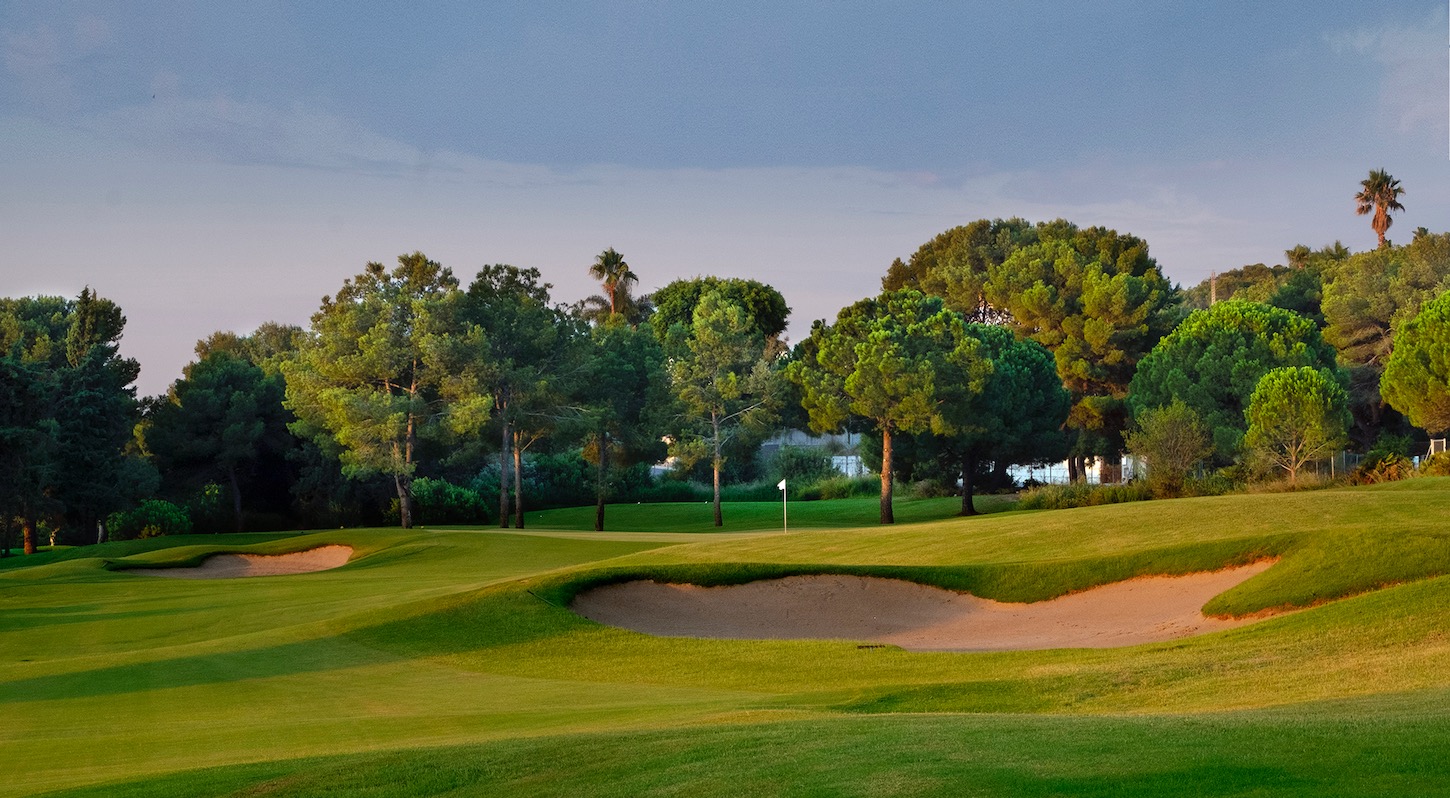
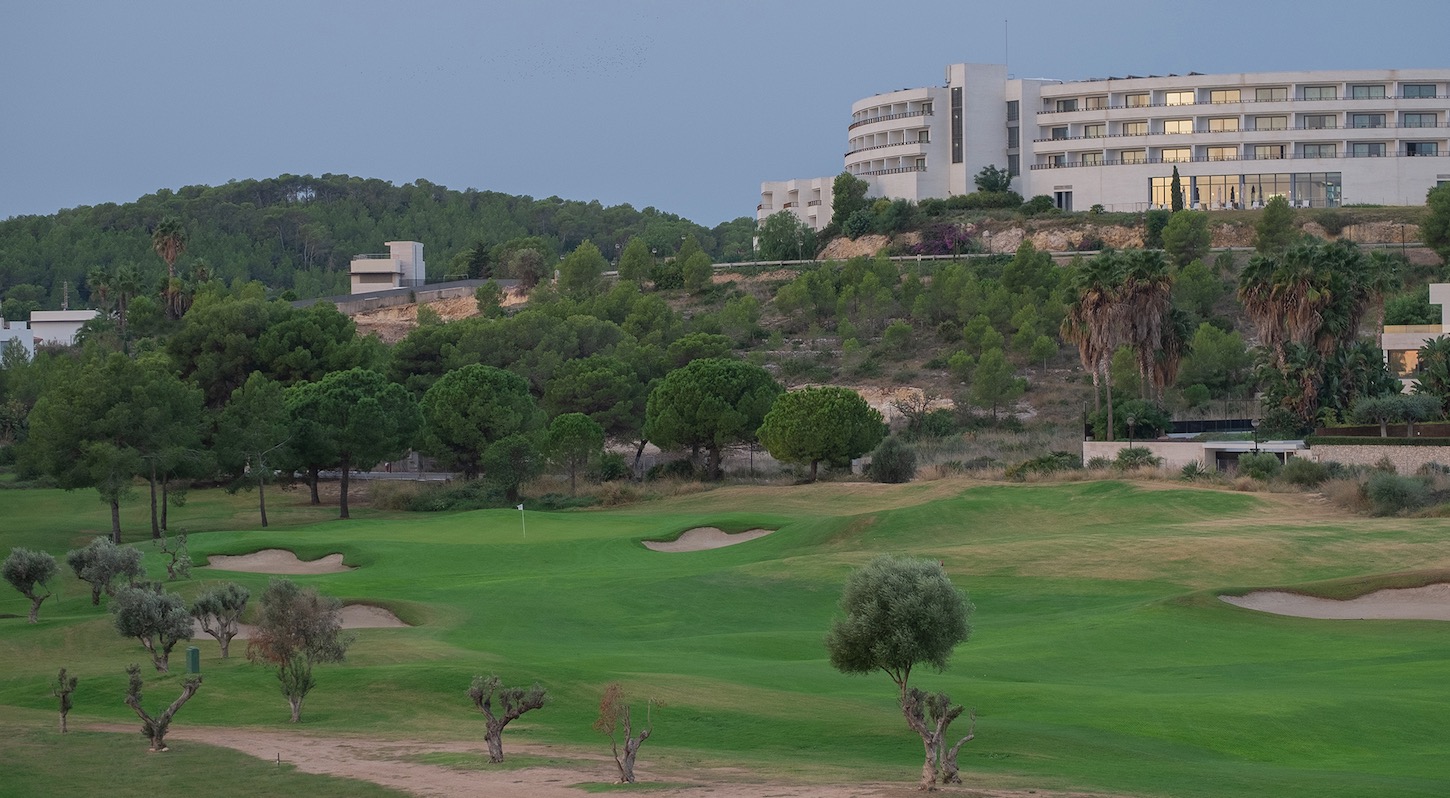
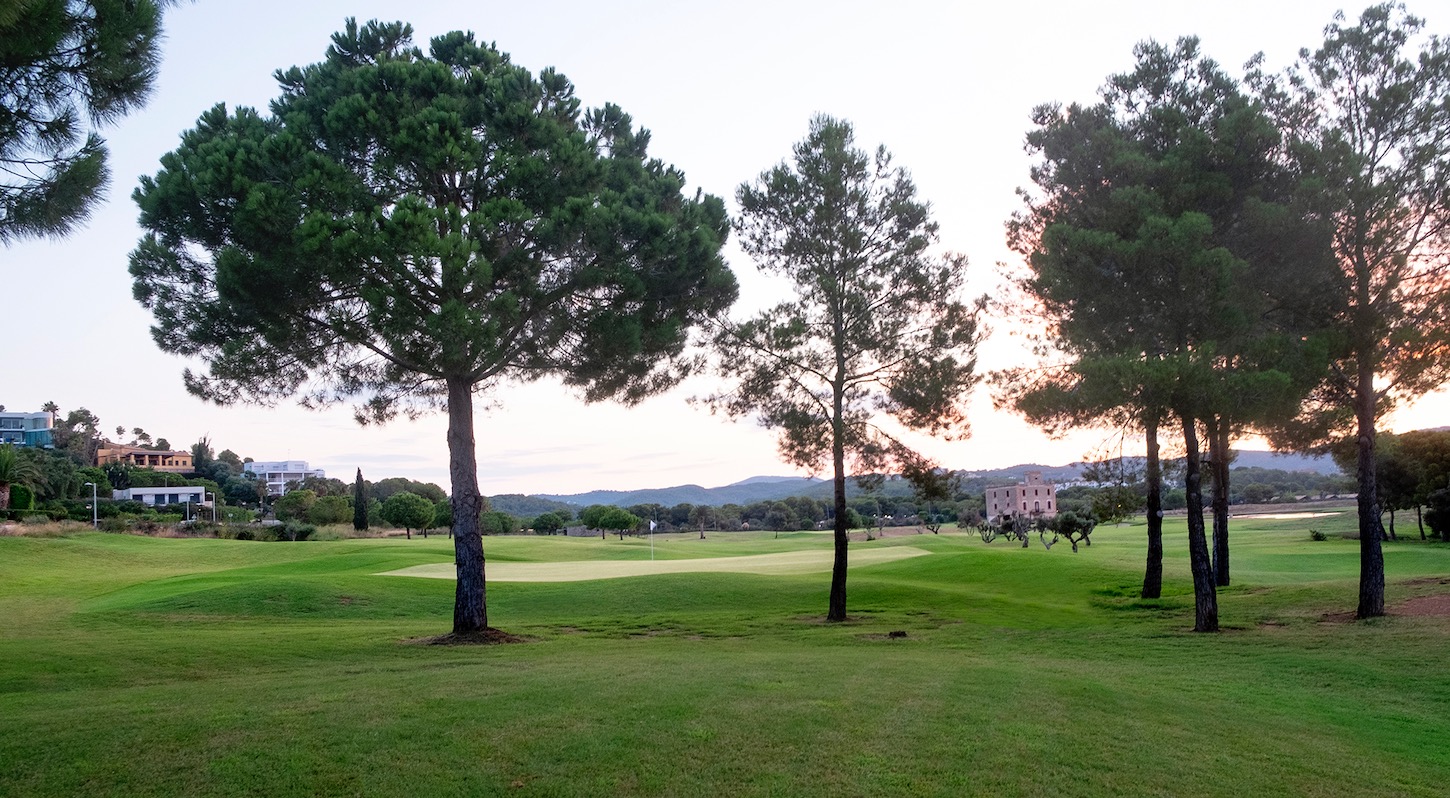
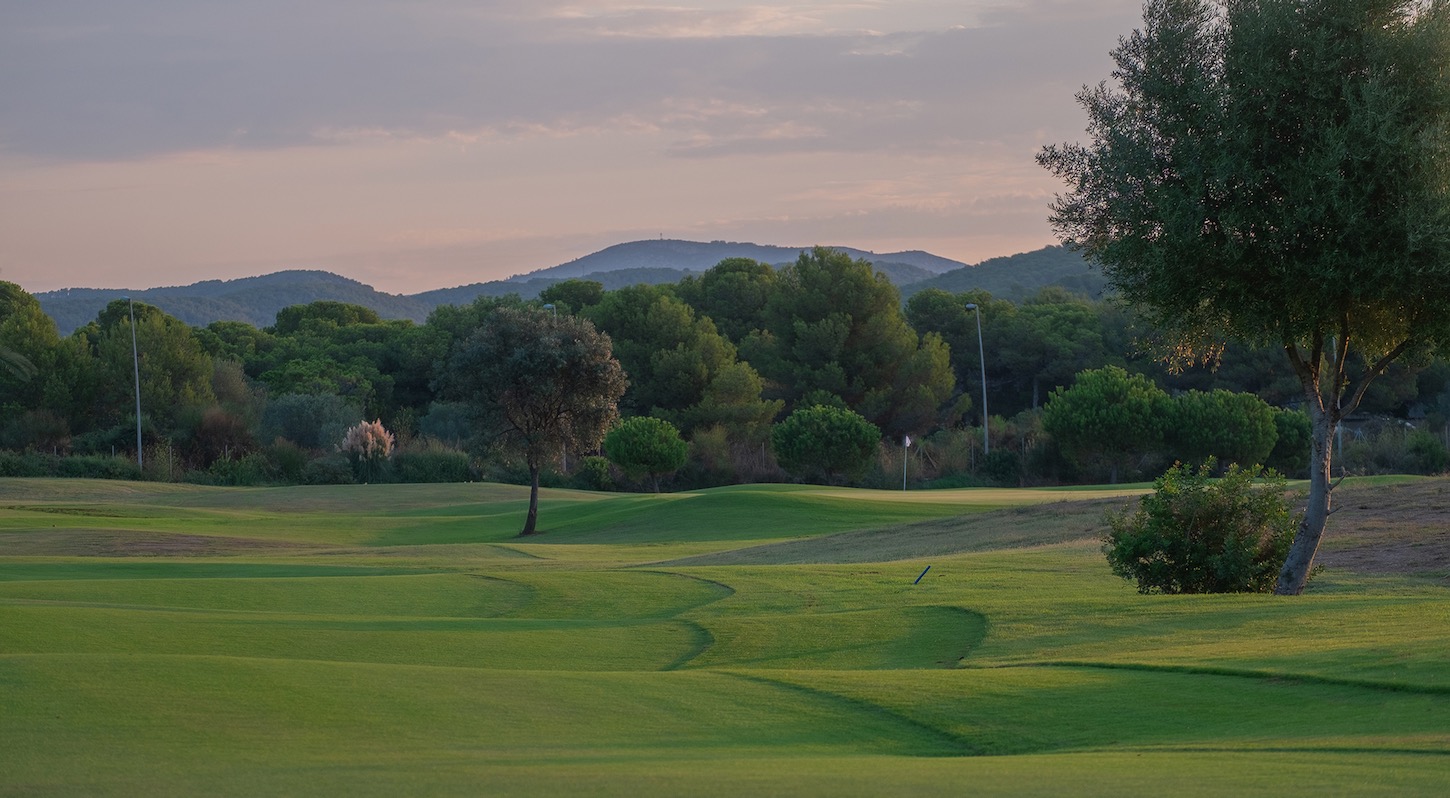
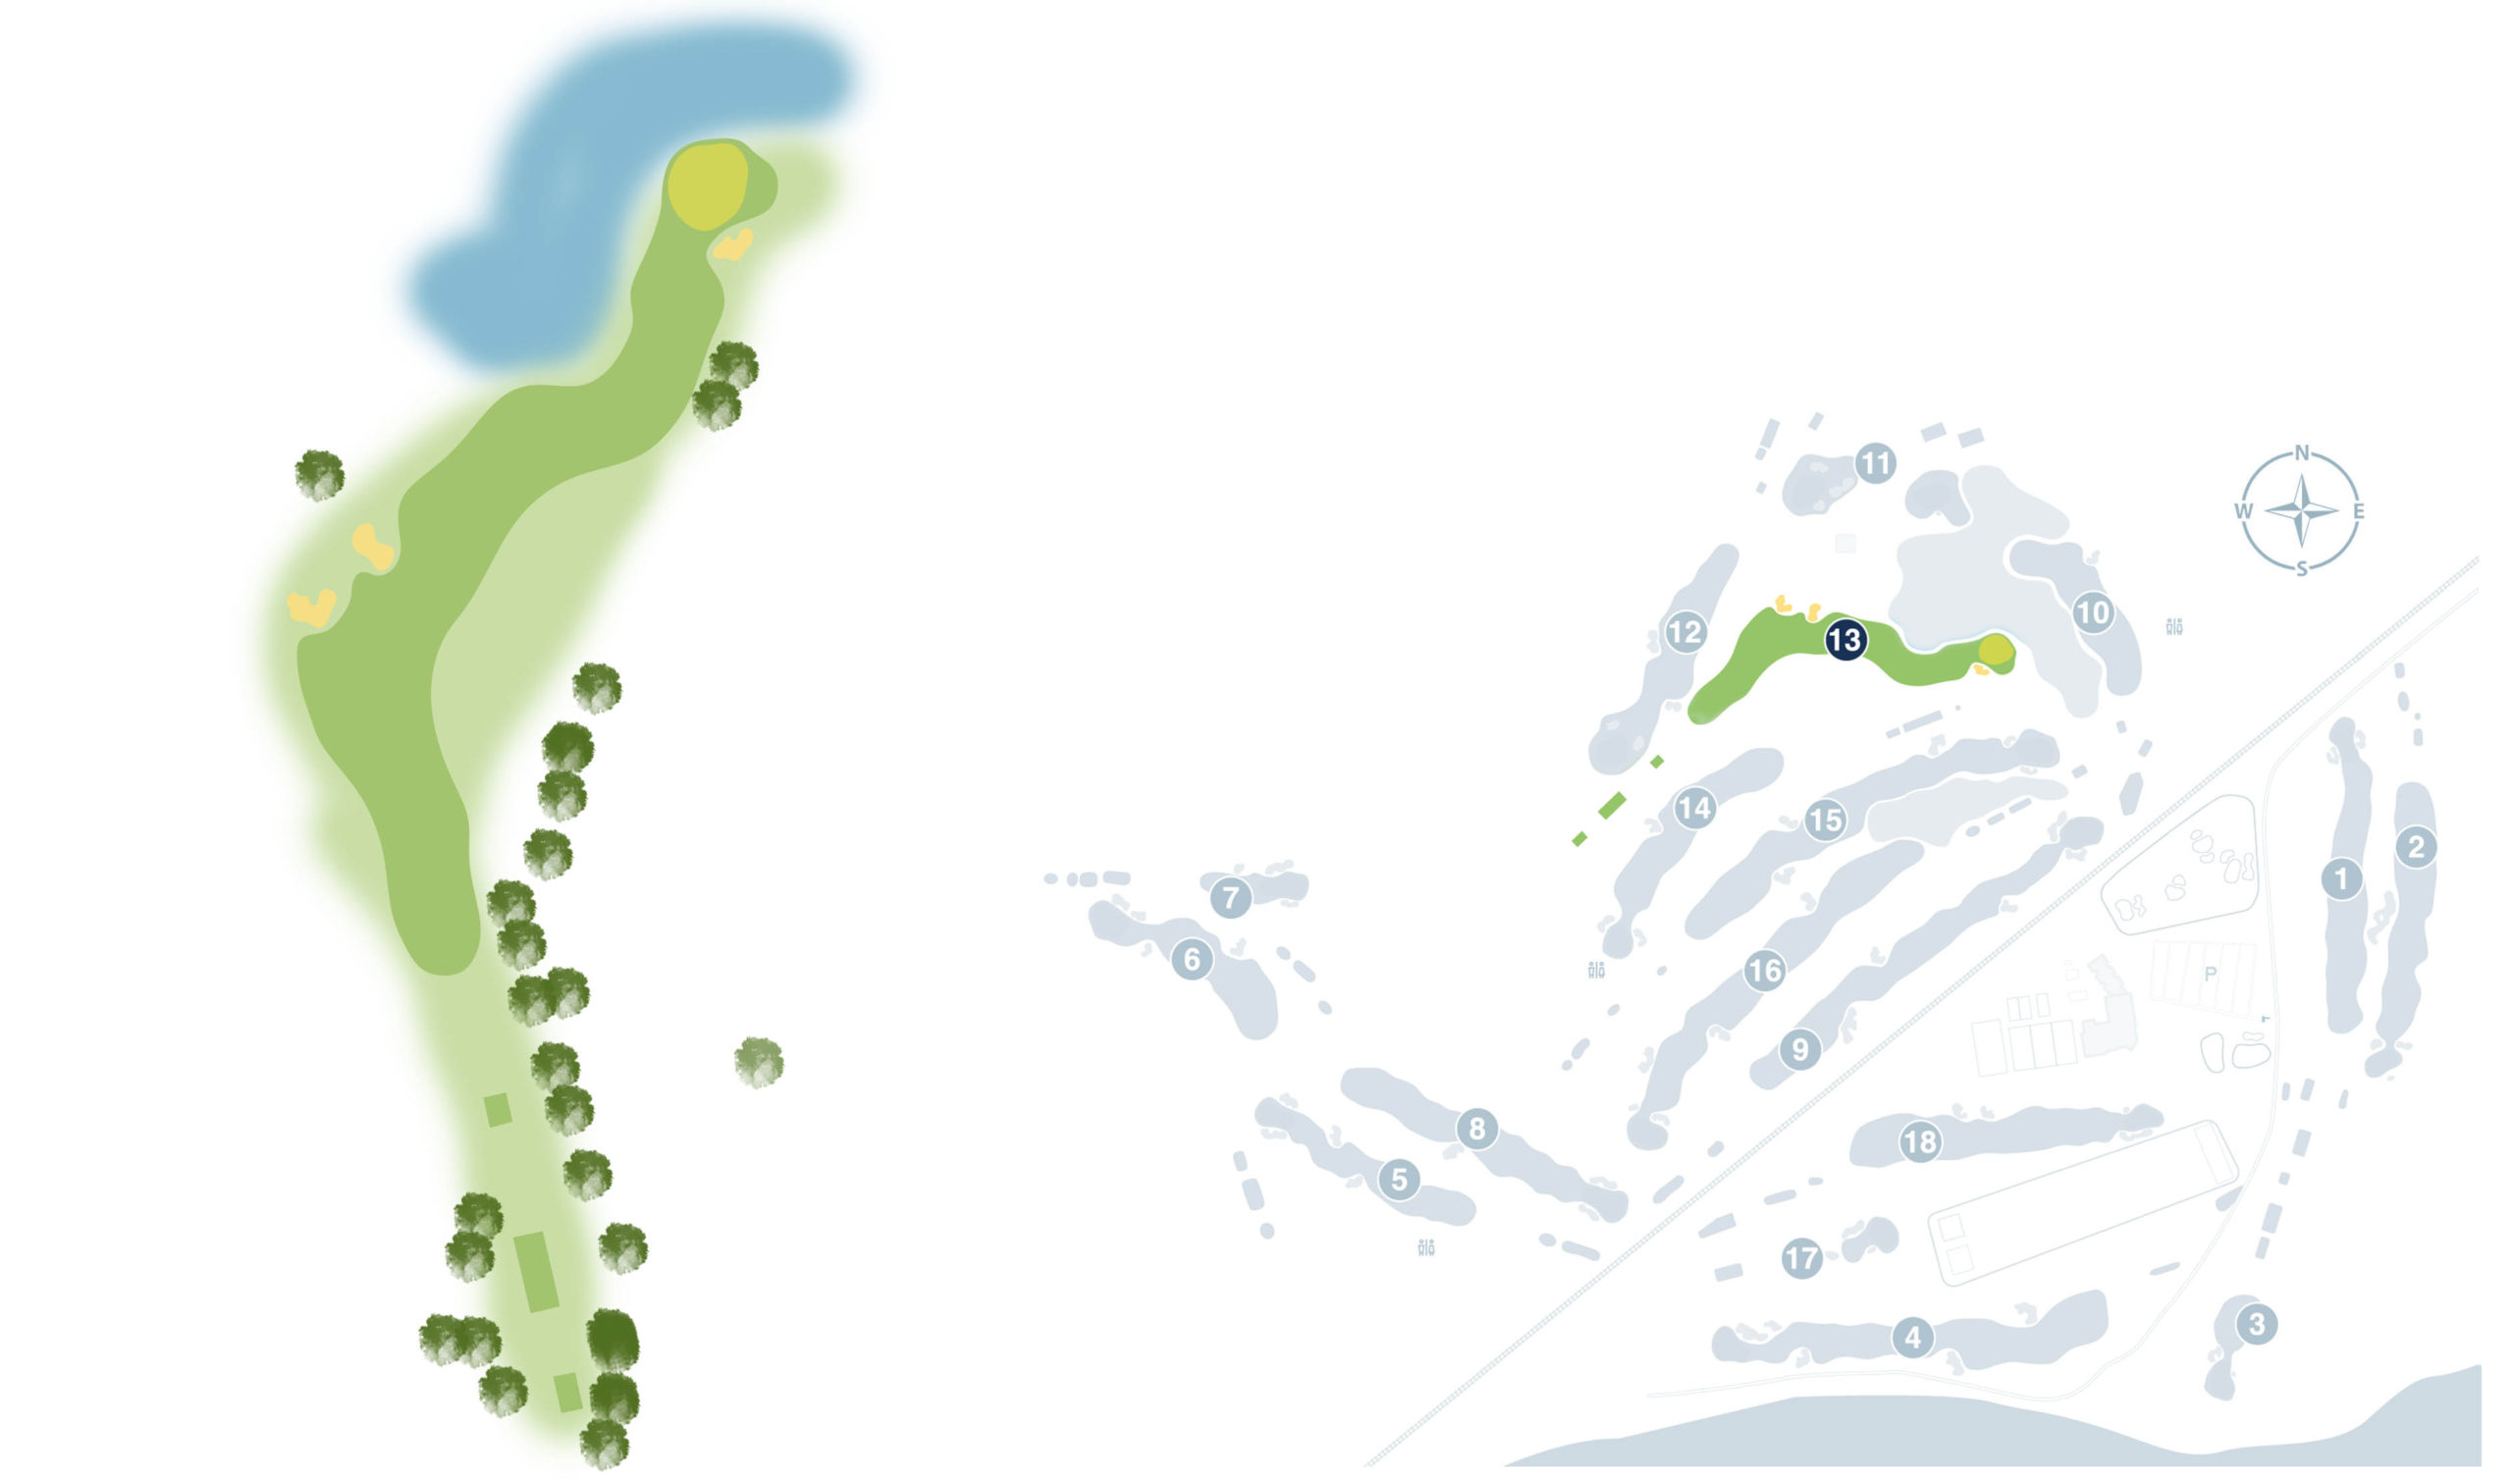
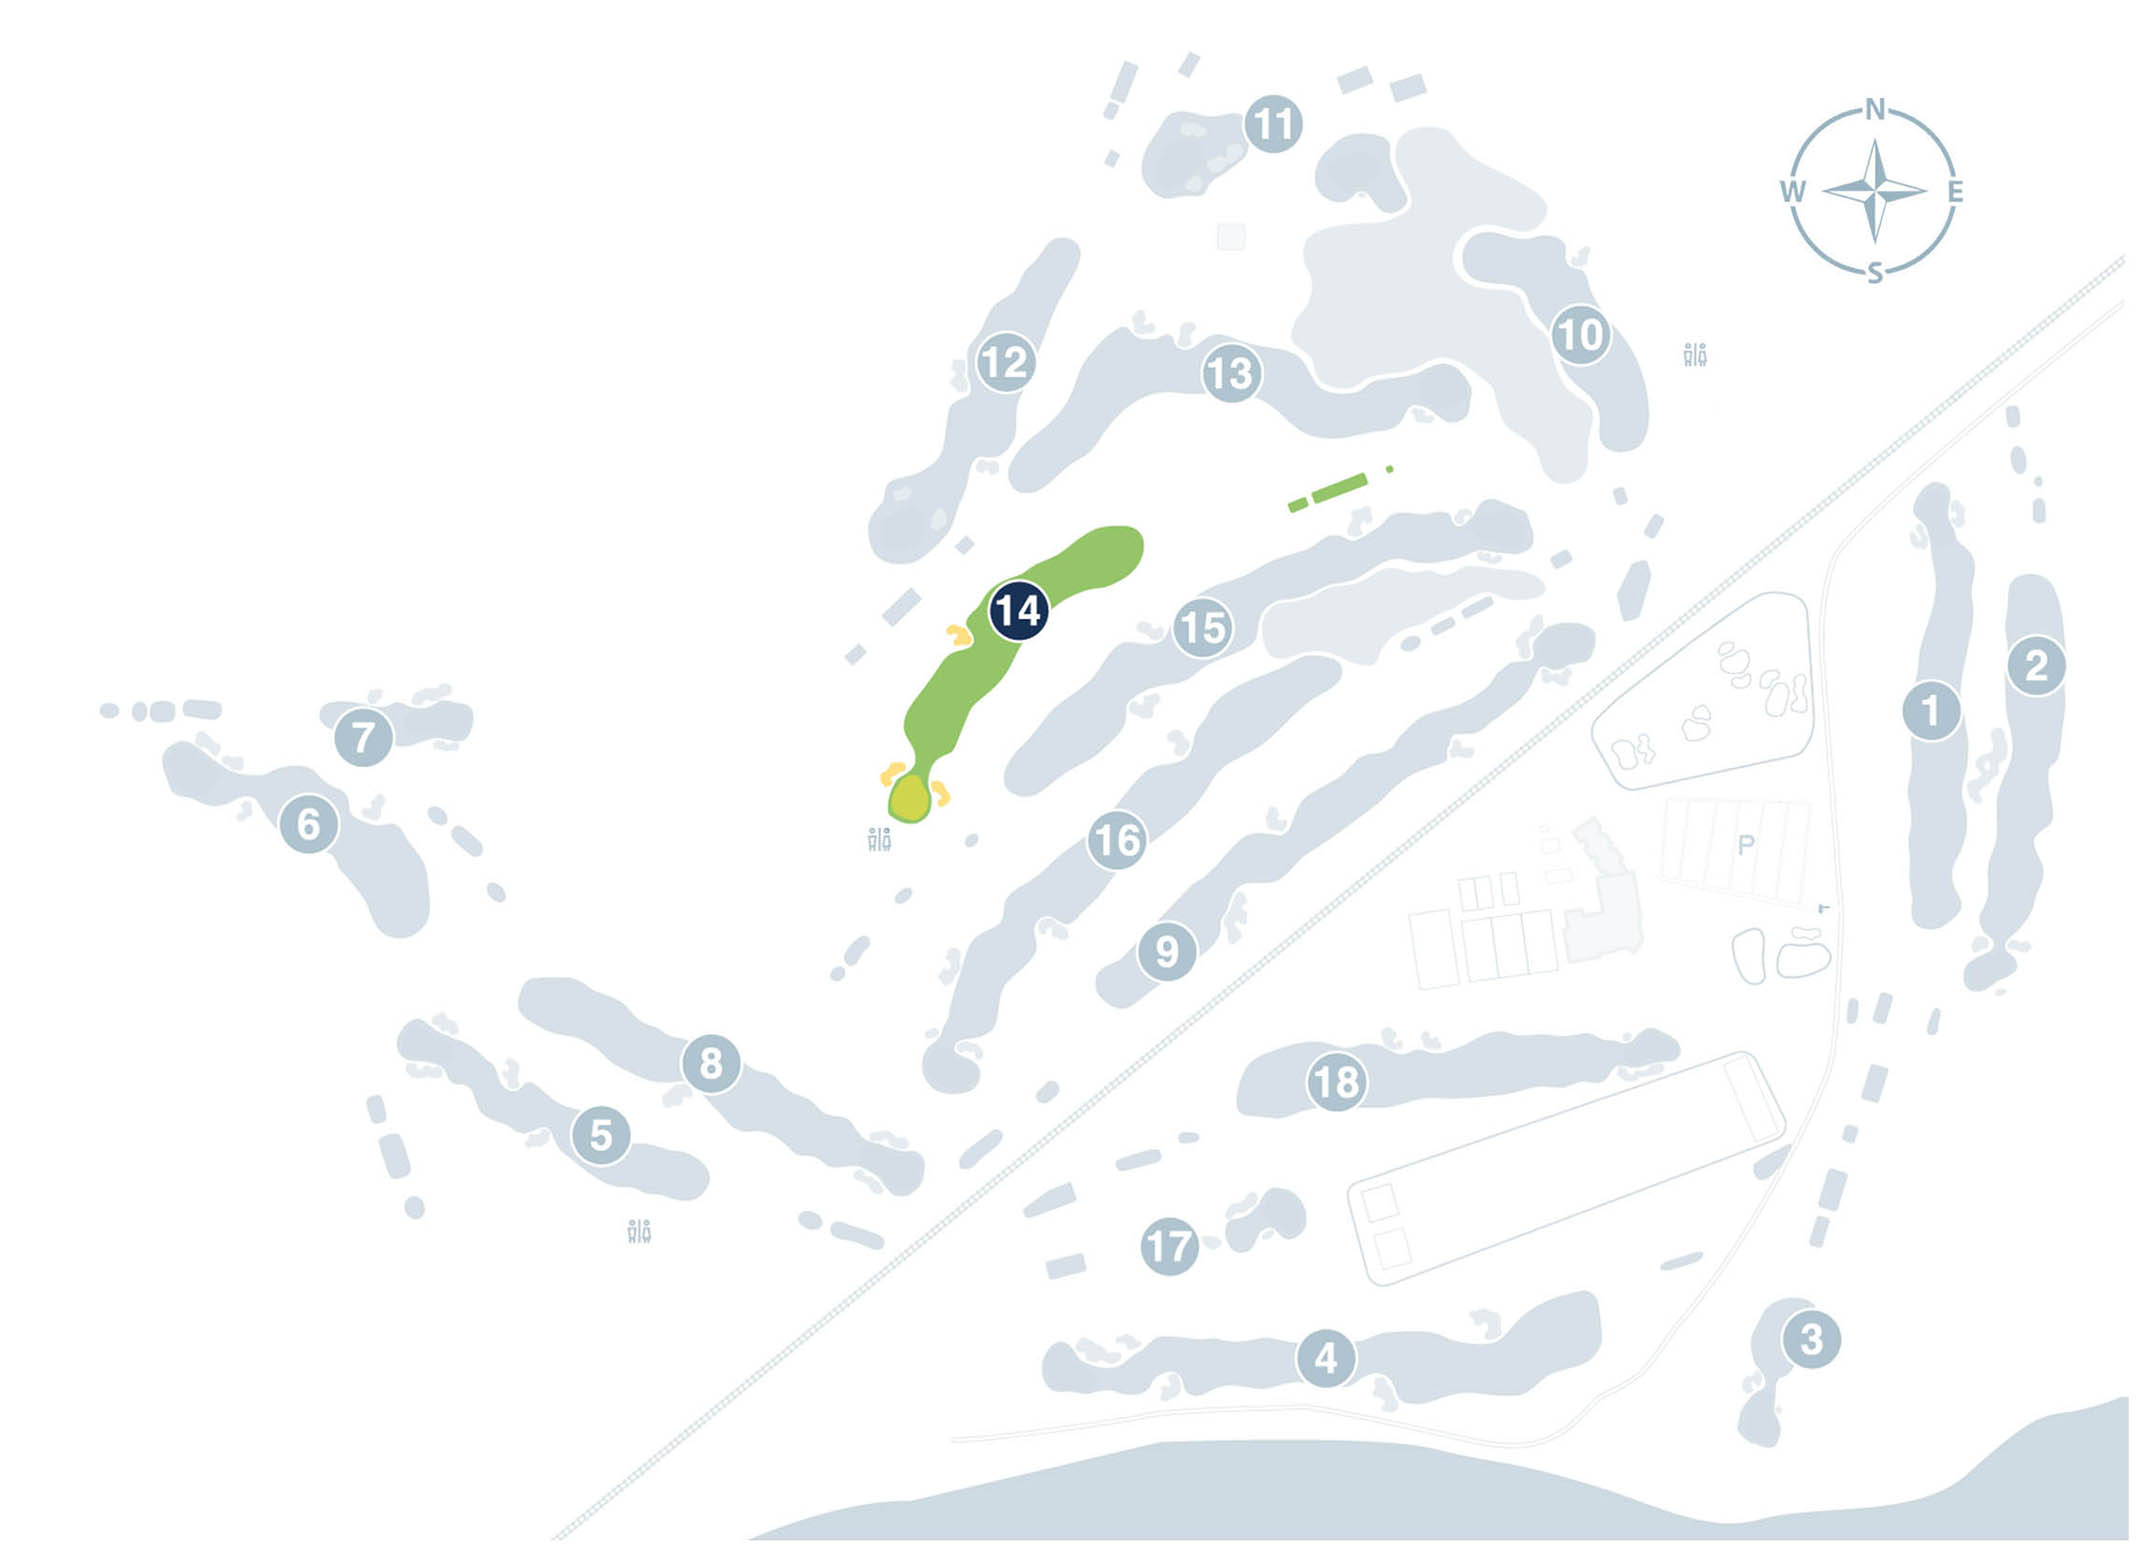
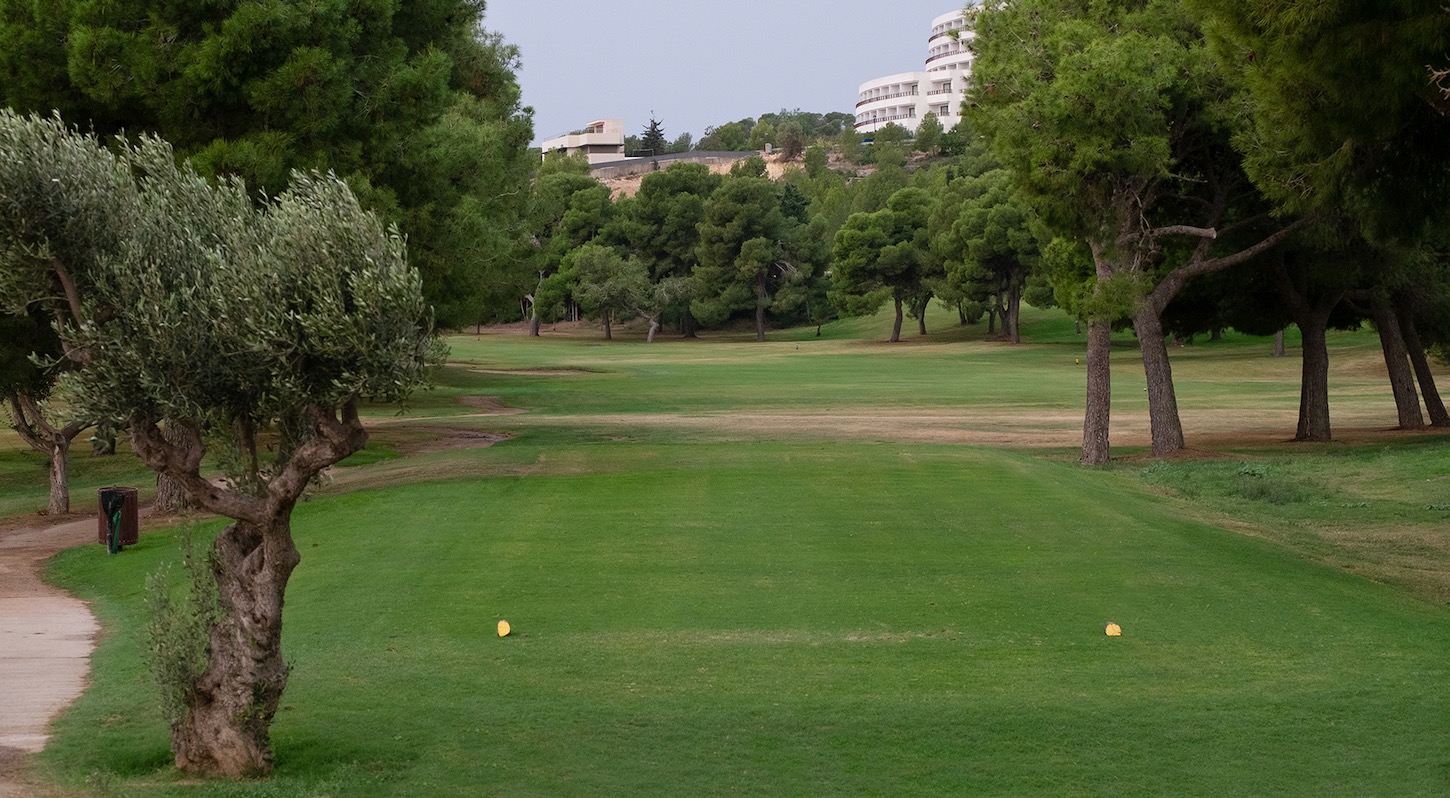
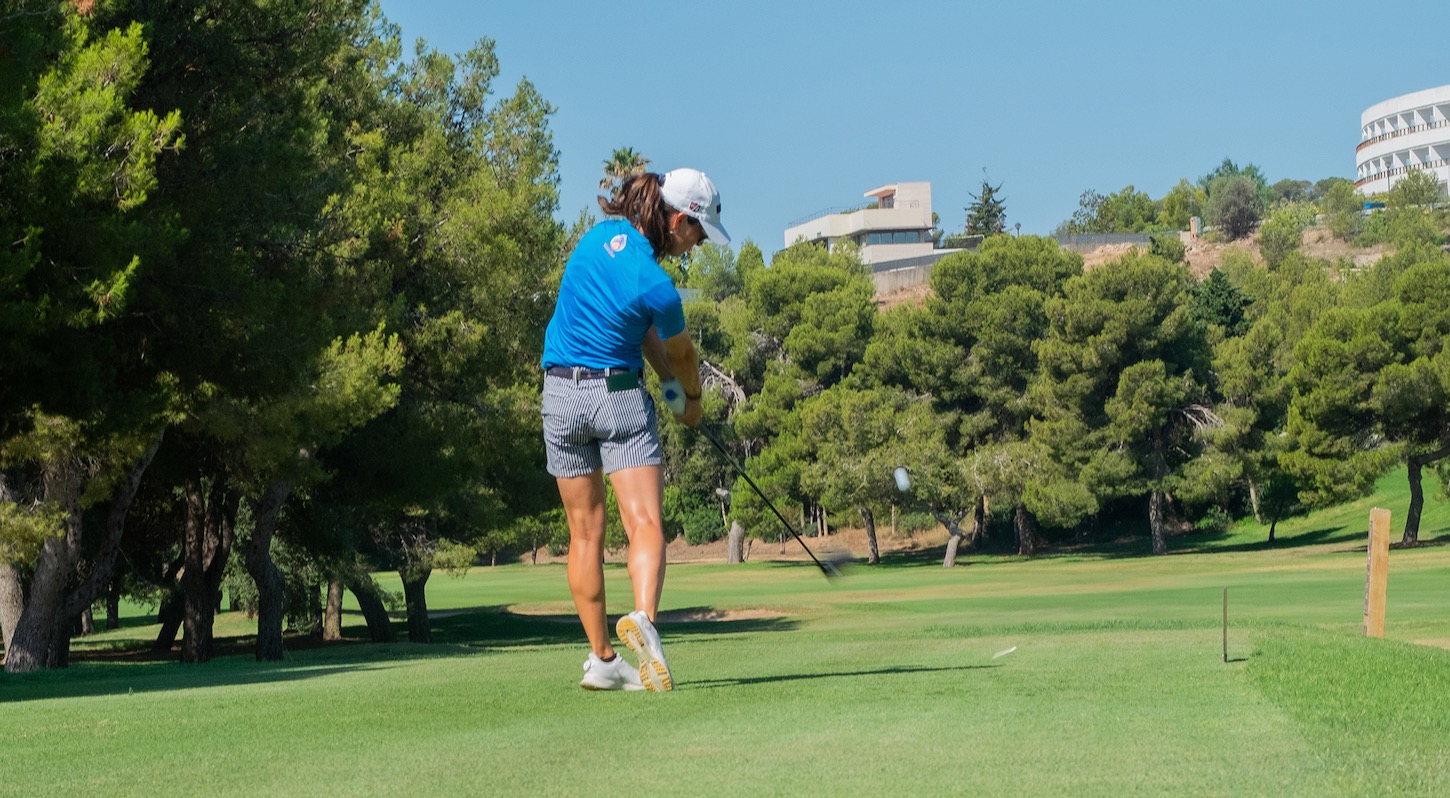
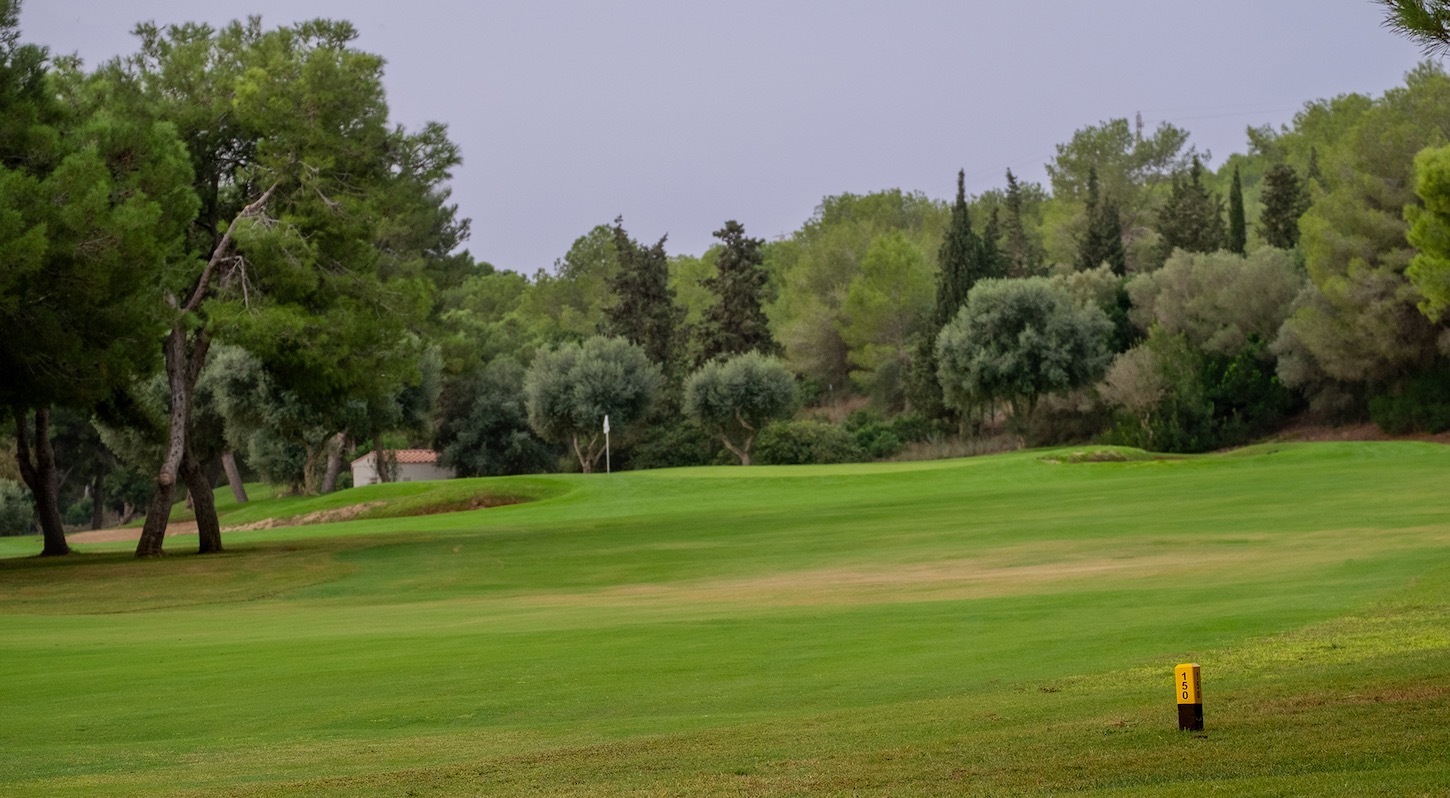
Handicap: 14
Whites: 181
Yellows: 148
Blues: 133
Reds: 118
Oranges: 107
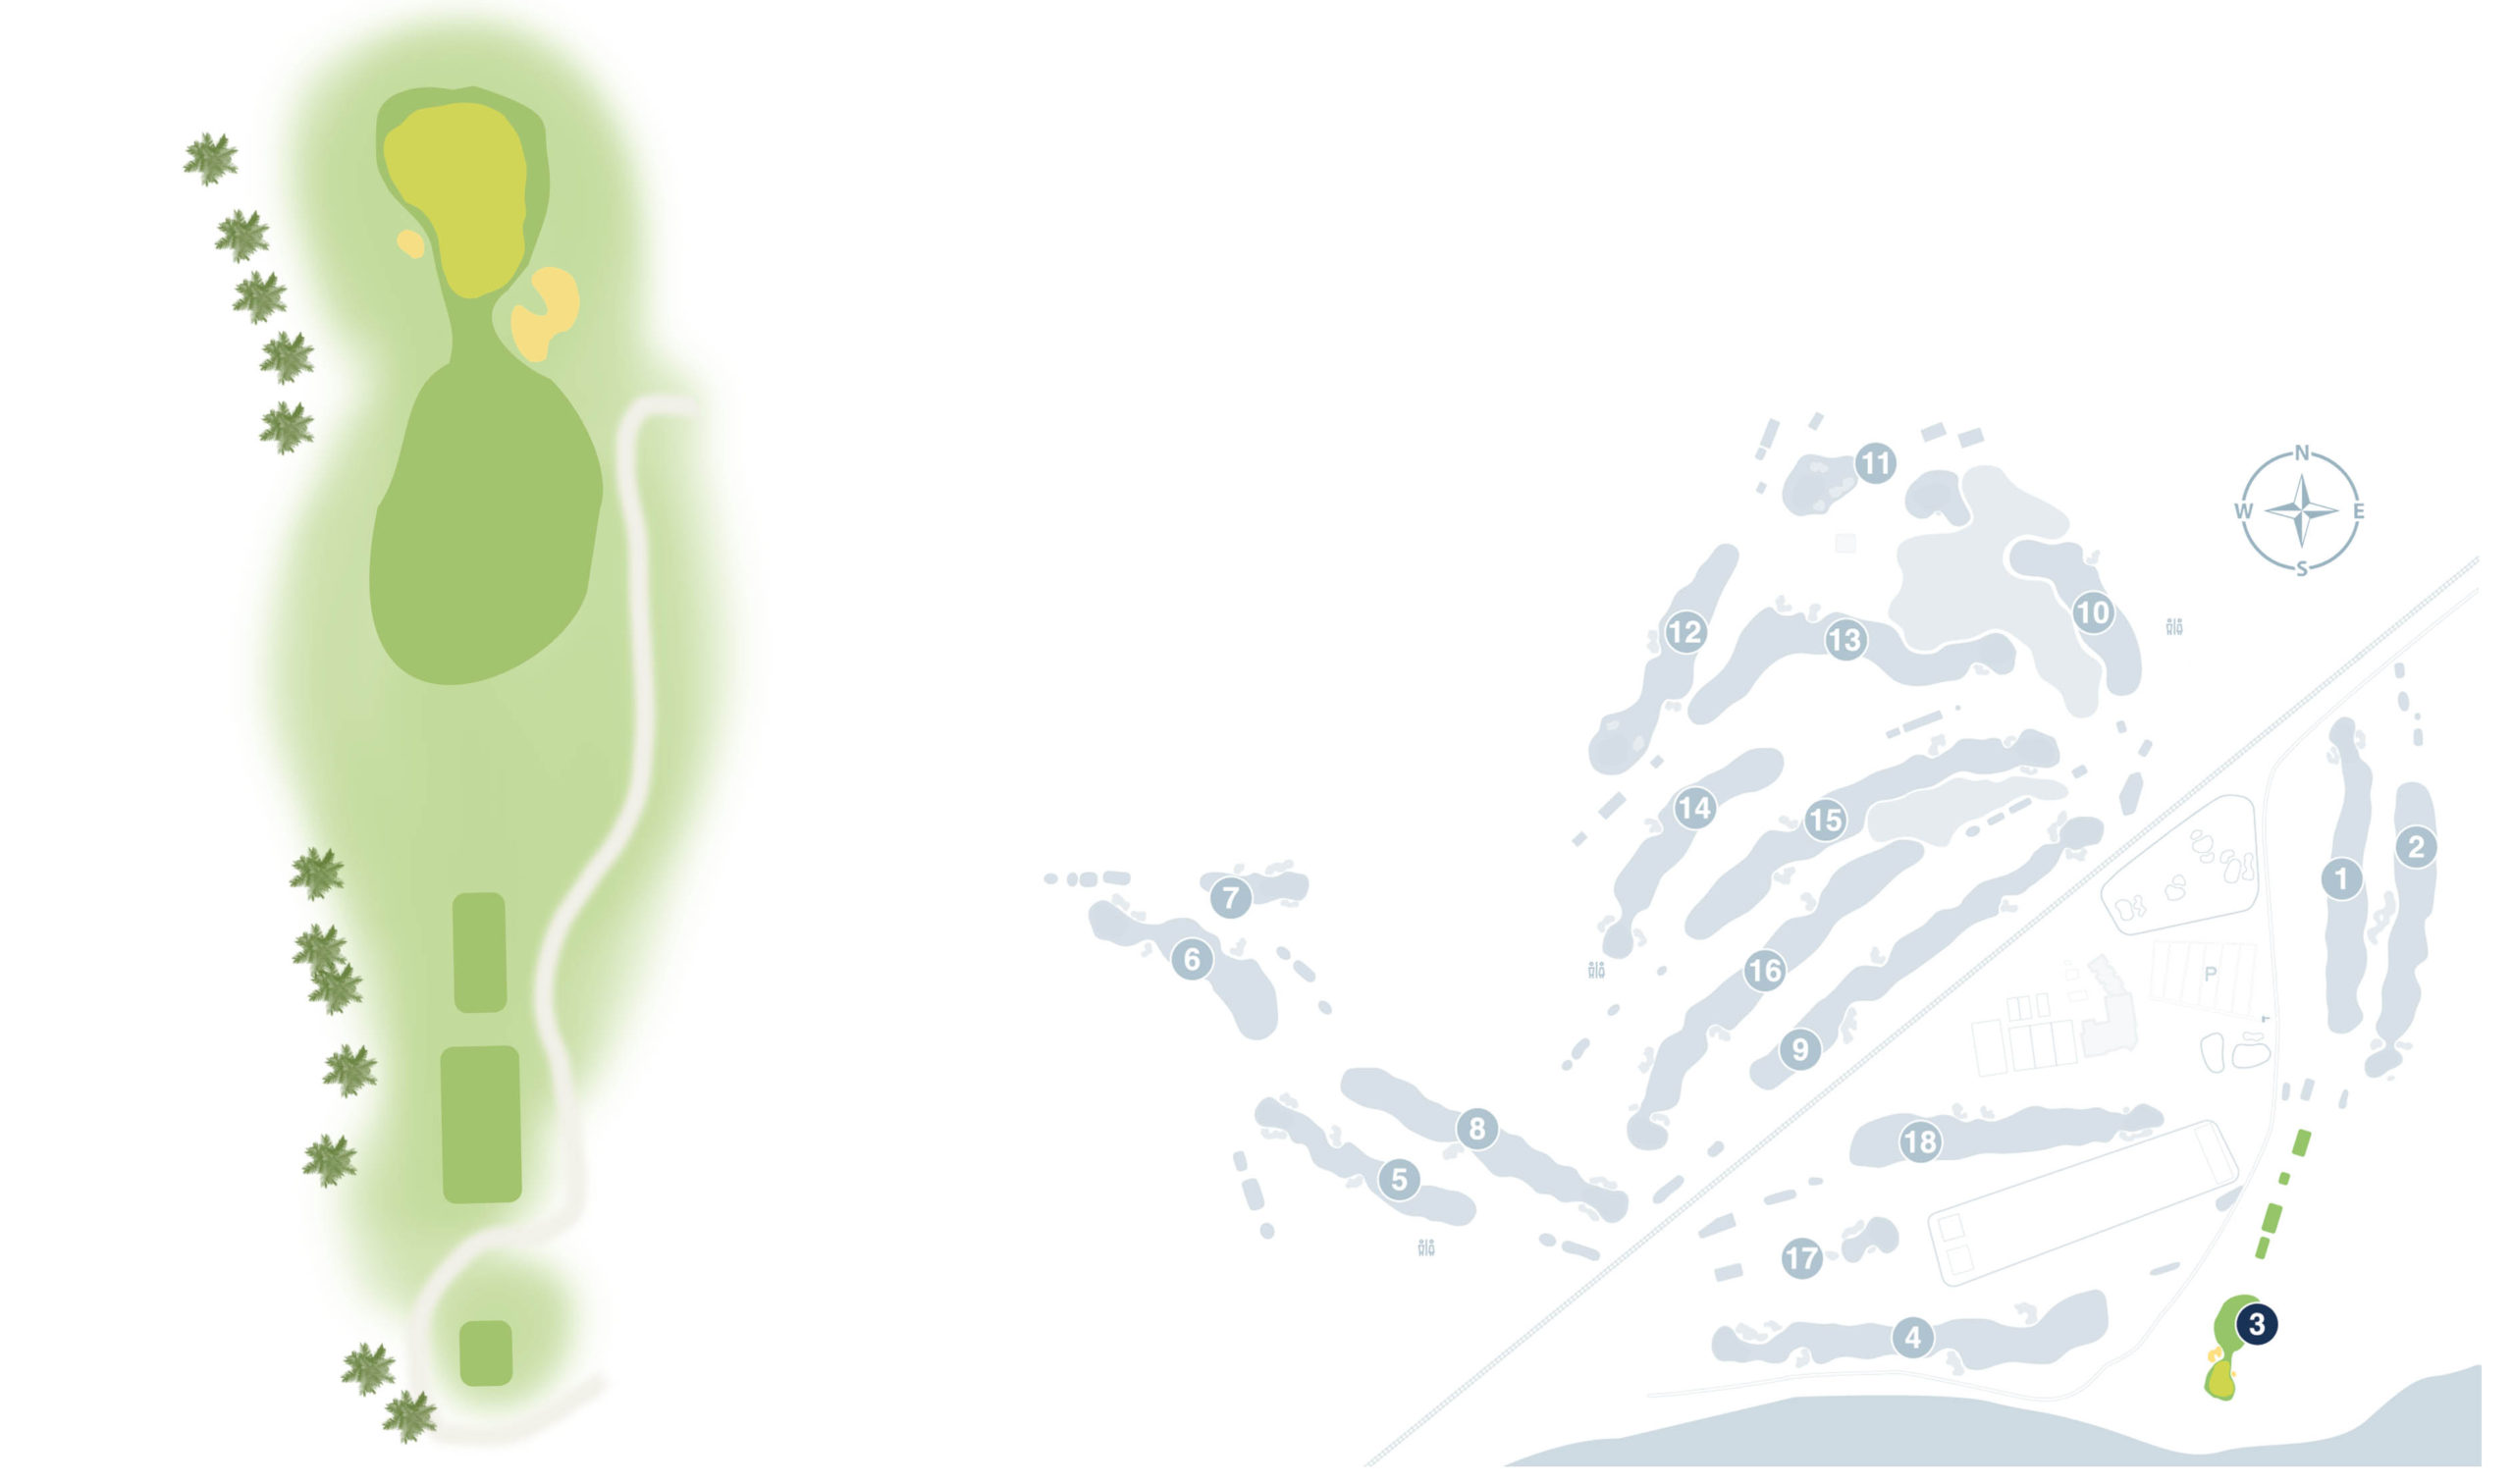
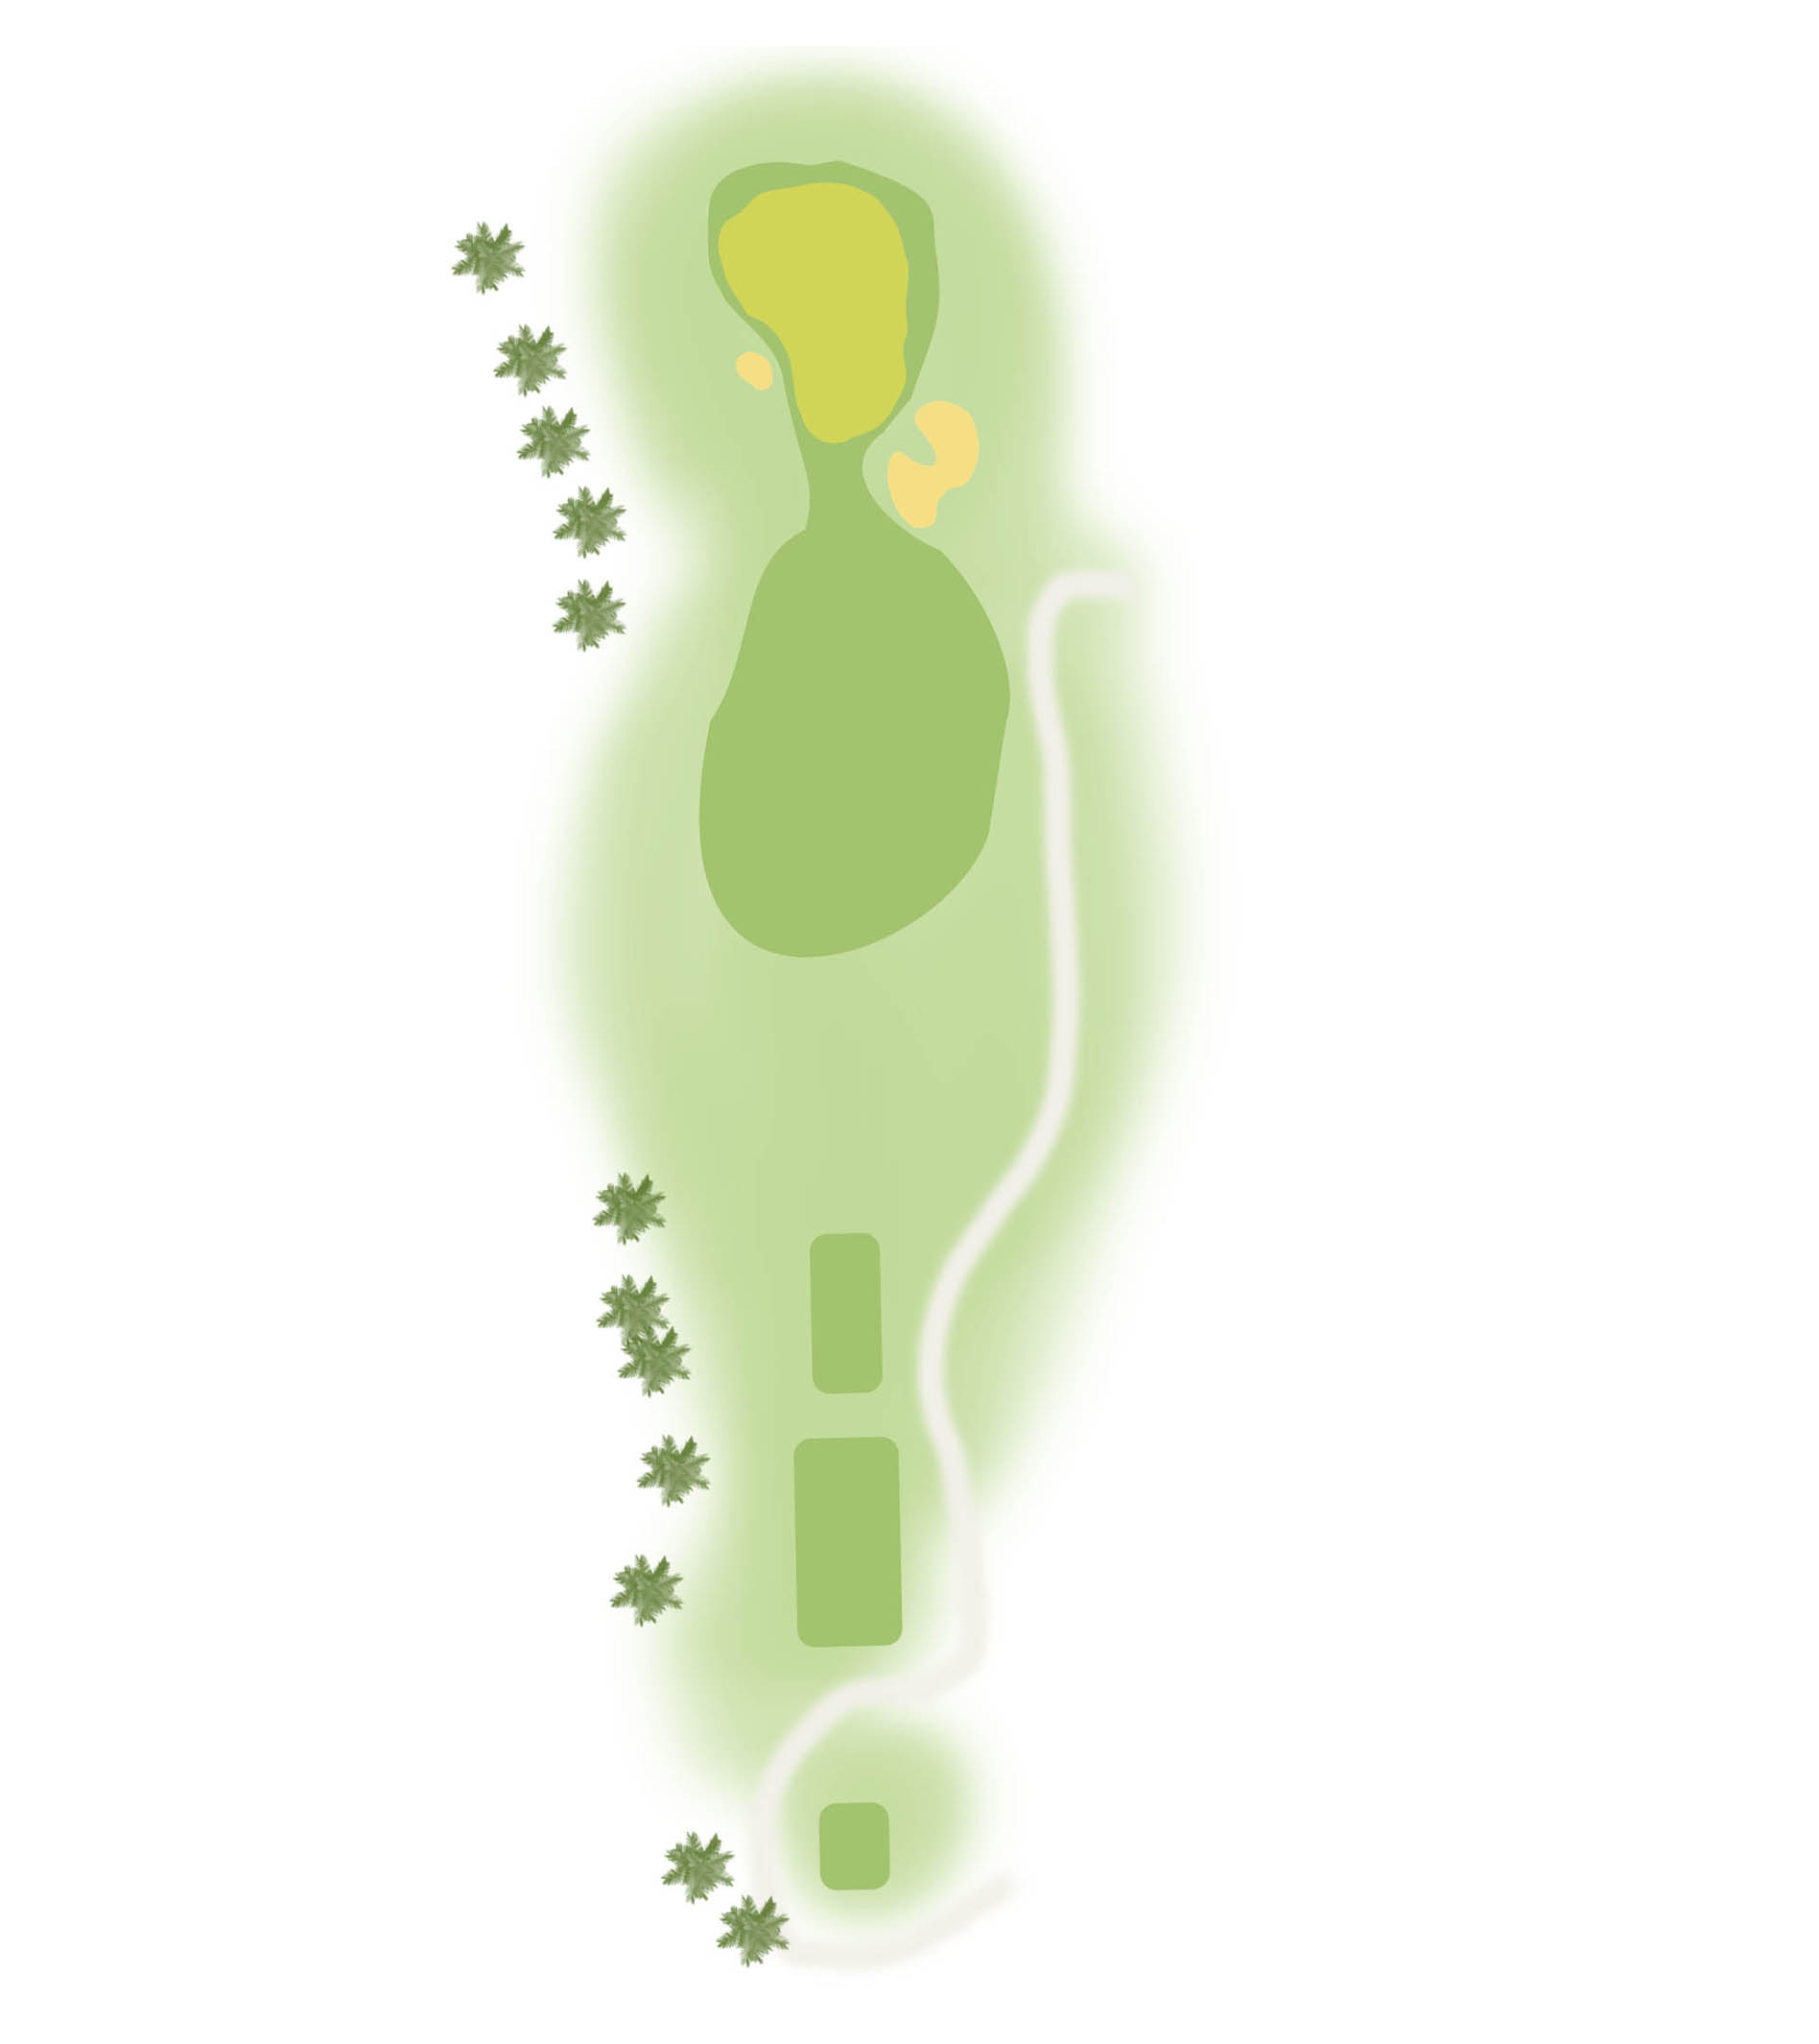
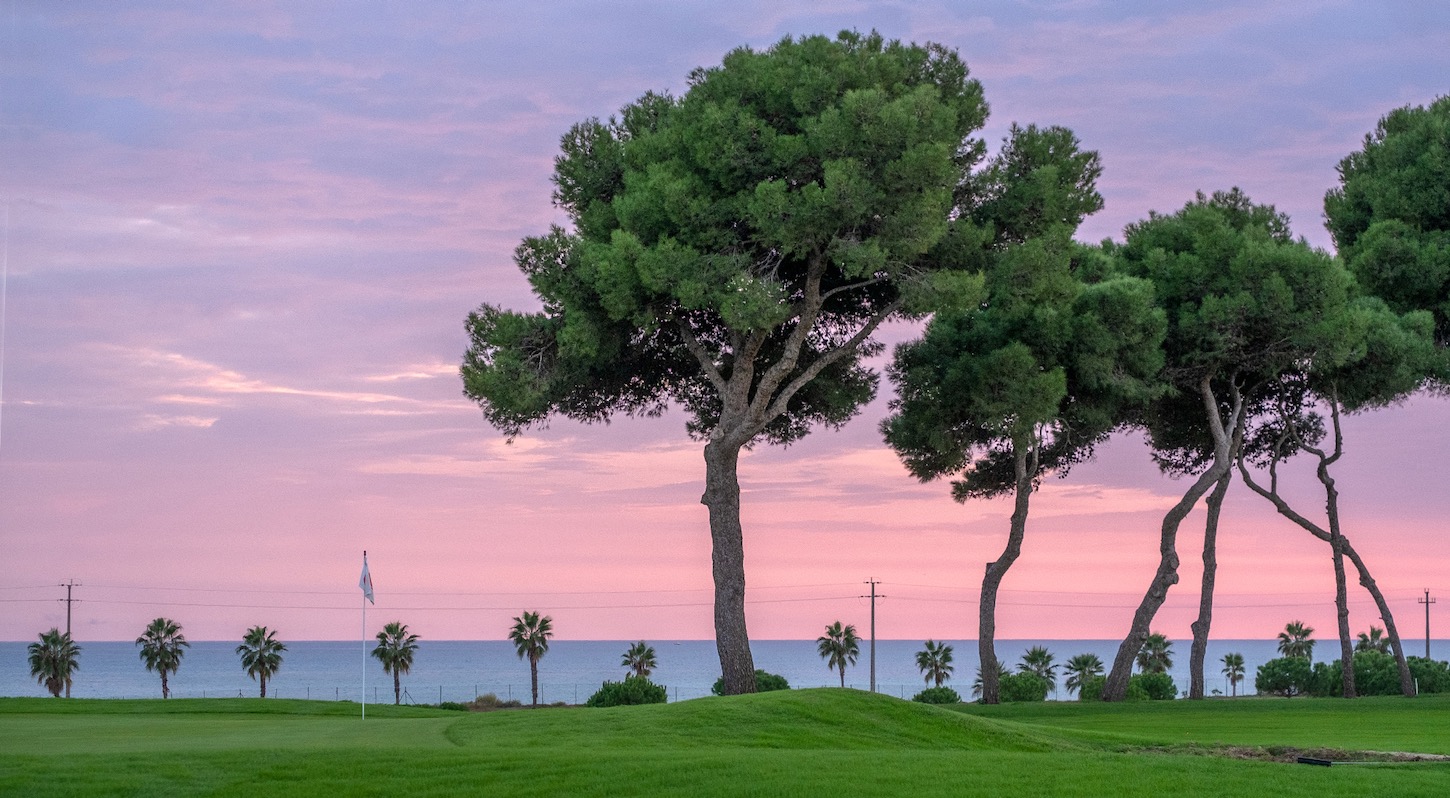
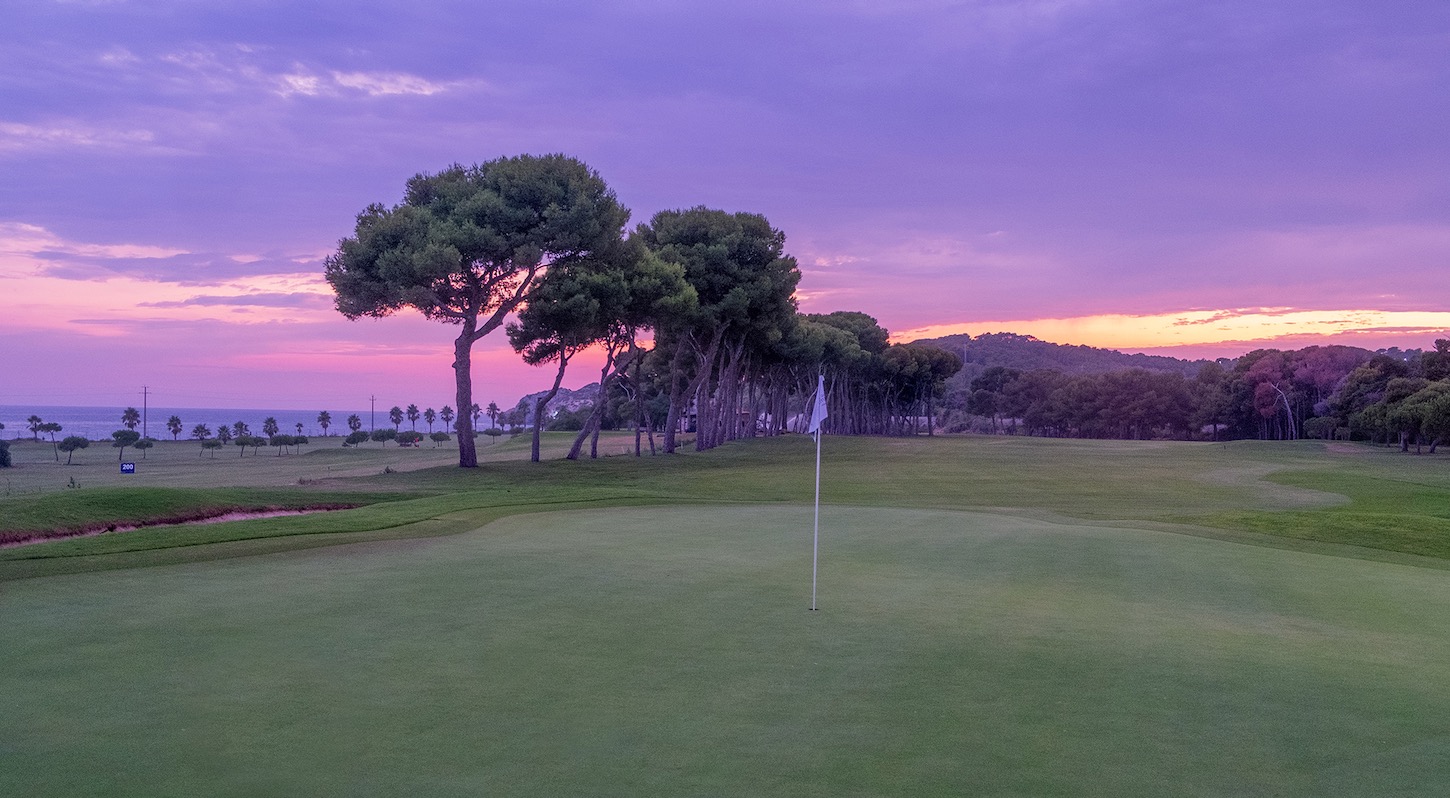
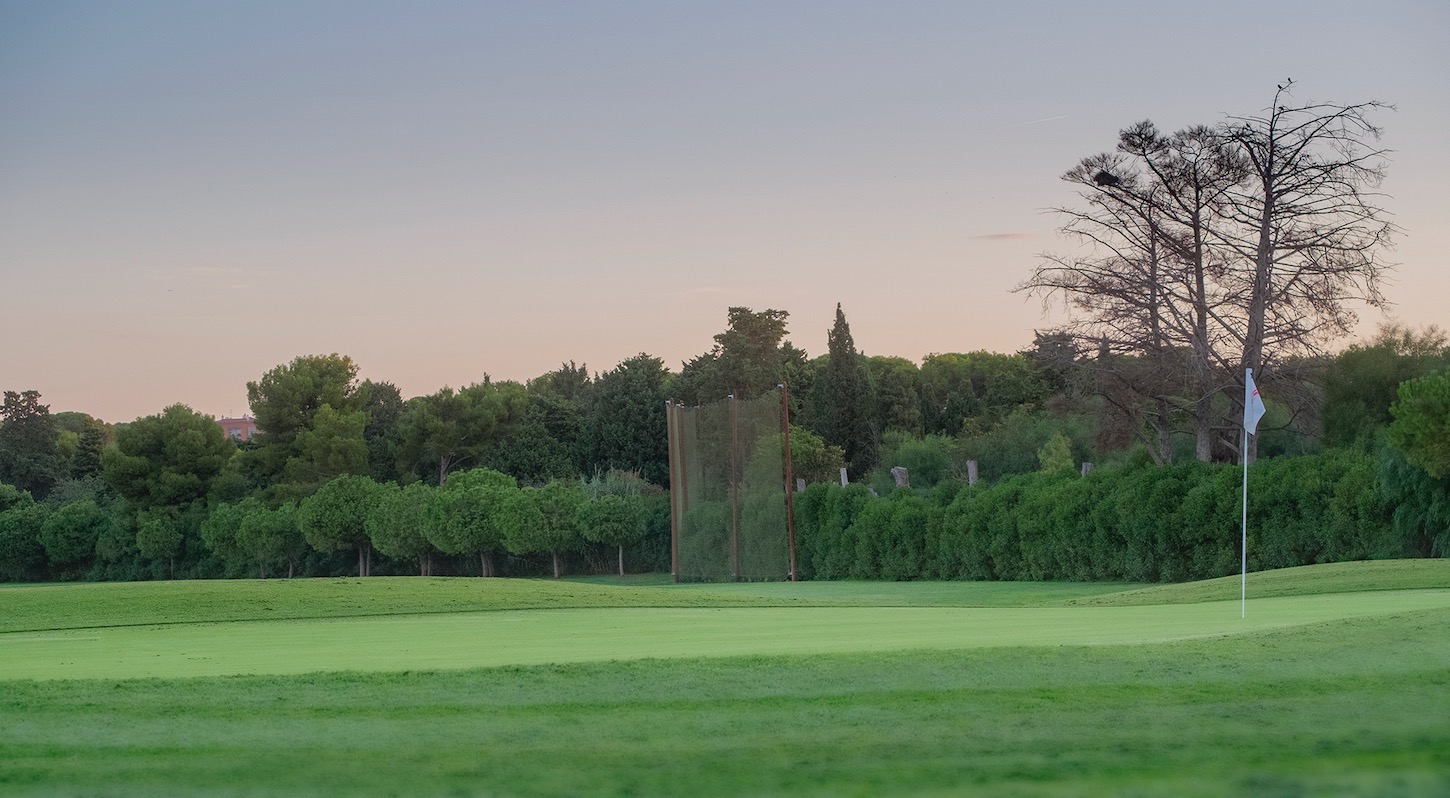
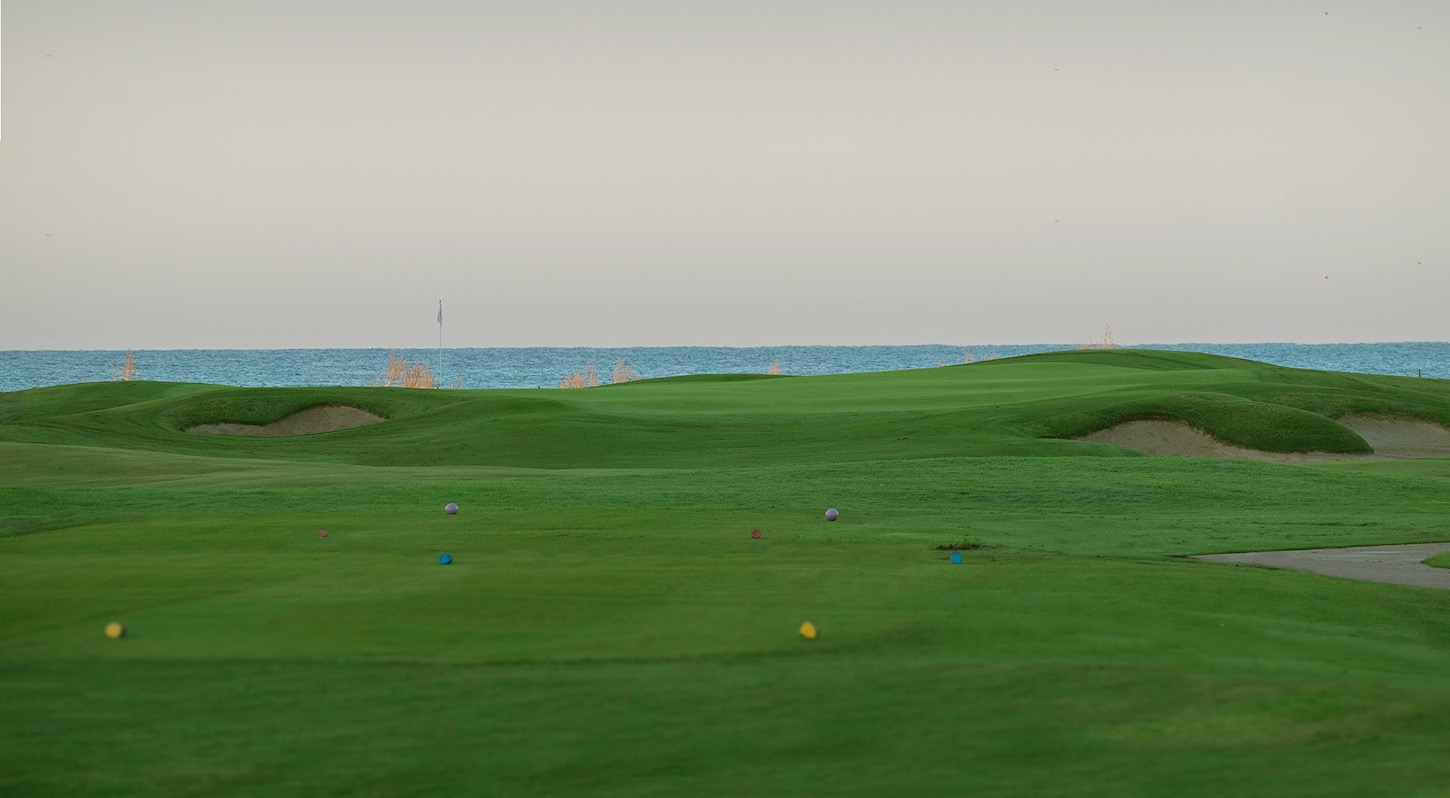
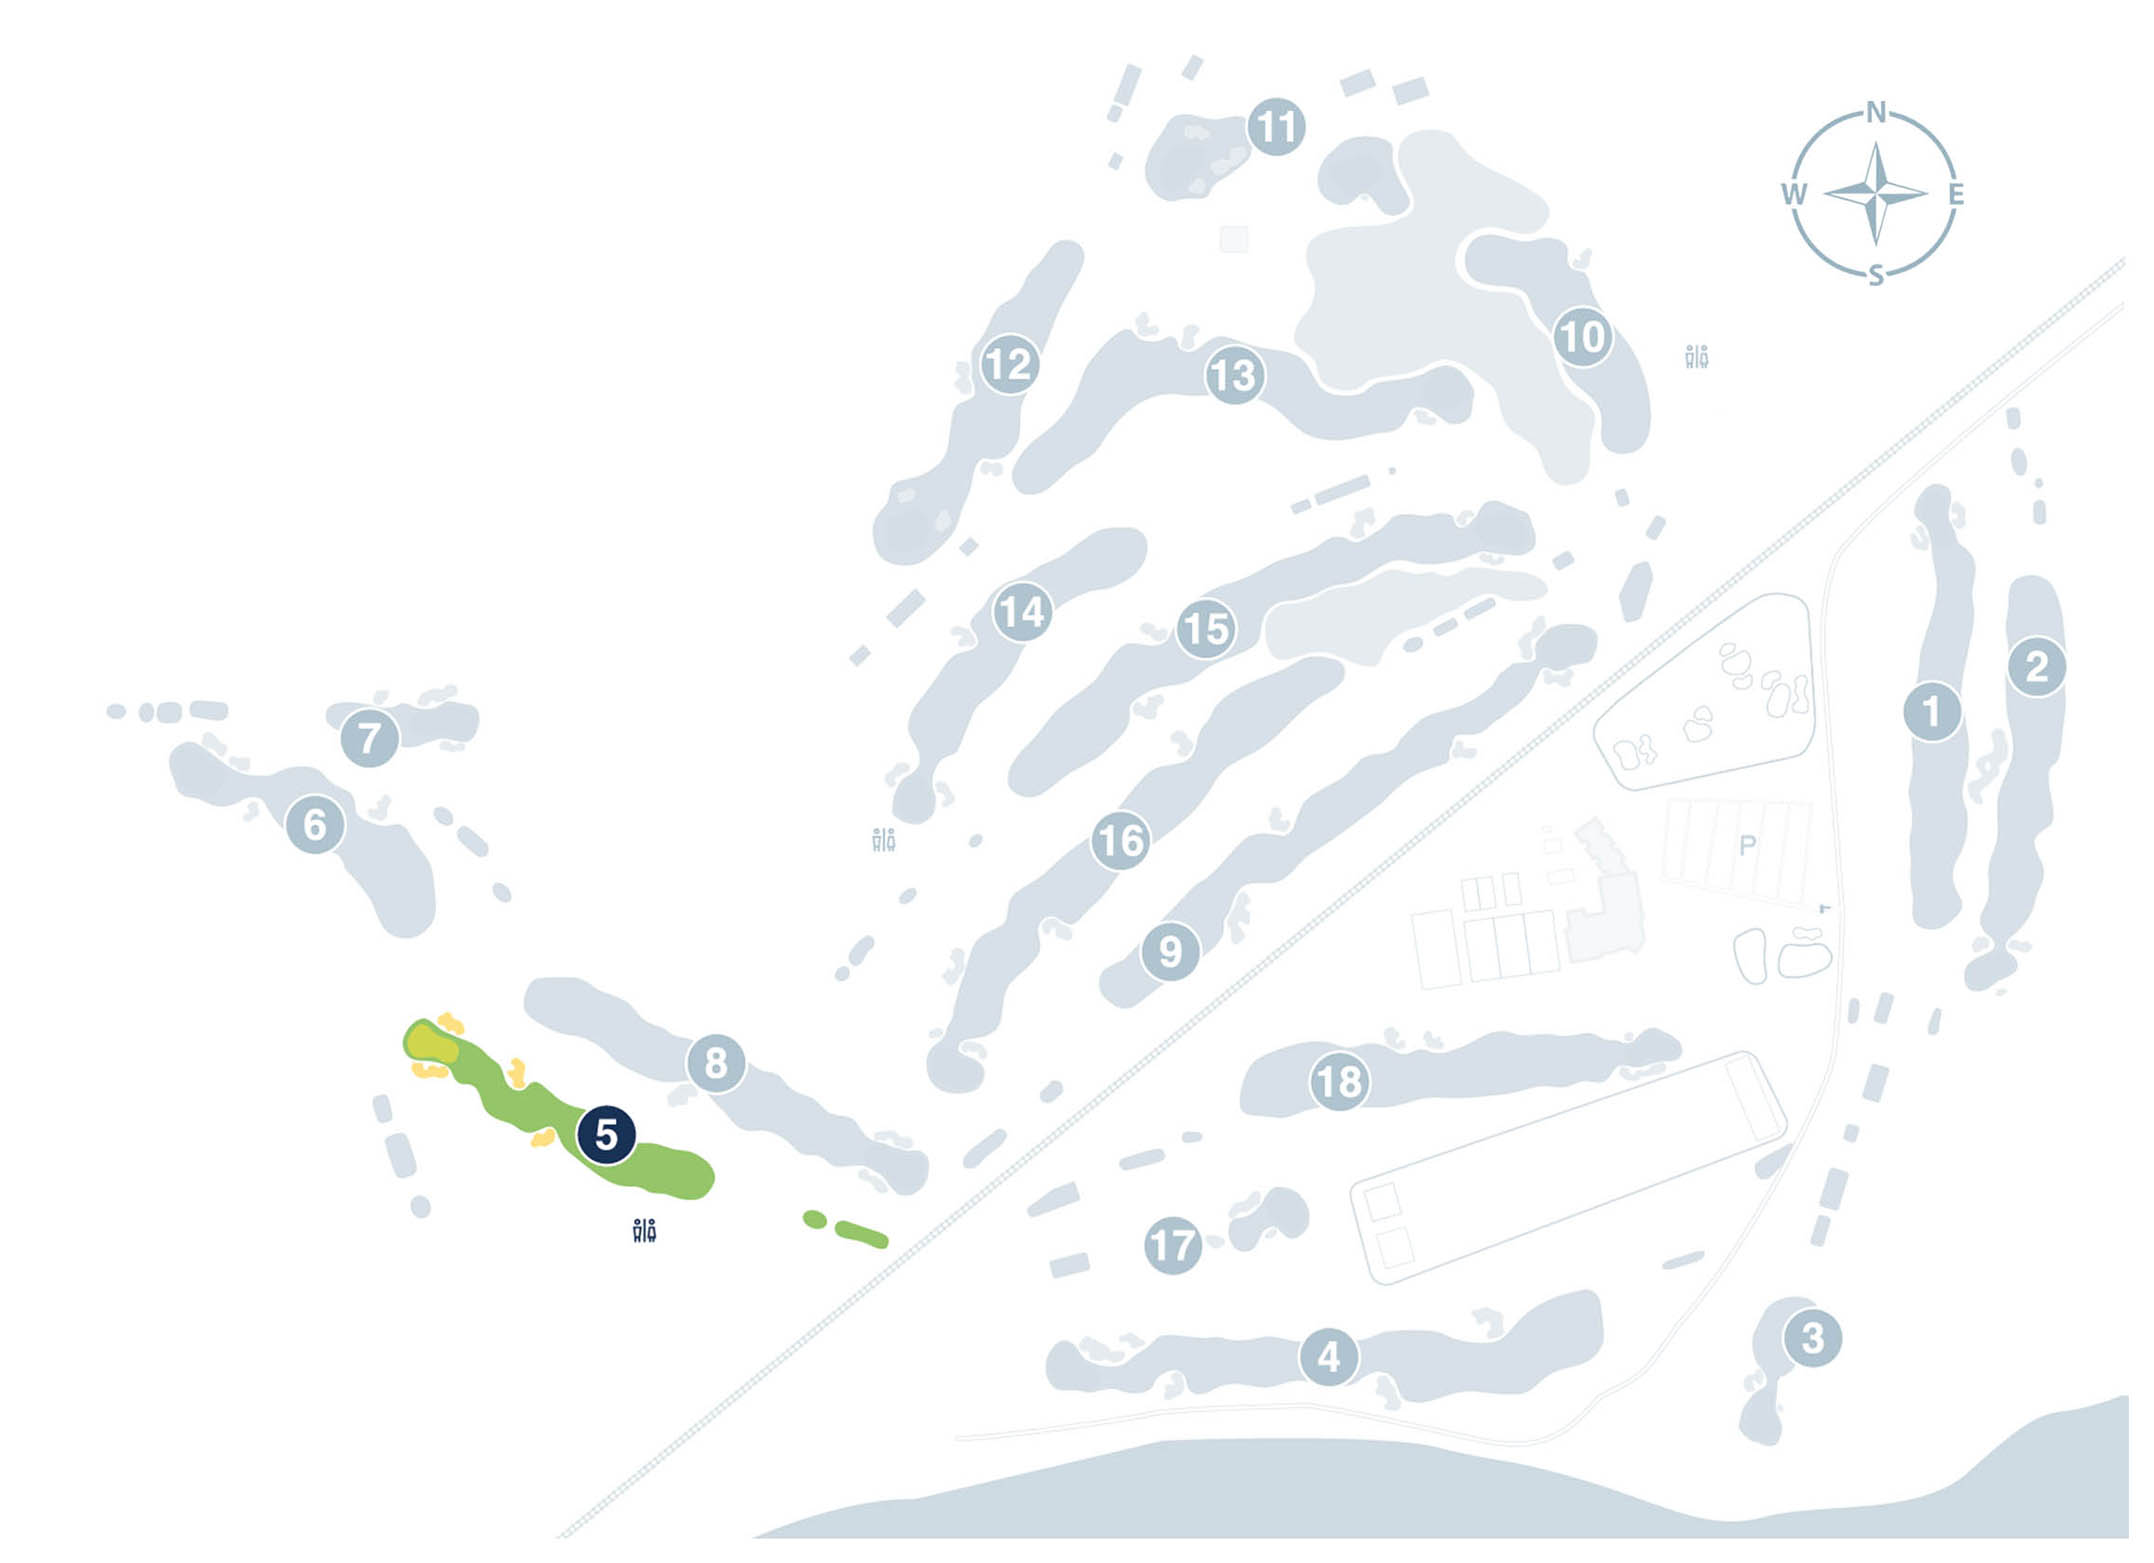
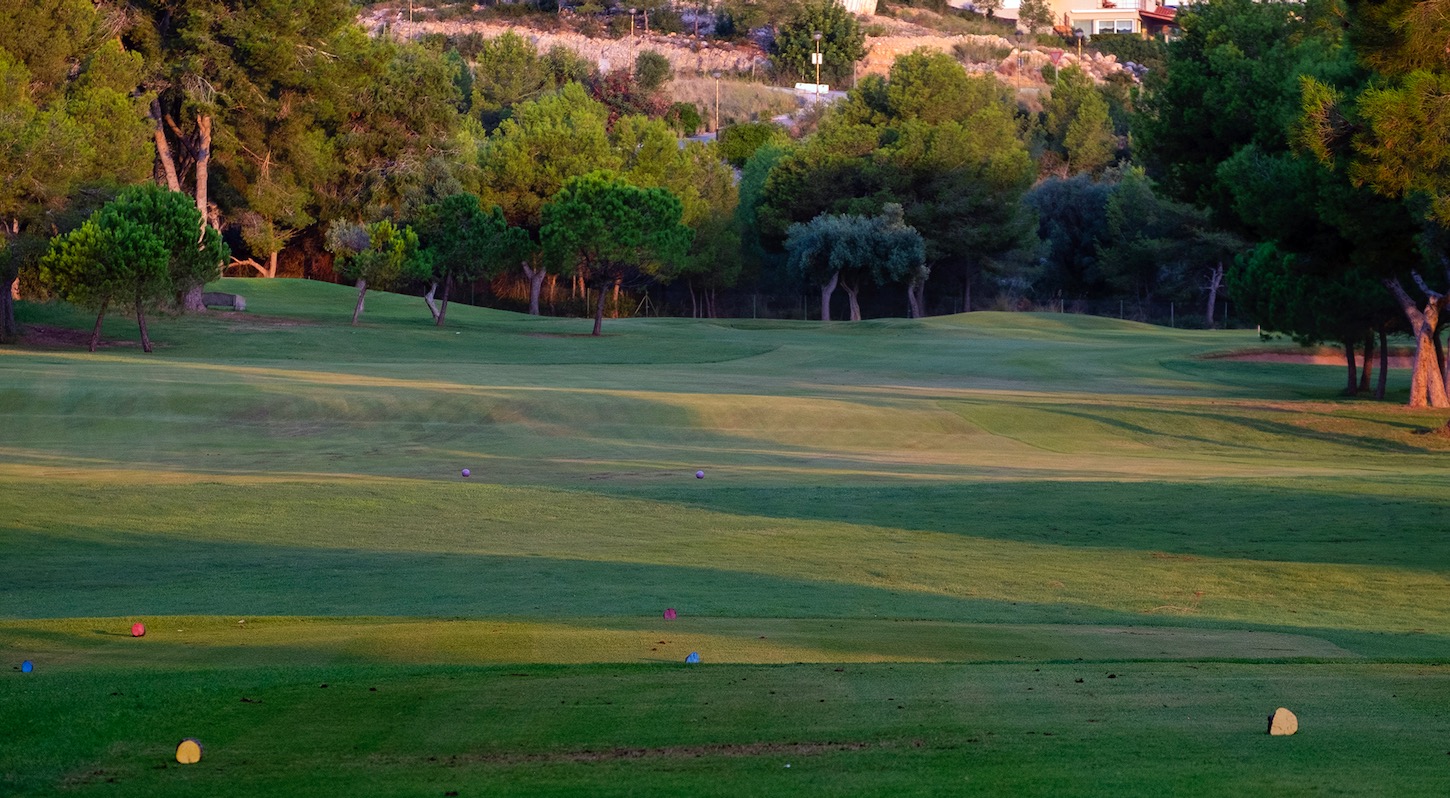
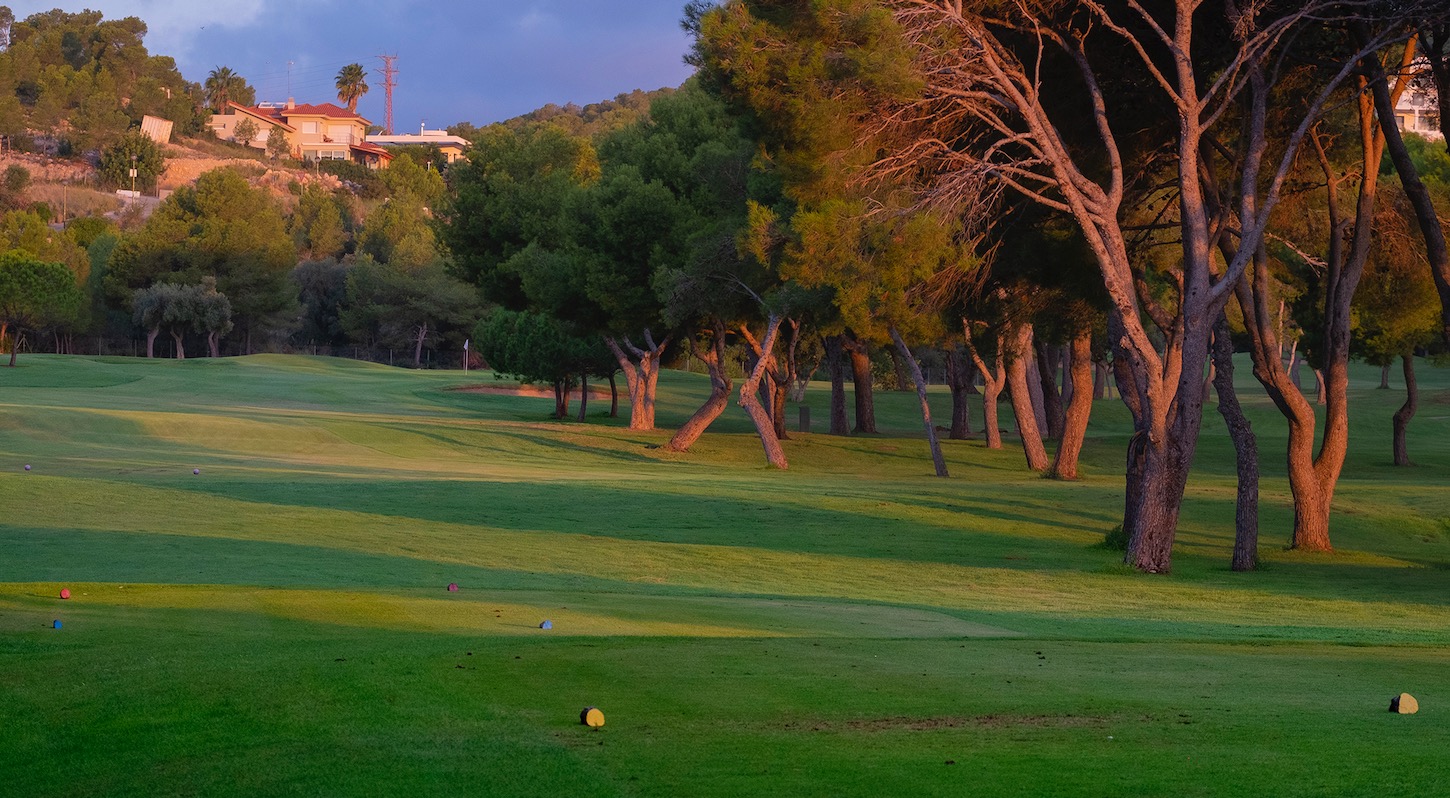
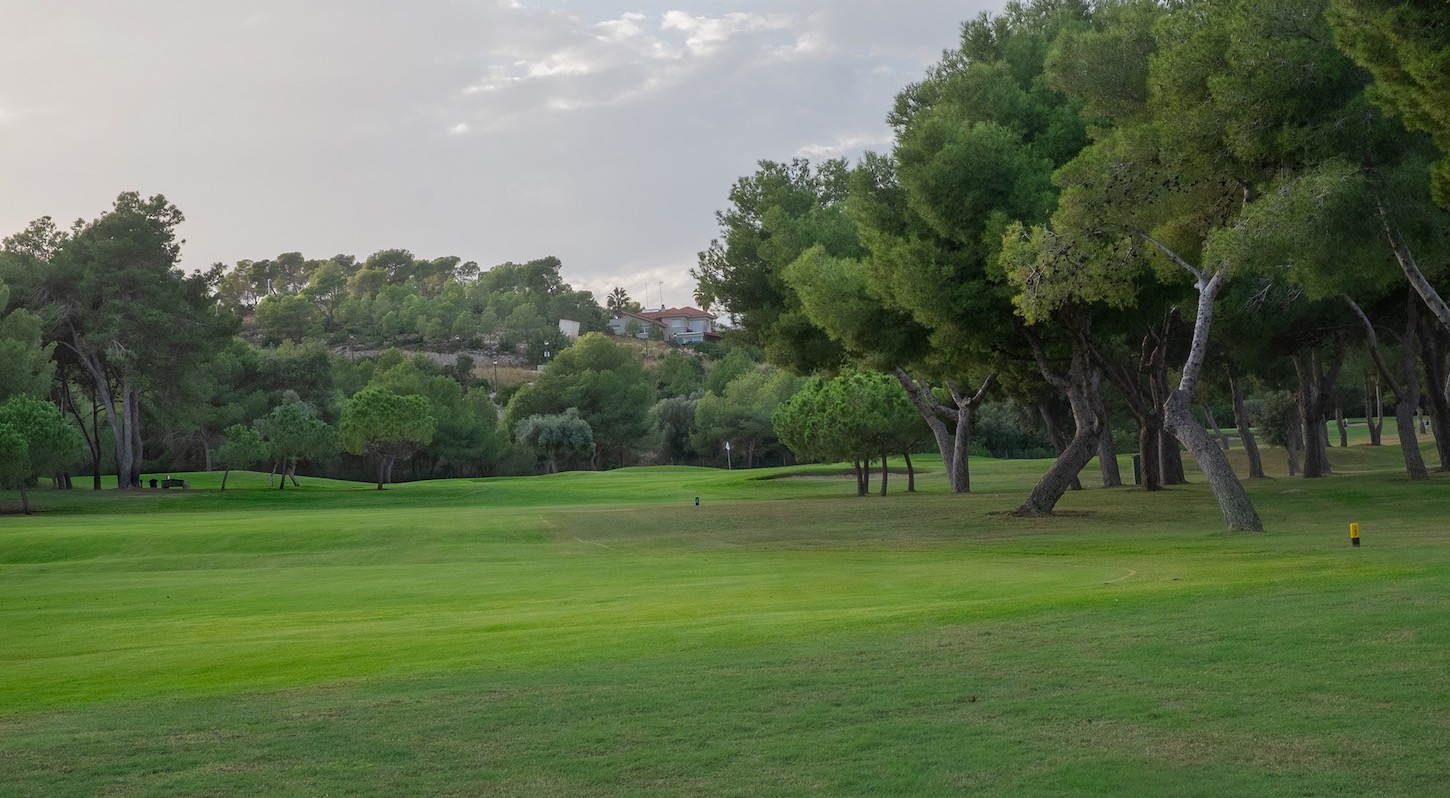
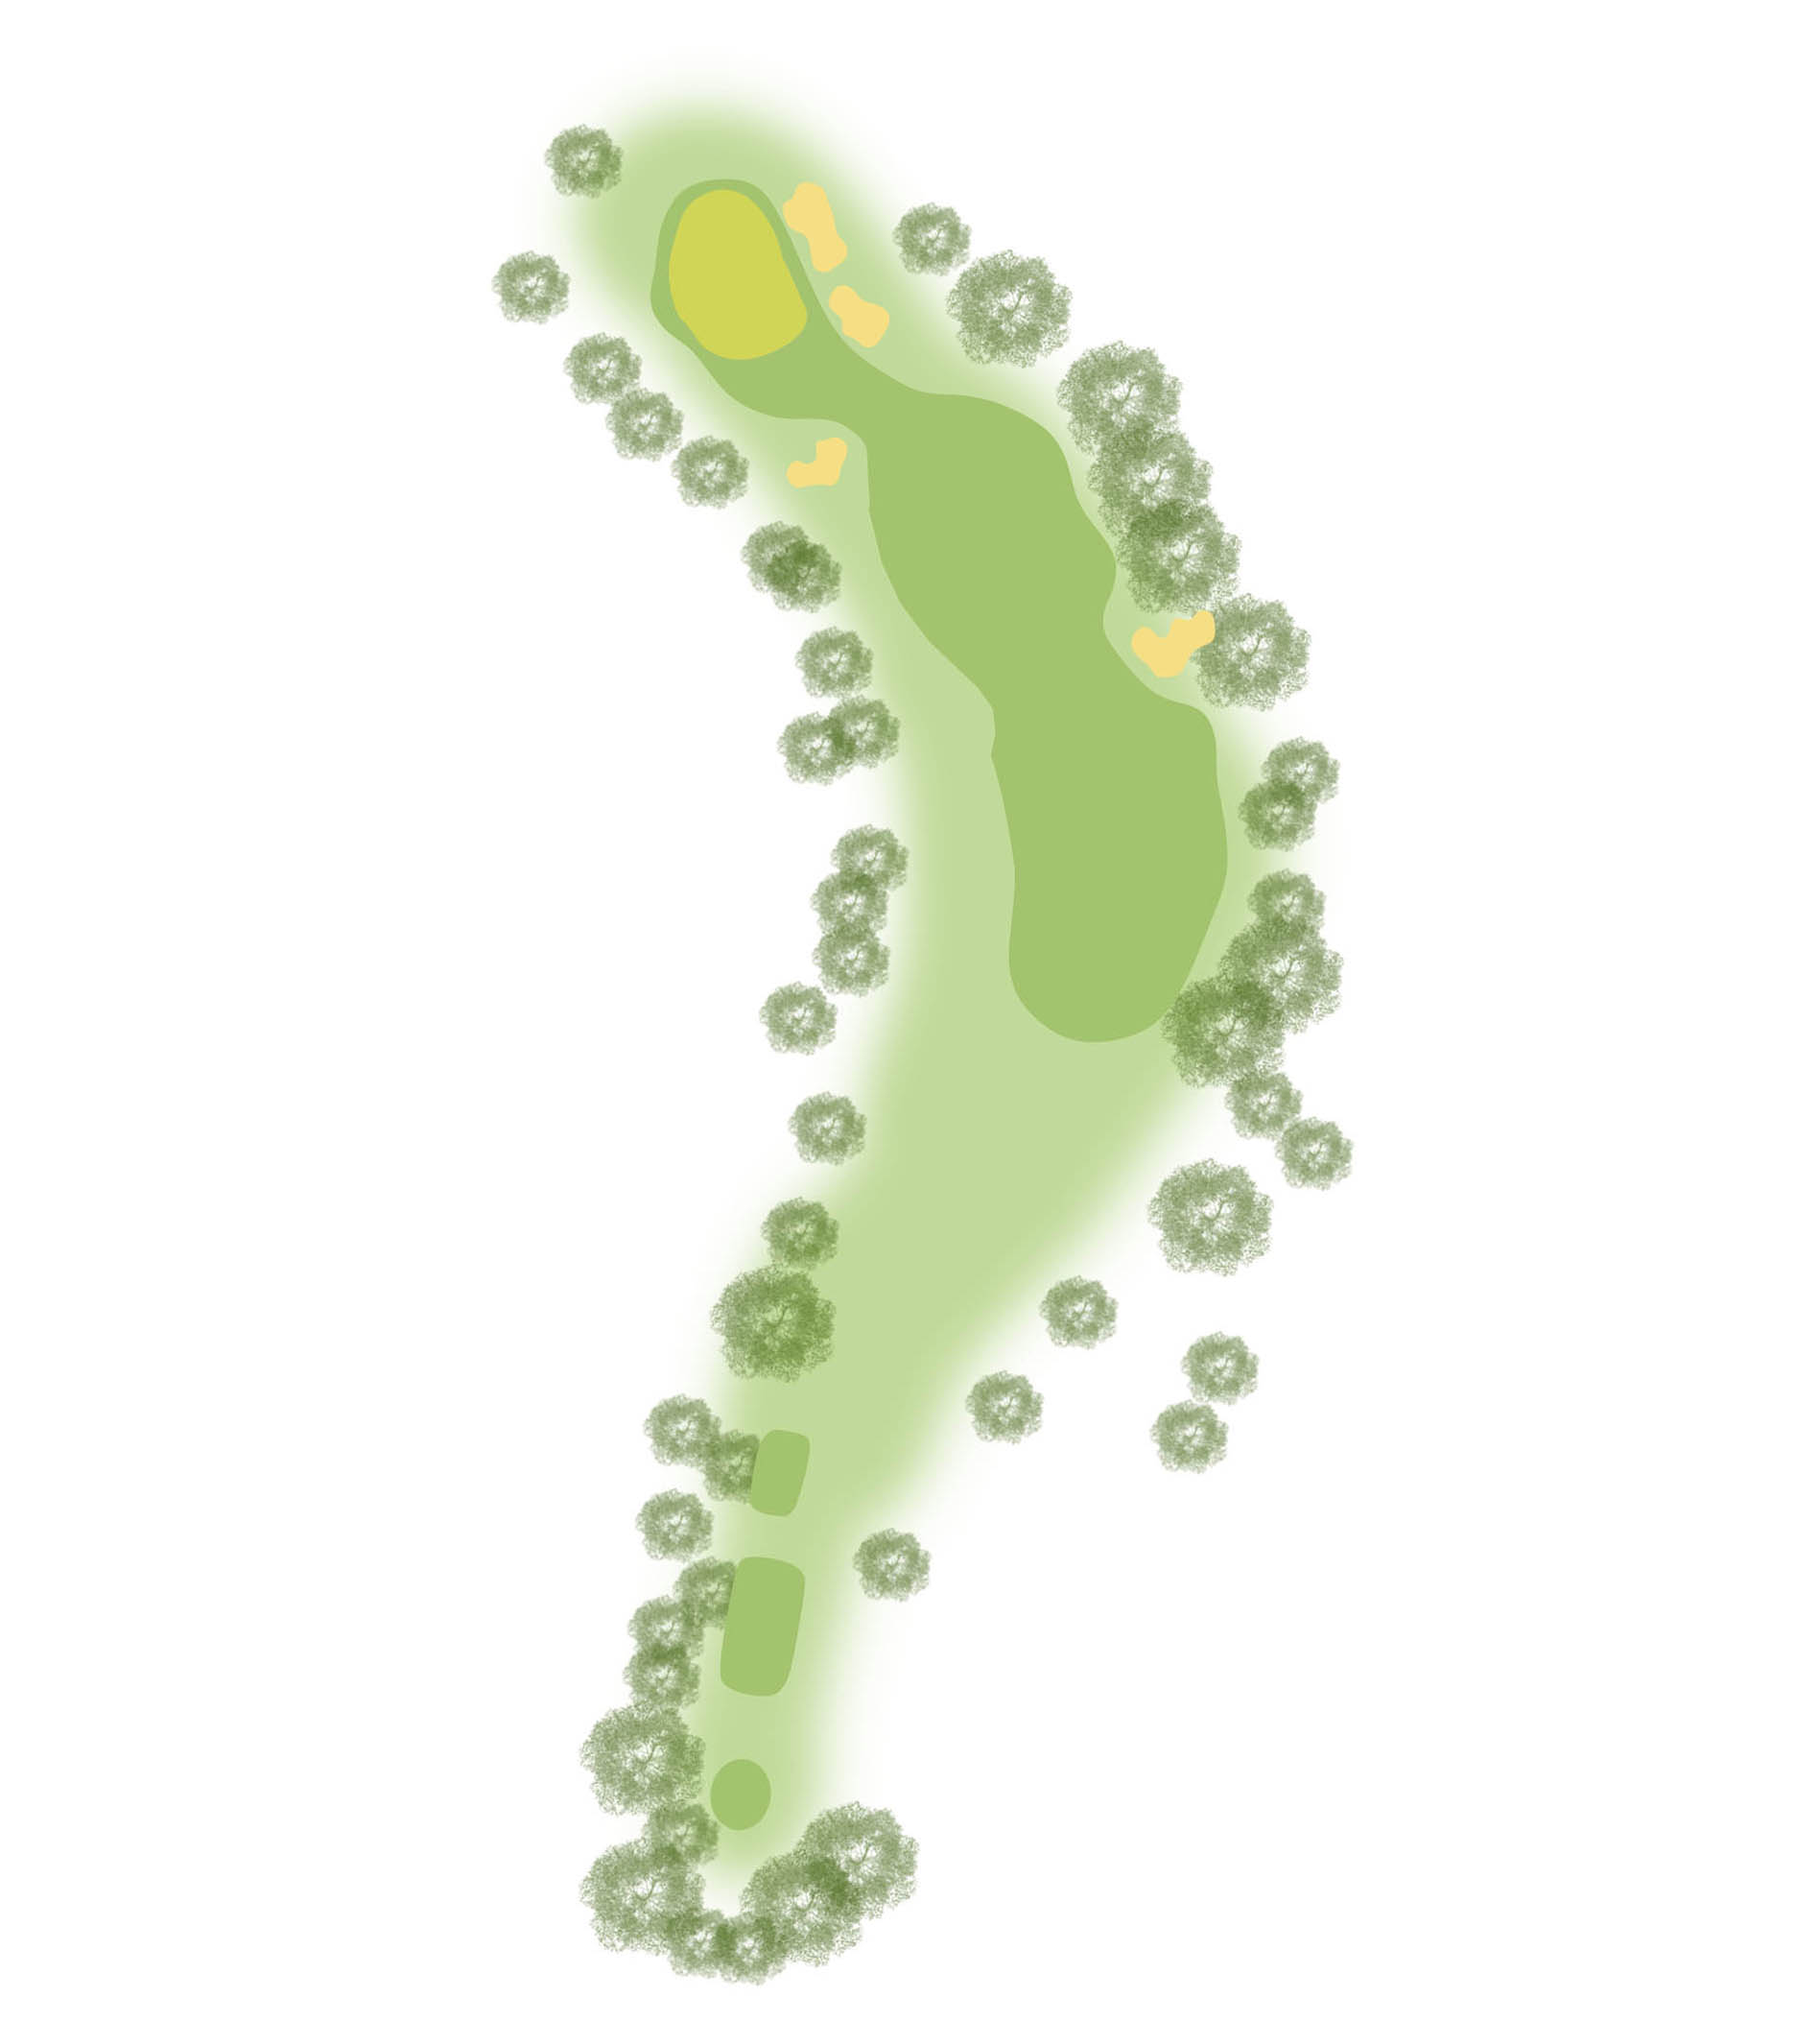
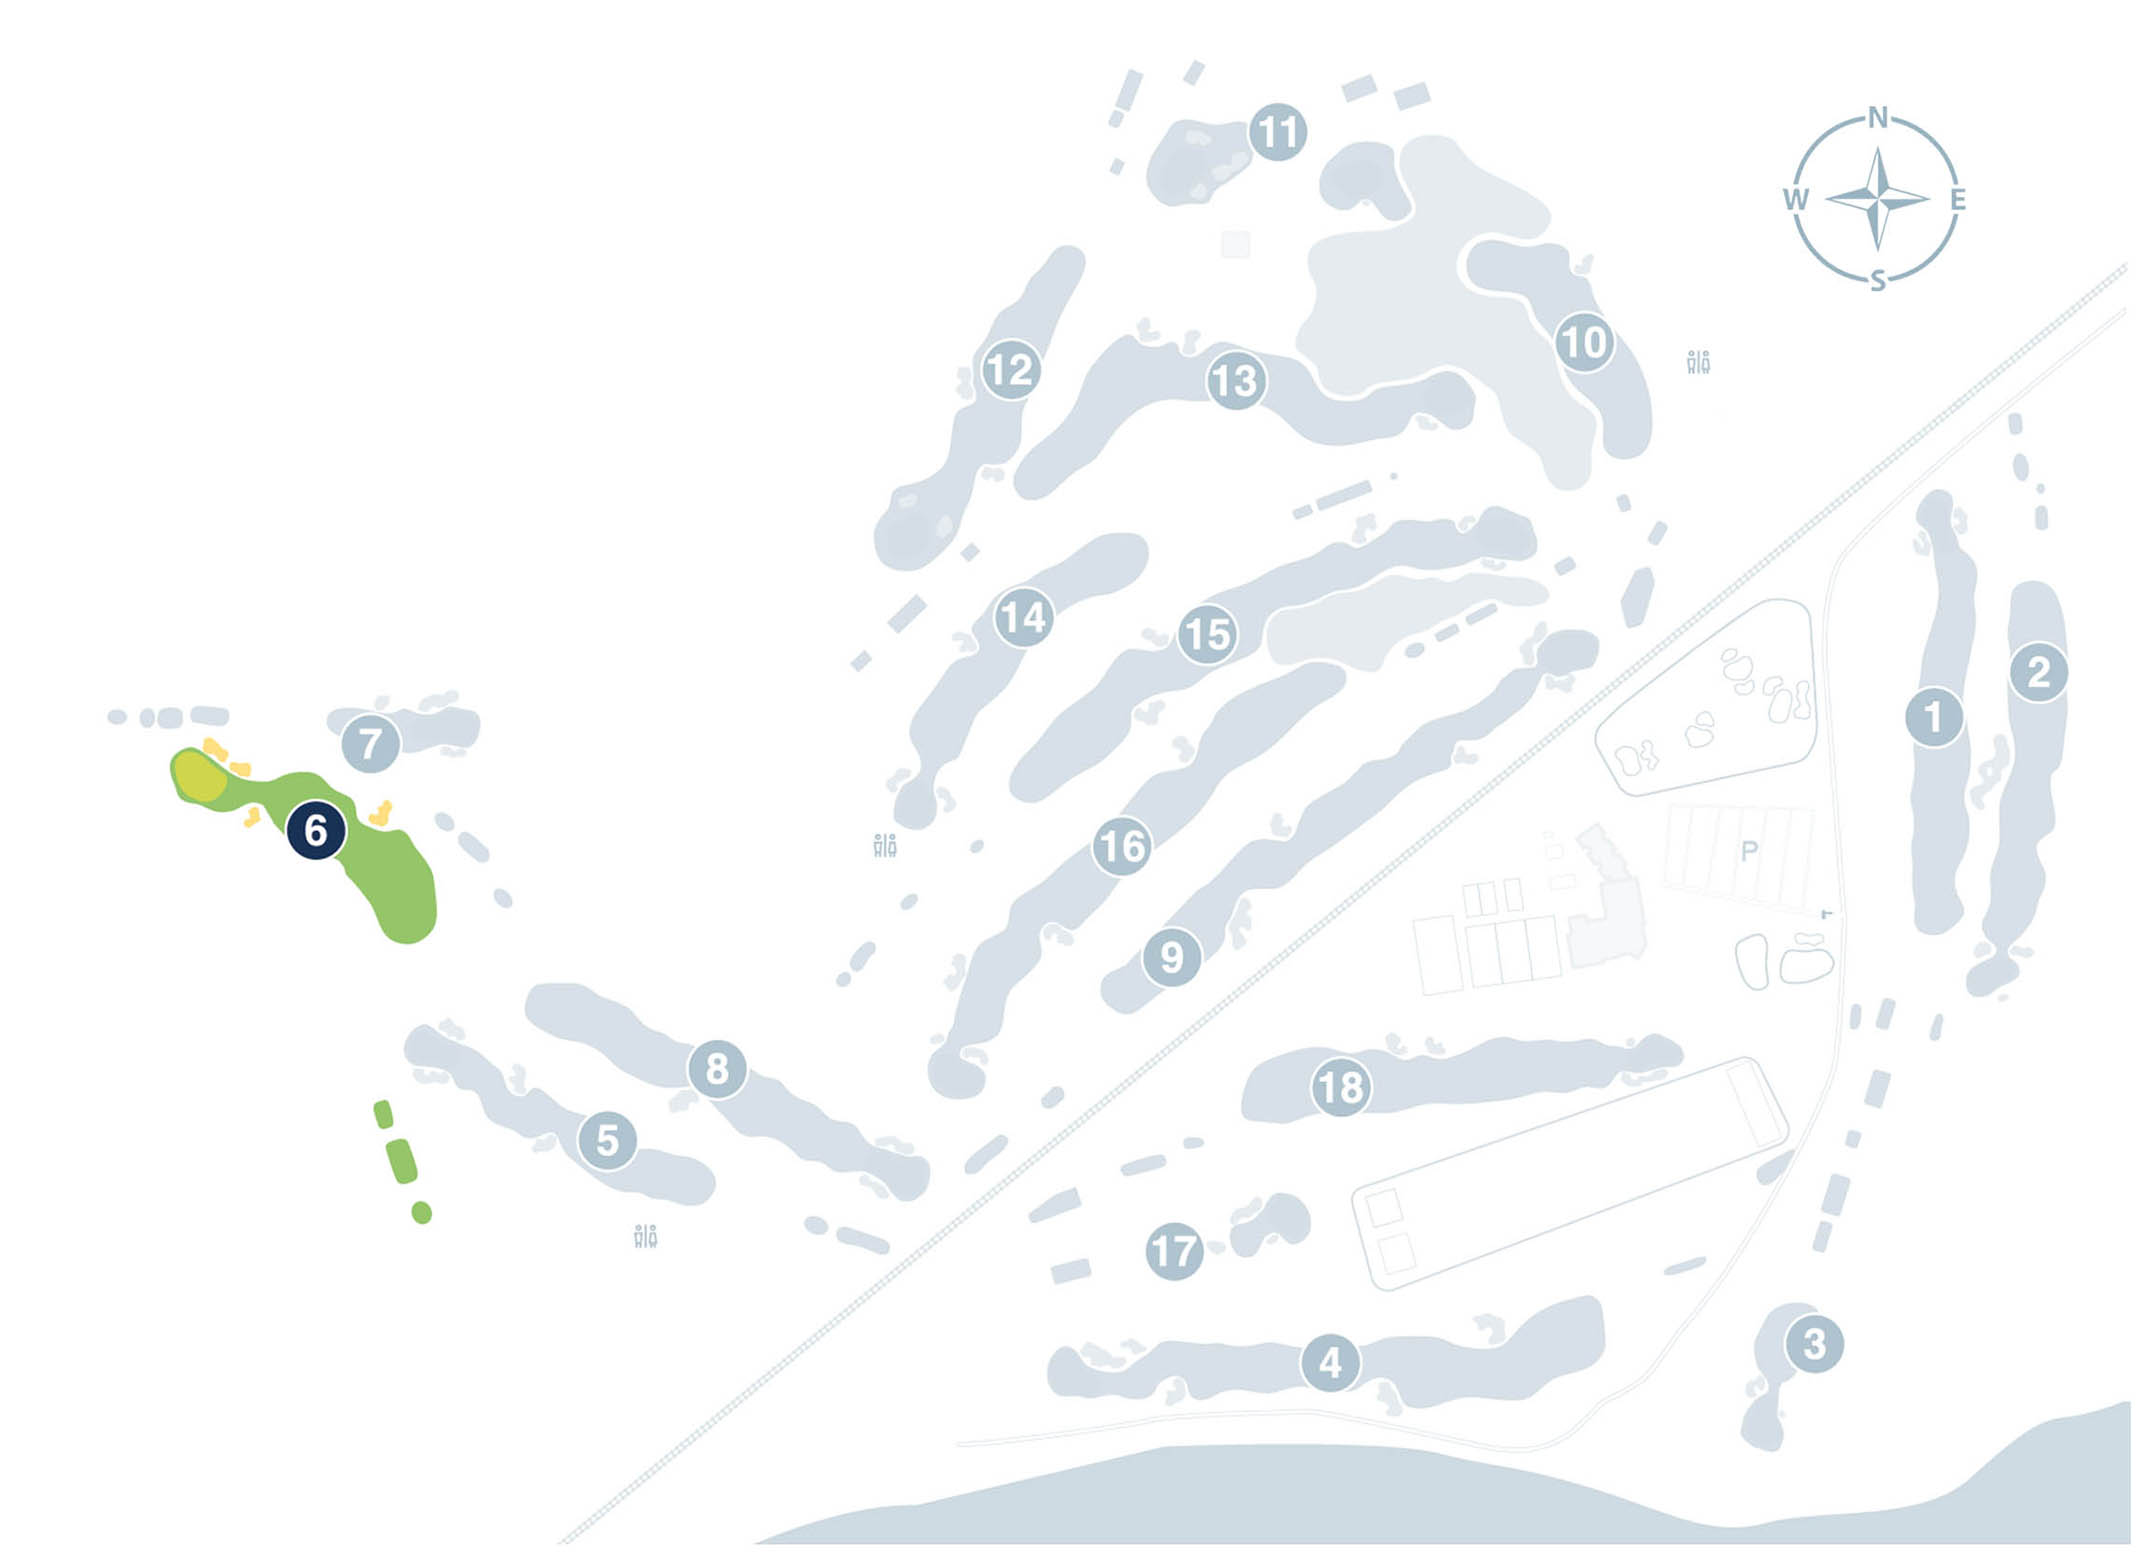
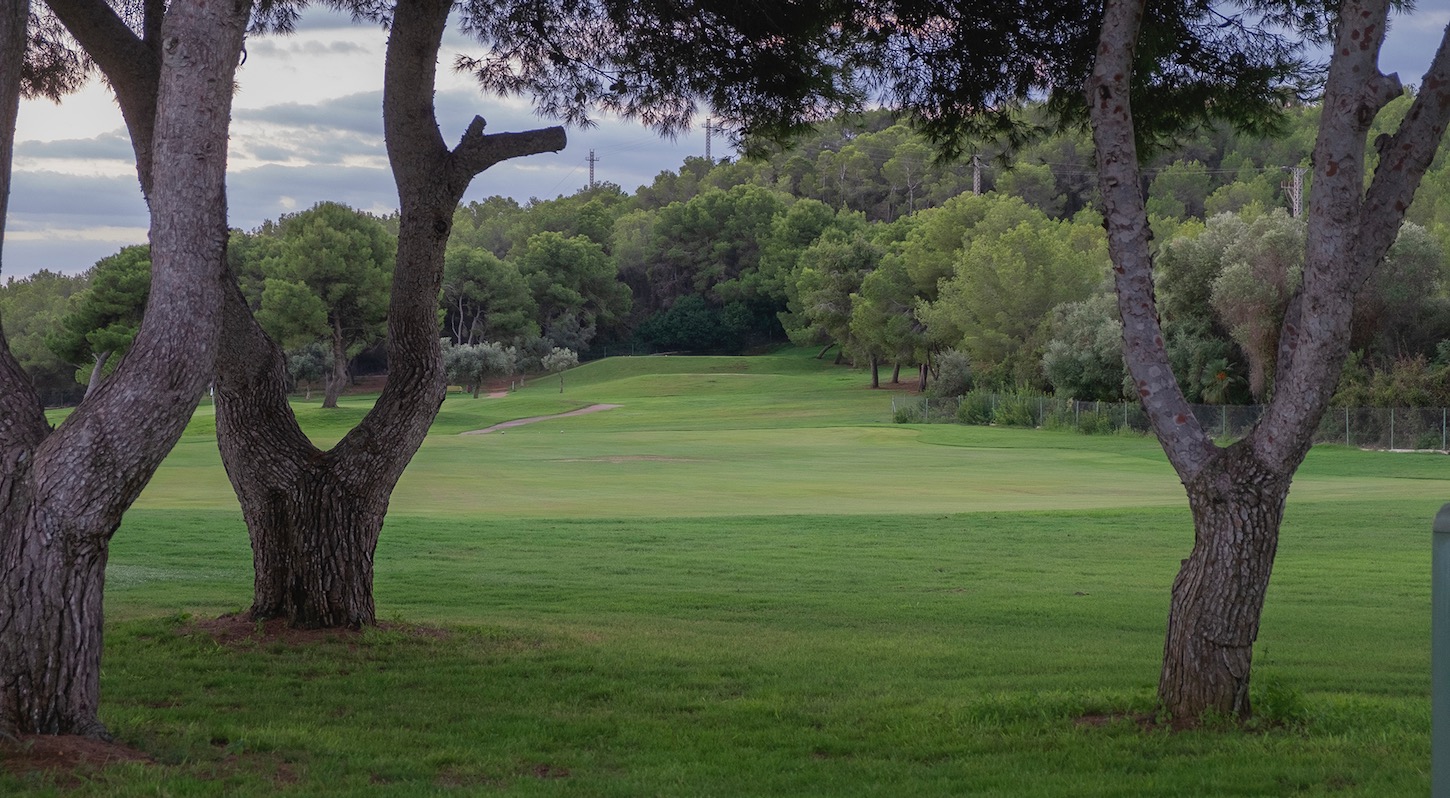
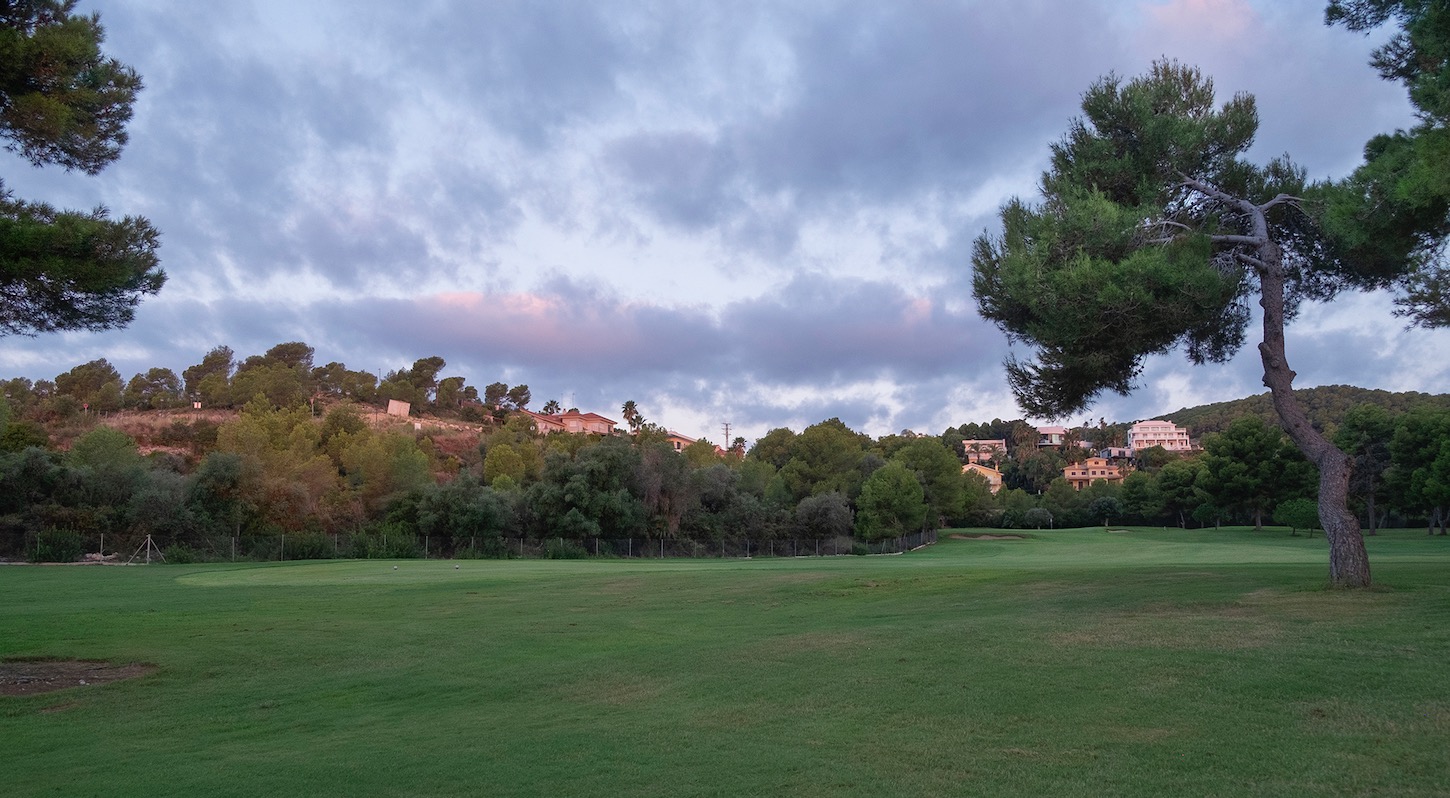
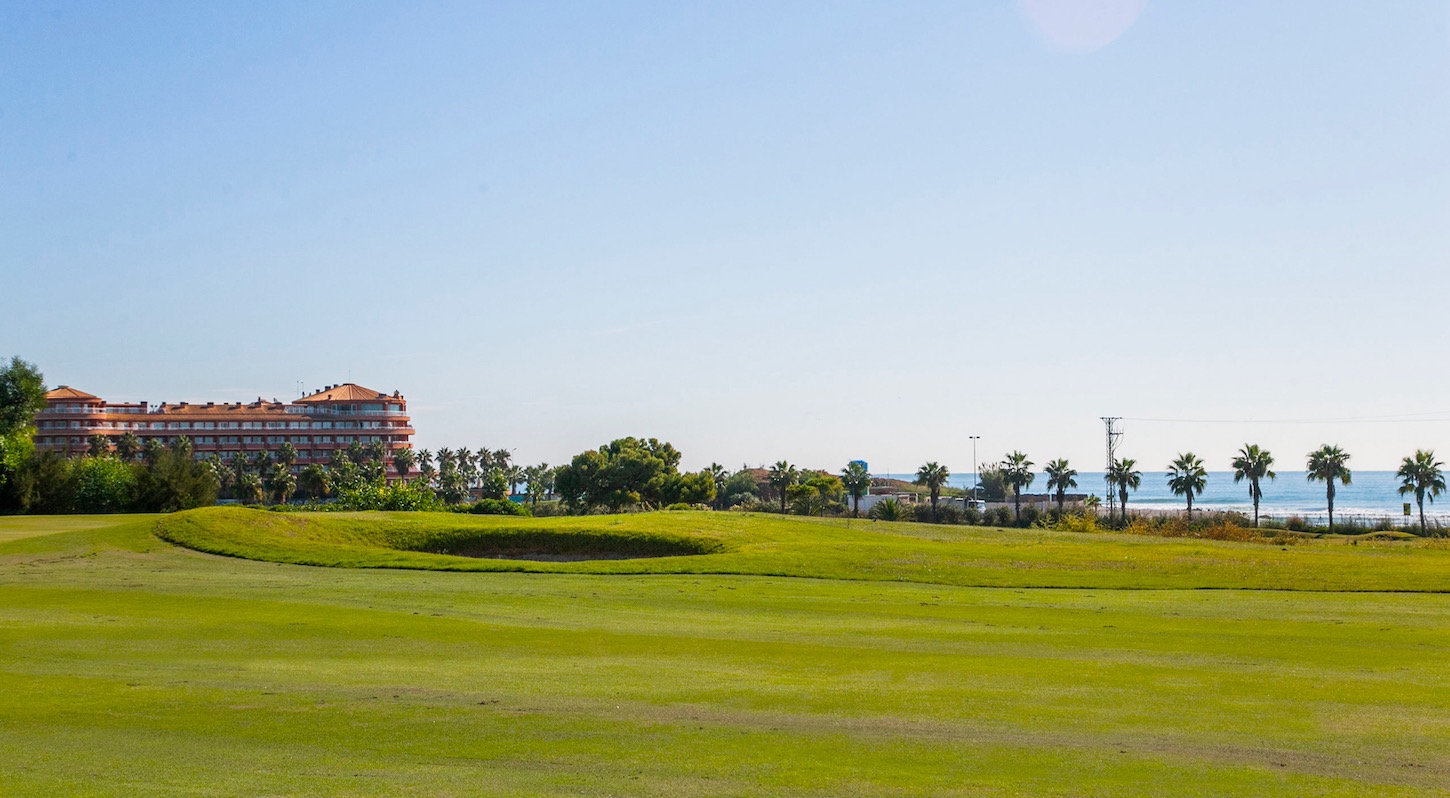
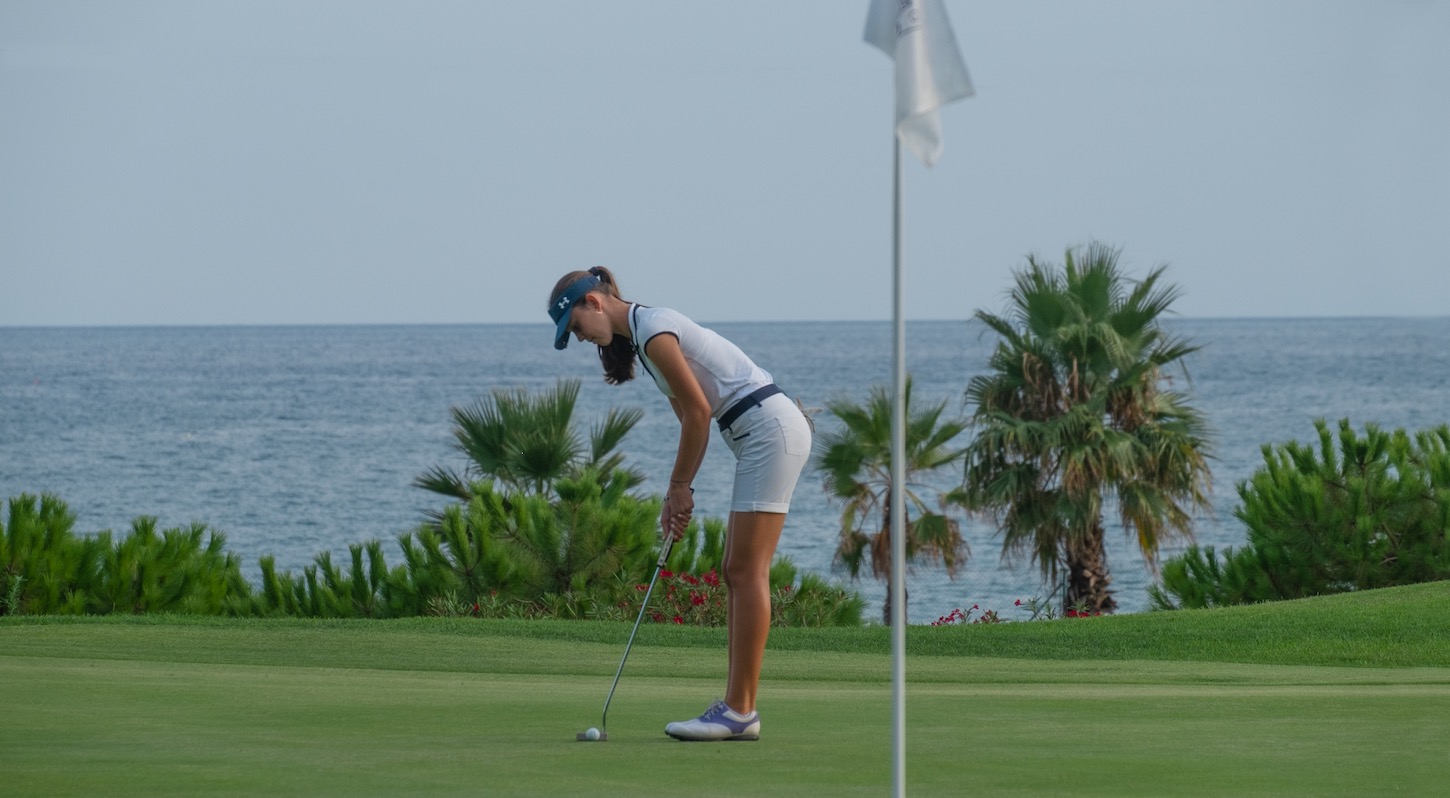
This hole is a beautiful par 3 facing the Mediterranean Sea. It is a long and demanding hole due to the slopy and elevated green, also protected by bunkers on both sides. A shot to the center of the green will always be good, but we must remember to read the green well before hitting the putt, since we will find ourselves with multiple breaks most of the time.


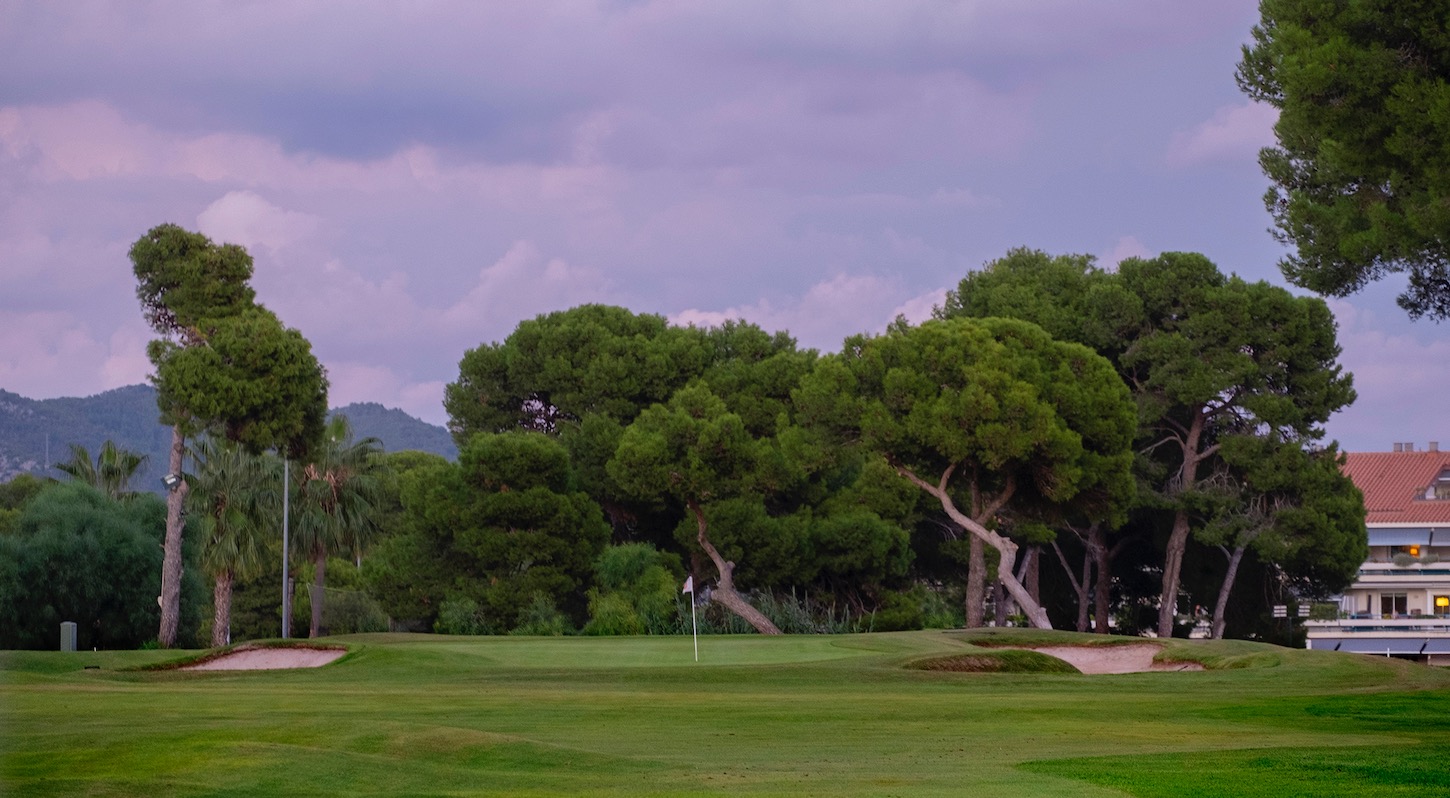
Handicap: 10
Whites: 469
Yellows: 460
Blues: 389
Reds: 382
Oranges: 339
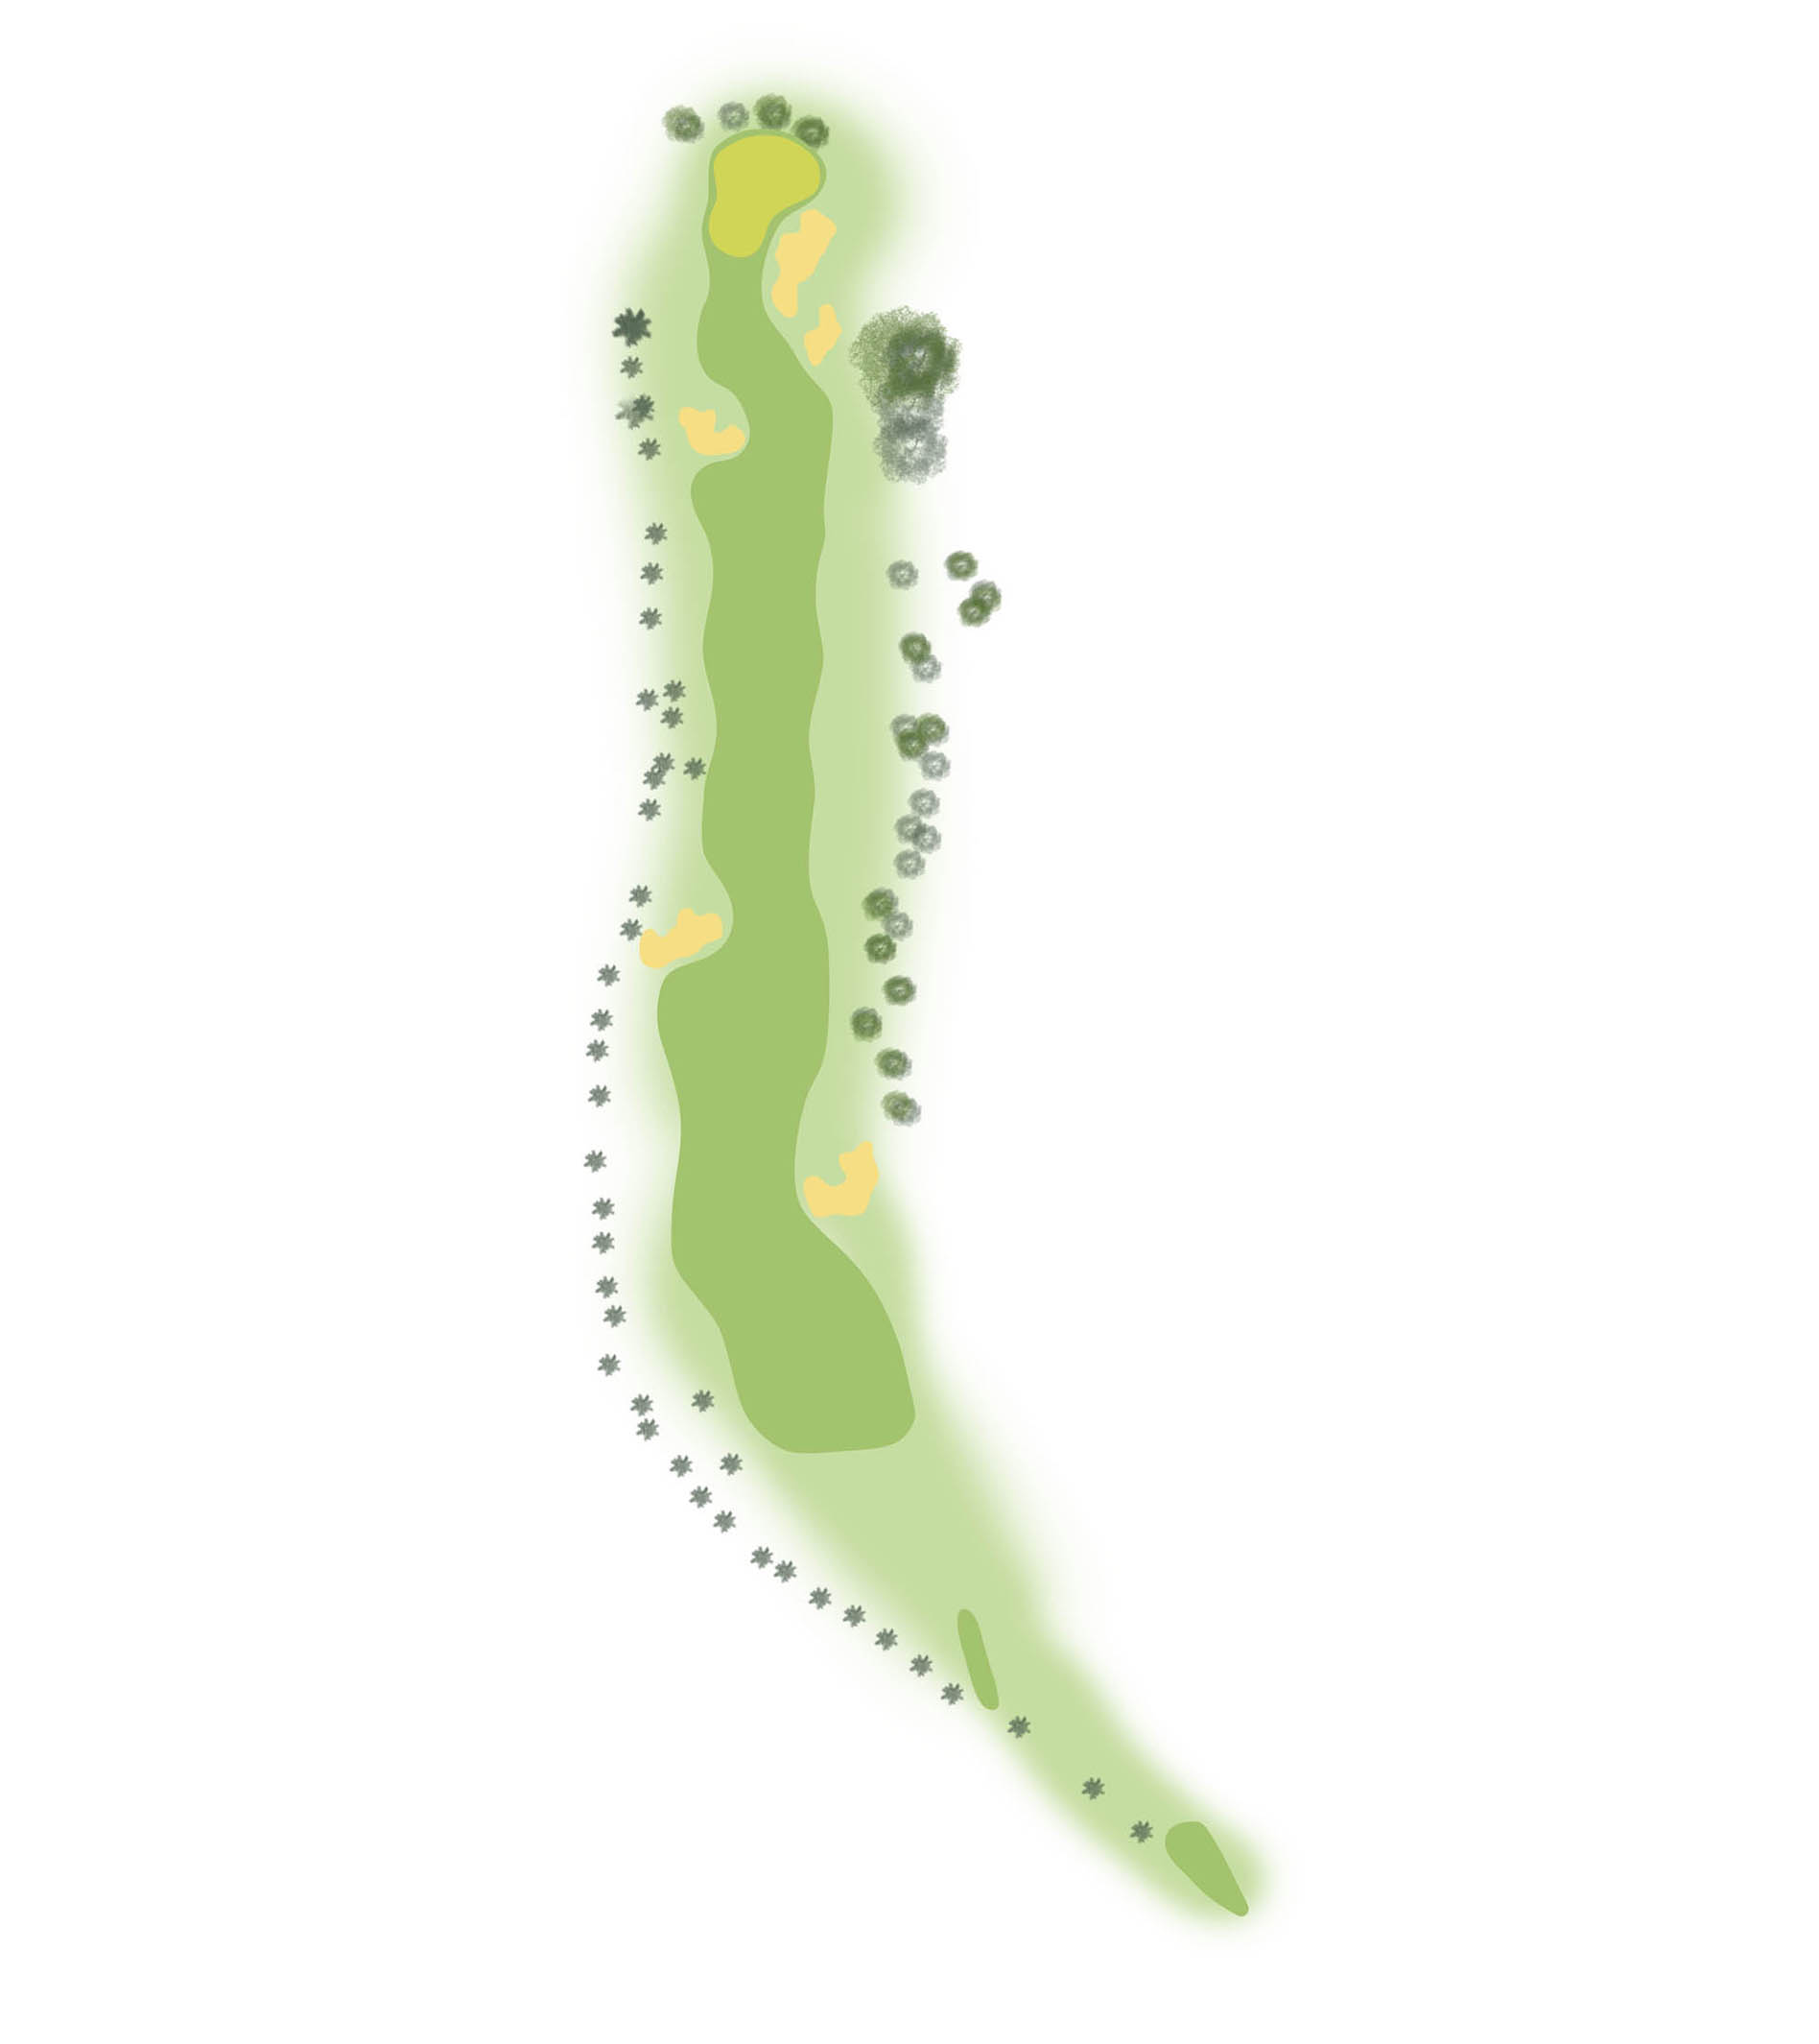
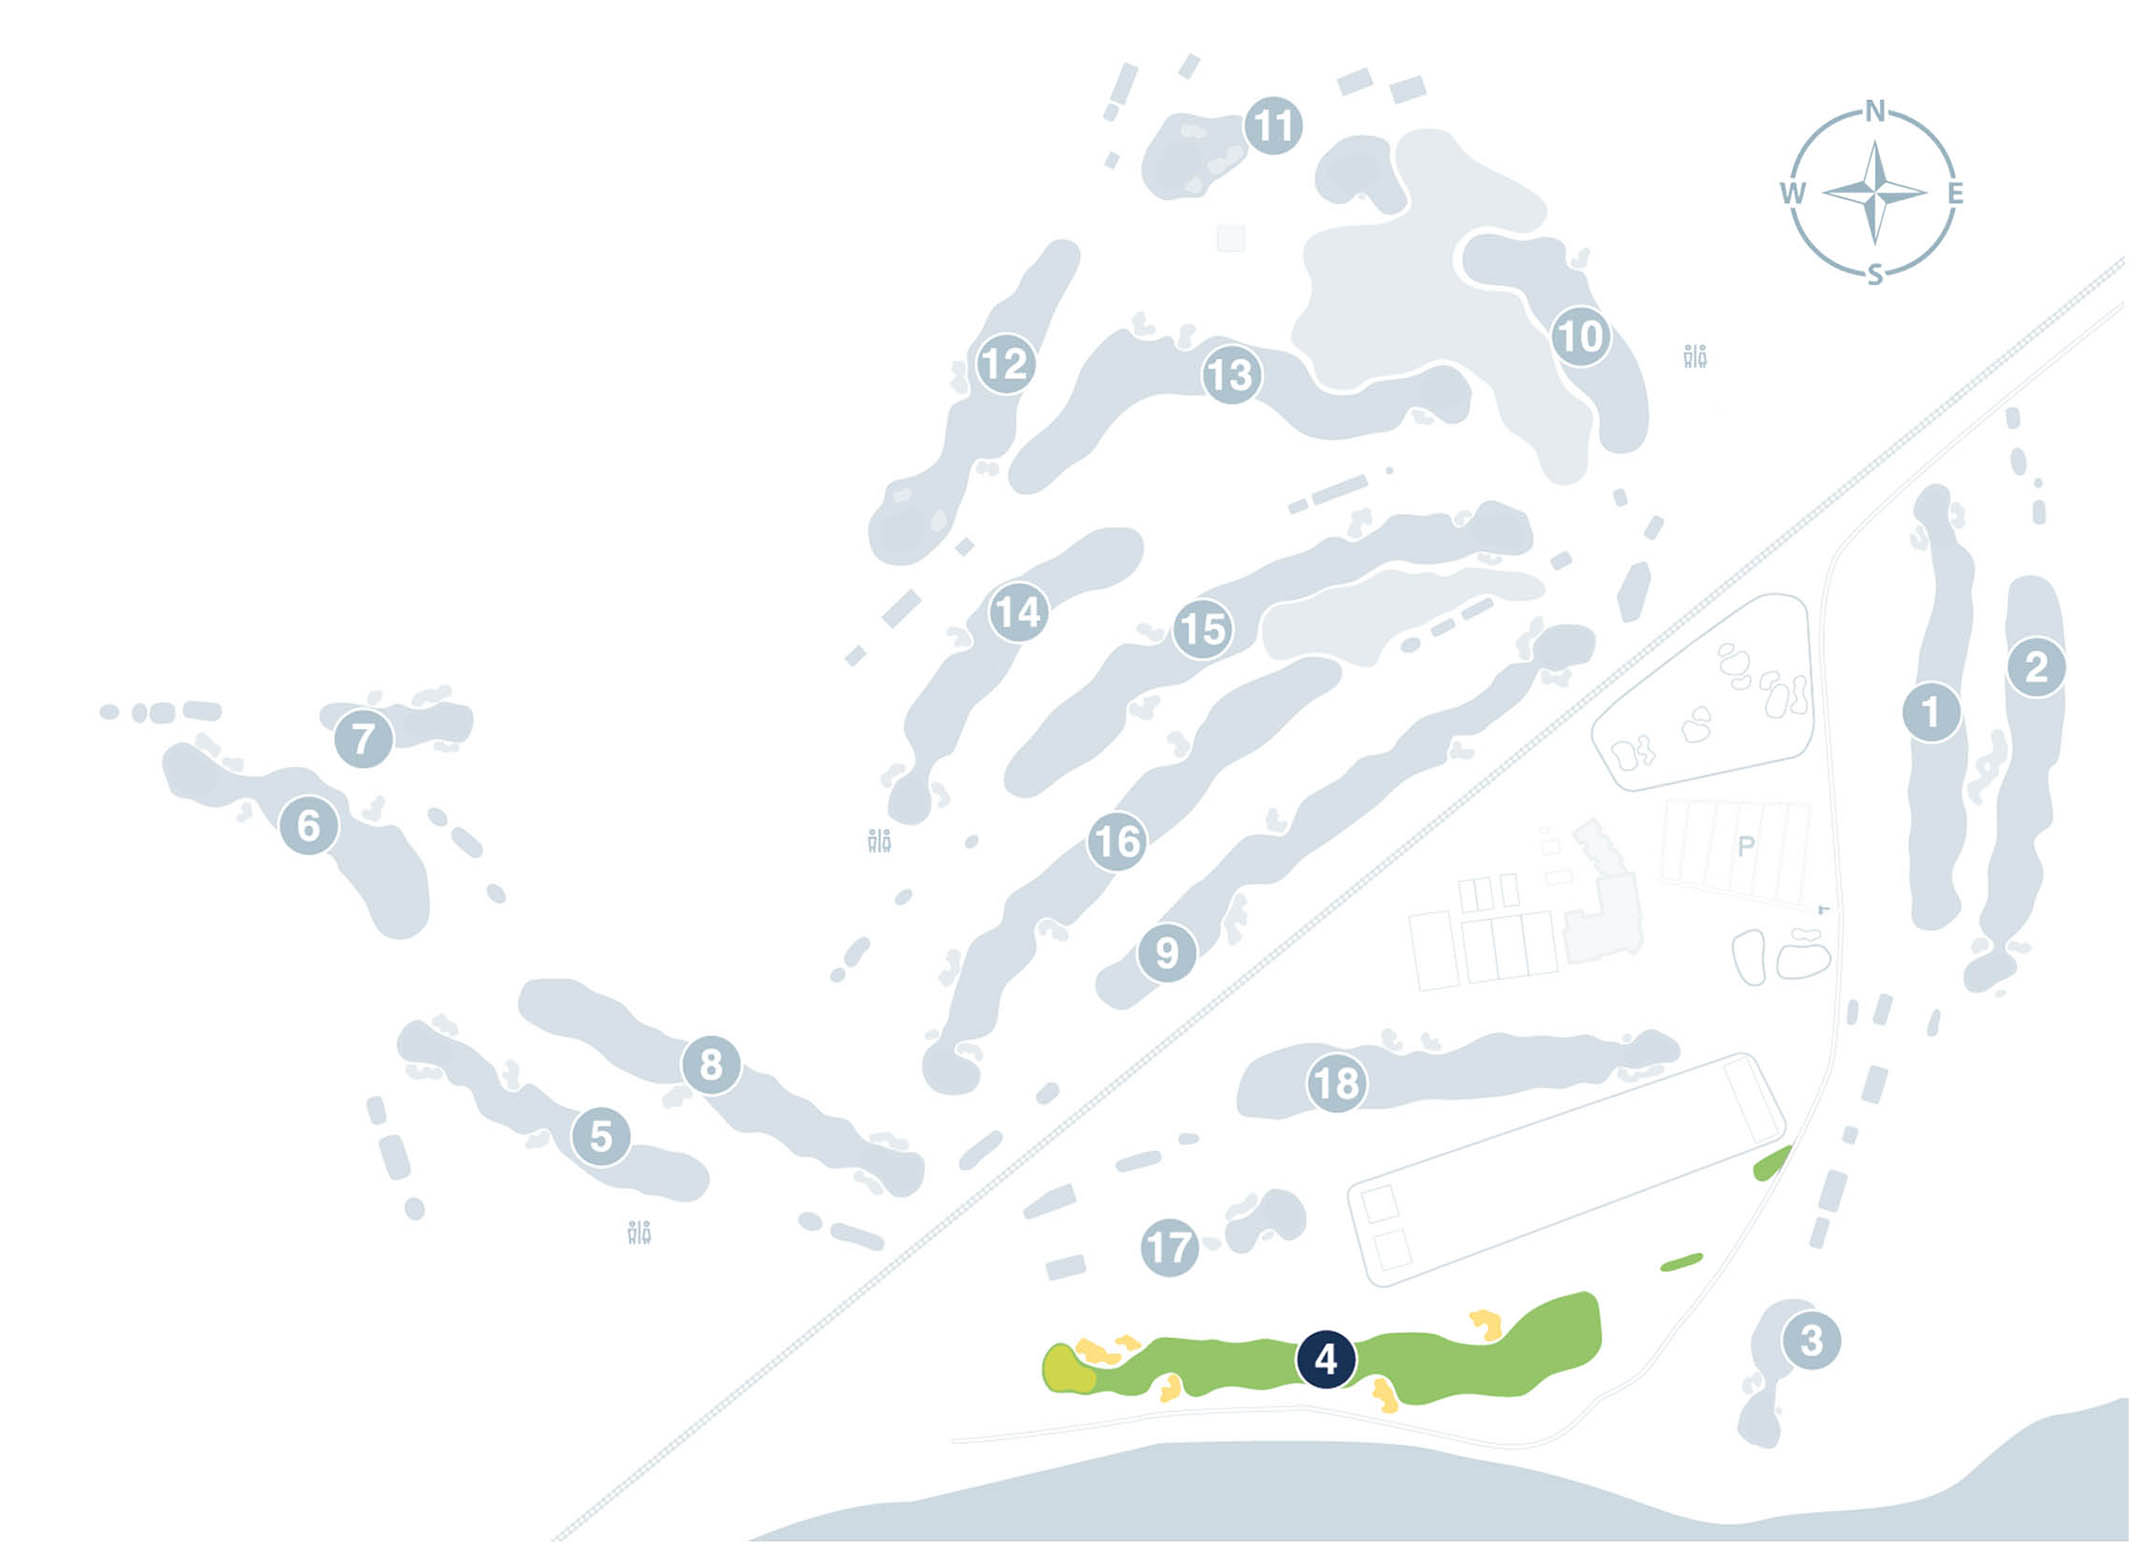
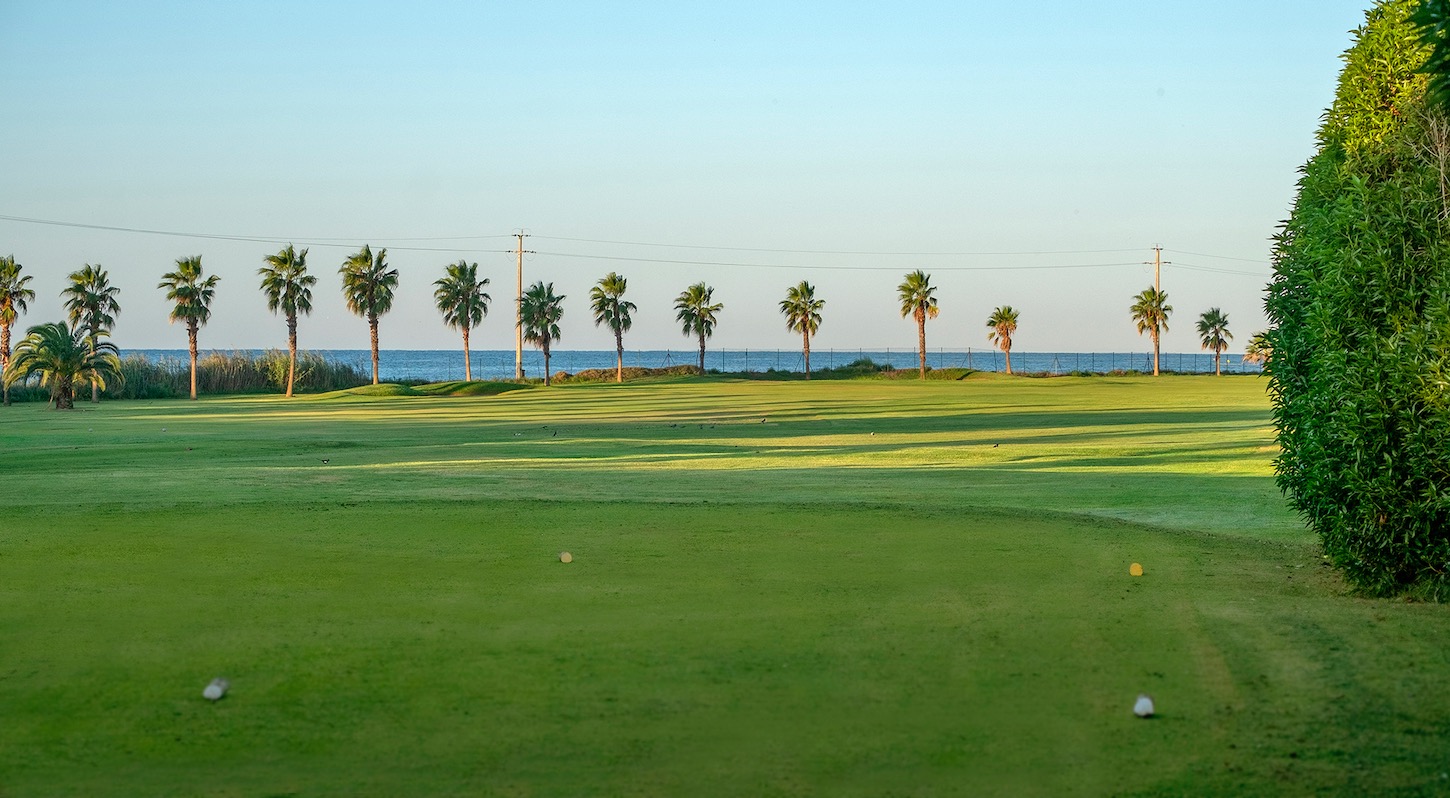
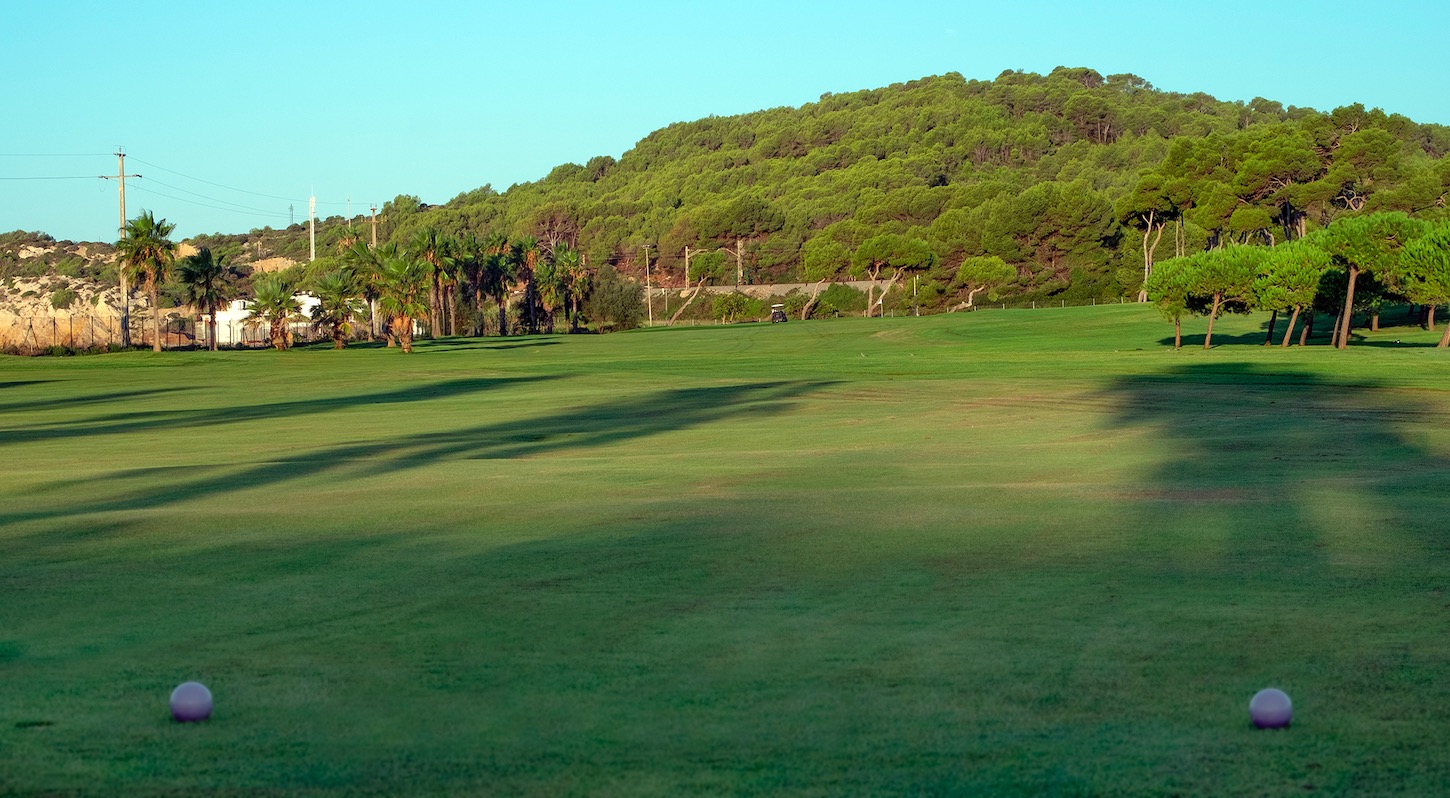
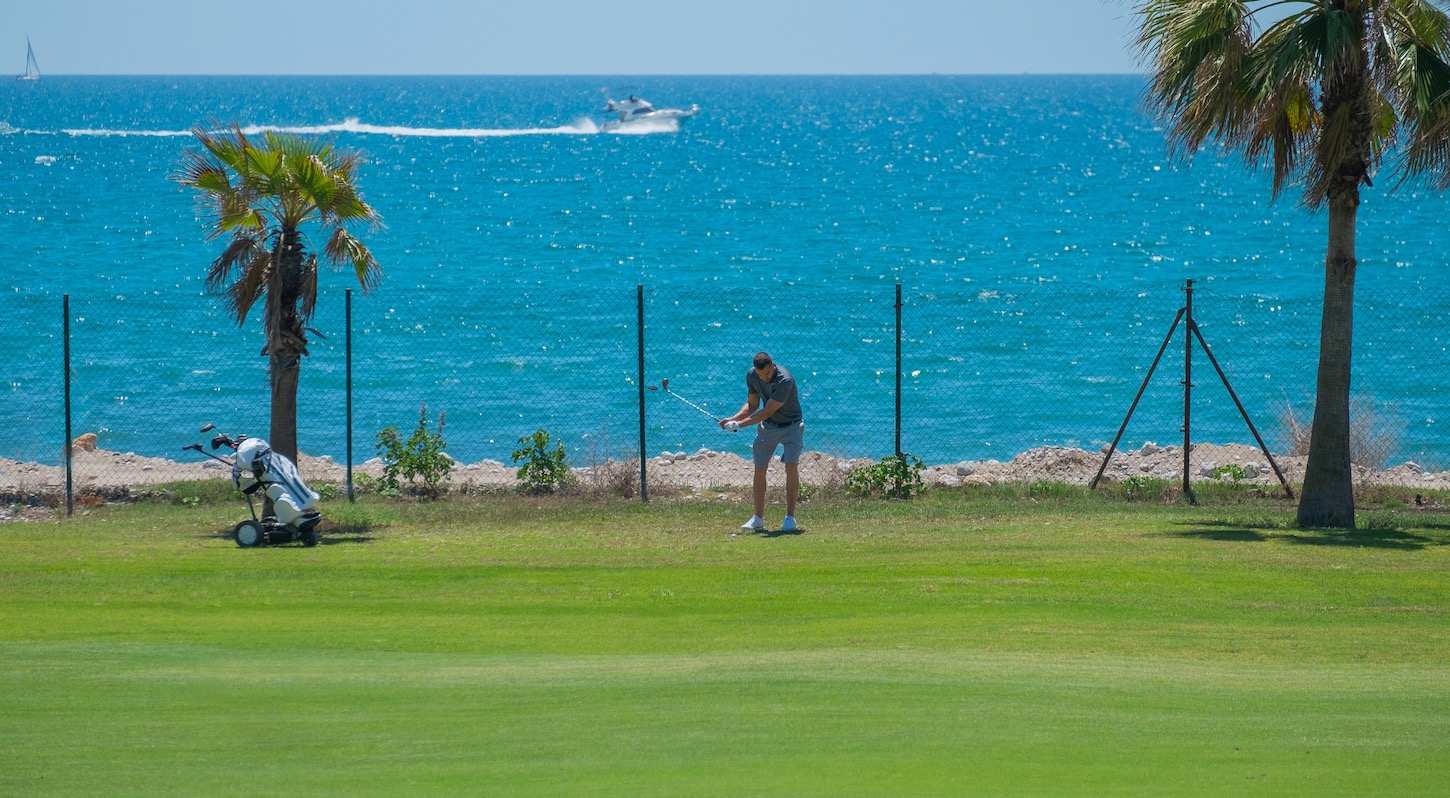
Recovery par 5 that goes along the Mediterranean Sea on the left side and the driving range on the right. From the tee we must favor the left side of the fairway. The hardest hitters will be able to attack the green in two shots, while the rest of the players will have to lay-up short of the bunkers that protect the right side of the green. We will be able to play a more aggressive approach shot into the green depending on the pin placement.

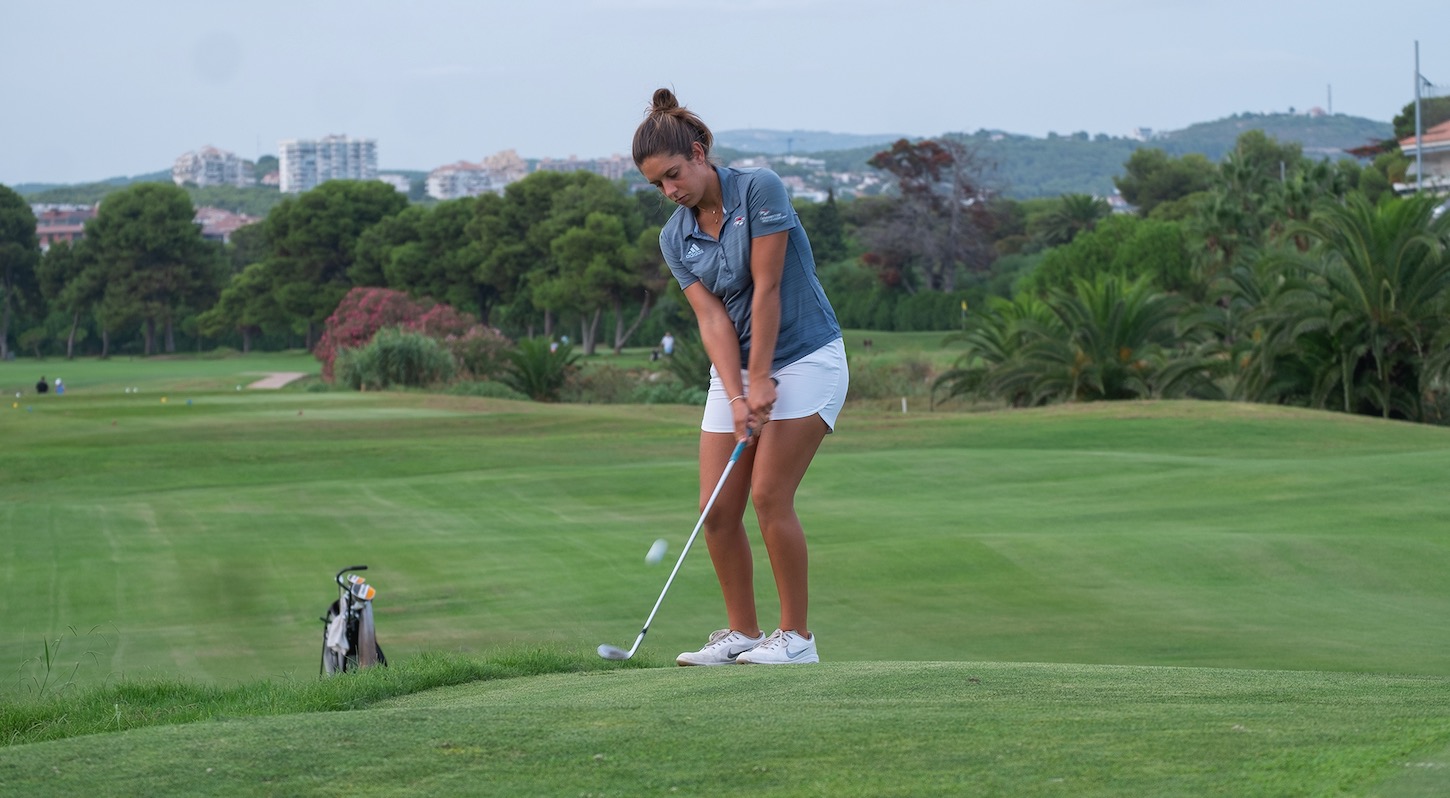
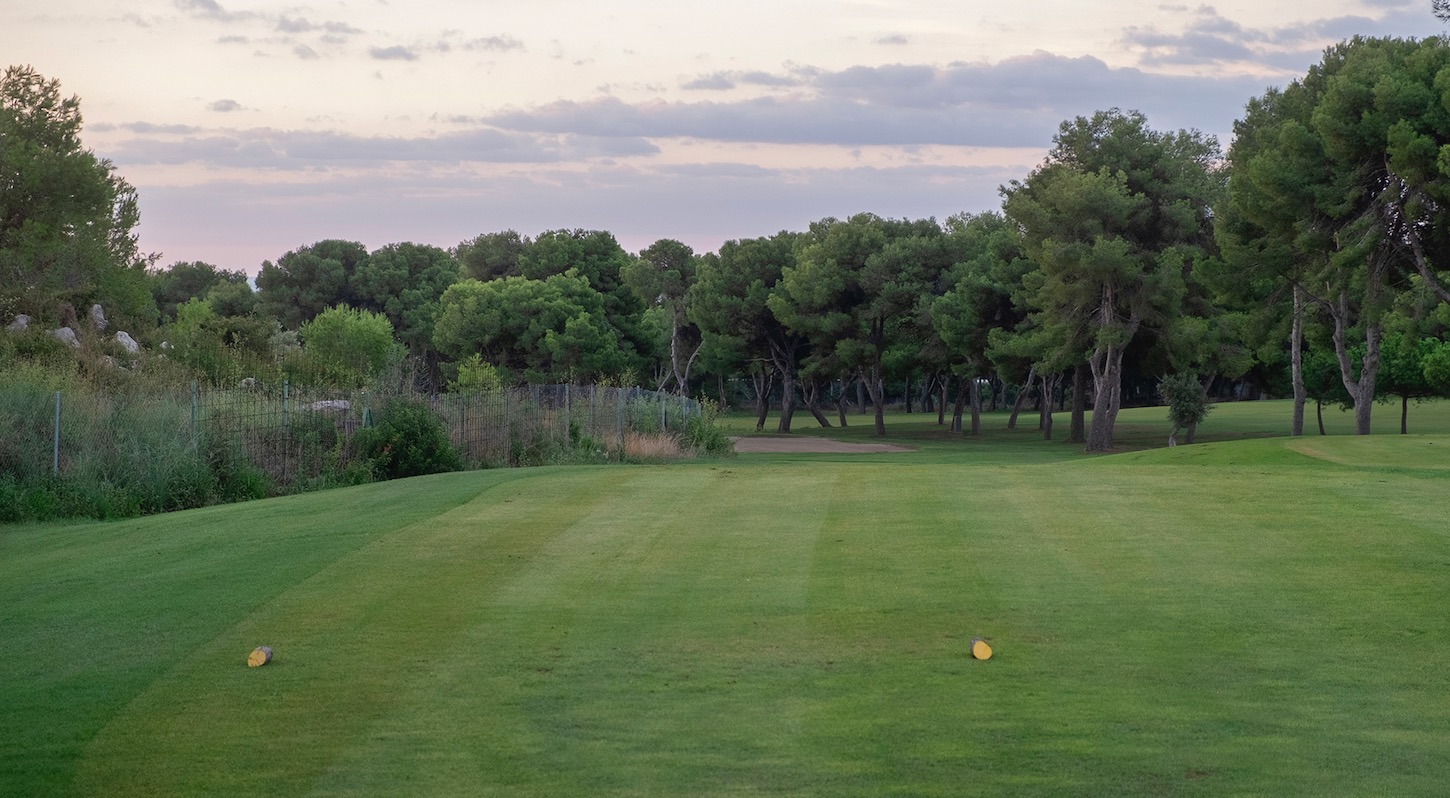
Handicap: 18
Whites: 294
Yellows: 285
Blues: 257
Reds: 252
Oranges: 178

One of the shortest par 4. Straight hole and slightly uphill where it will be key to find the fairway from the tee, to avoid the trees on the right. When hitting our approach shot into the green we must take the right club, since the green is long and narrow. Putting from the beginning of the green will give us an easier uphill putt.
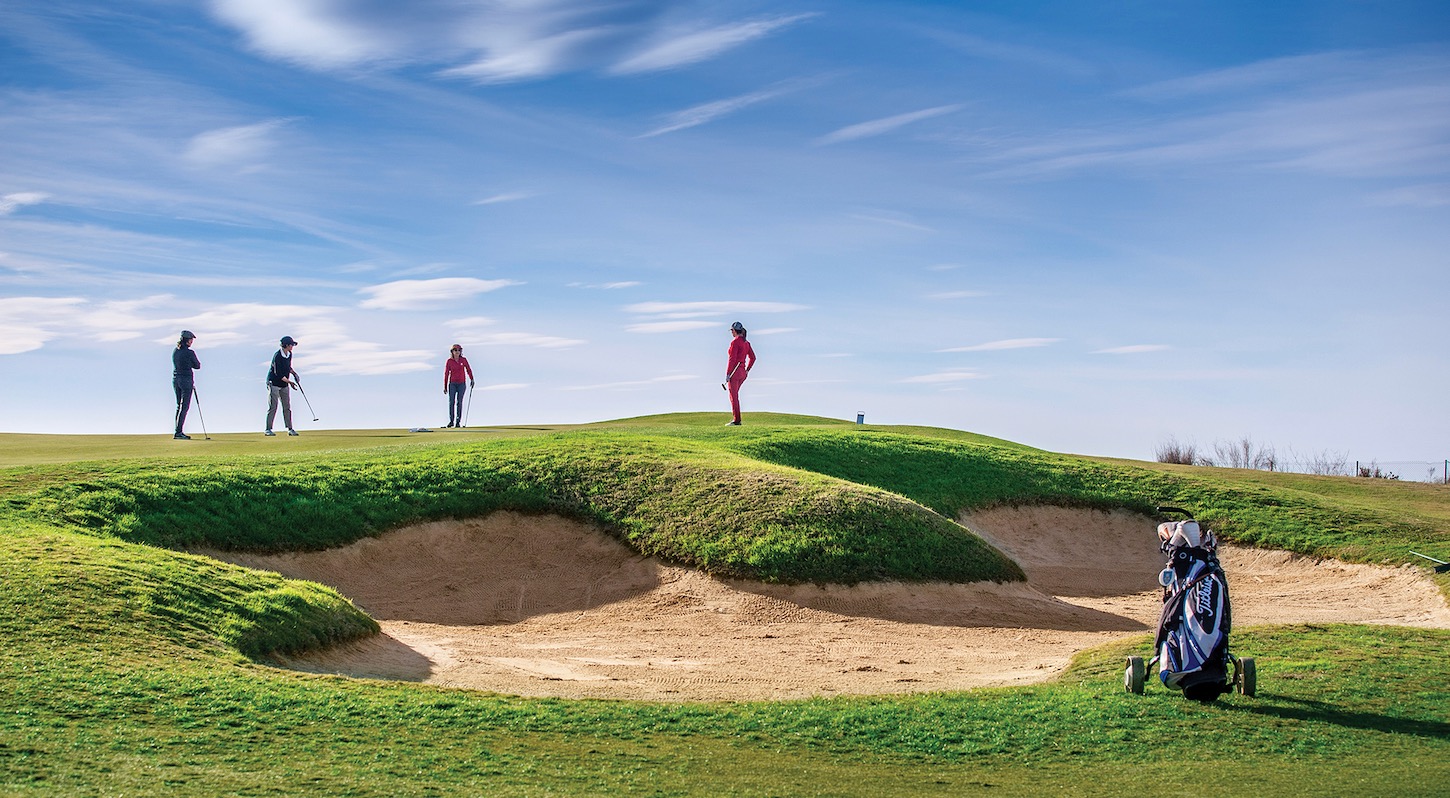
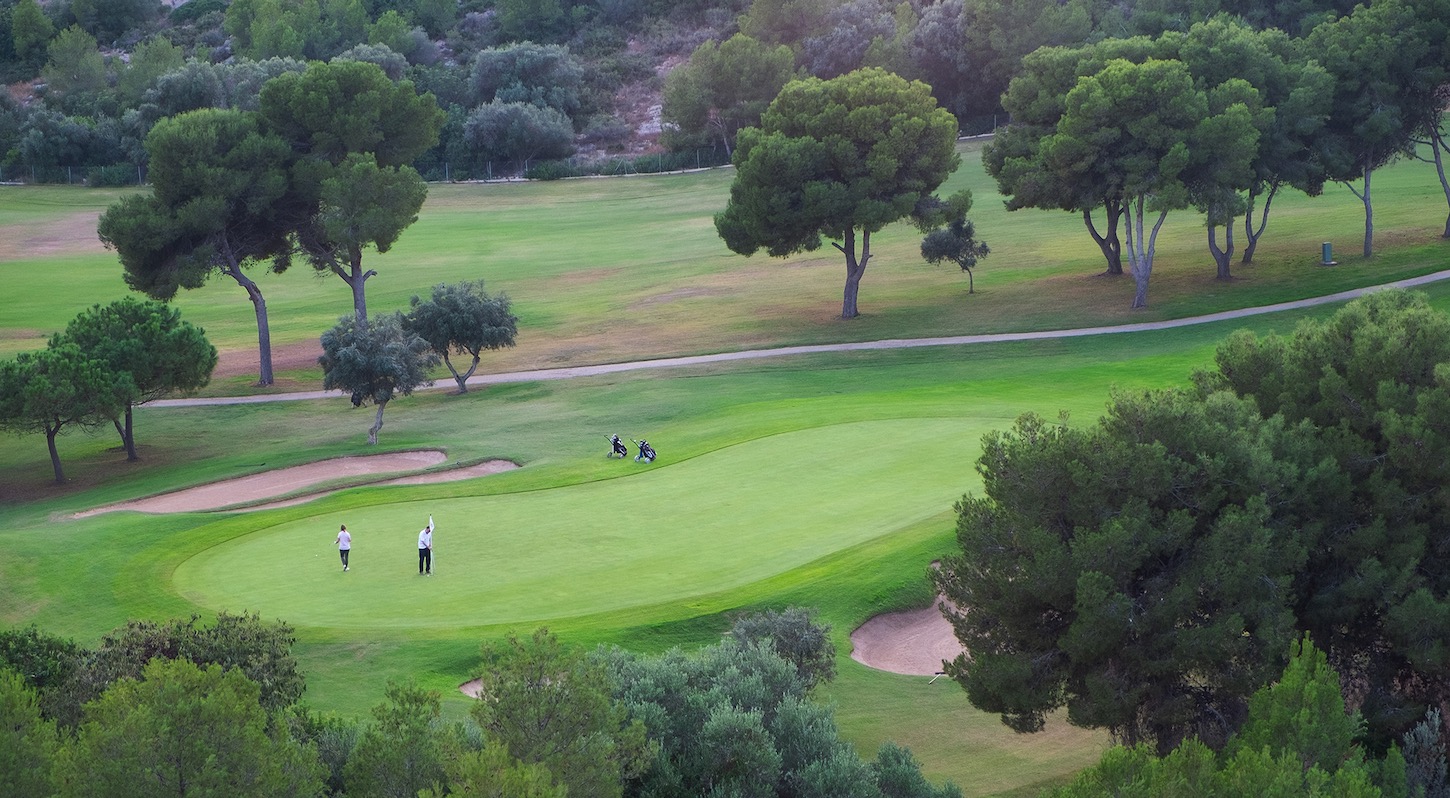
Handicap: 12
Whites: 320
Yellows: 311
Blues: 286
Reds: 280
Oranges: 172
Dogleg to the left that requires a good strategy. We will find an out of bounds on the left side, so from the tee we will try to secure the fairway to have a comfortable shot to the green. The start for the hardest hiters is penalized by bunkers in the rough. It is important to be well positioned at the start, because we find ourselves with a very high and undulating green, with a large slope that divides it into two platforms. Generally, we will have to play a longer club since it is an uphill shot, but always trying to stay under the flag as the speed of the downhill putt can be incredibly fast.

Handicap: 16
Whites: 180
Yellows: 166
Blues: 149
Reds: 140
Oranges: 132
Long, downhill Par 3 with a very long green, but not that wide. Club decision making is important here since it can vary up to 1 or 2 clubs depending on the pin position. The green is protected by bunkers on both sides. The wind typically swirls around on this hole, so it can be hard to tell on which direction it is blowing.
Handicap: 2
Whites: 386
Yellows: 371
Blues: 331
Reds: 327
Oranges: 234


Par 4 downhill with pine trees on both sides of the fairway. From the yellow and white tees, we will find a blind shot that requires going over an out of bounds. The hardest part of this hole is the green since it is narrow and long and is very well protected by deep bunkers on both sides. When we hit into the green we must try to stay on the right platform, in order to have an easier putt.

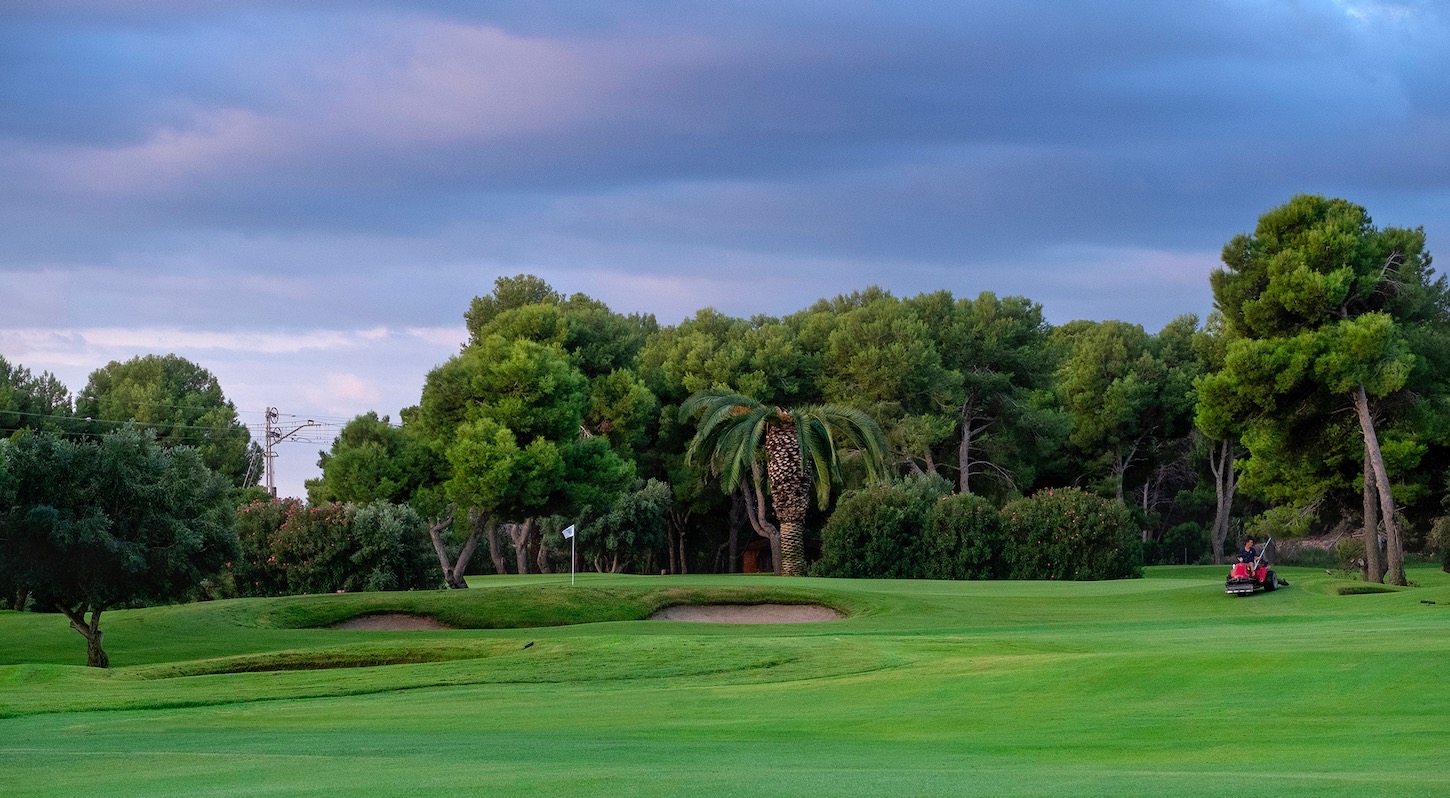
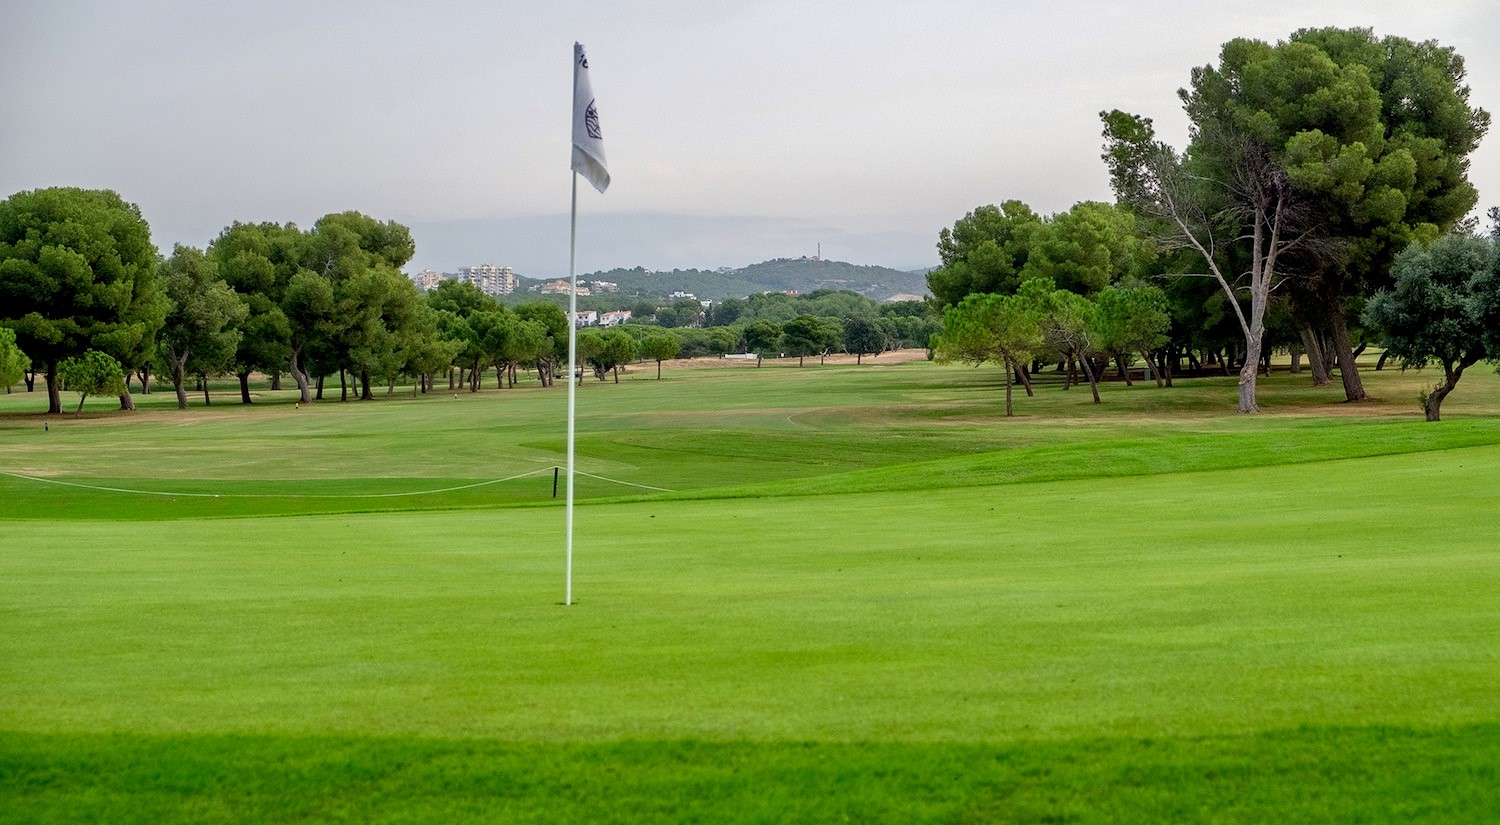
Handicap: 6
Whites: 476
Yellows: 467
Blues: 415
Reds: 410
Oranges: 346
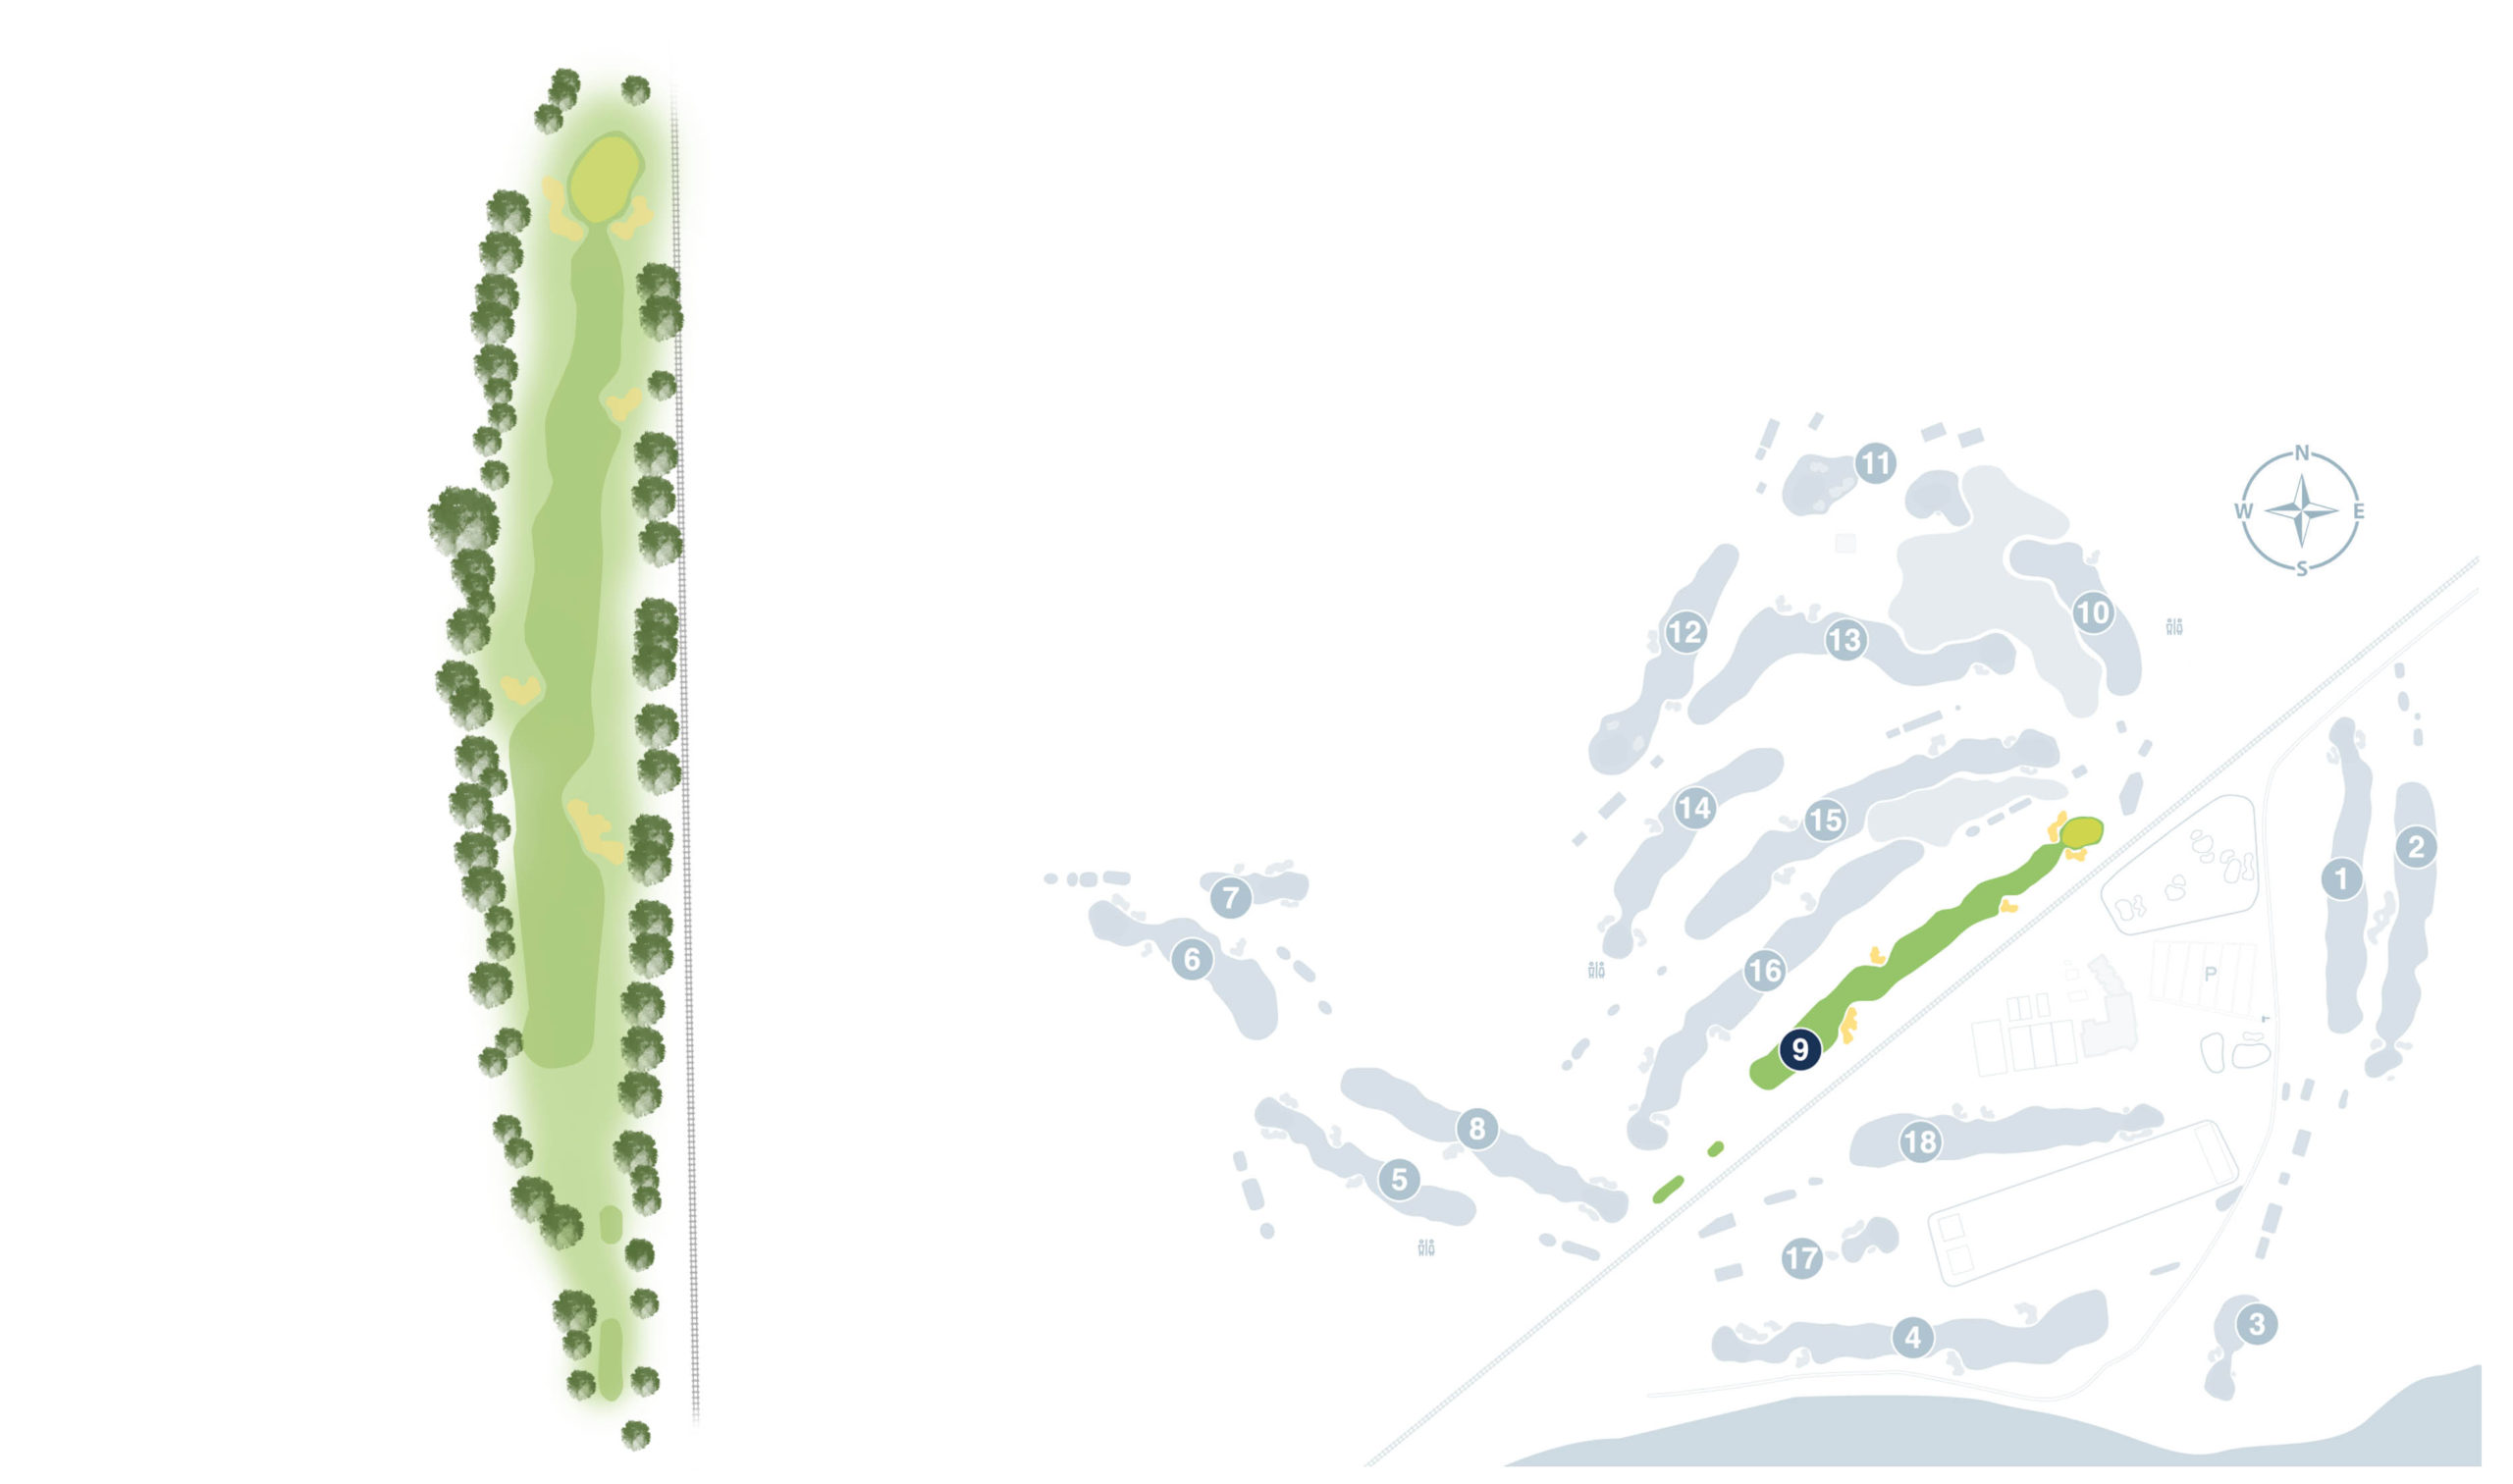
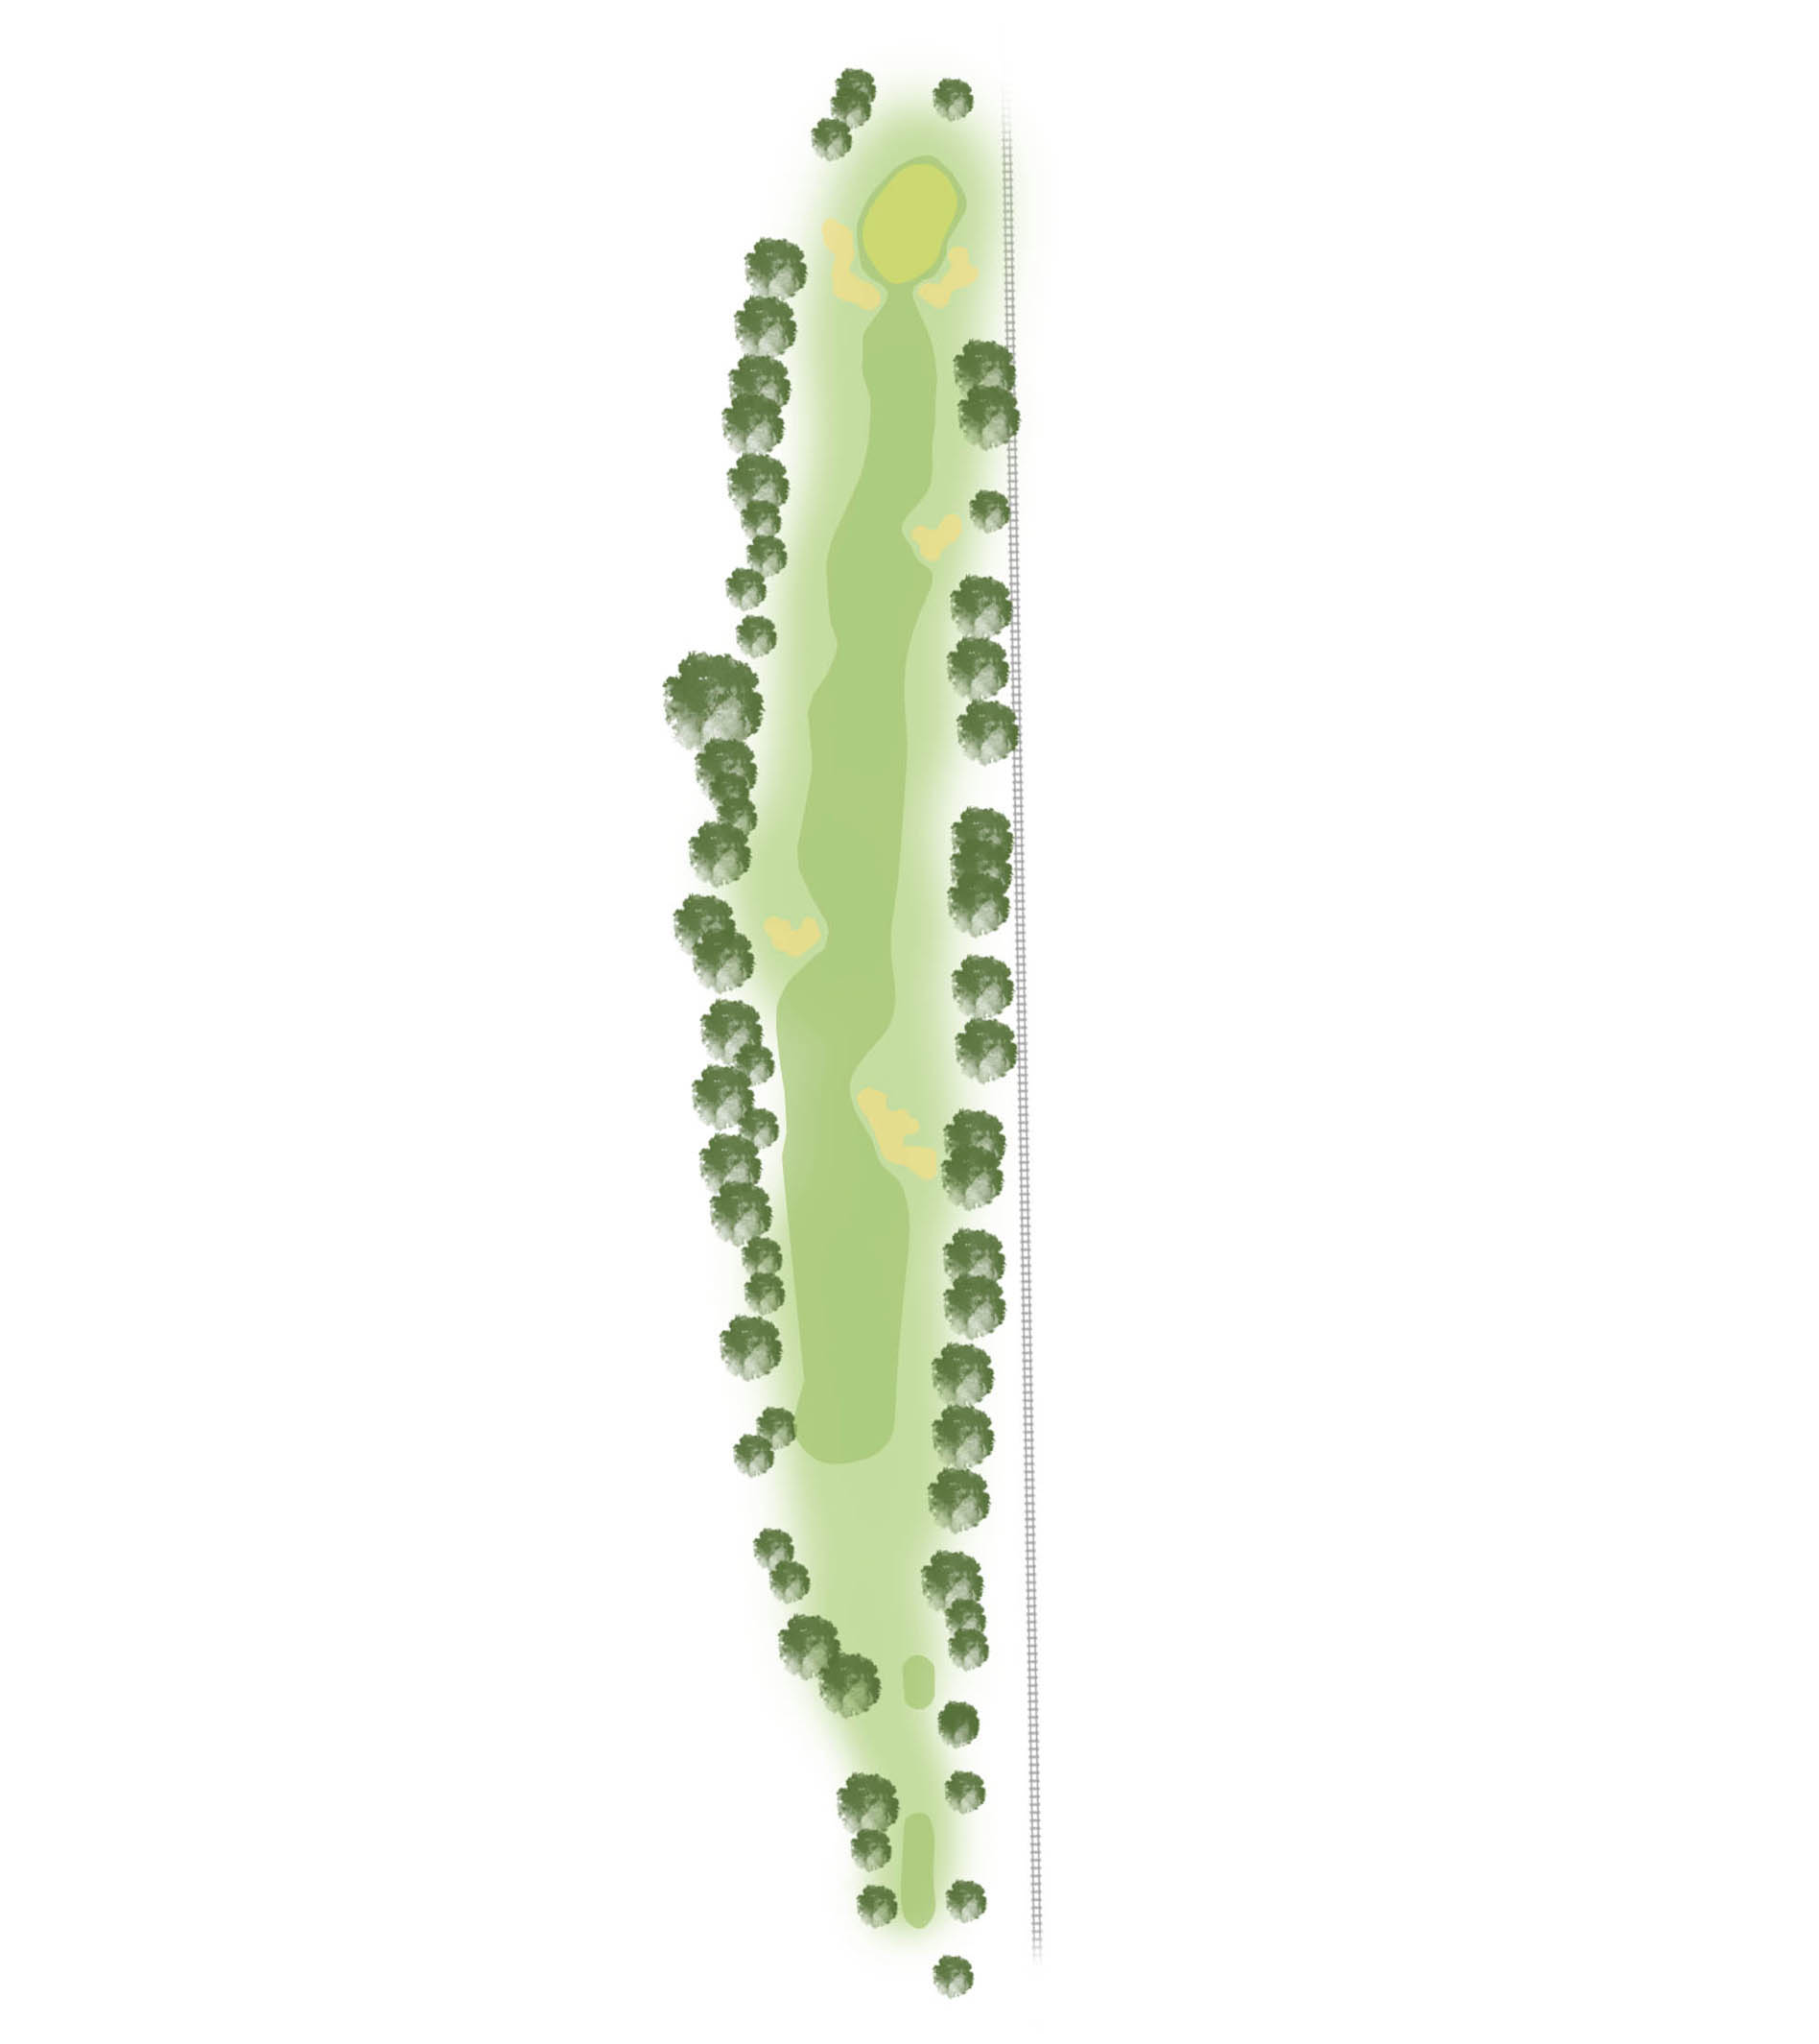
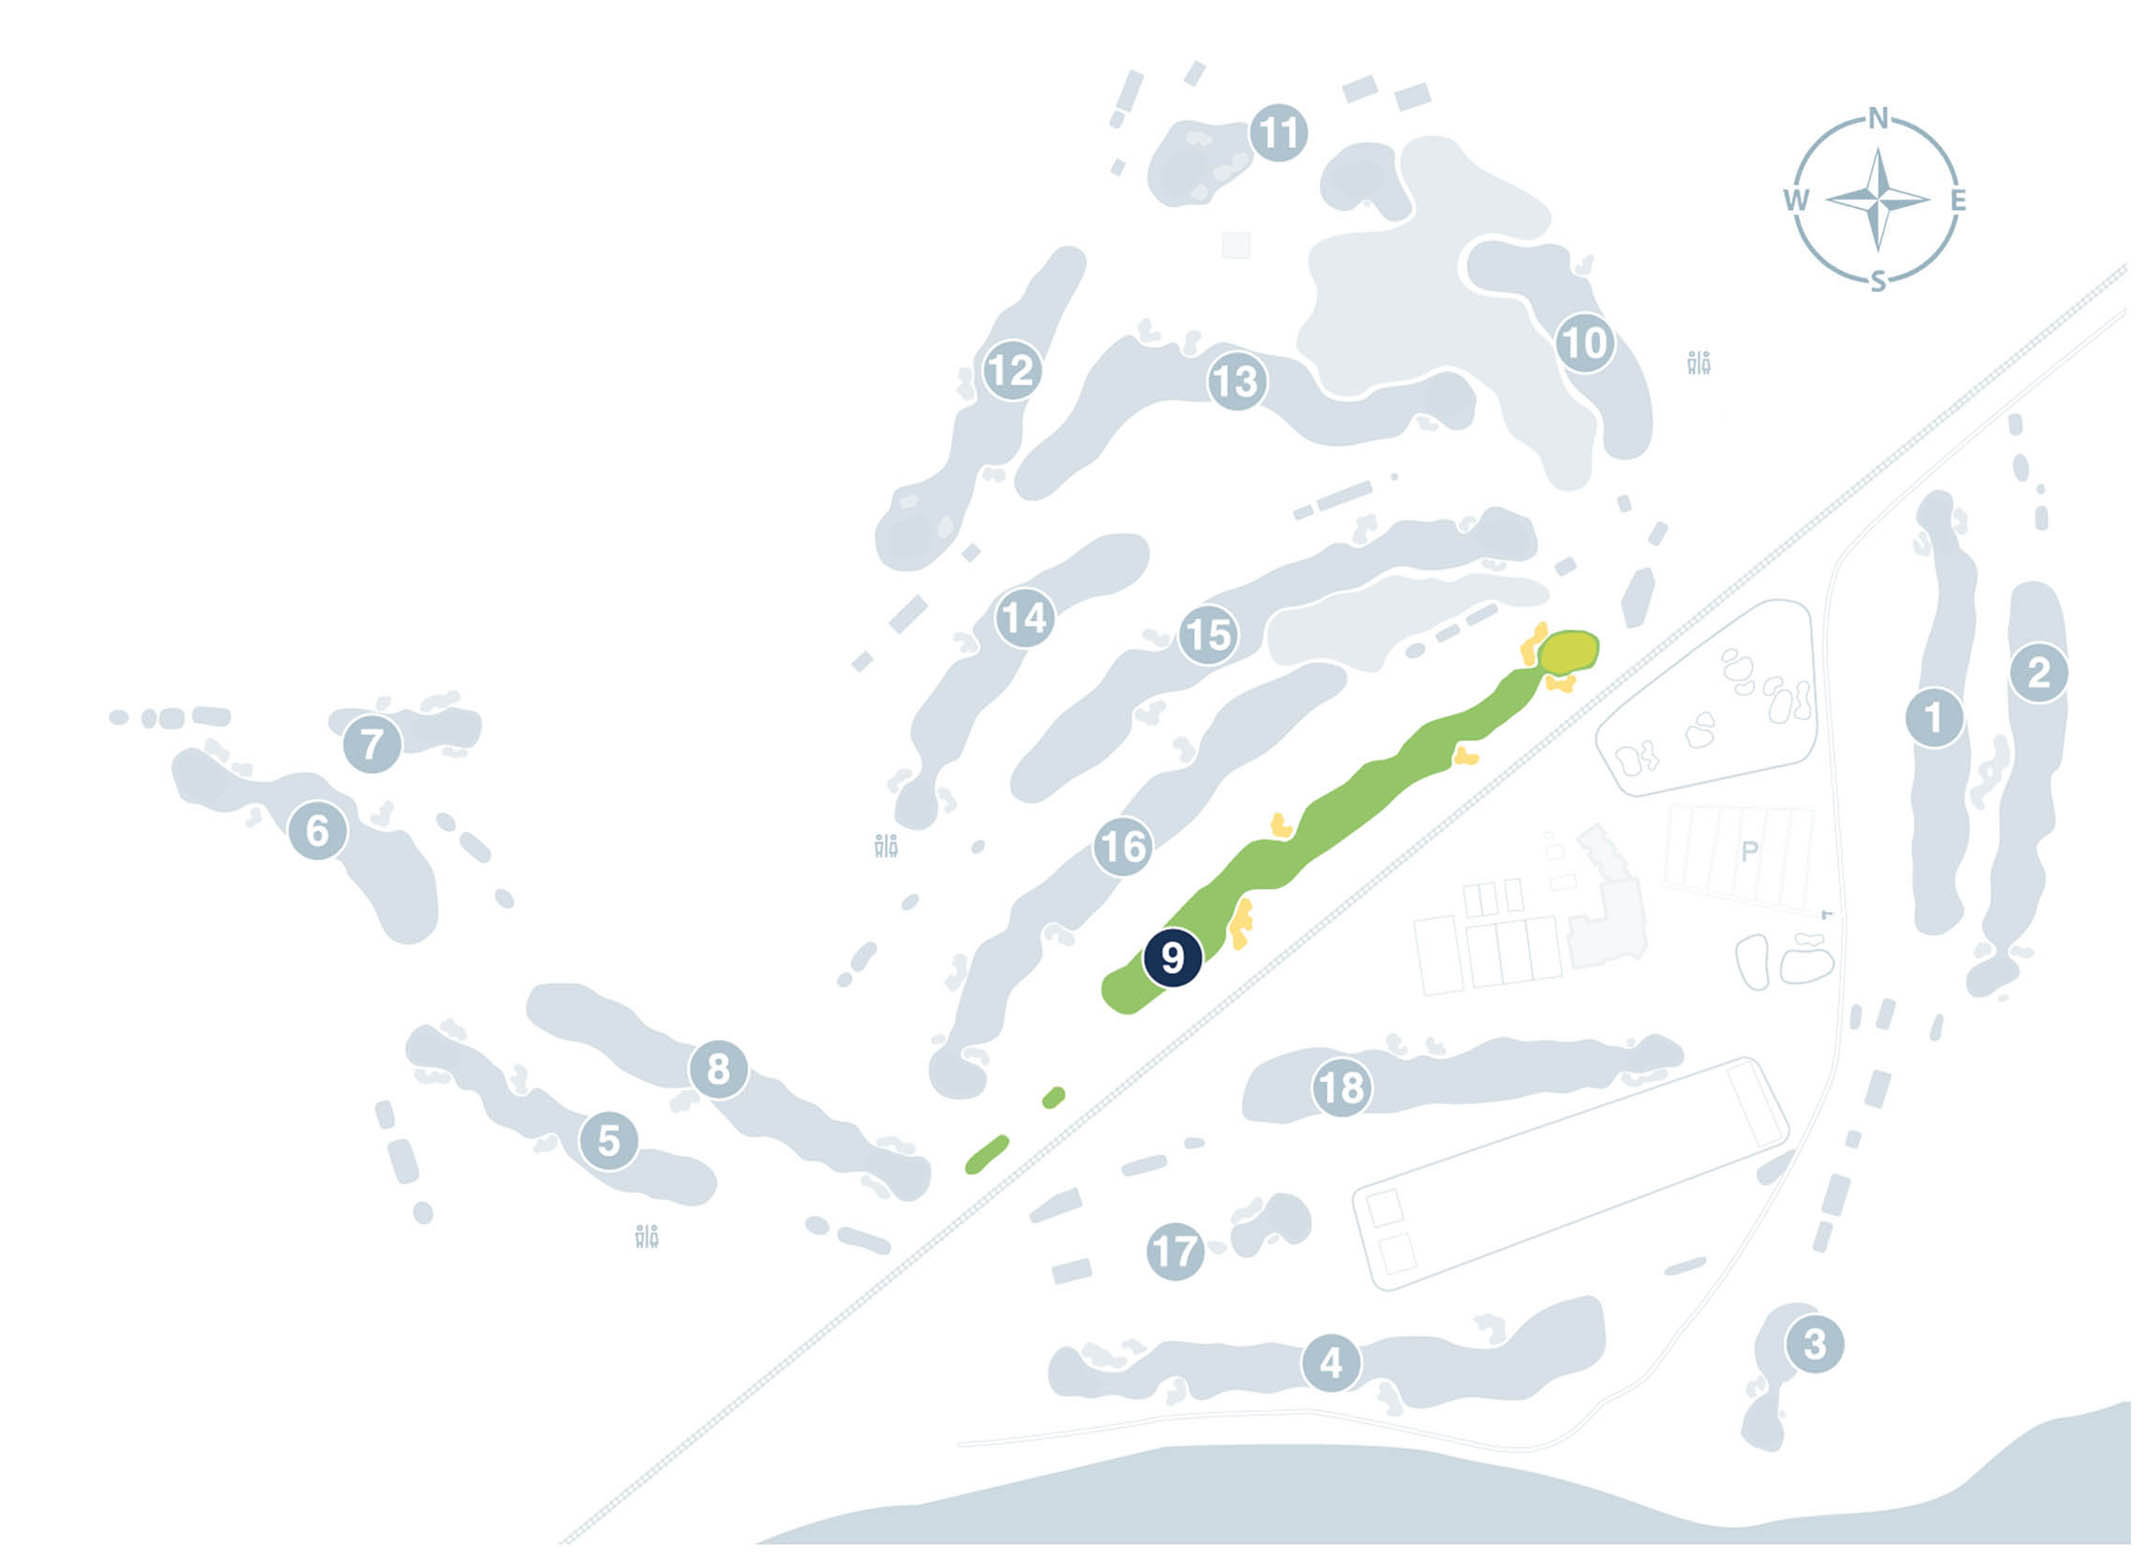
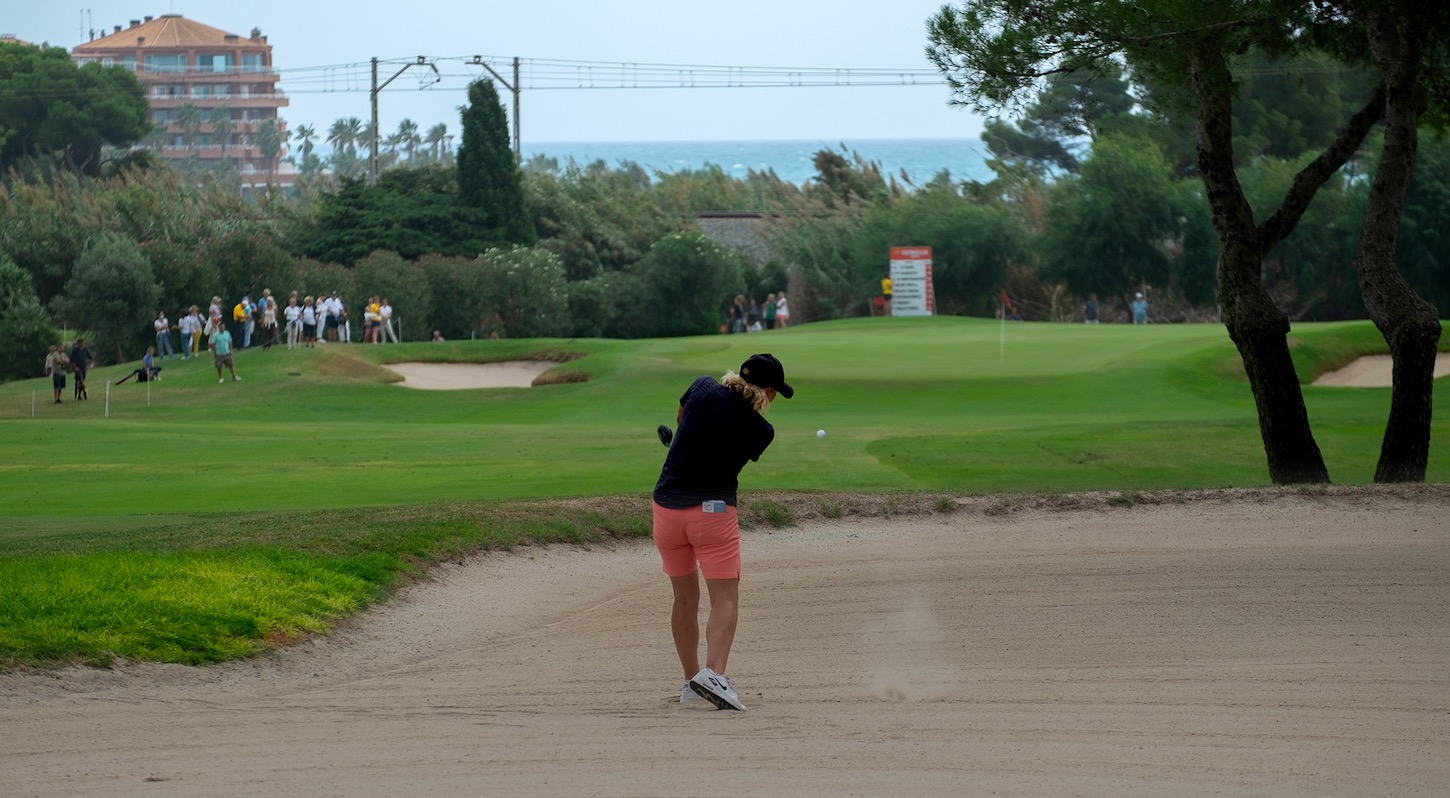
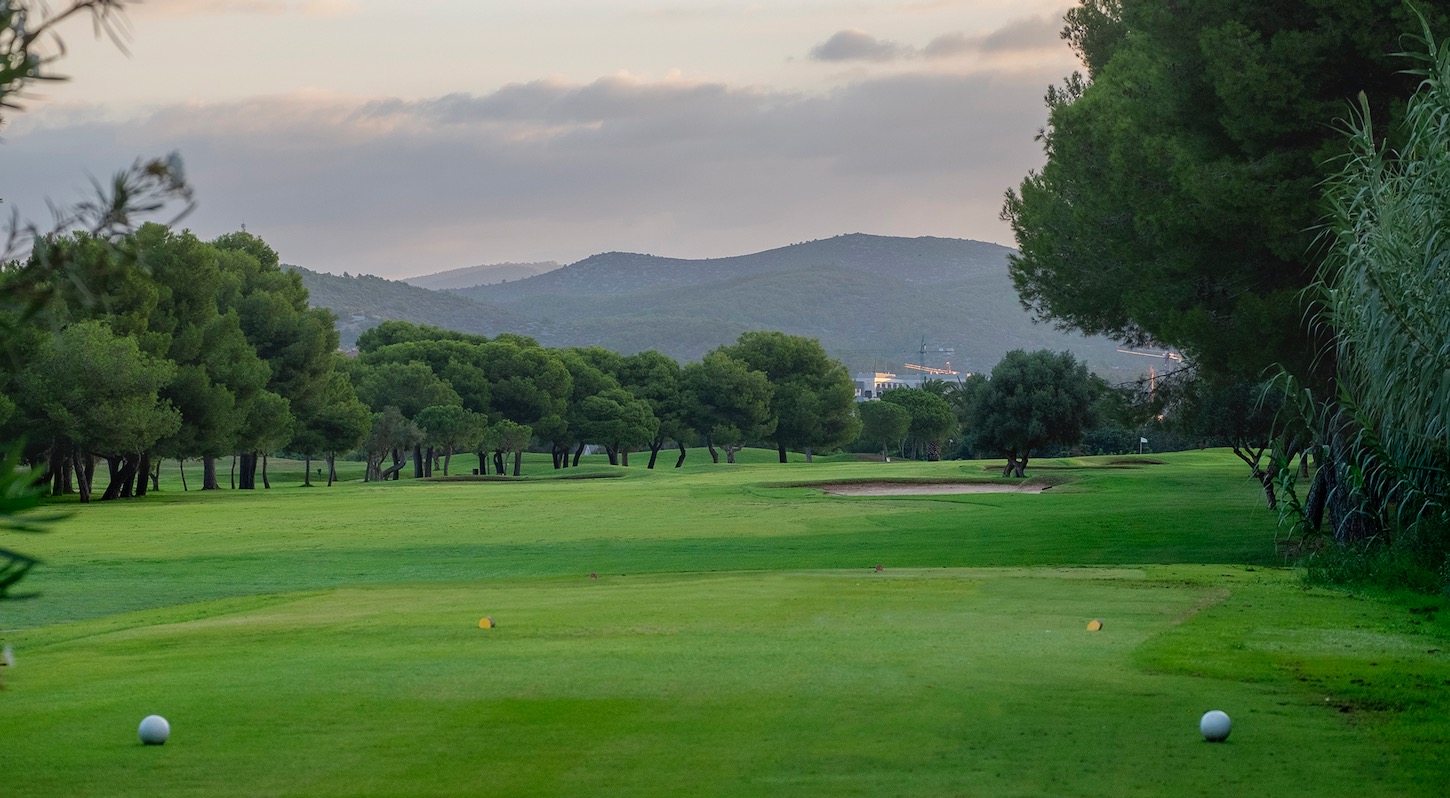
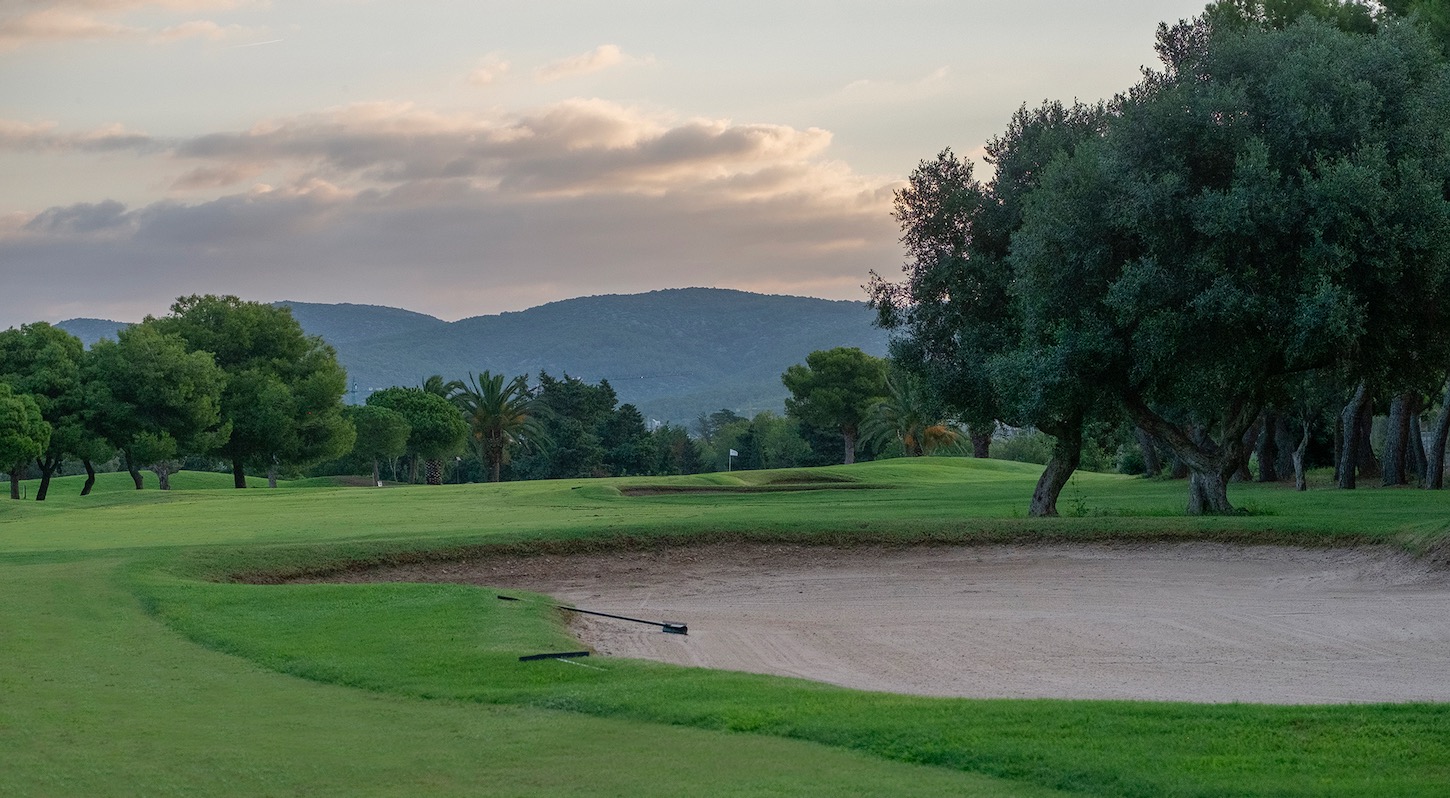
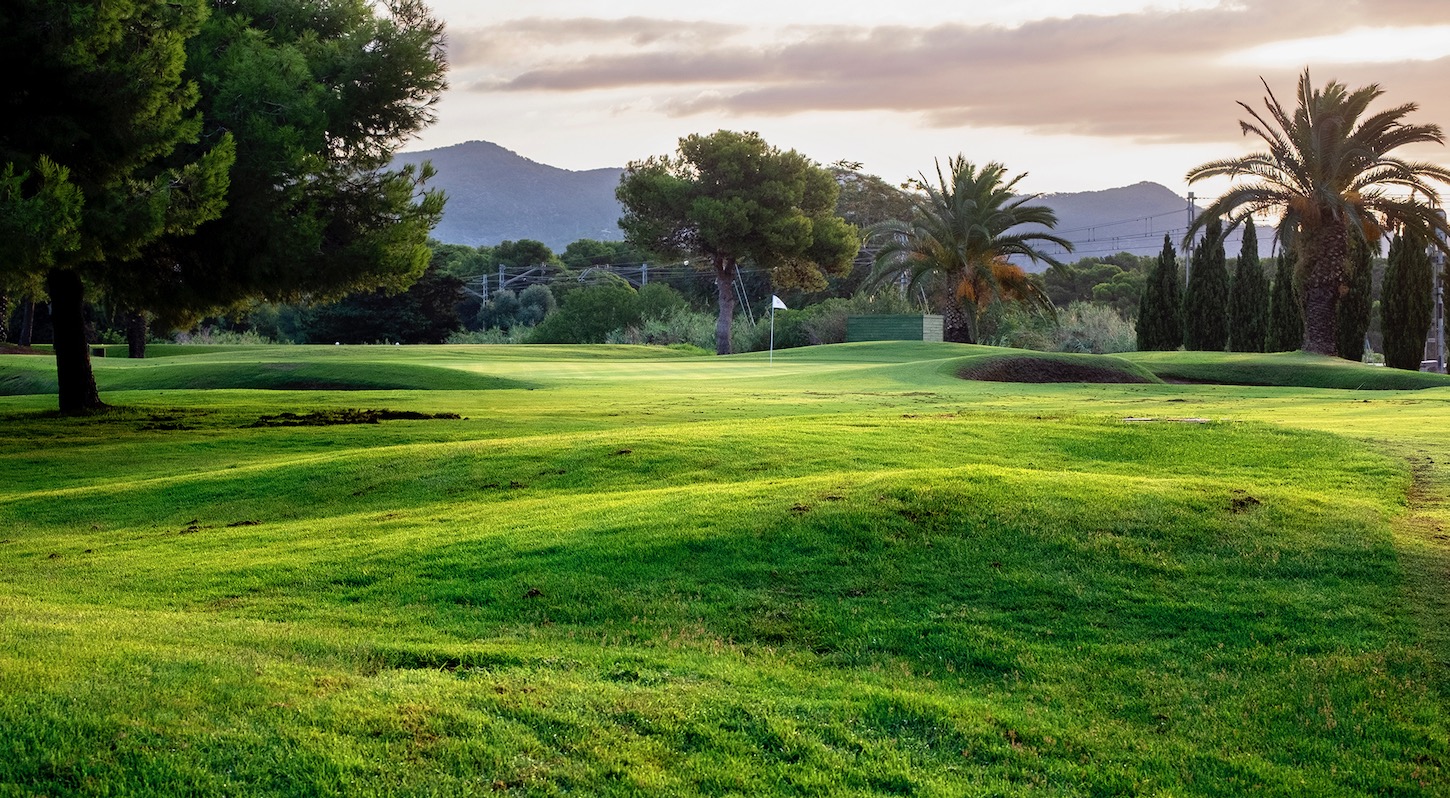
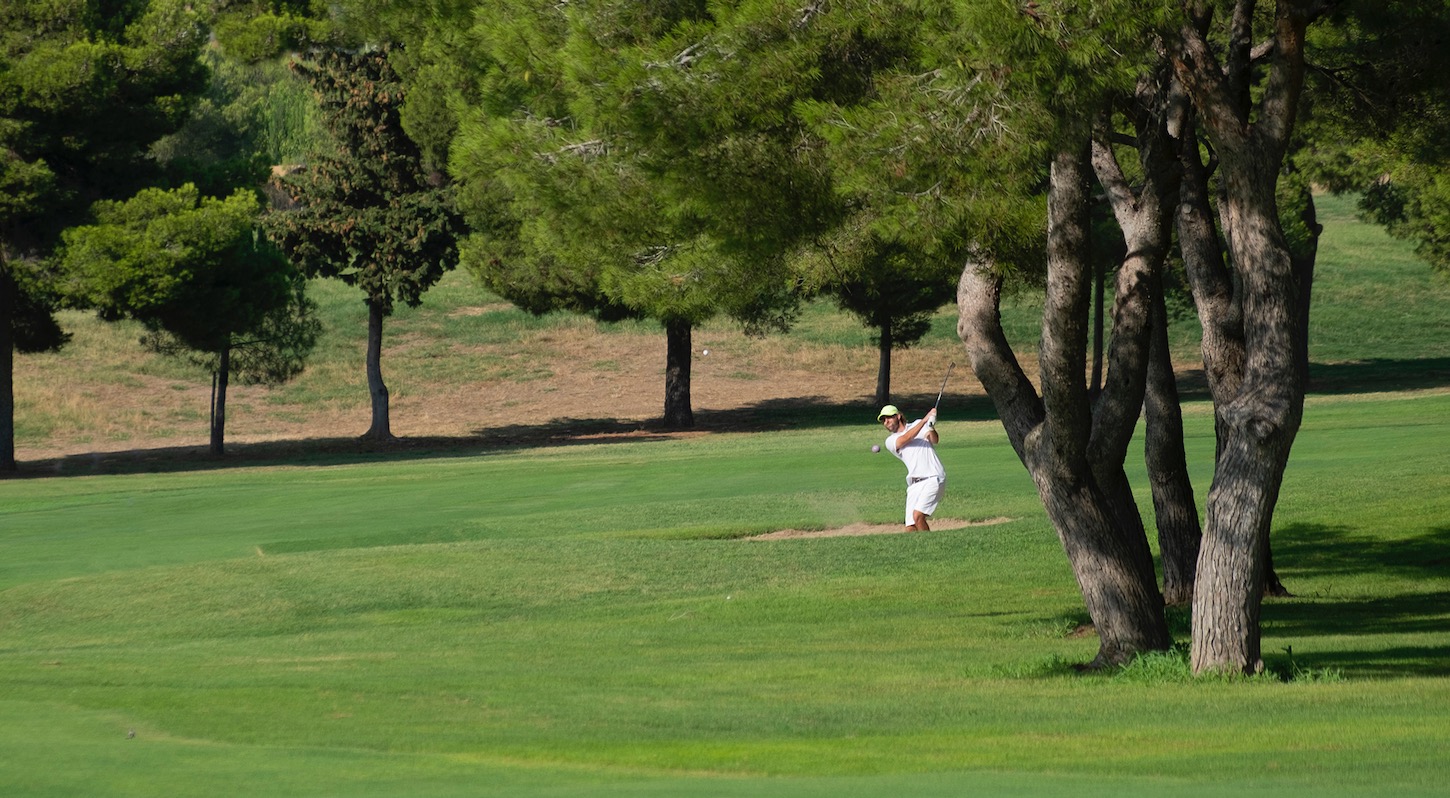
Second par 5 of the course, which we can also take advantage of as a recovery hole. It is a totally straight hole that runs parallel to the train track which is on the right side. This invites us to keep the driver from the tee on the left side of the fairway, from where we will have a better shot both to reach the green in two shots or to lay-up. The approach shot into the green will allow us to be aggressive, if we carry the bunkers. It is a very large and flat green where we can go for the birdie!

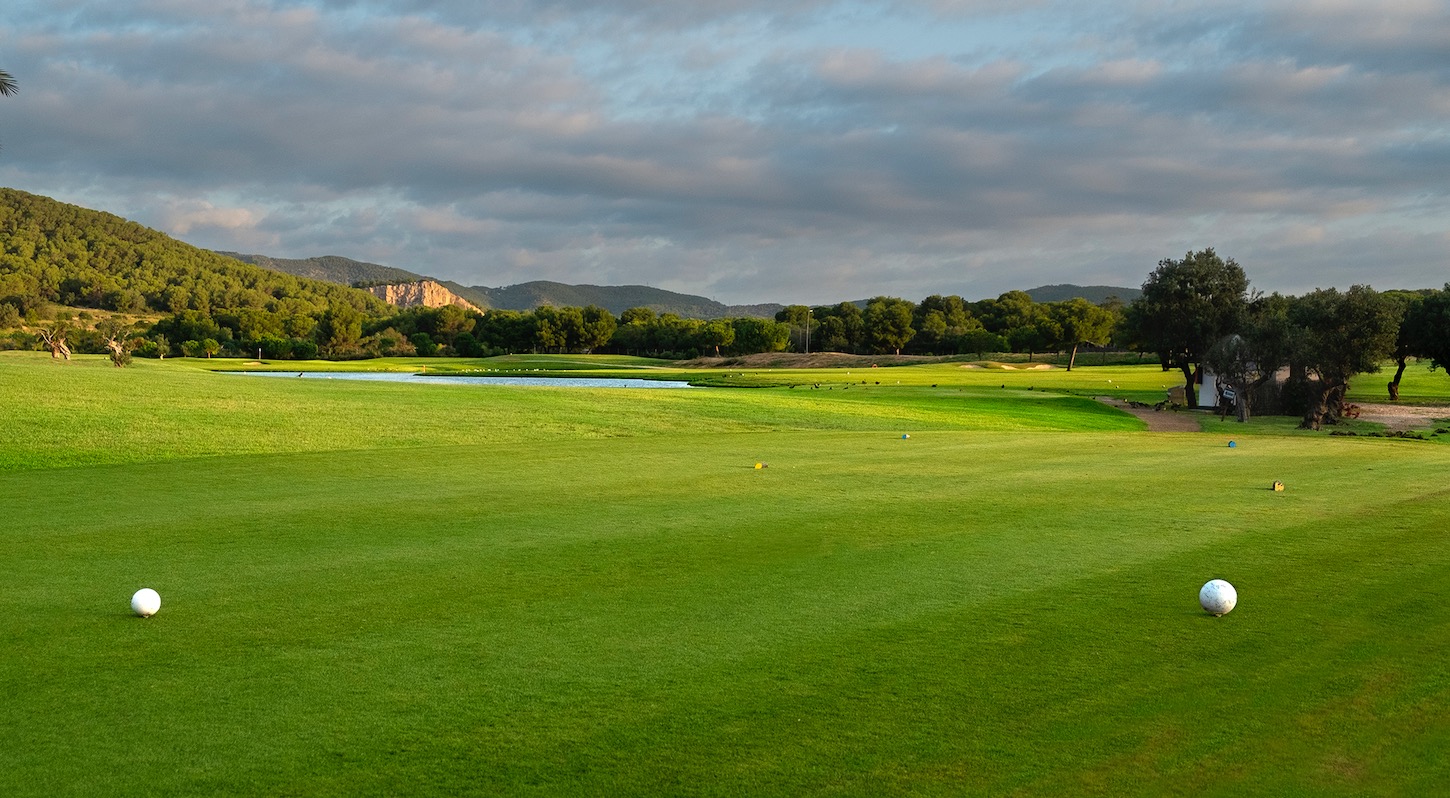
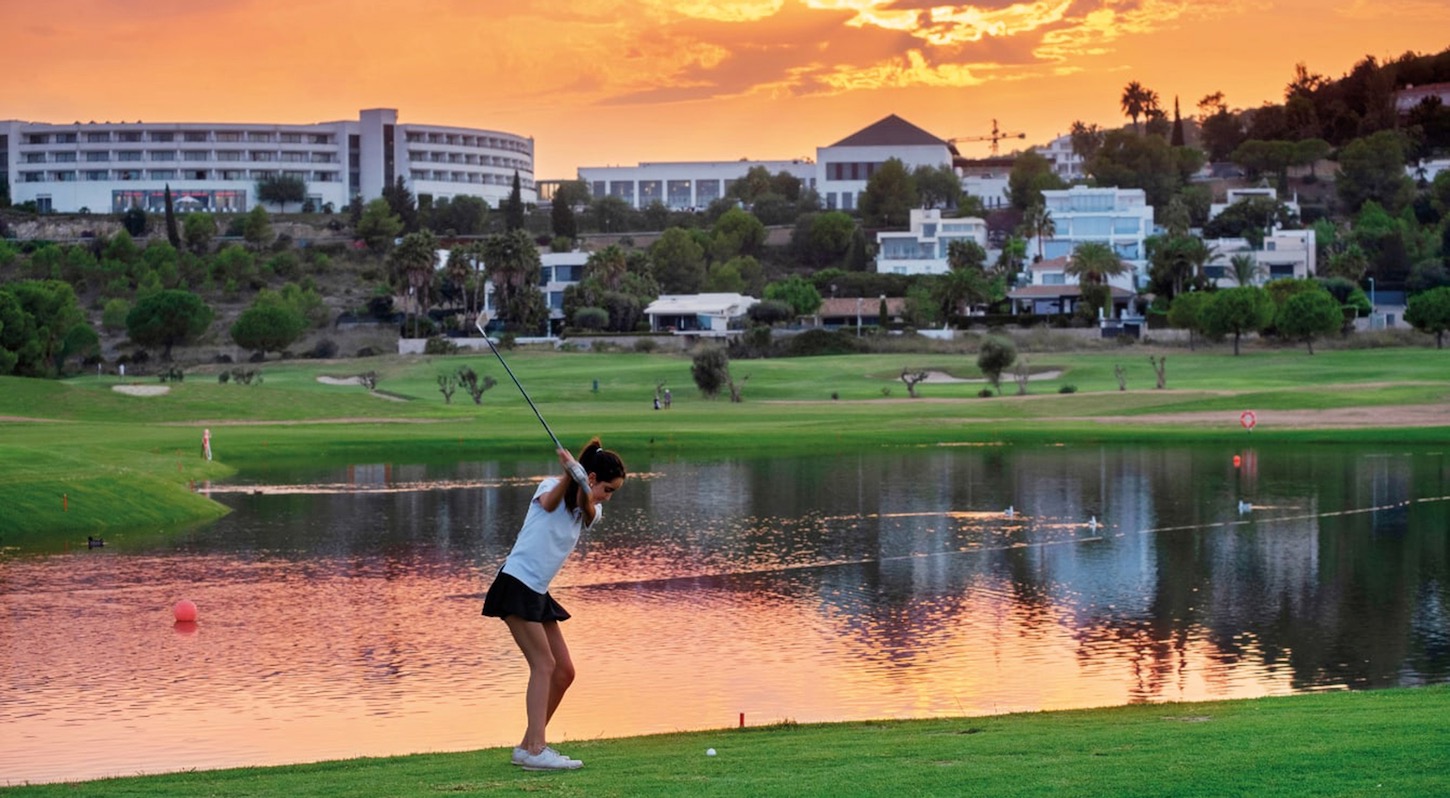
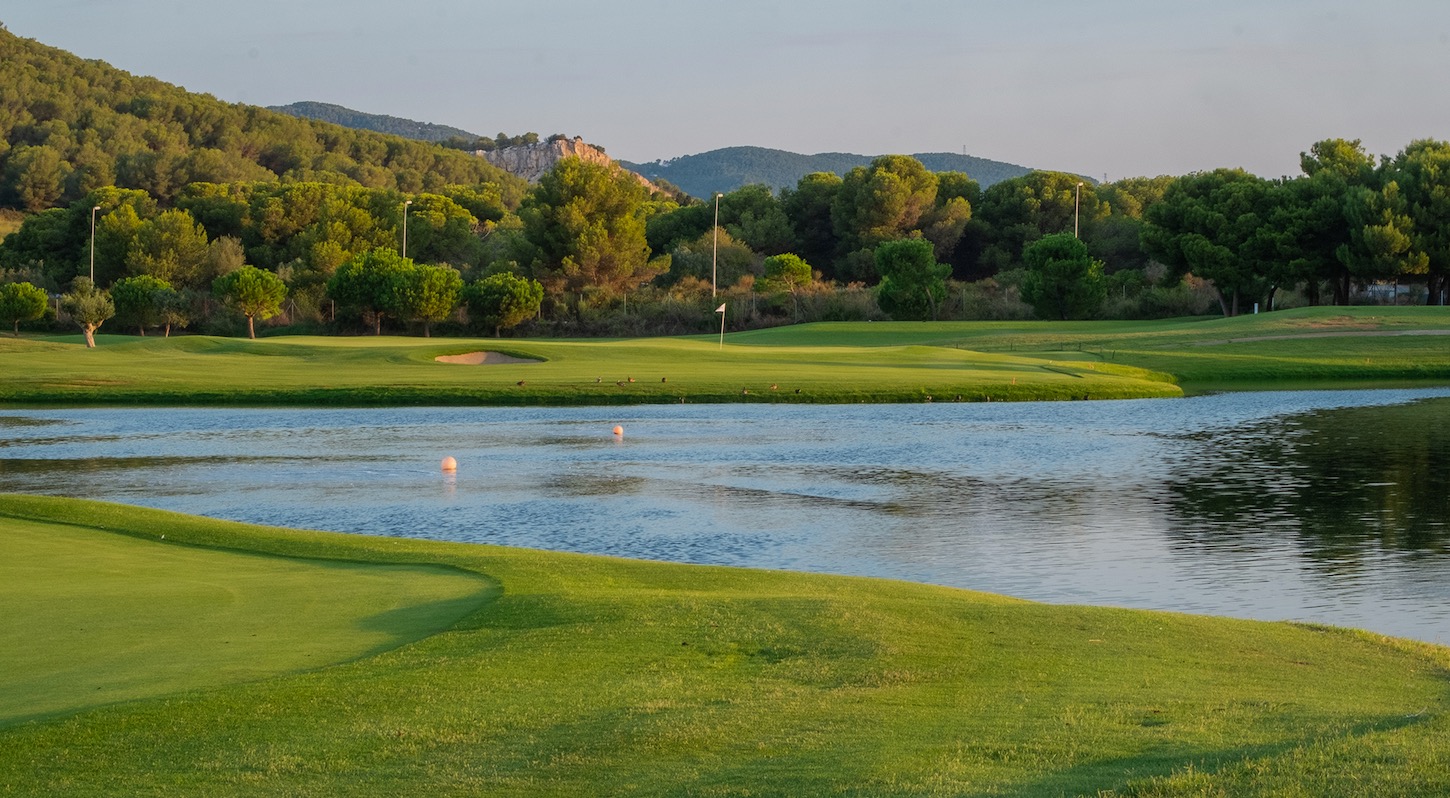
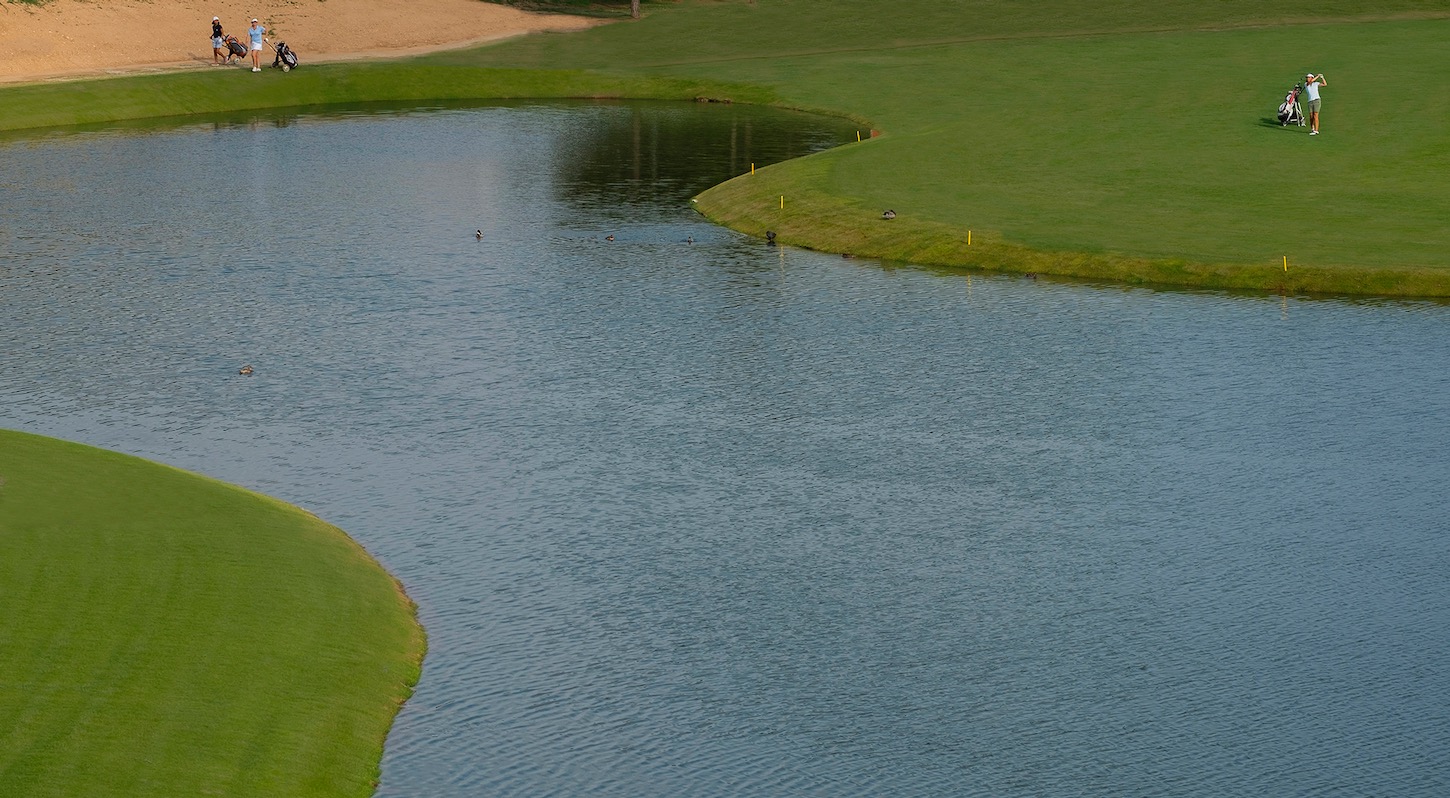
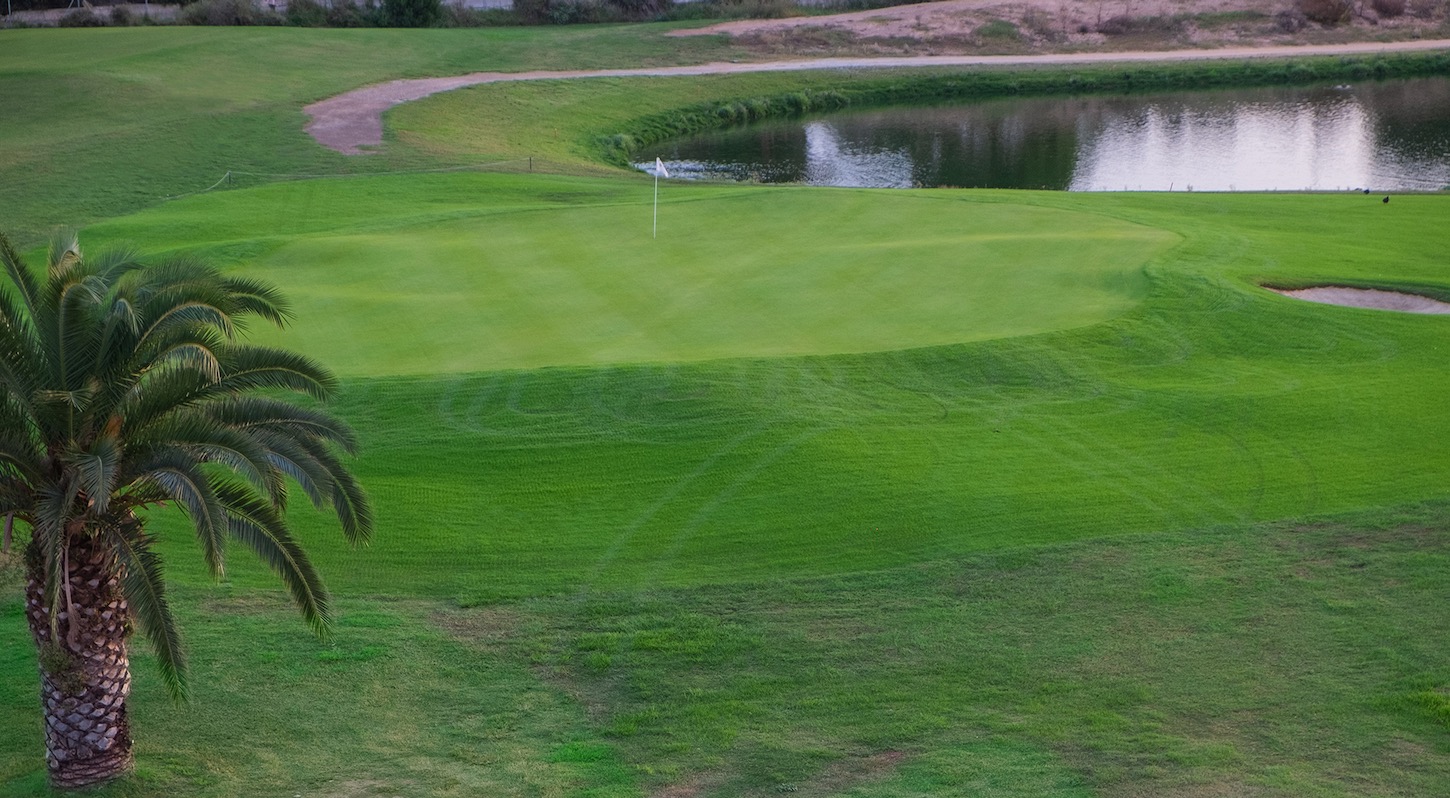
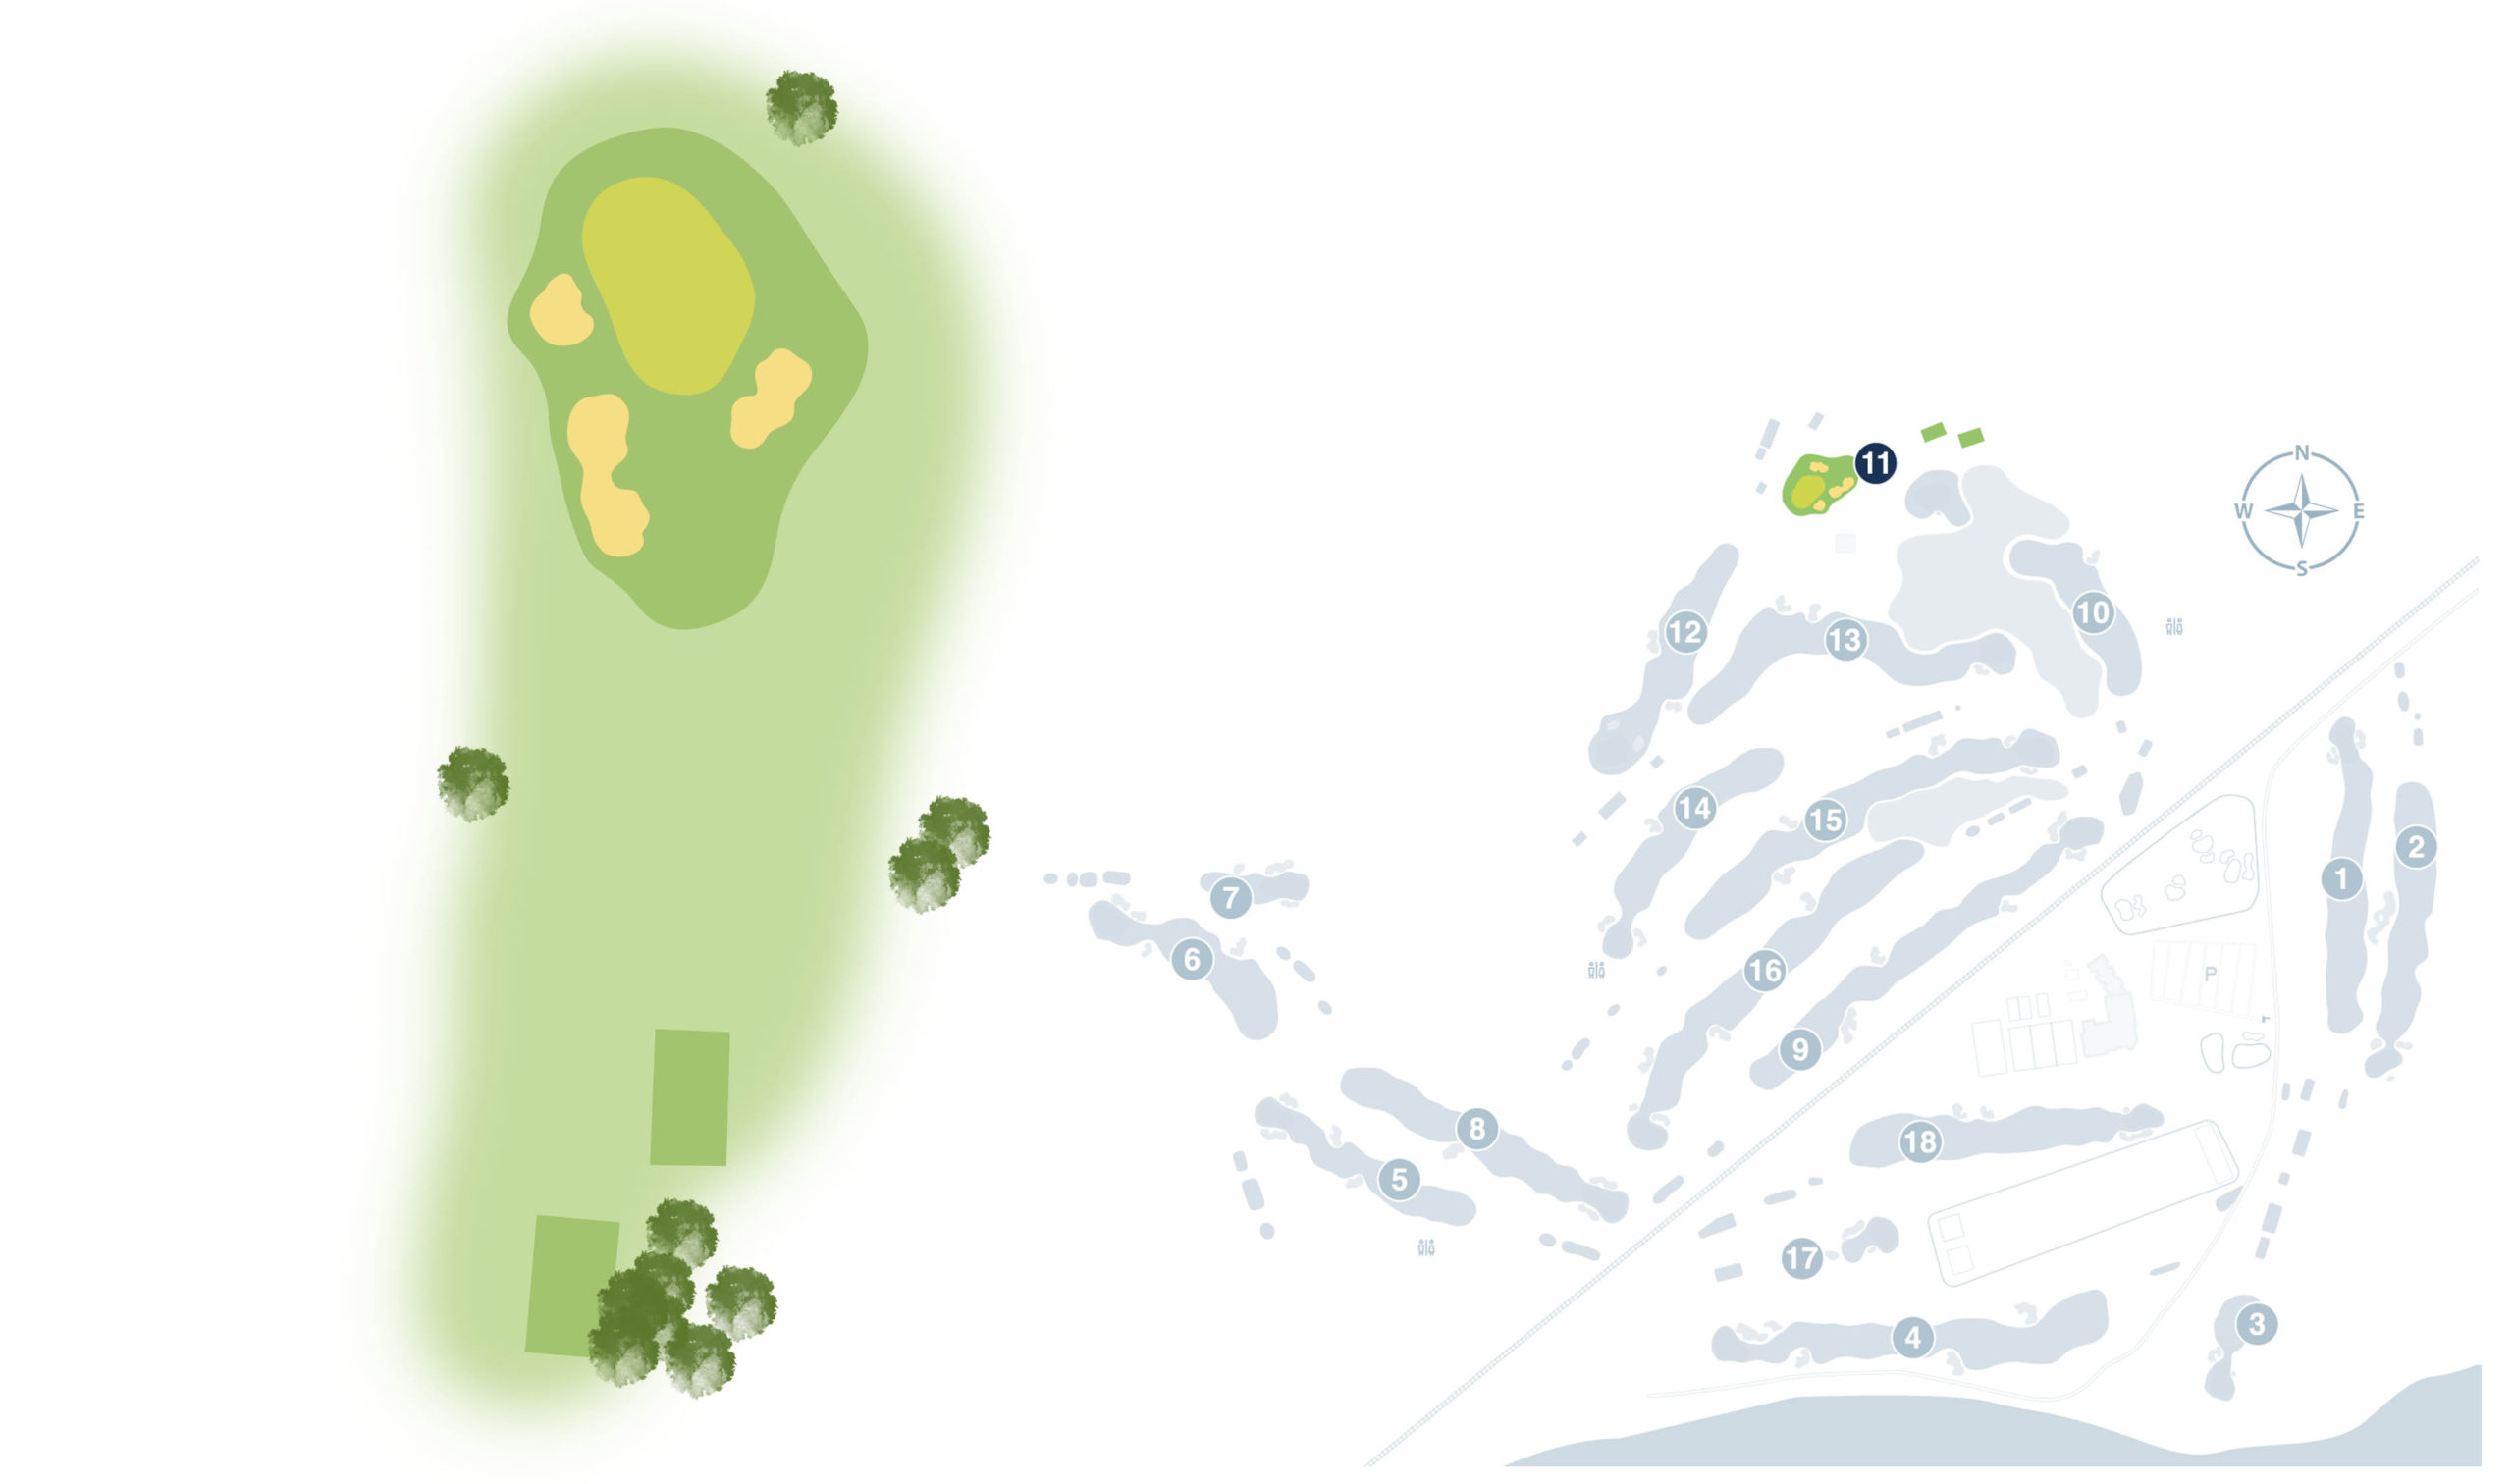
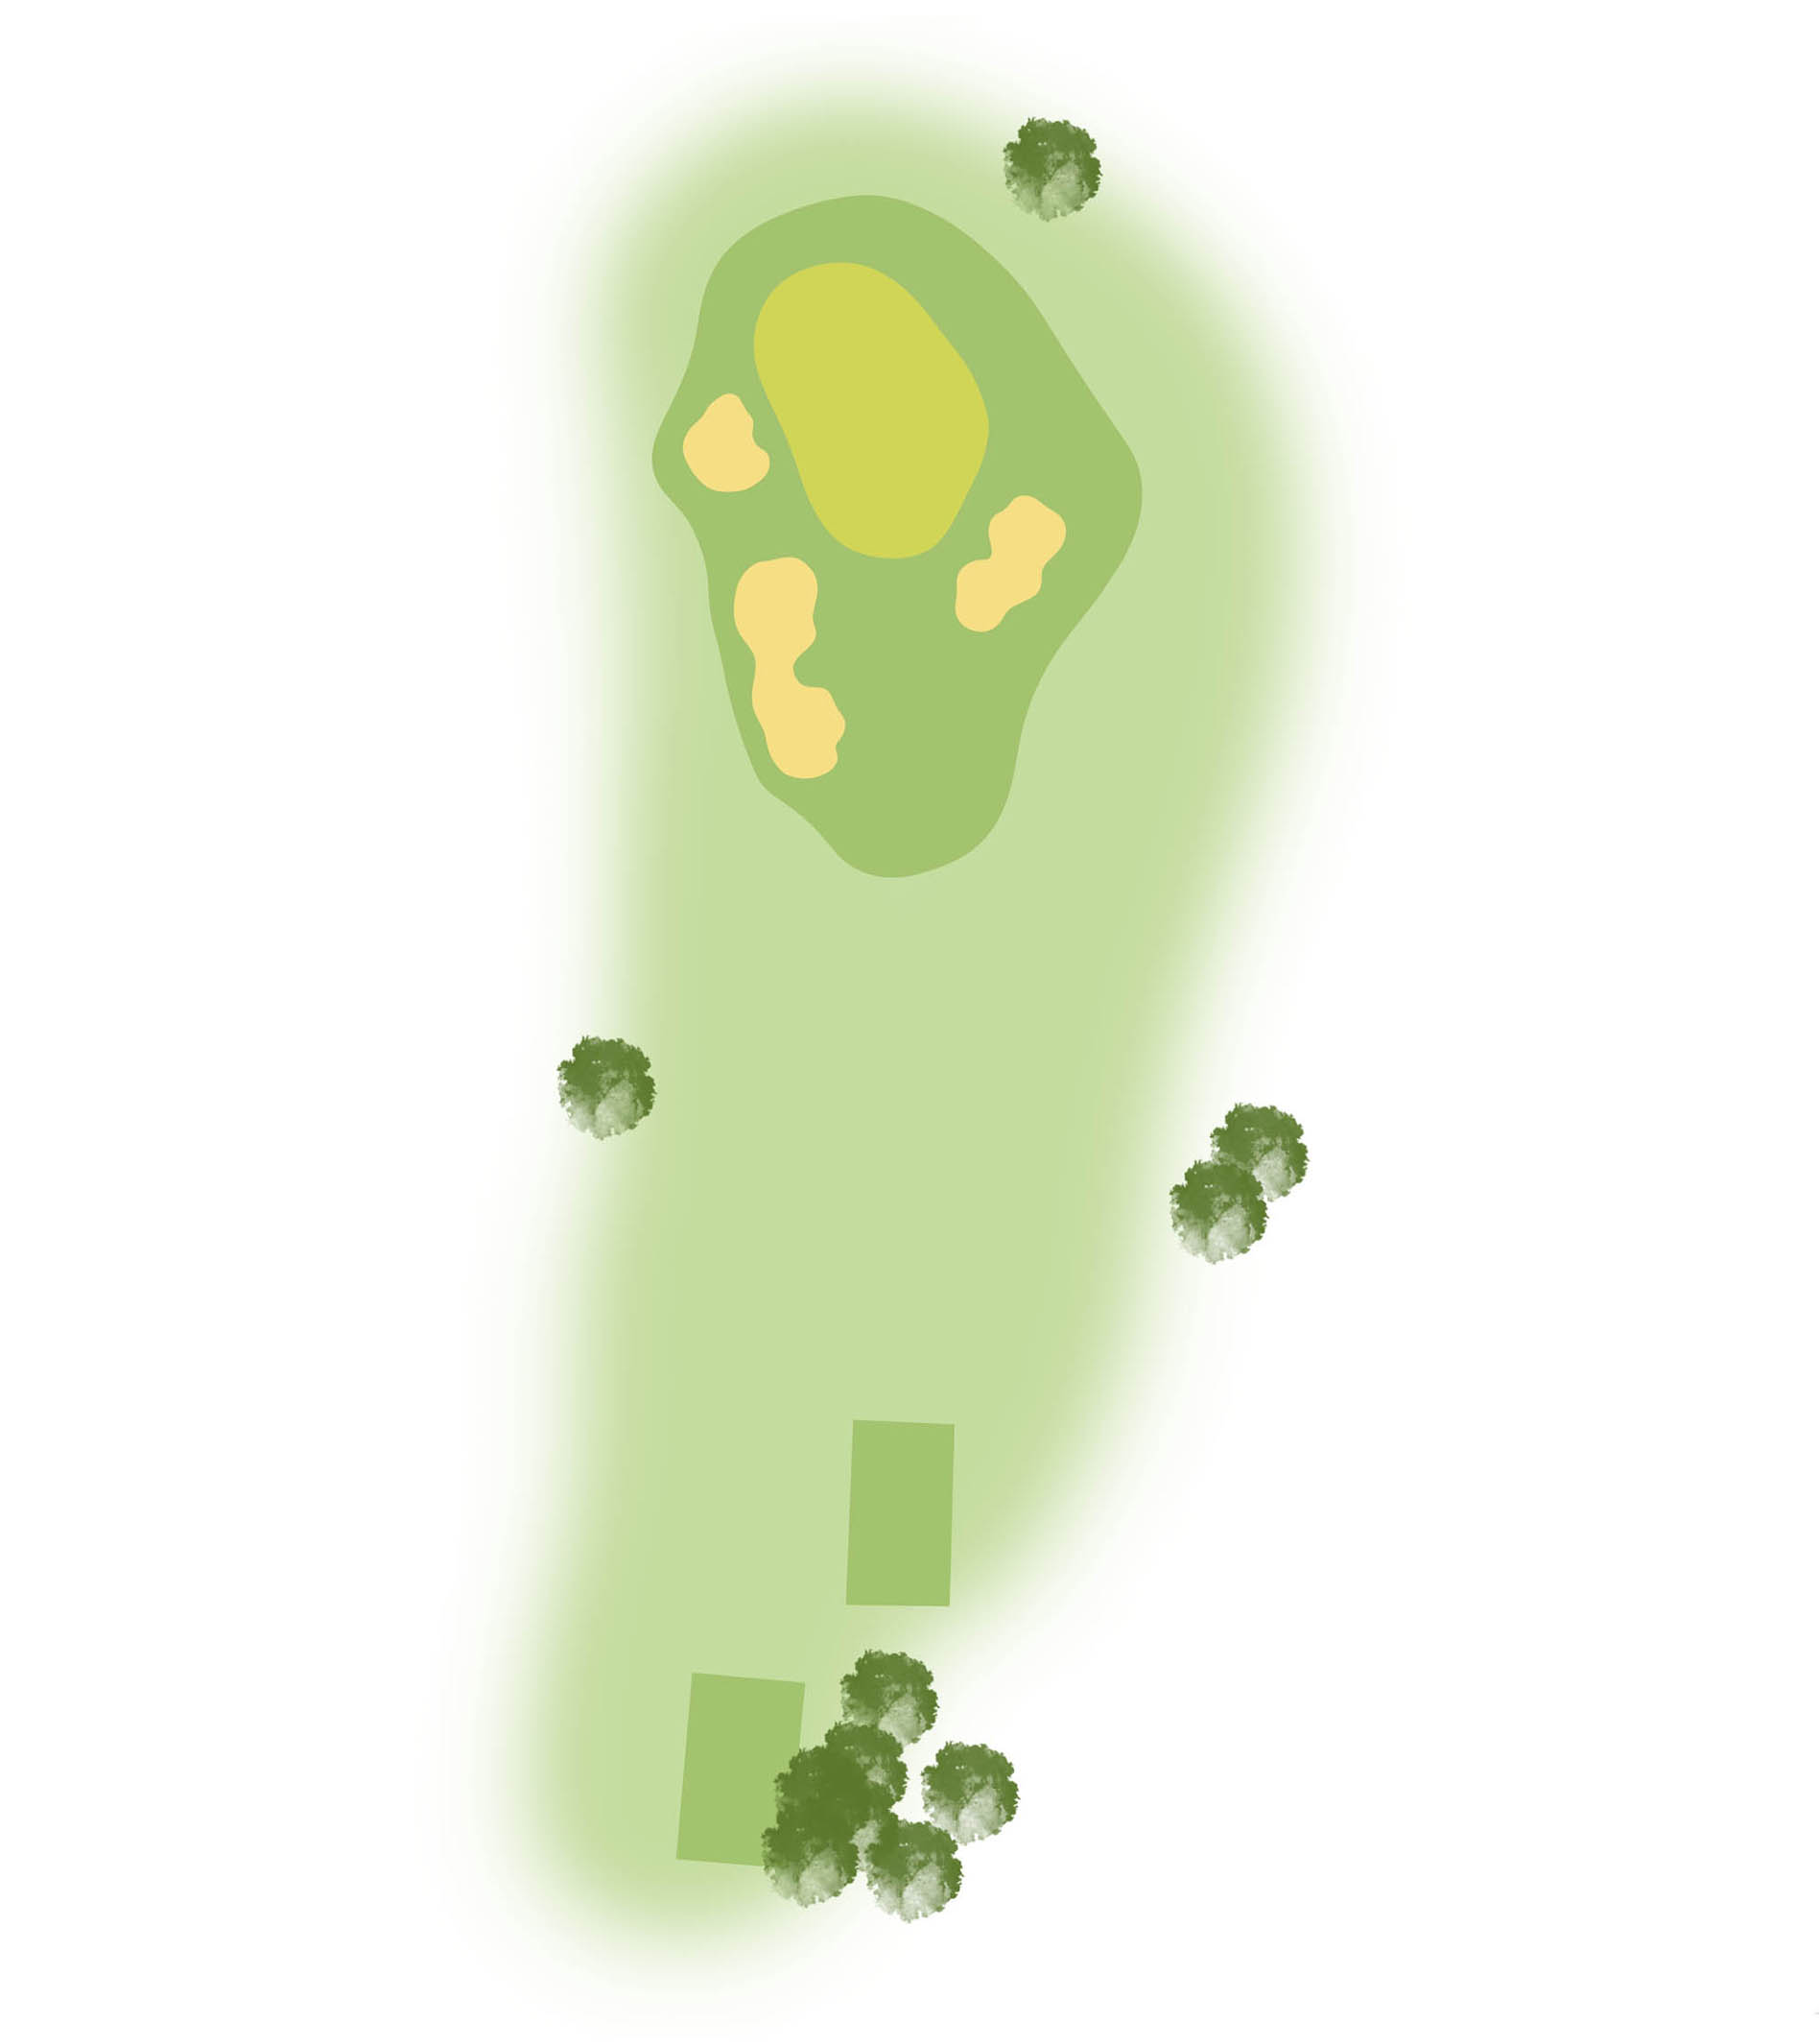
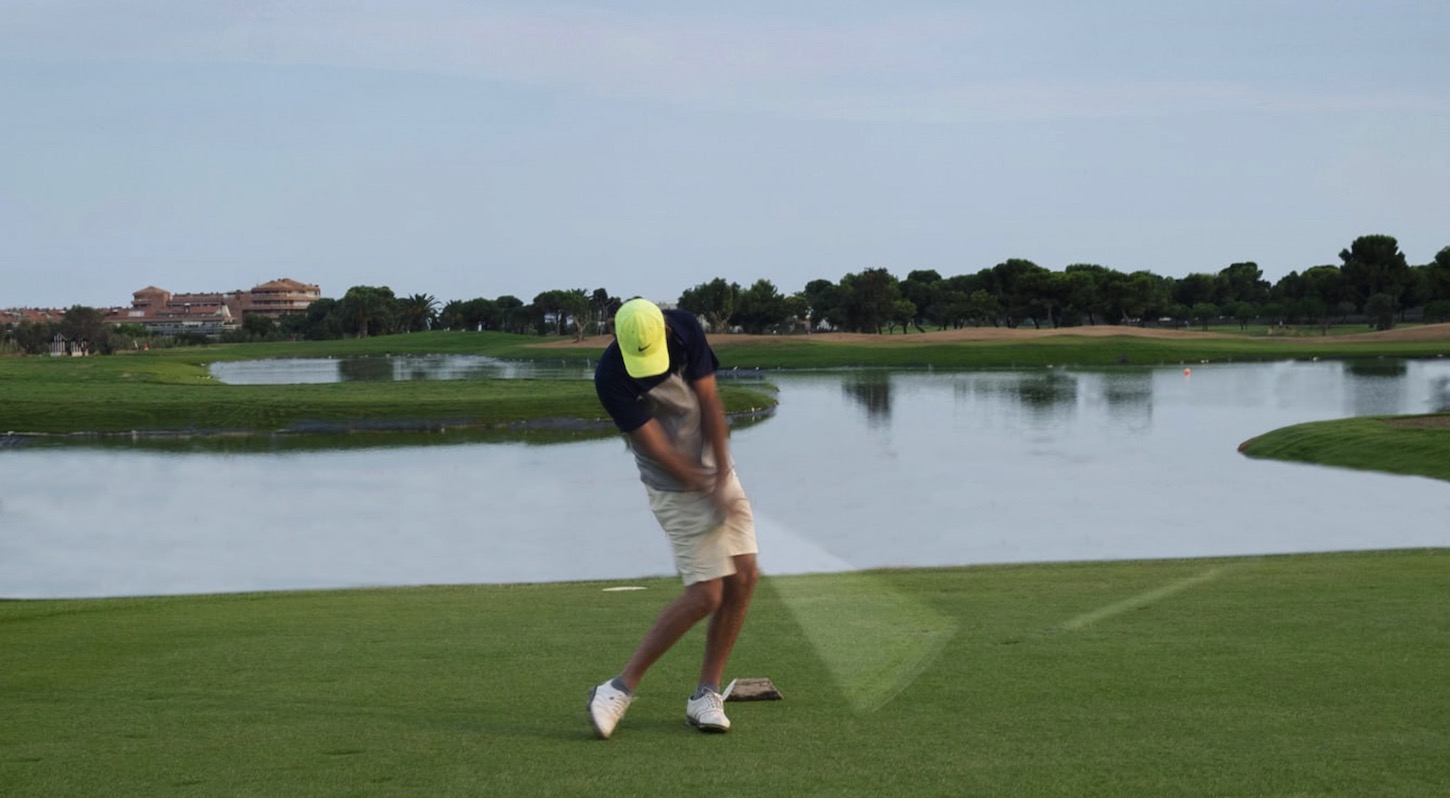
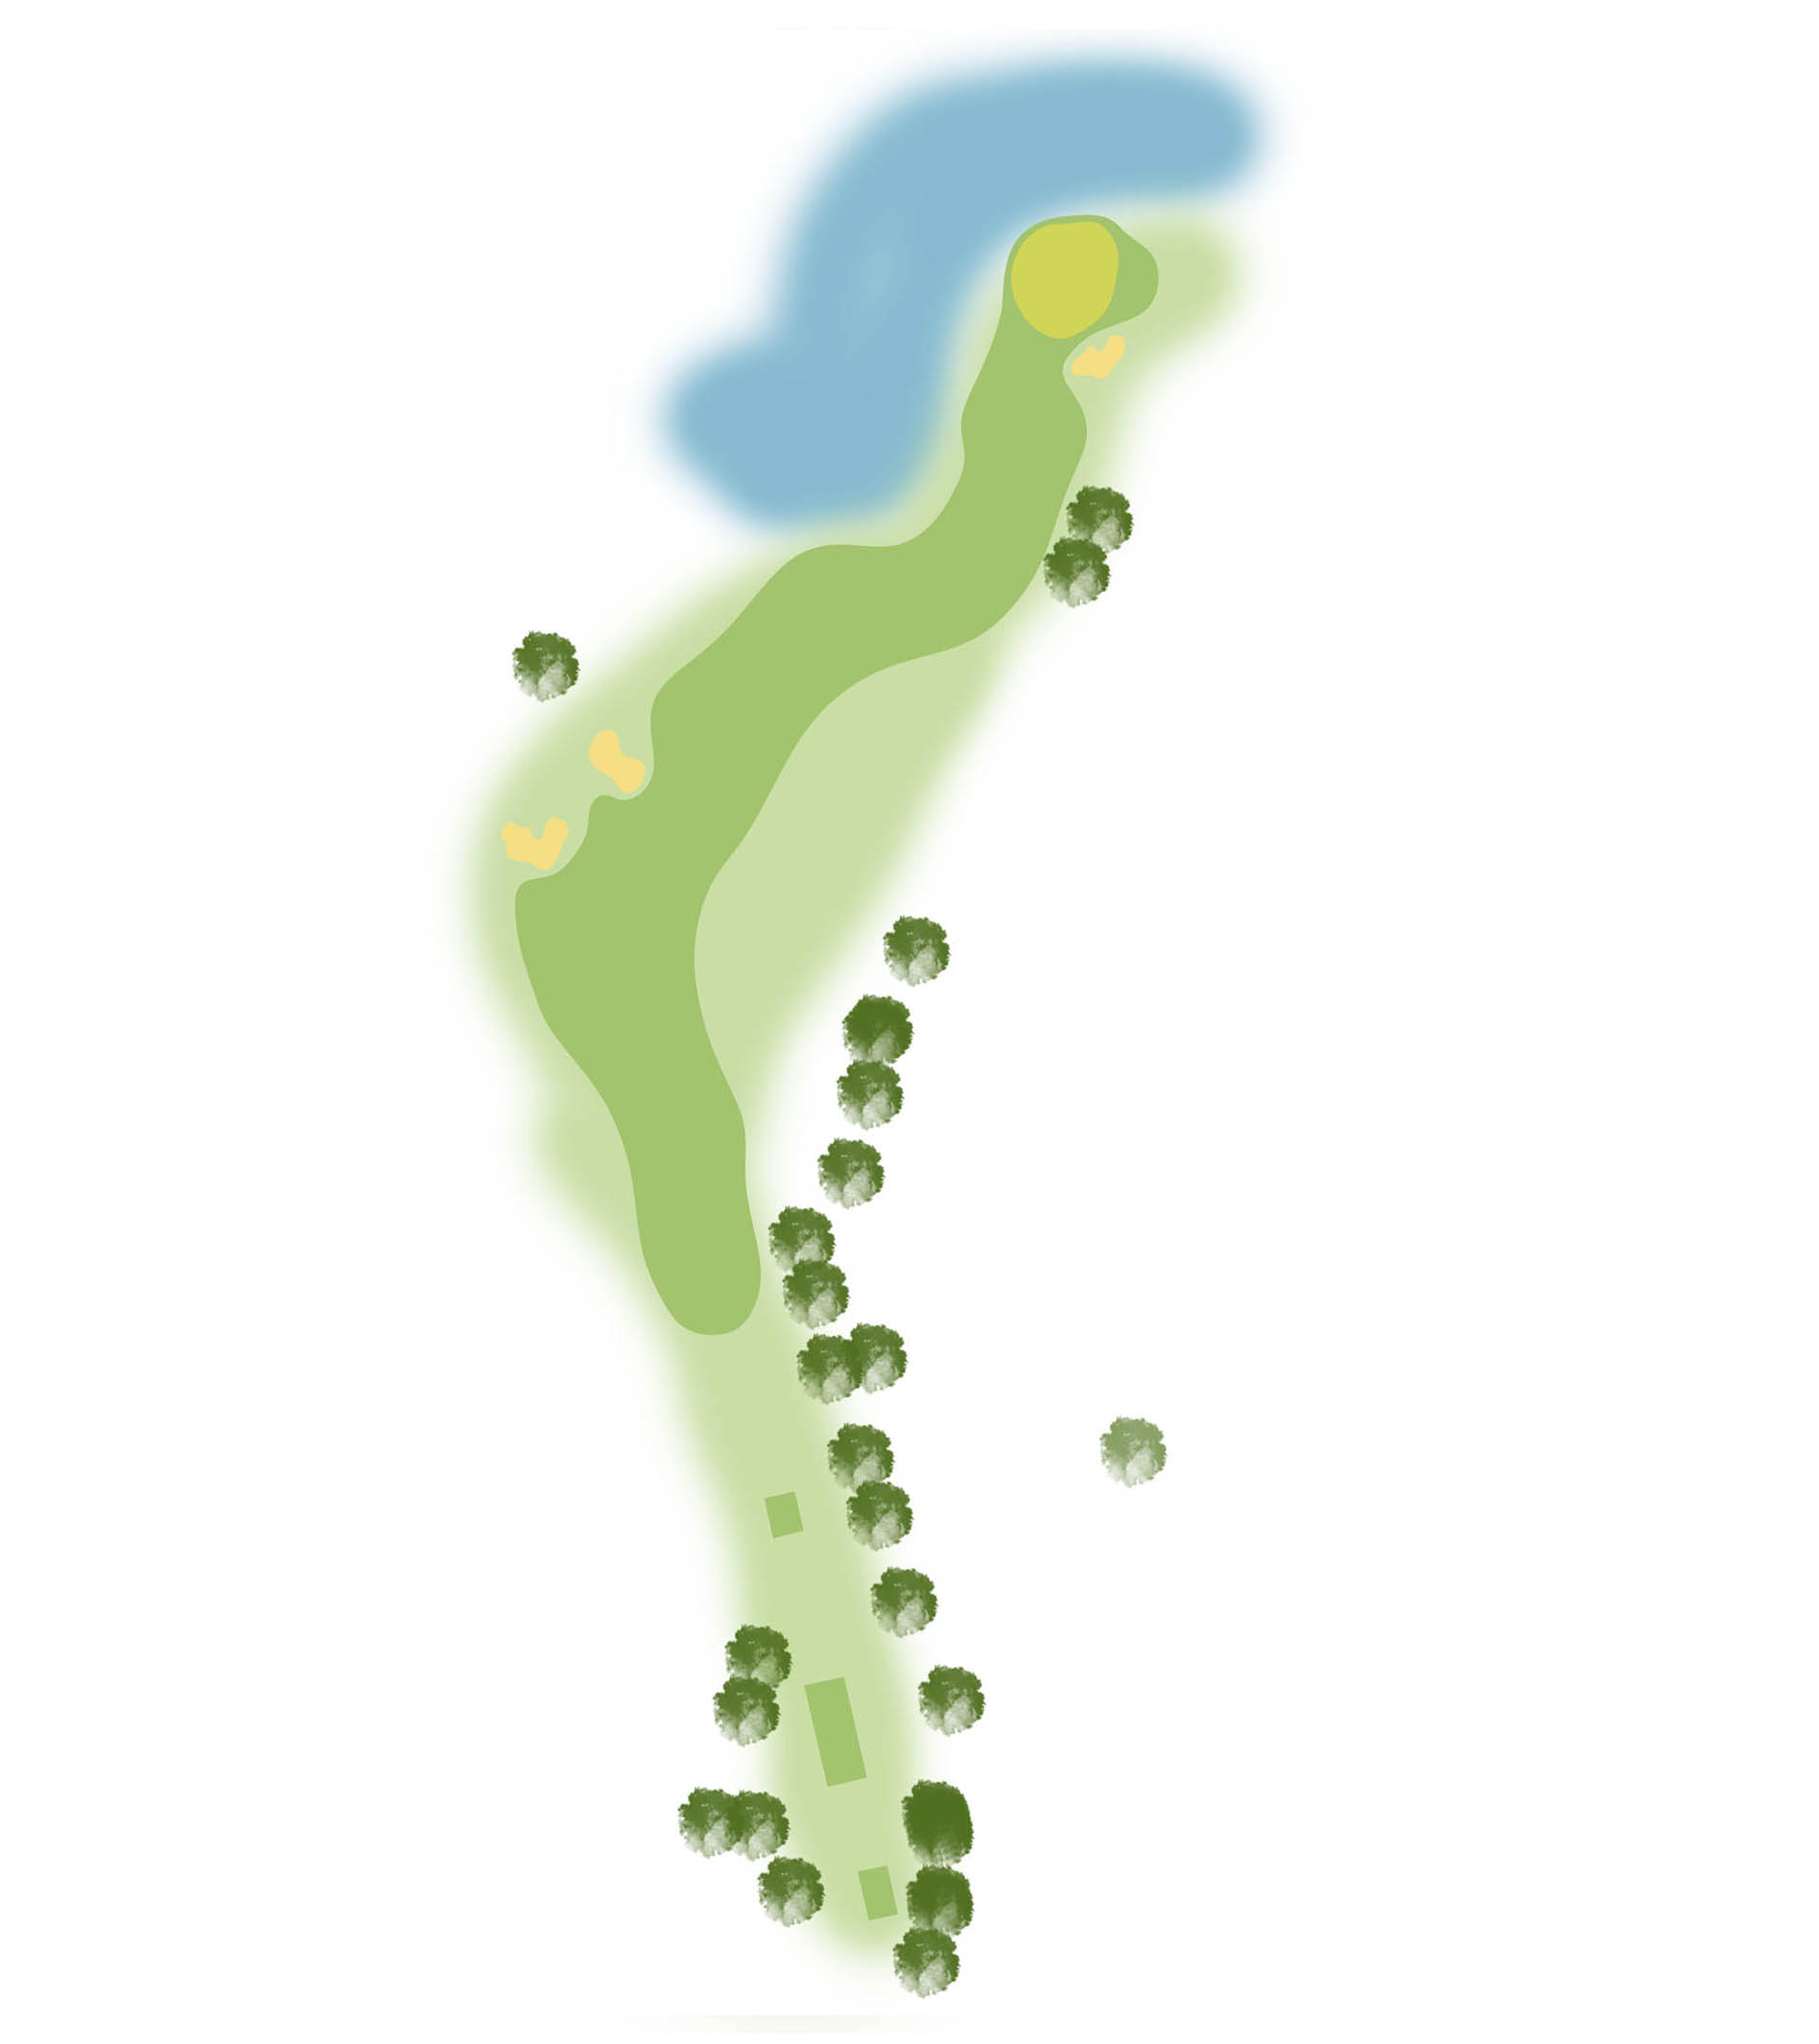
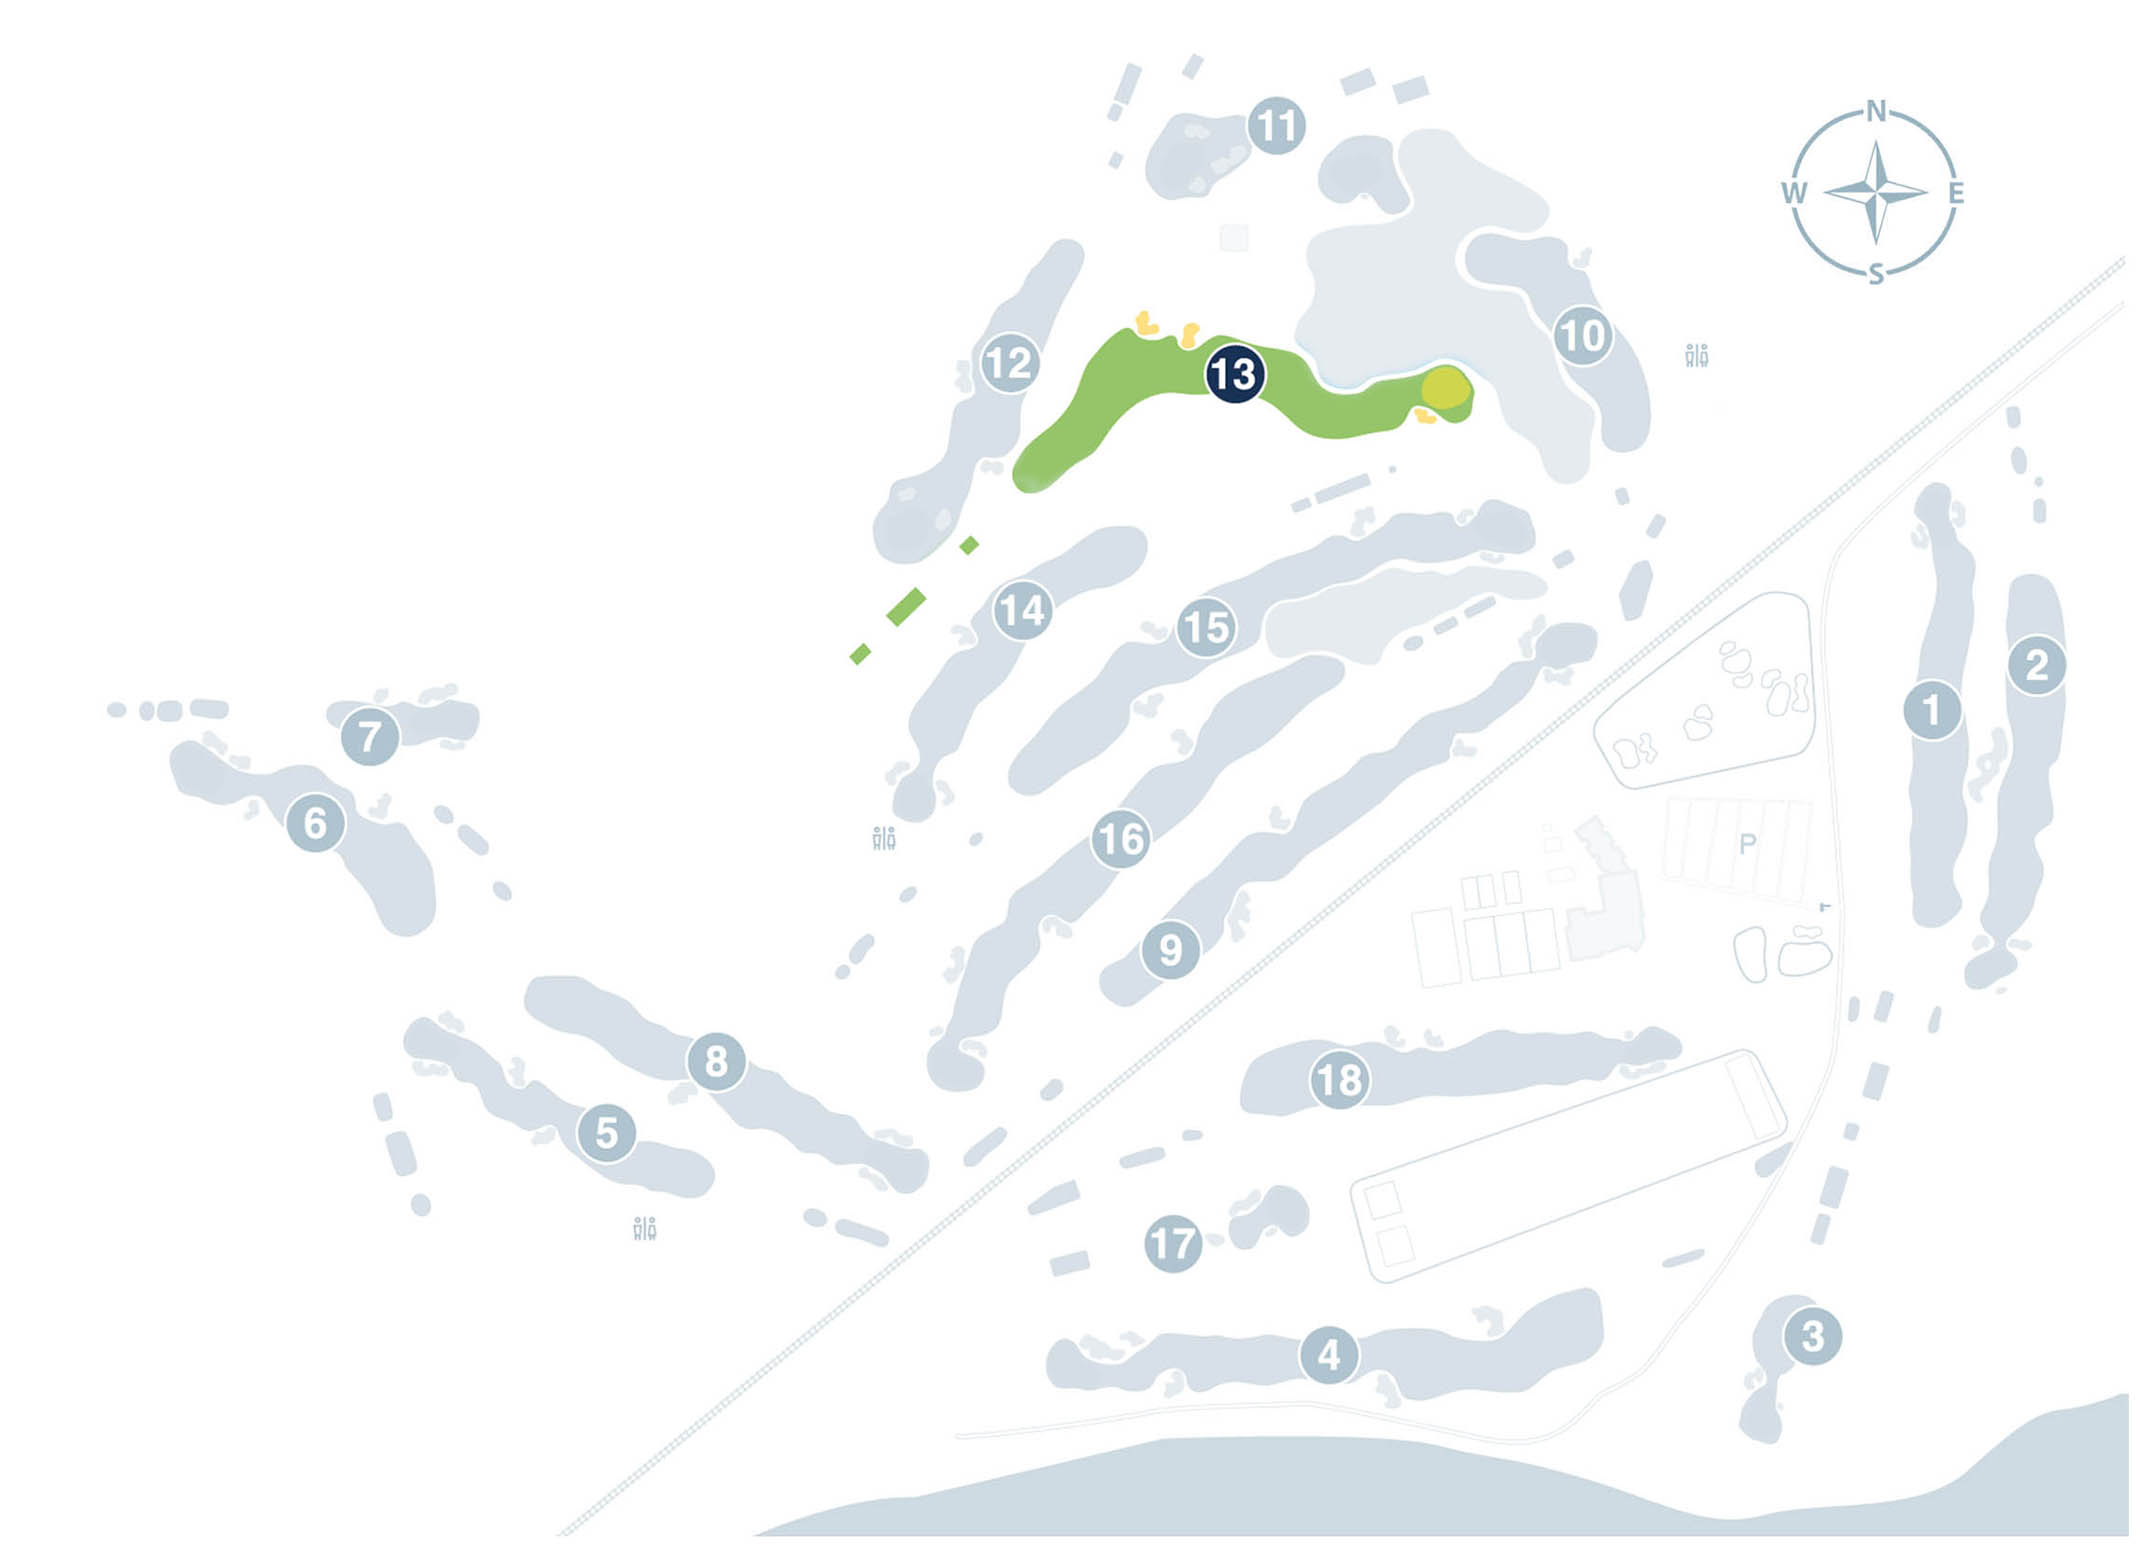
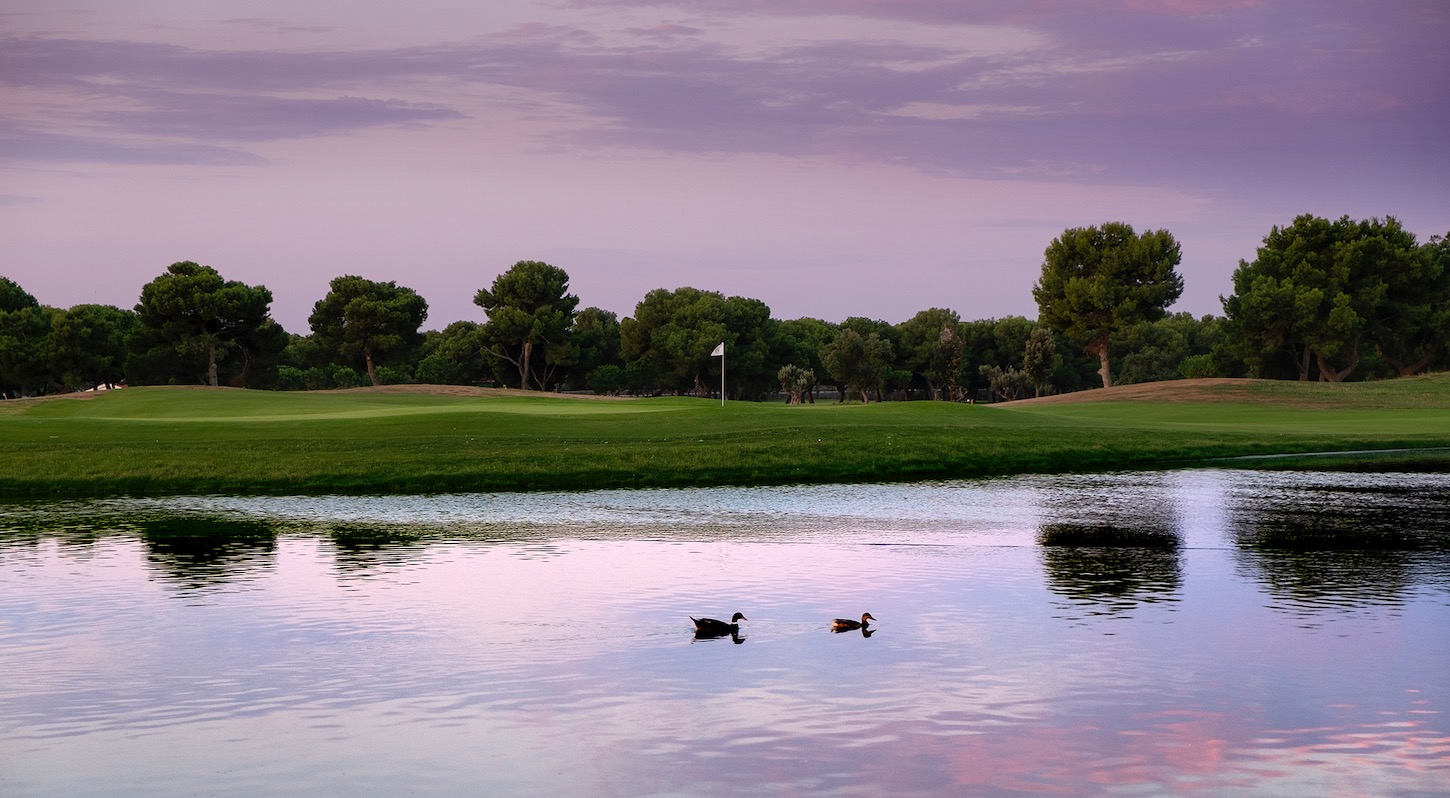
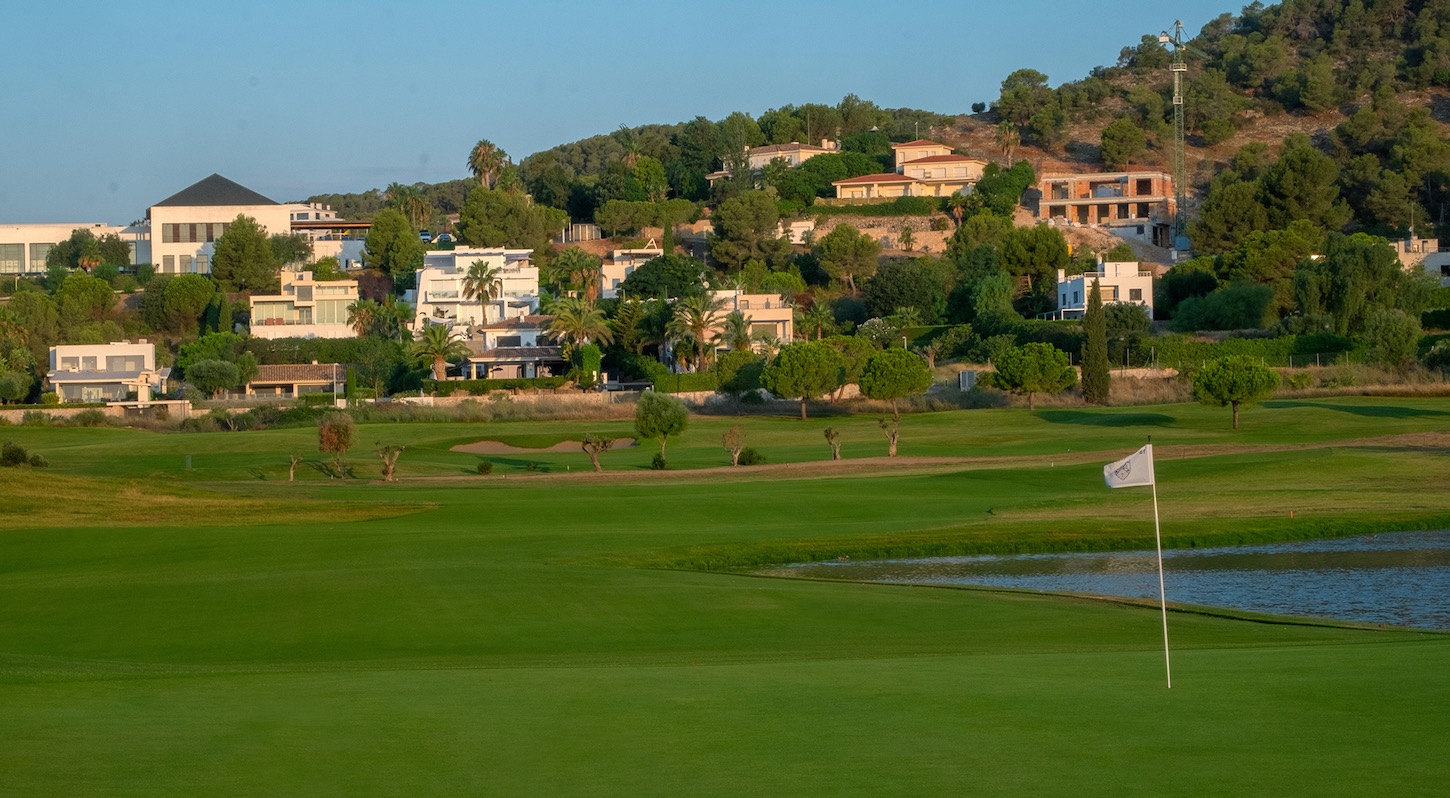
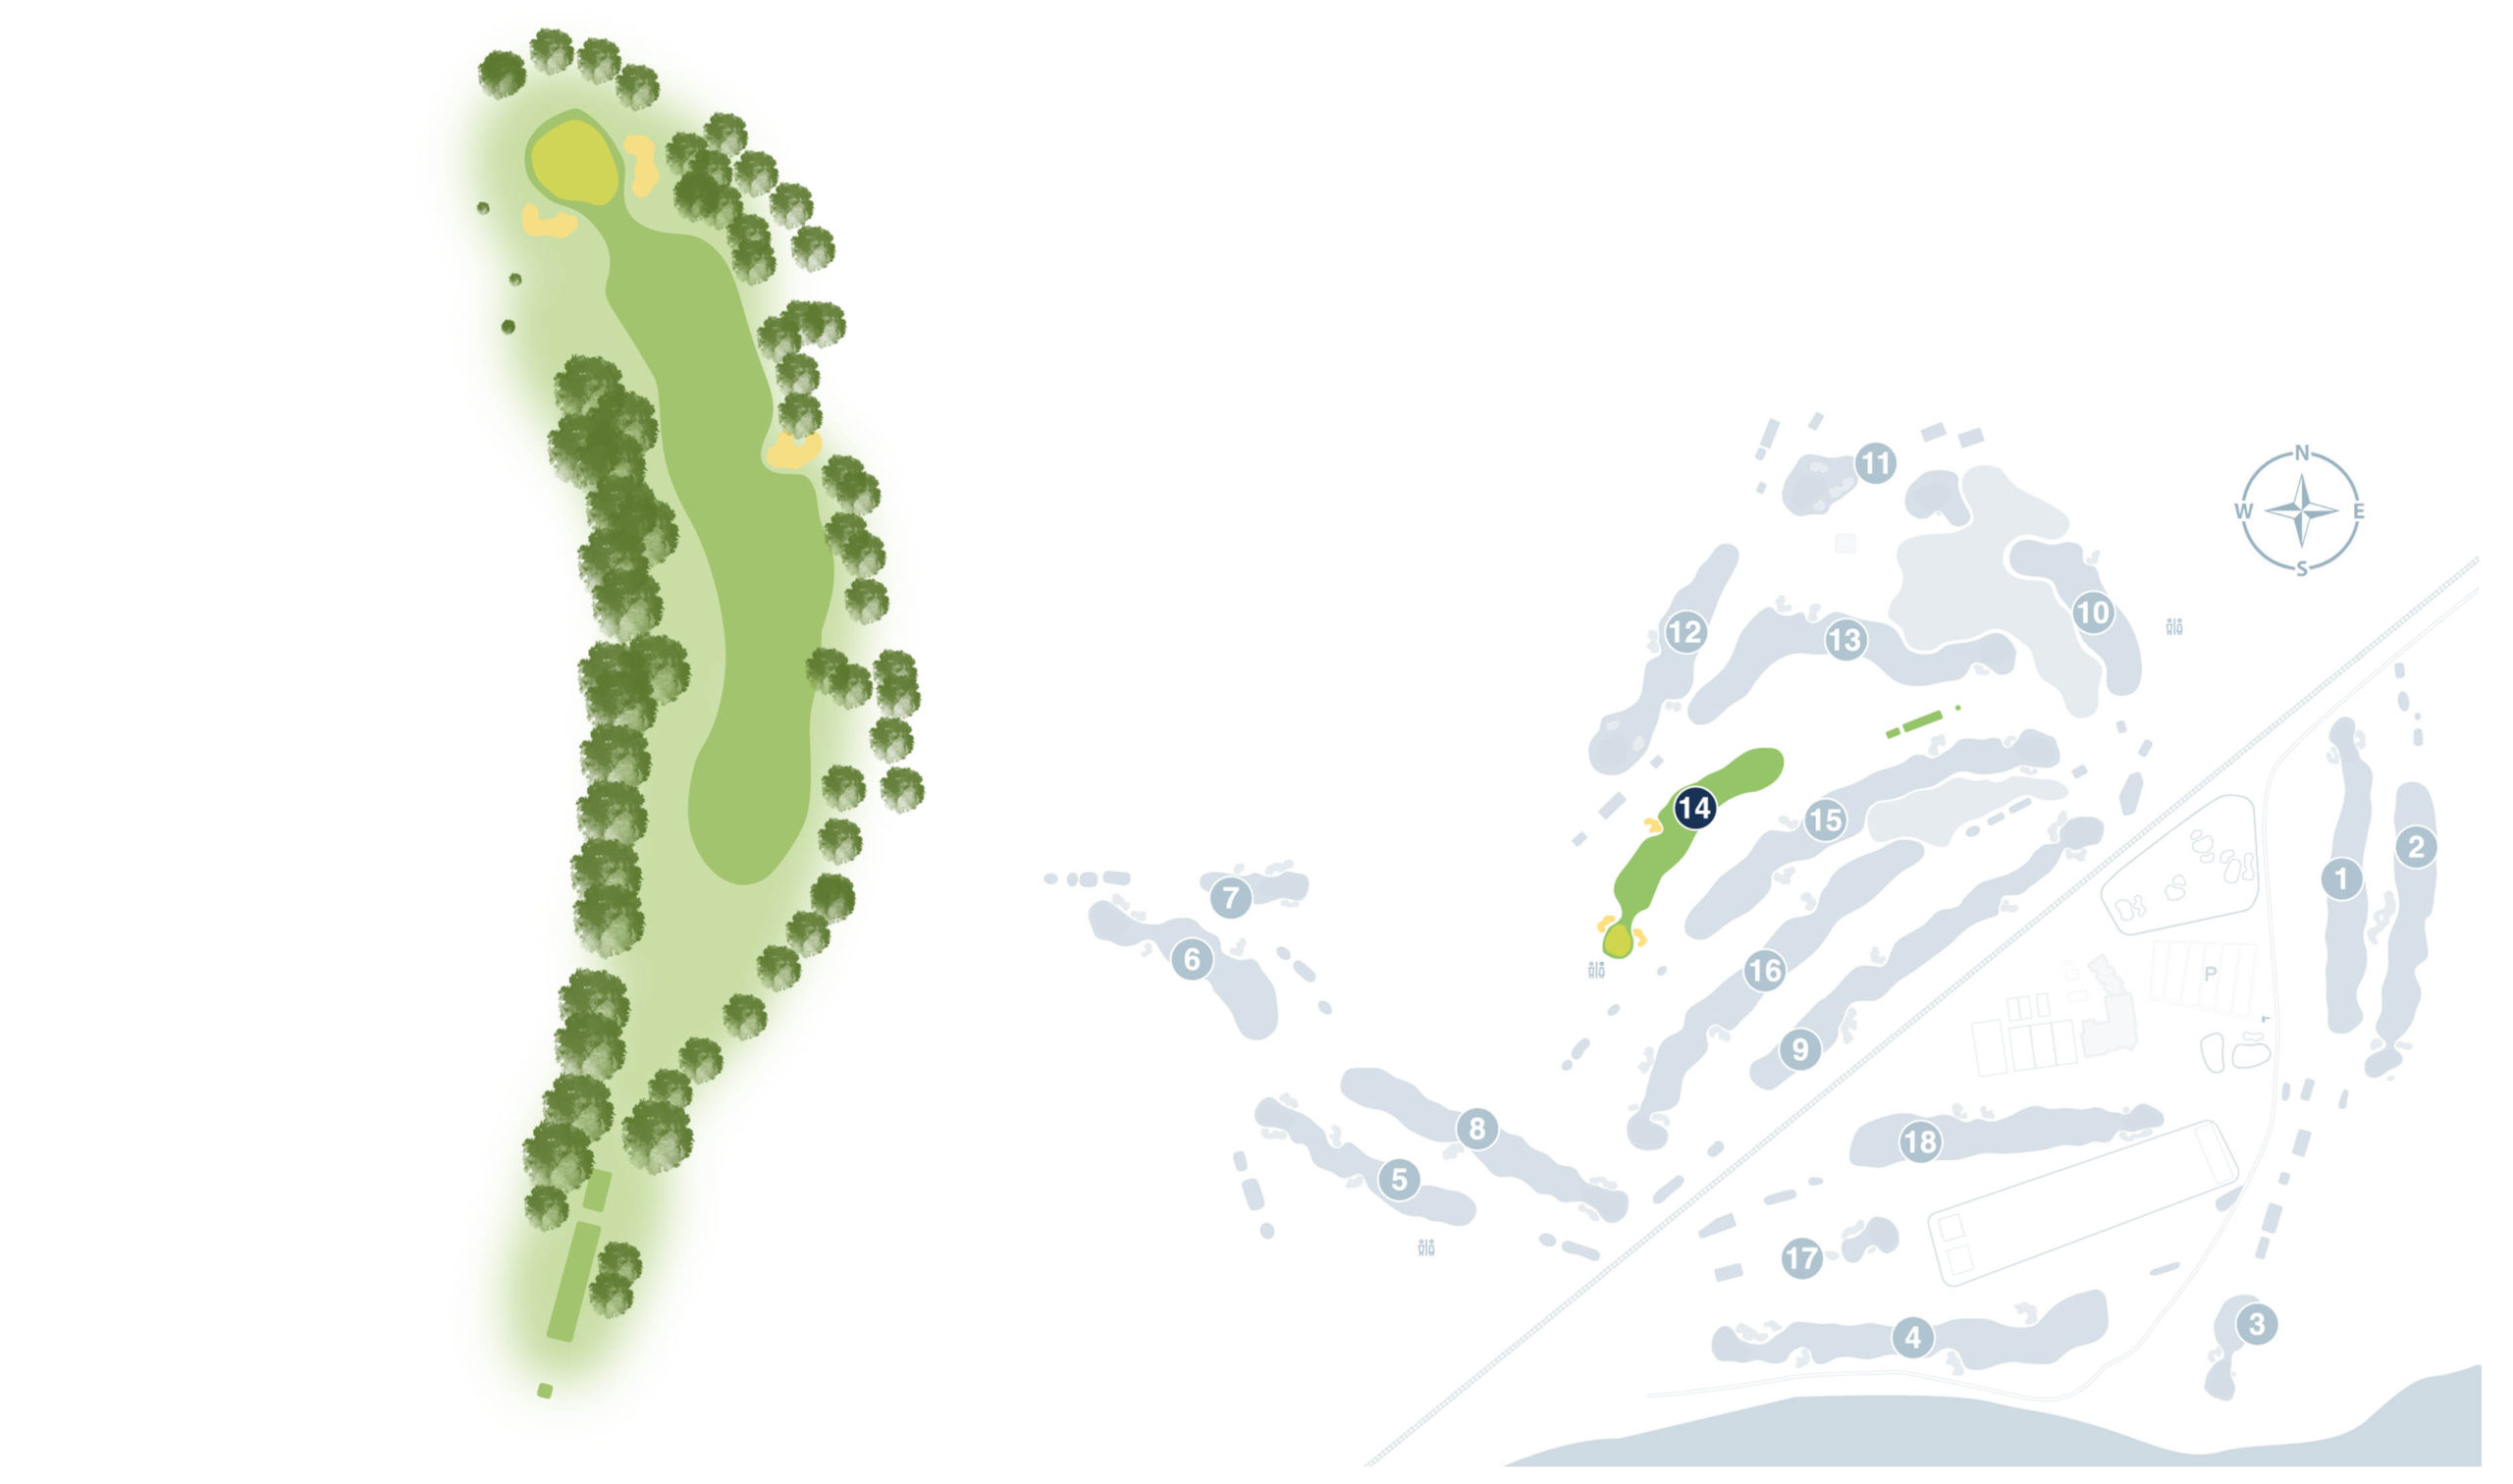
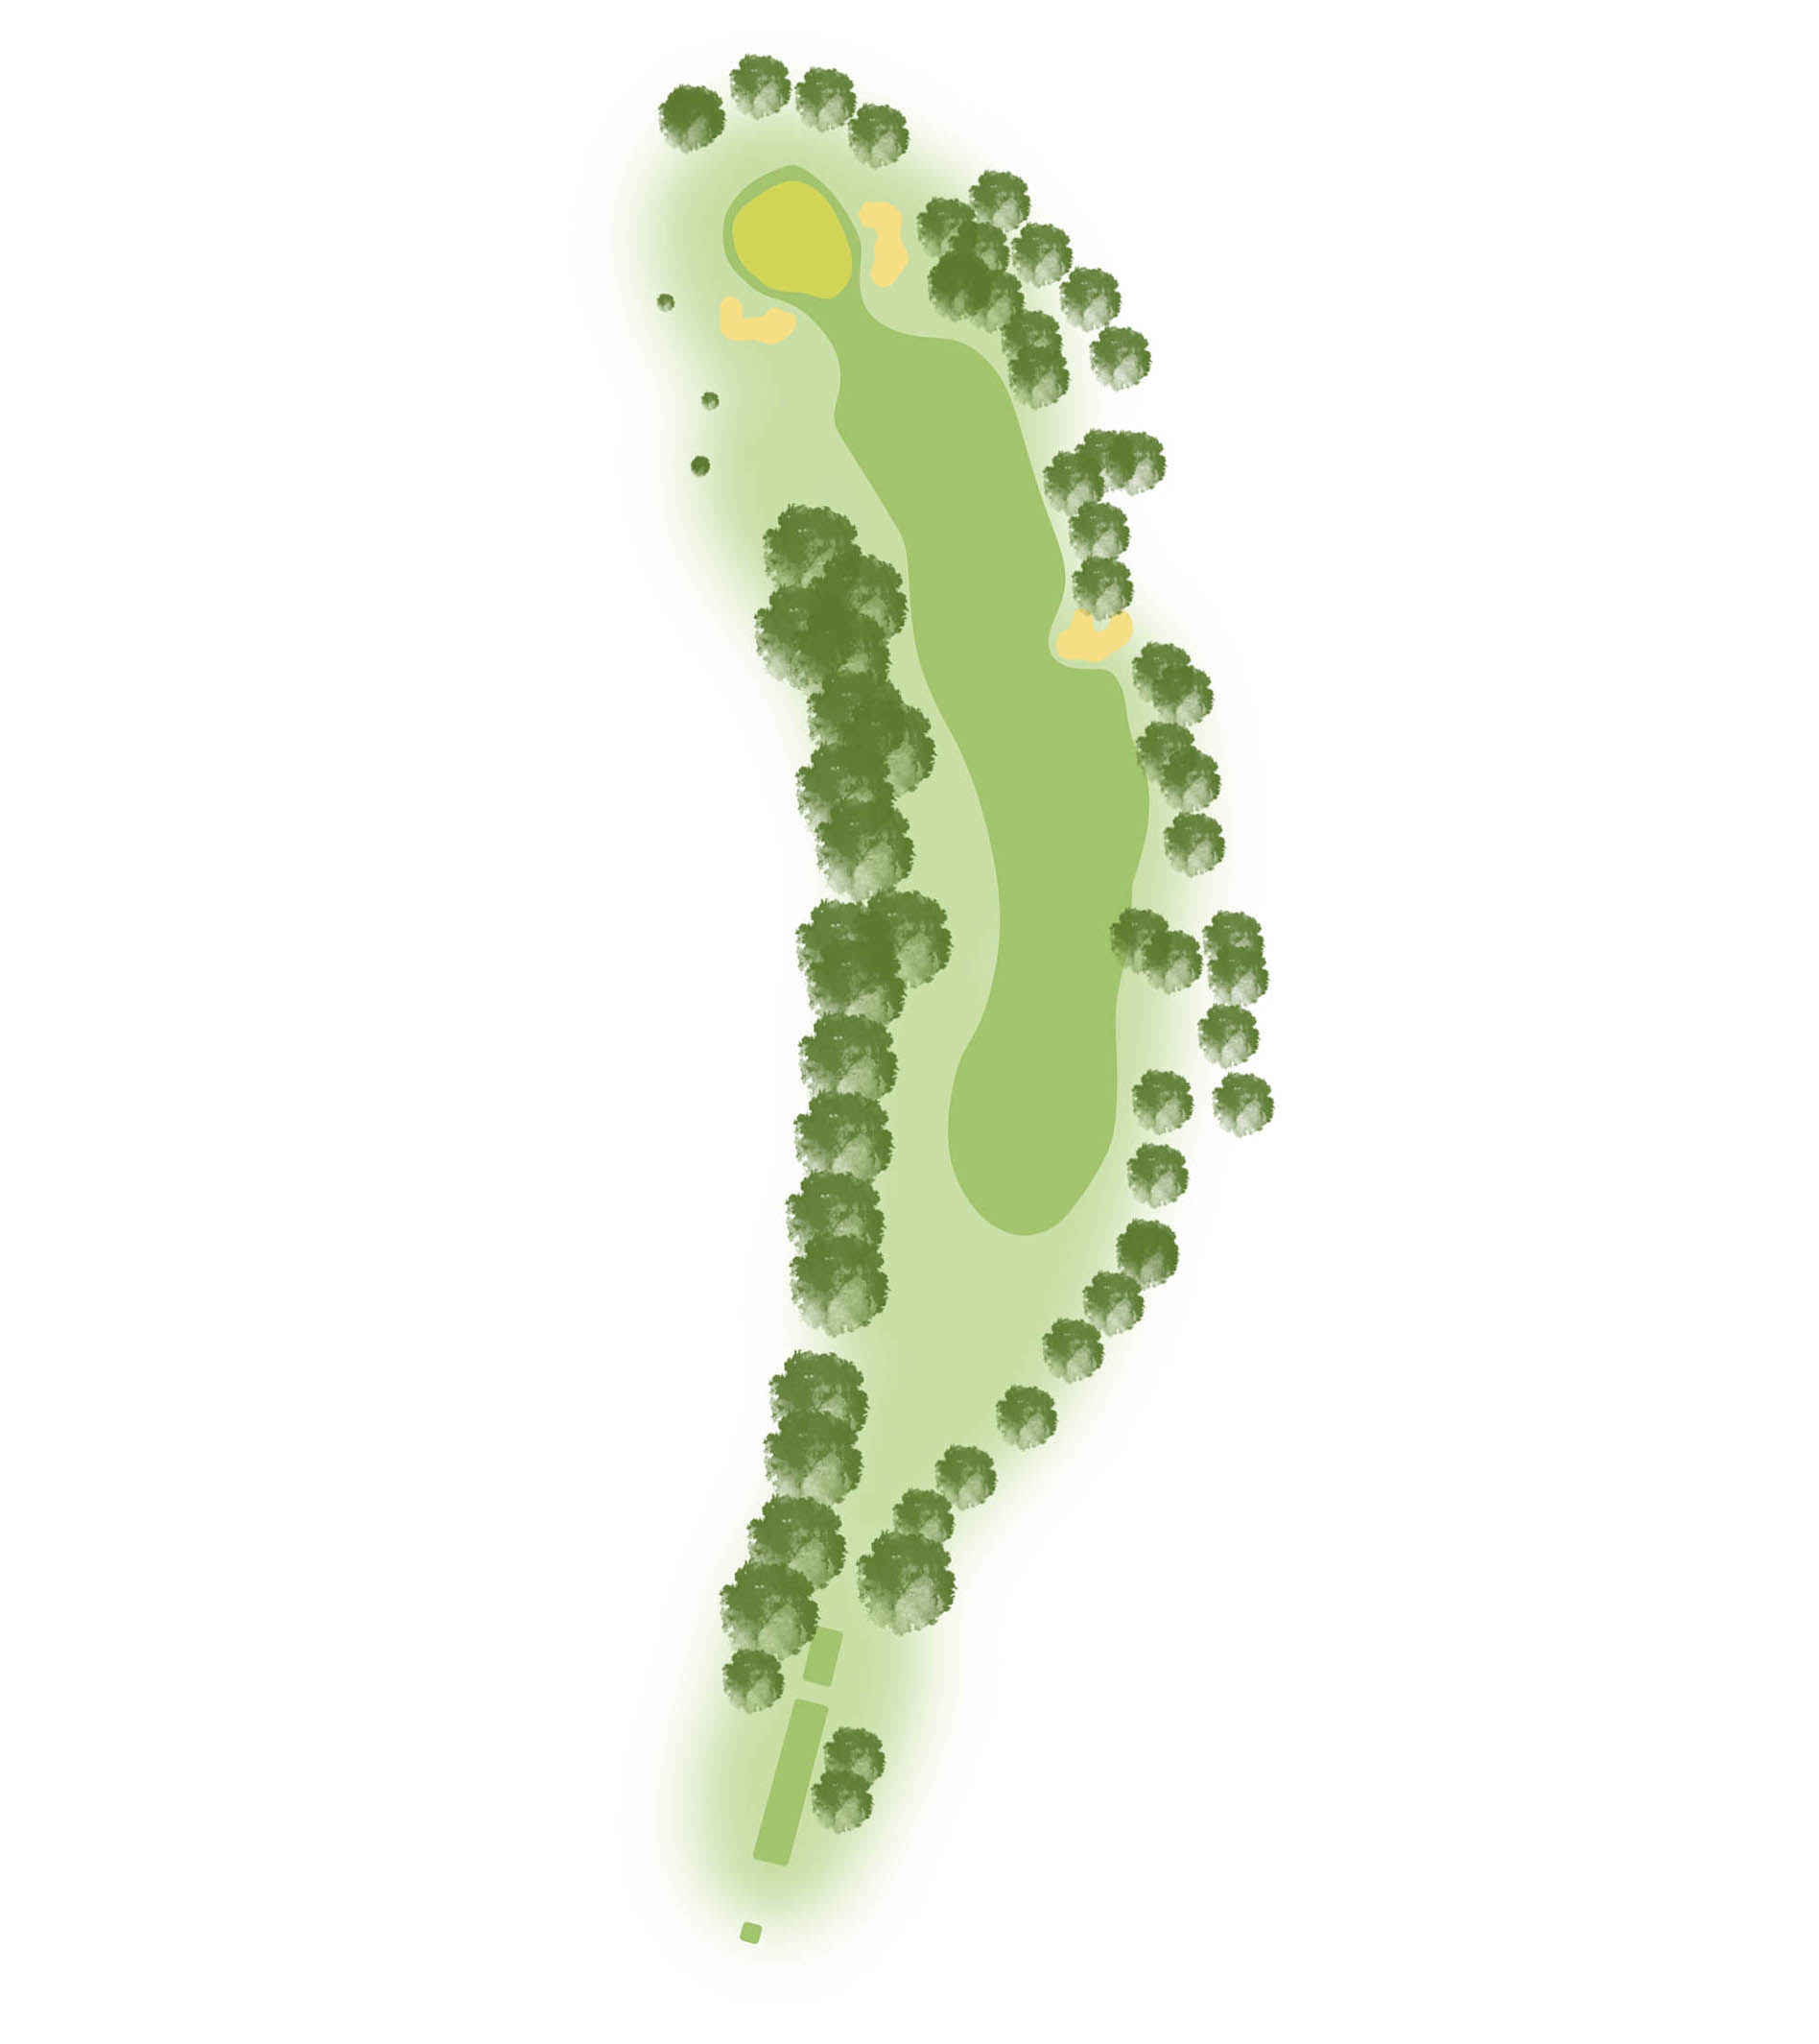
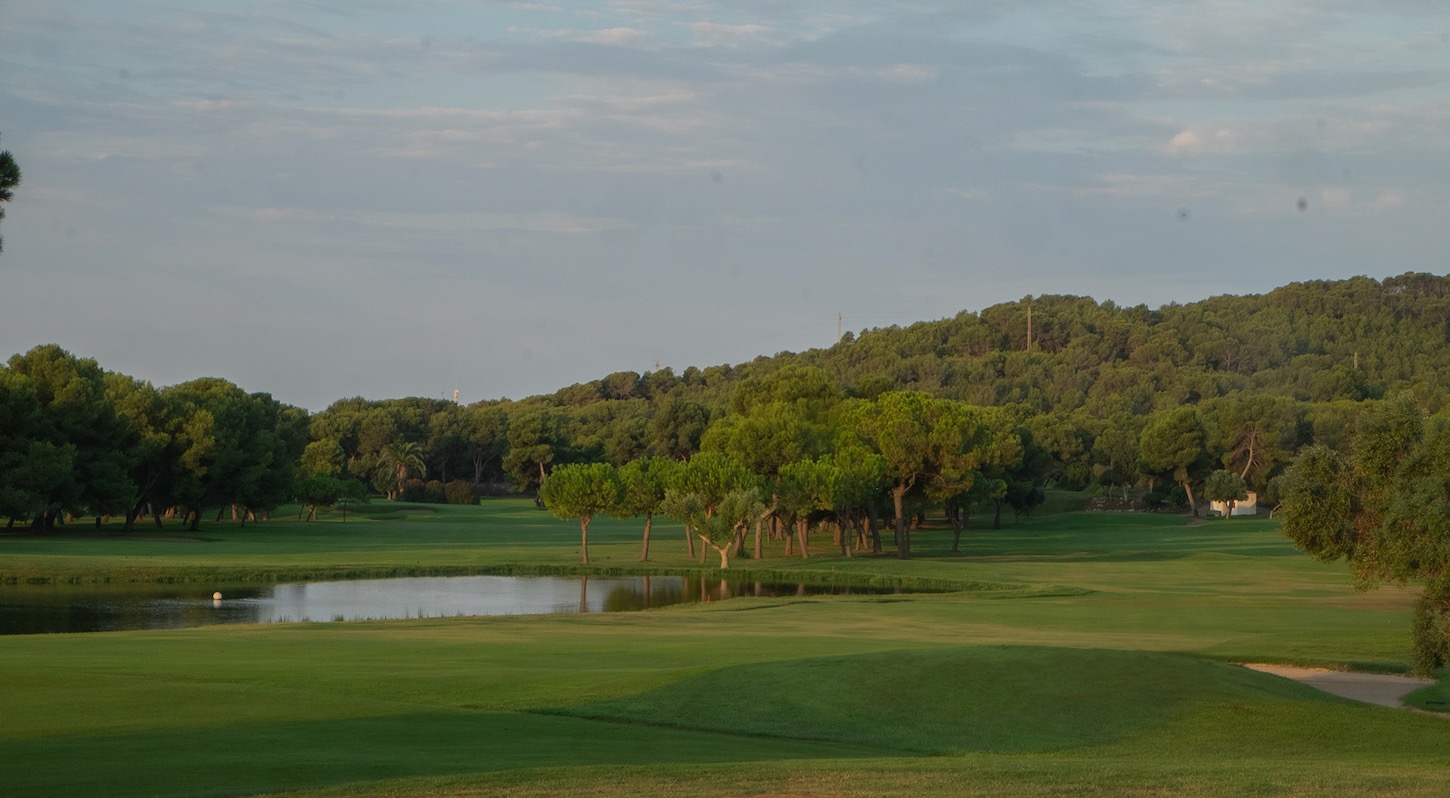
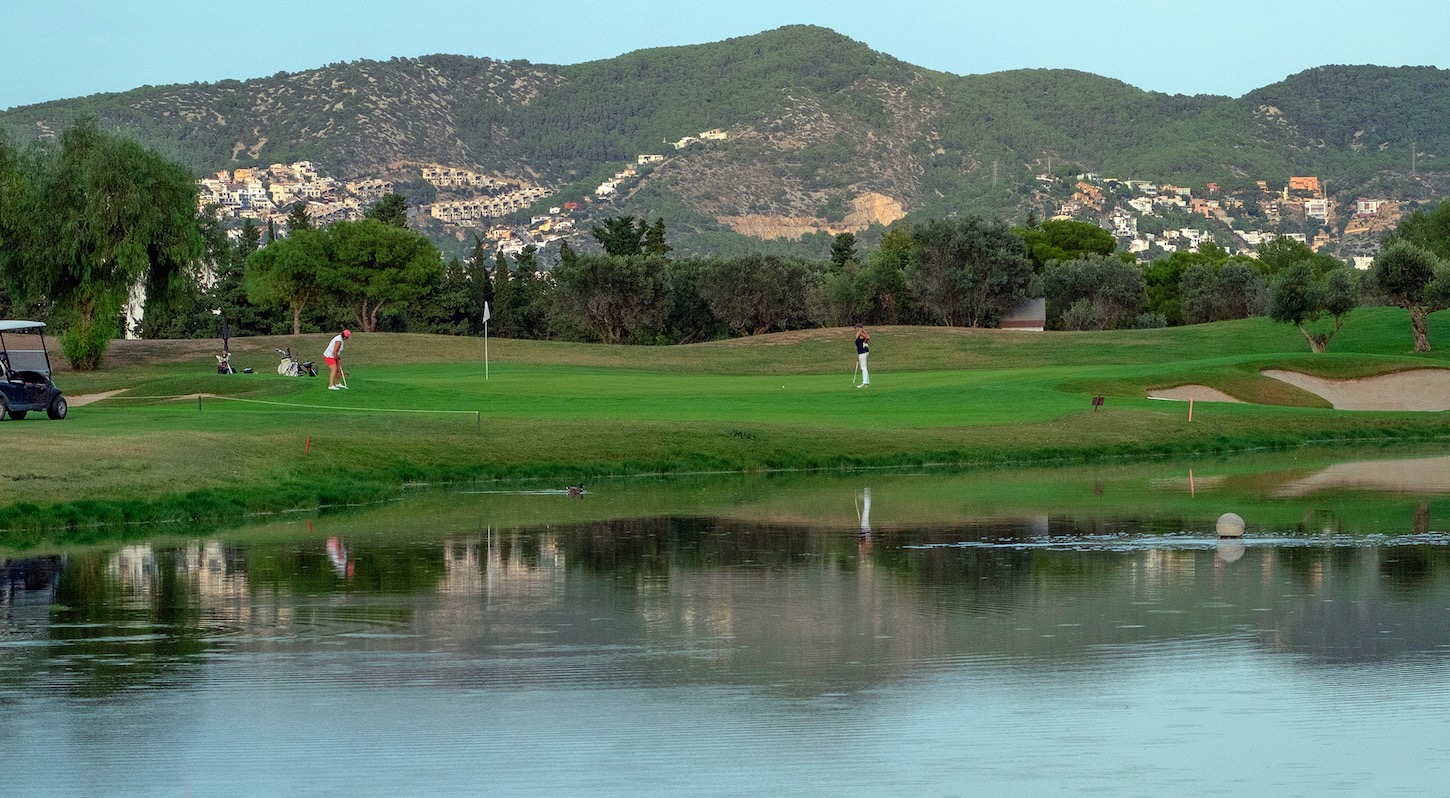
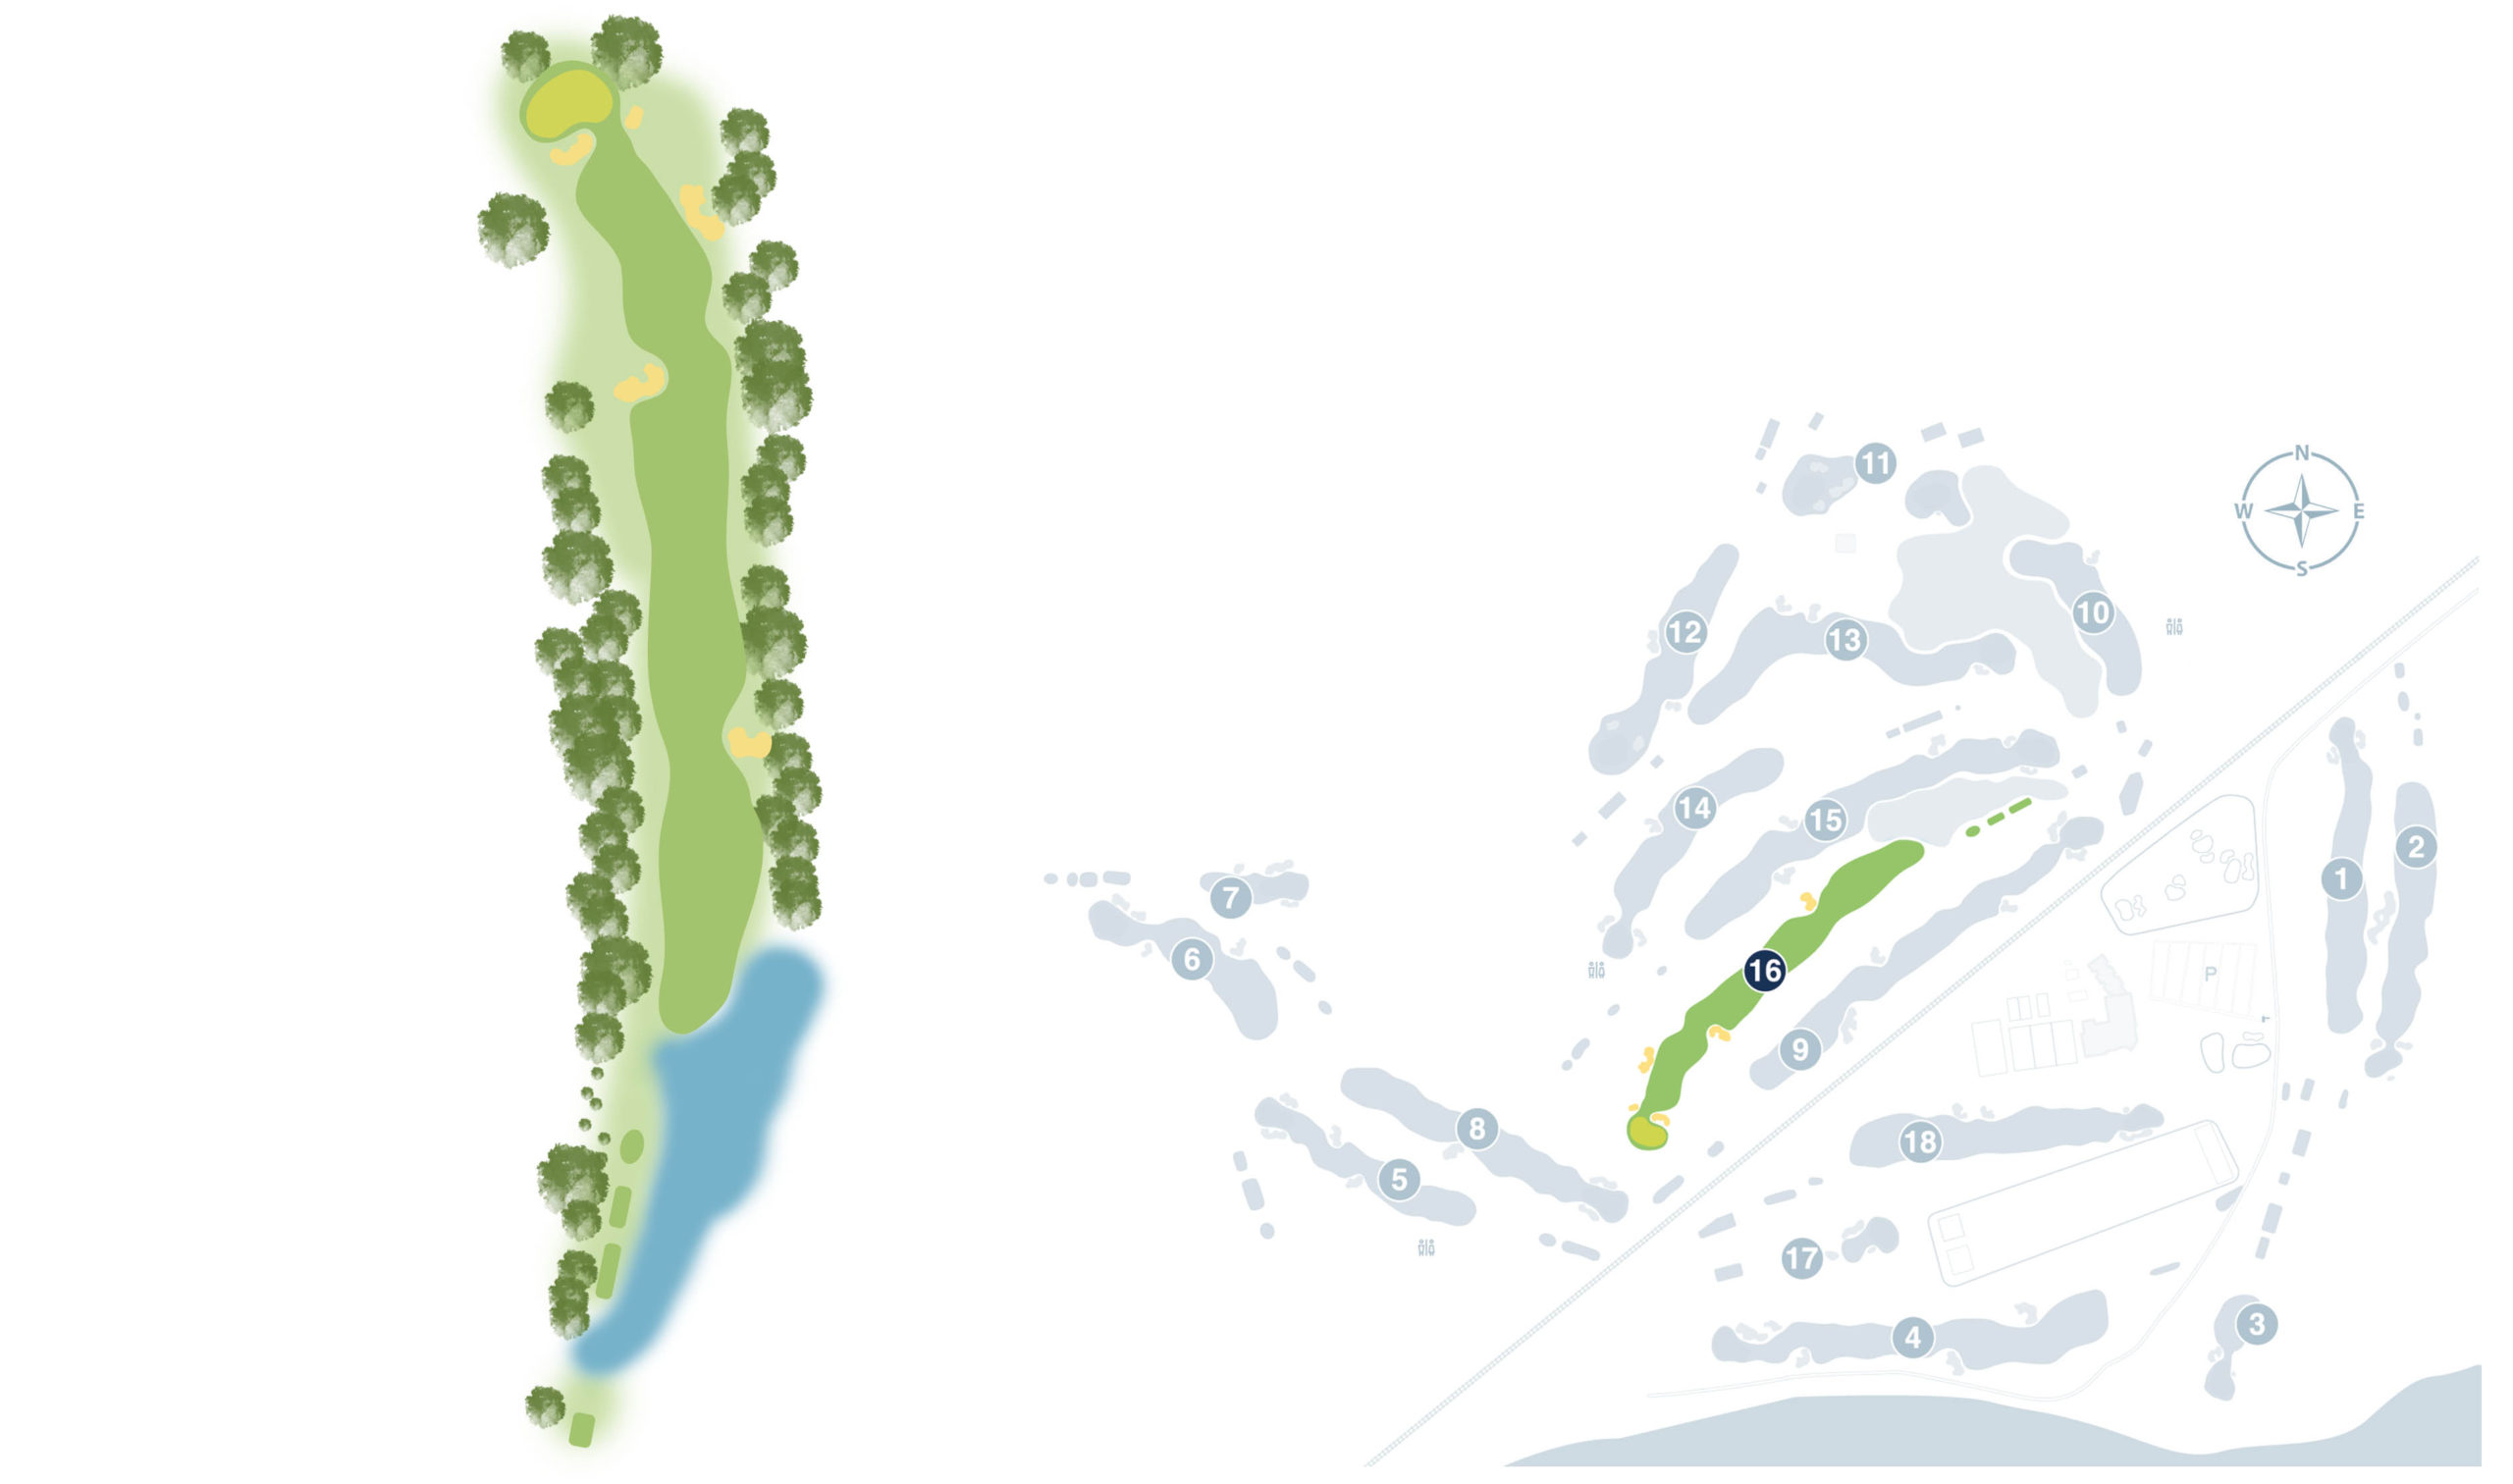
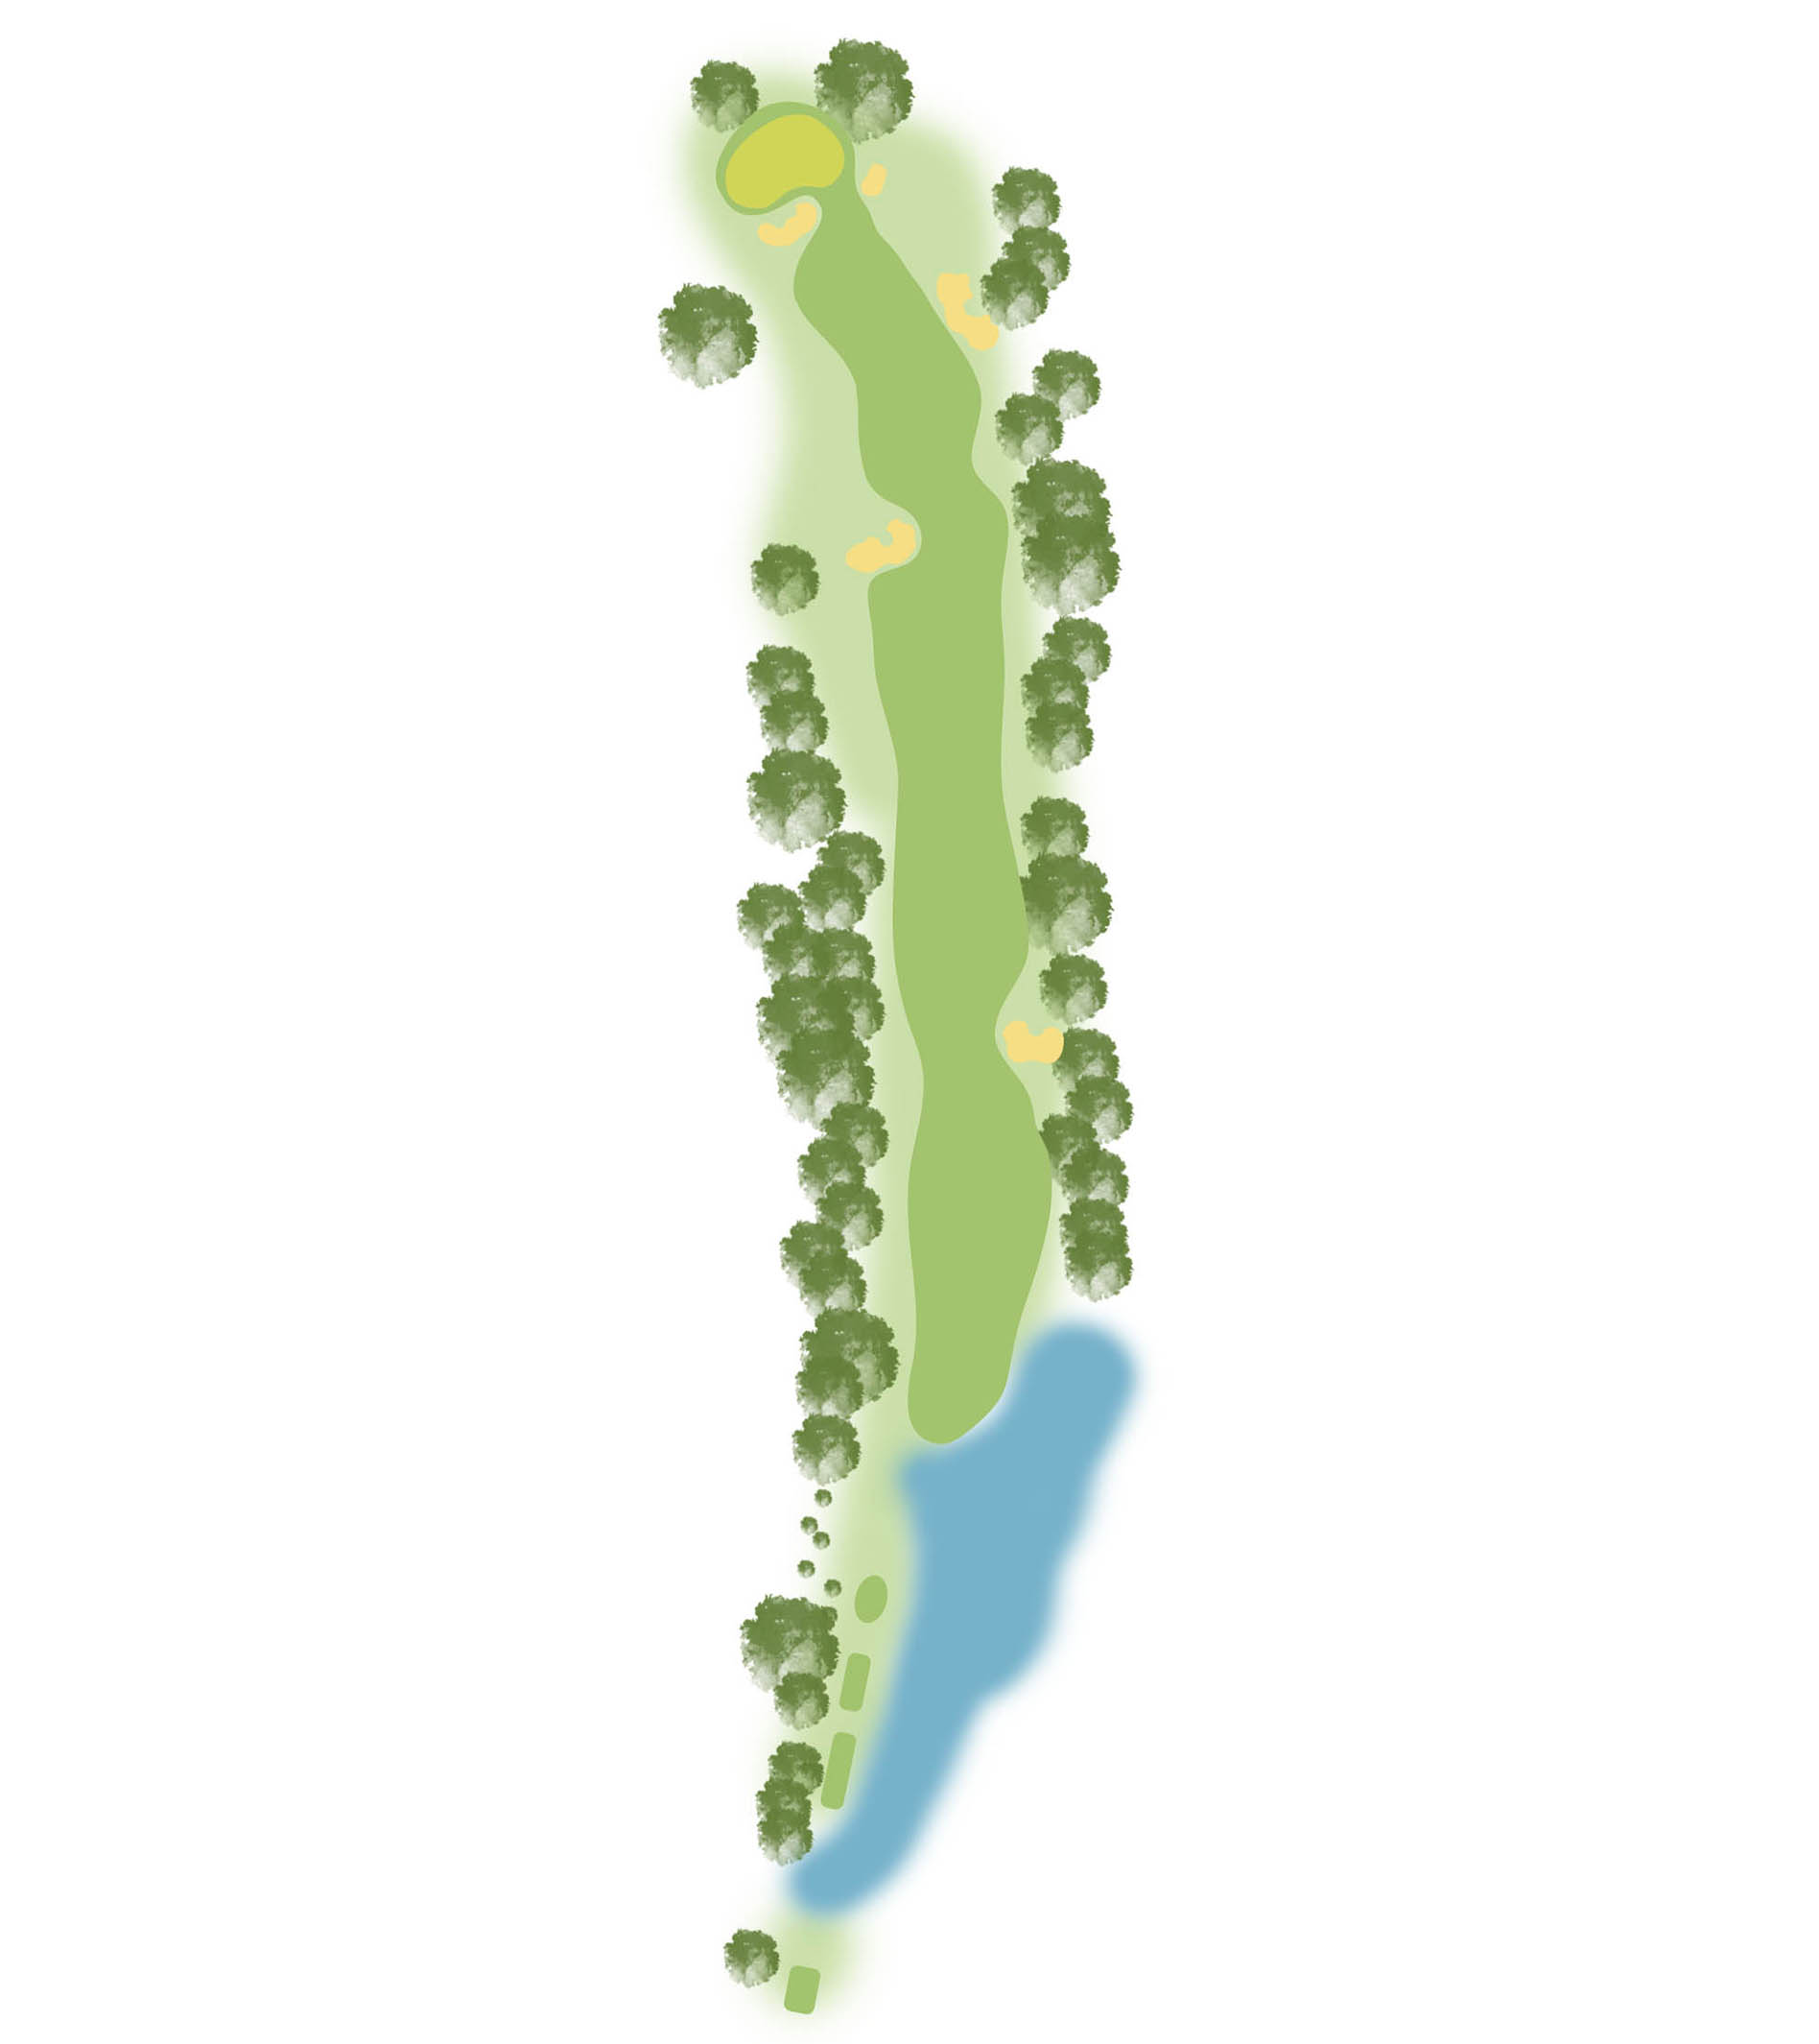
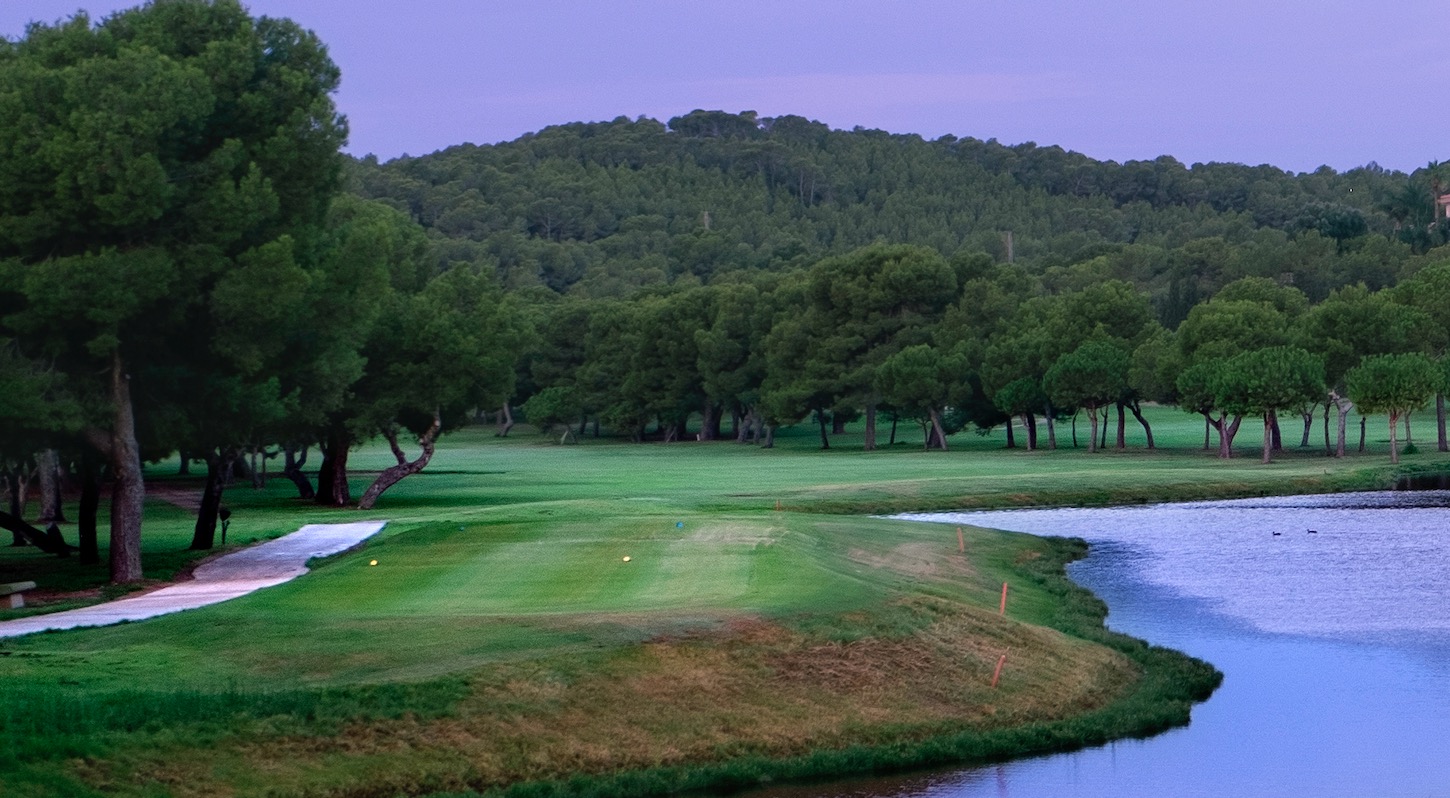
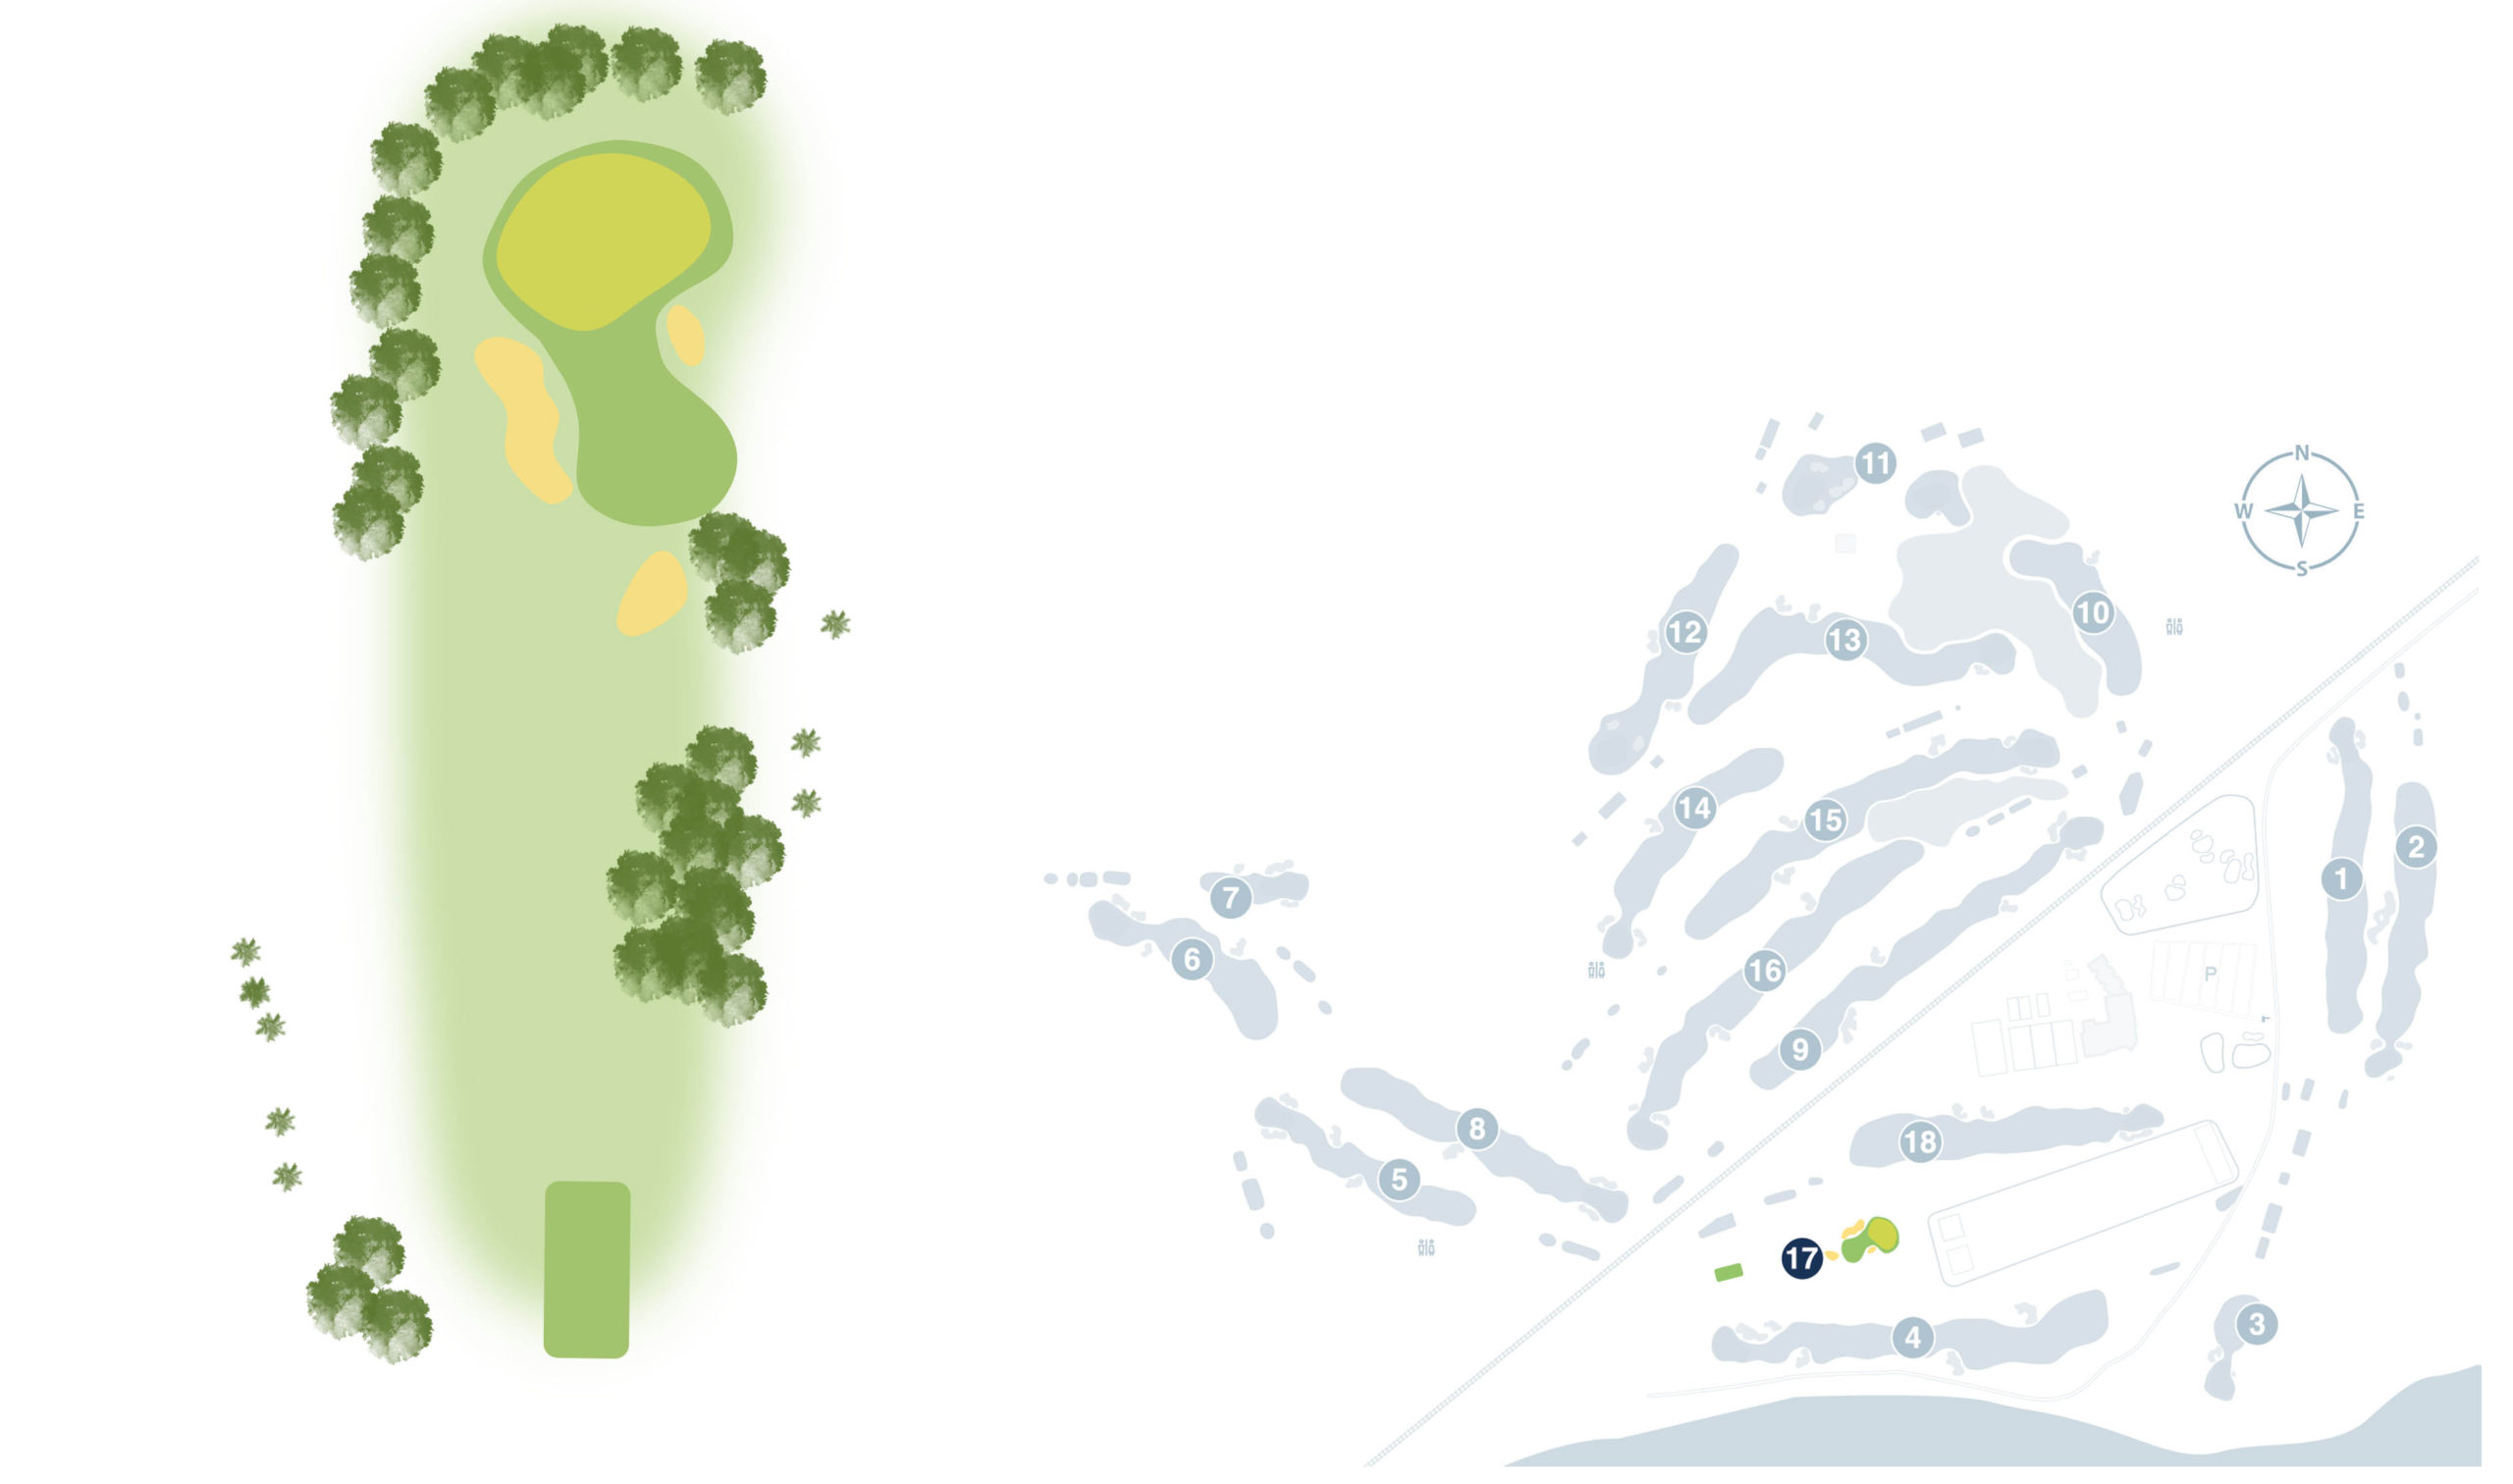
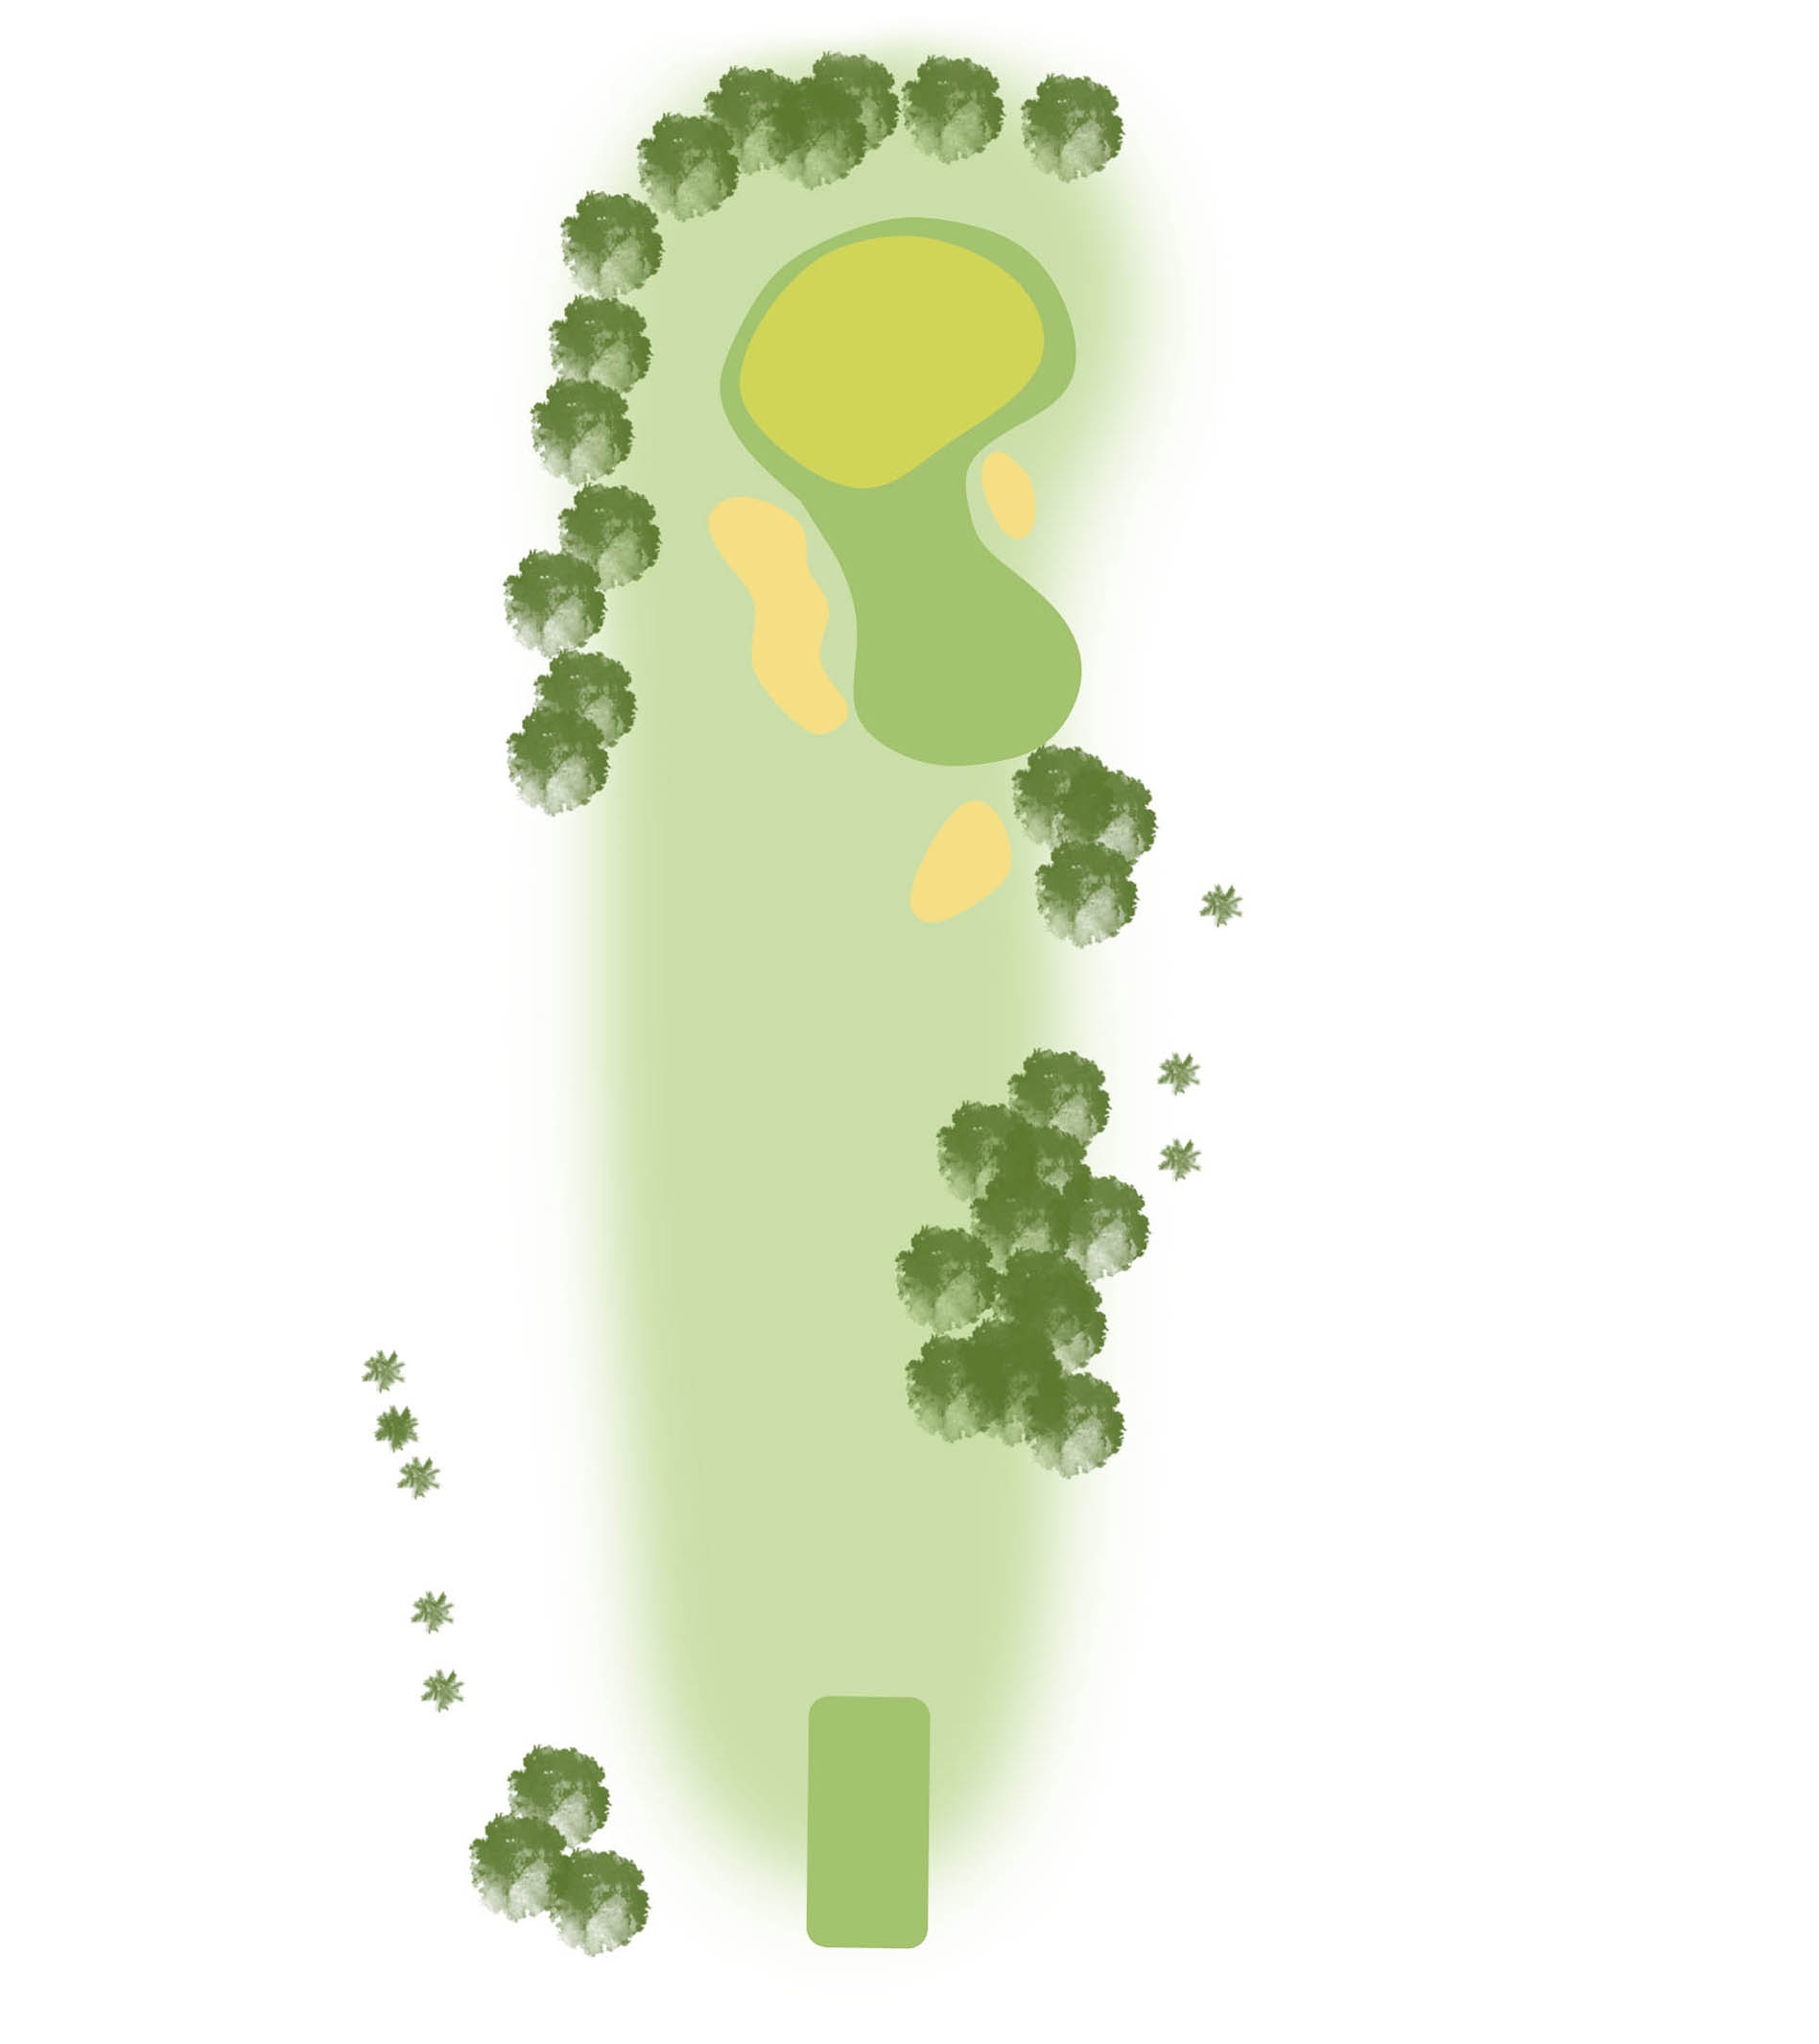
Handicap: 1
Whites: 340
Yellows: 331
Blues: 319
Reds: 272
Oranges: 249
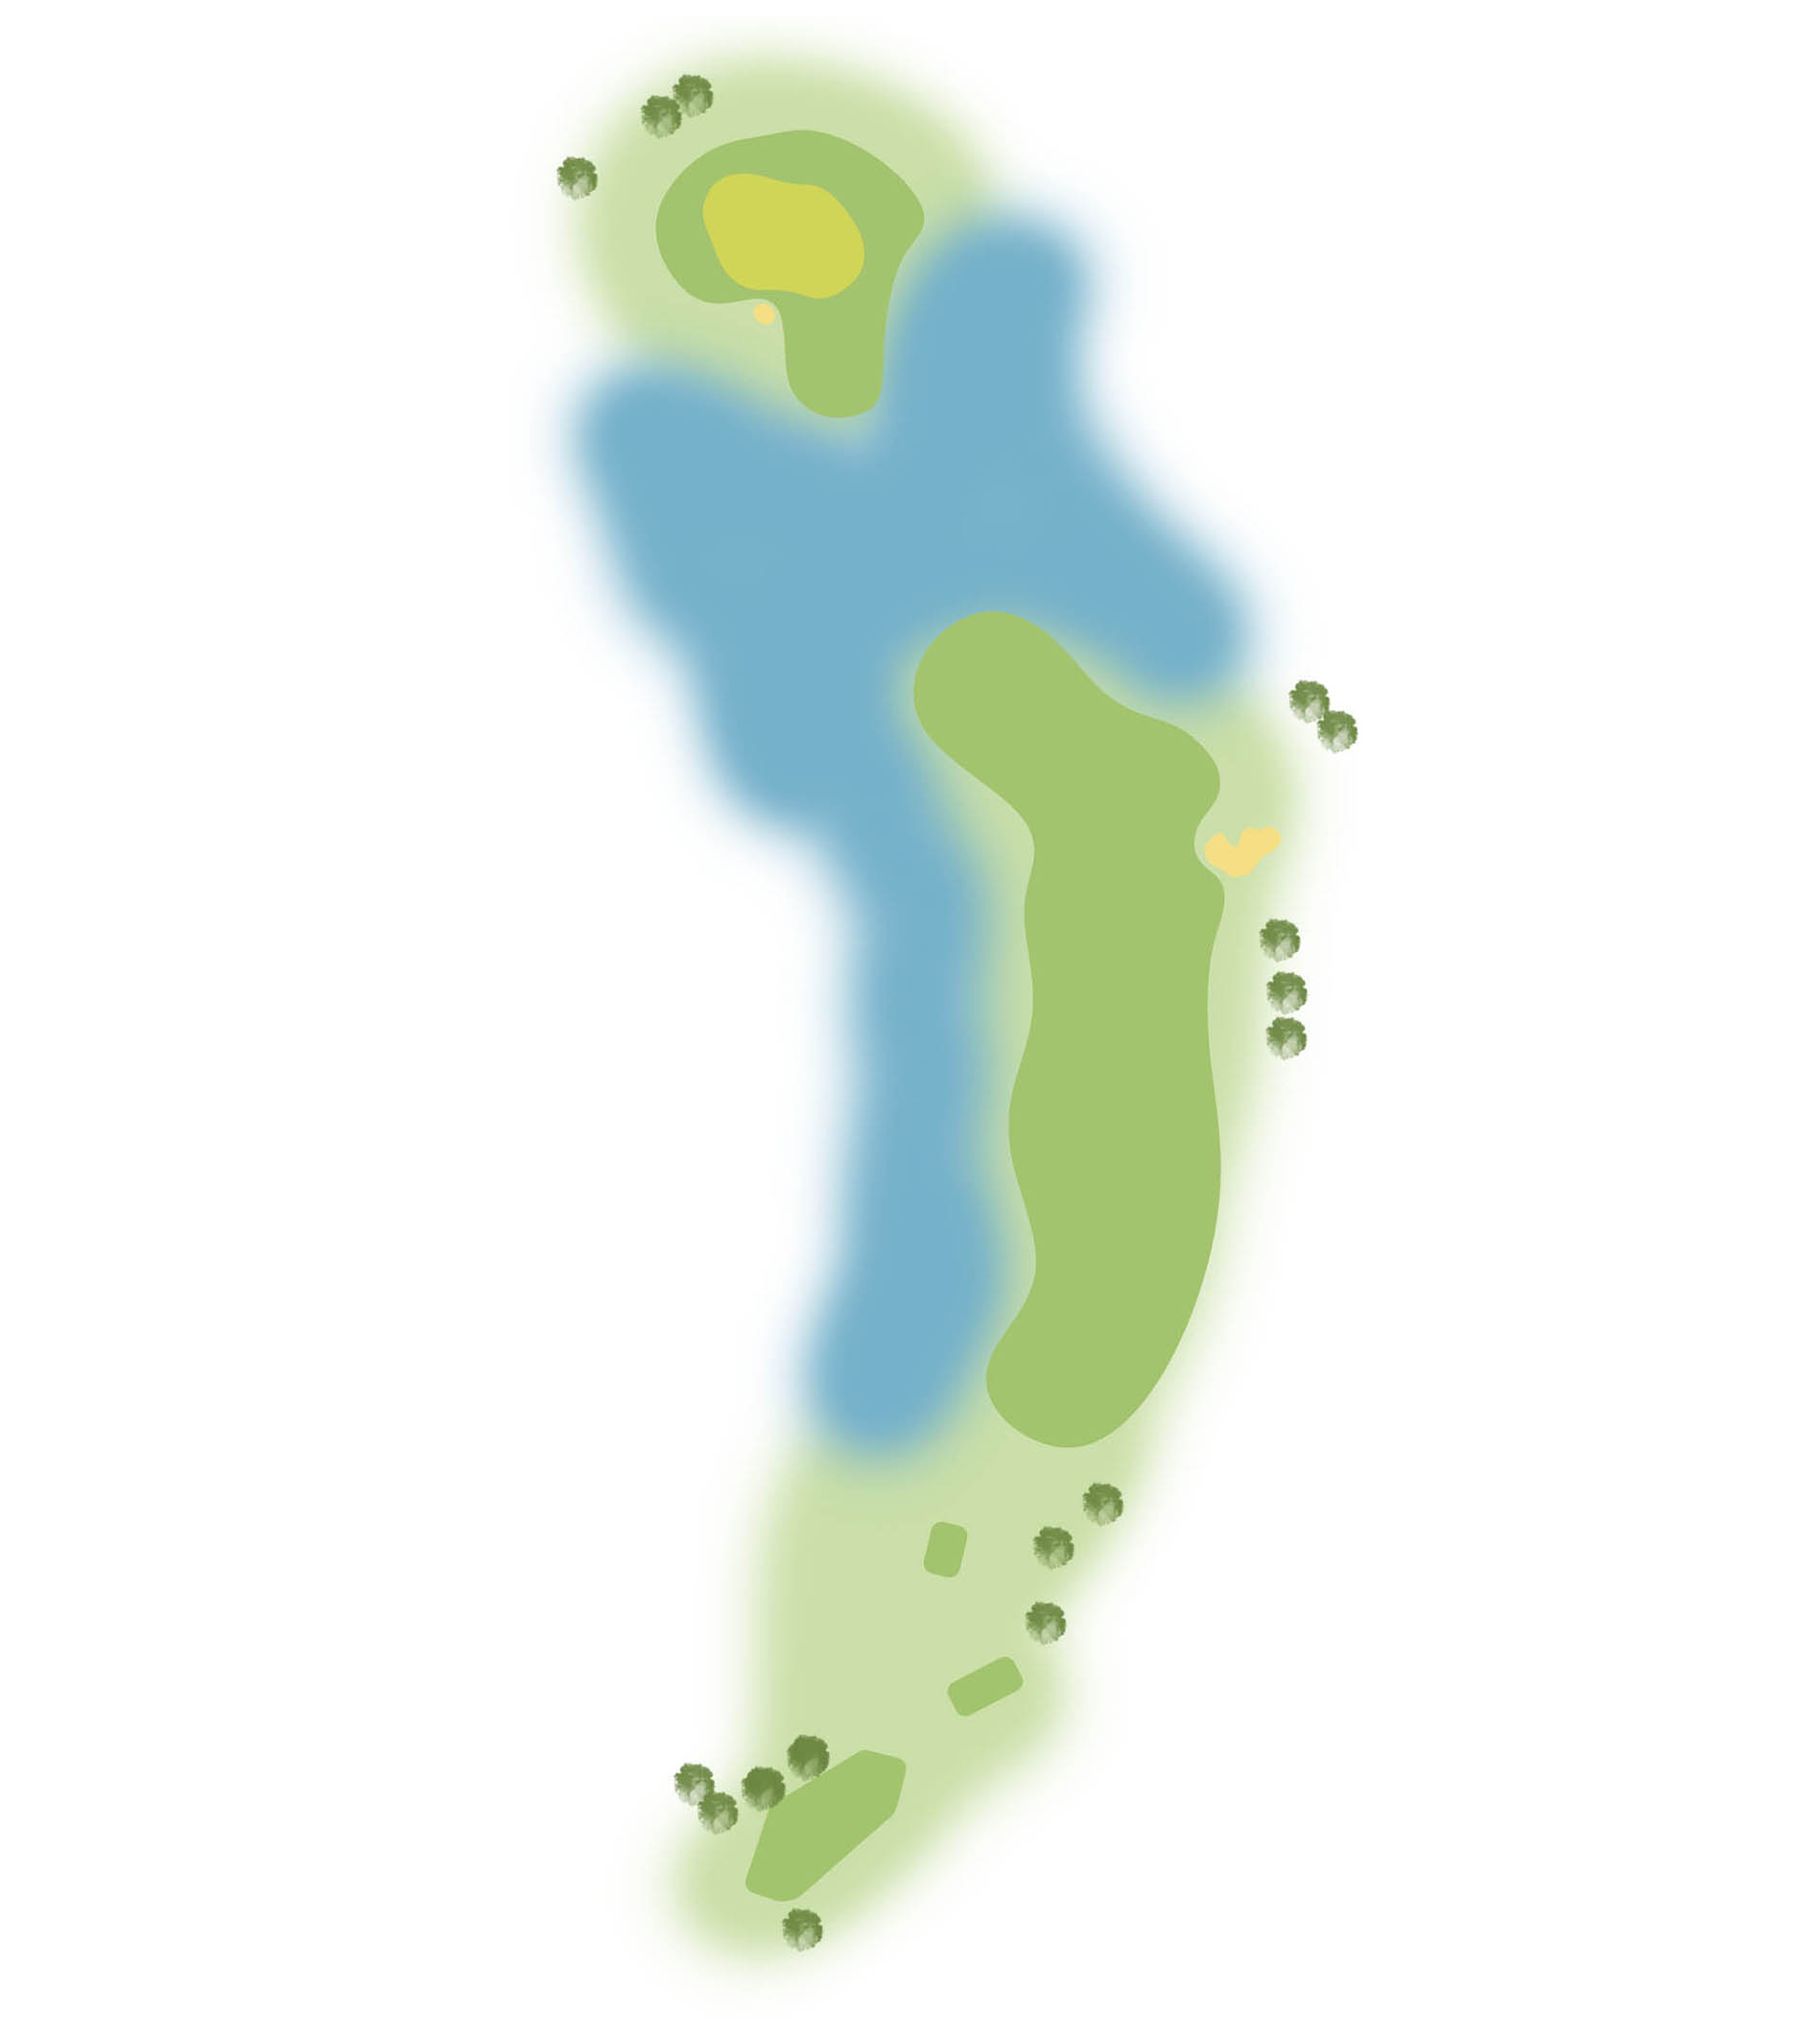

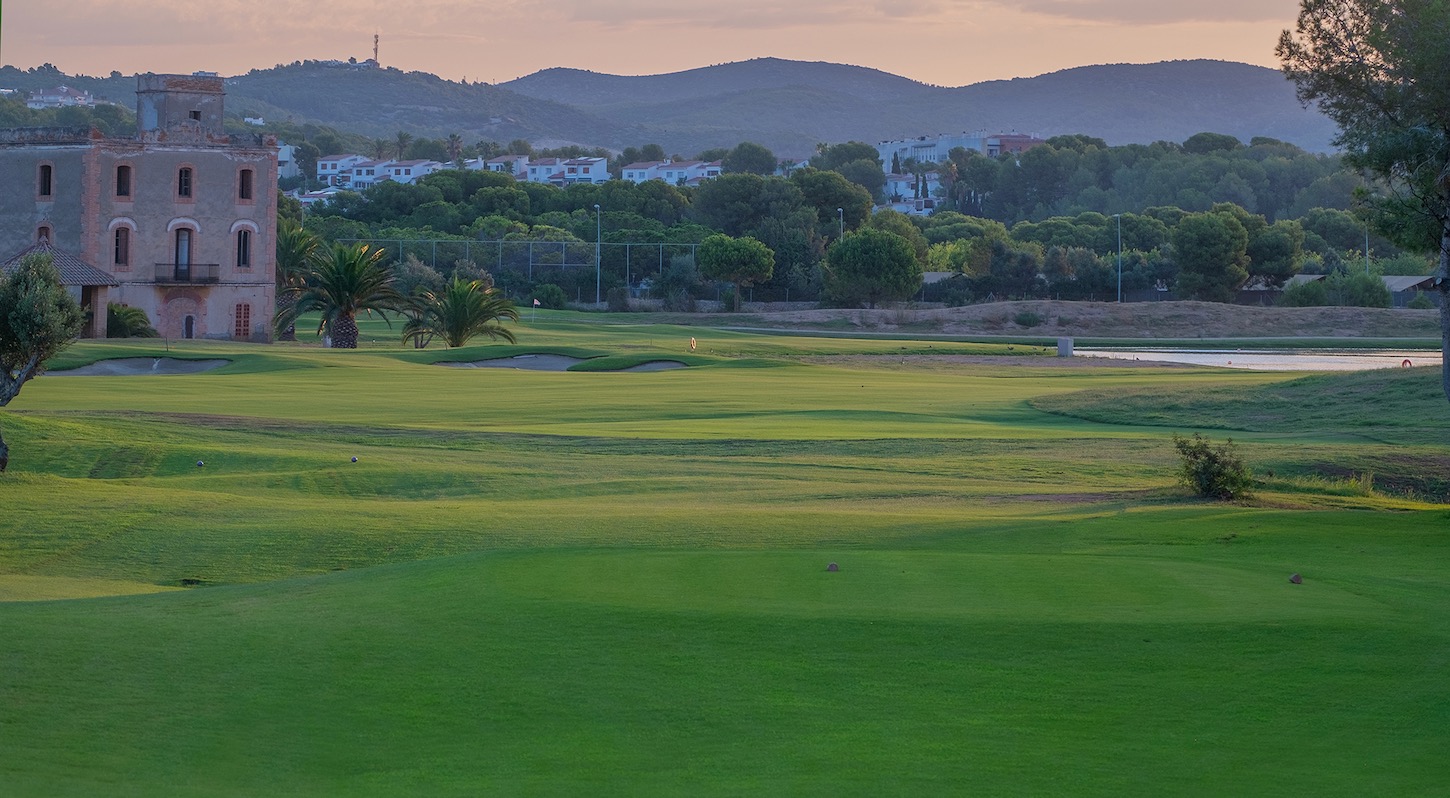
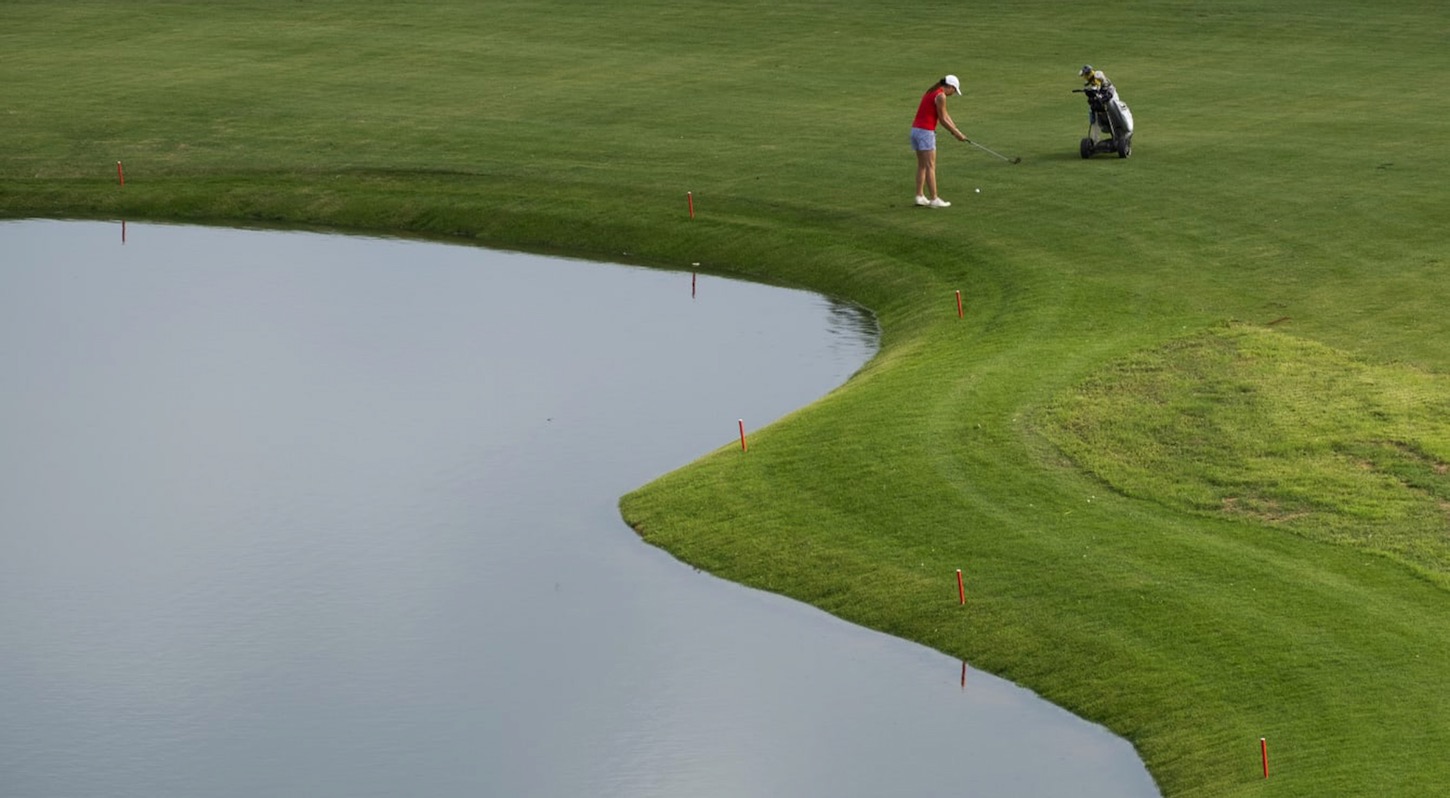
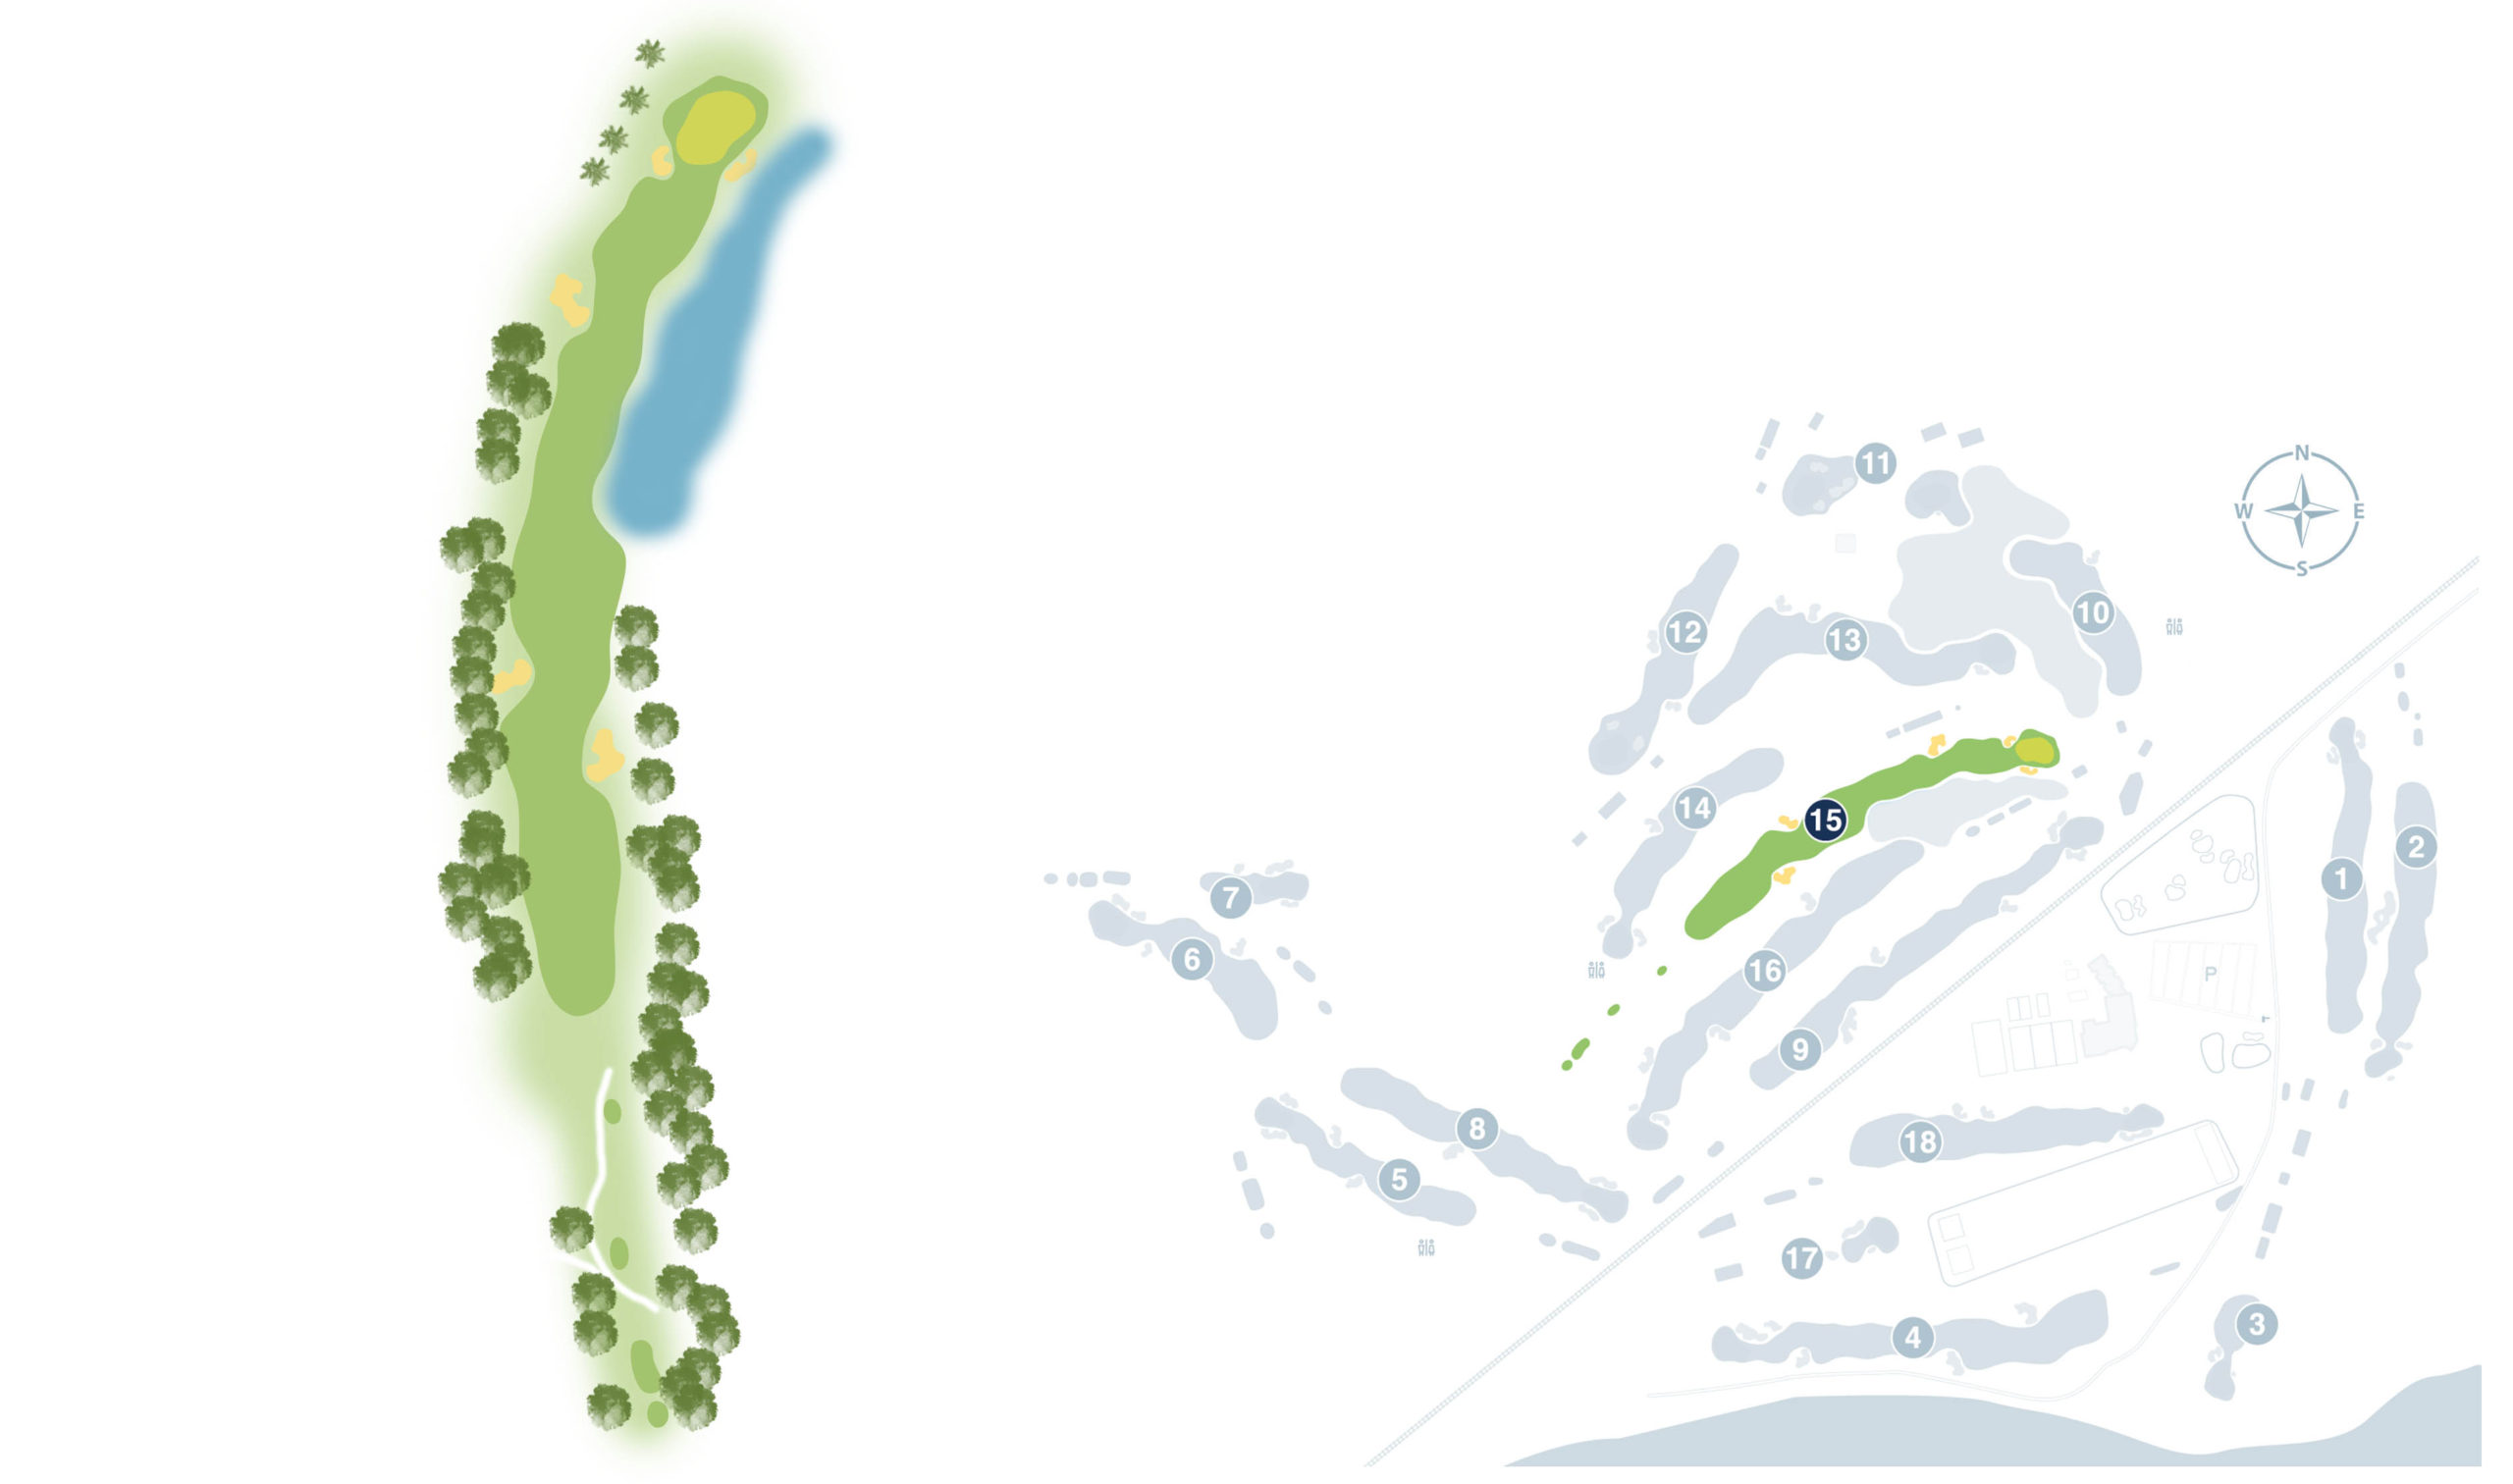
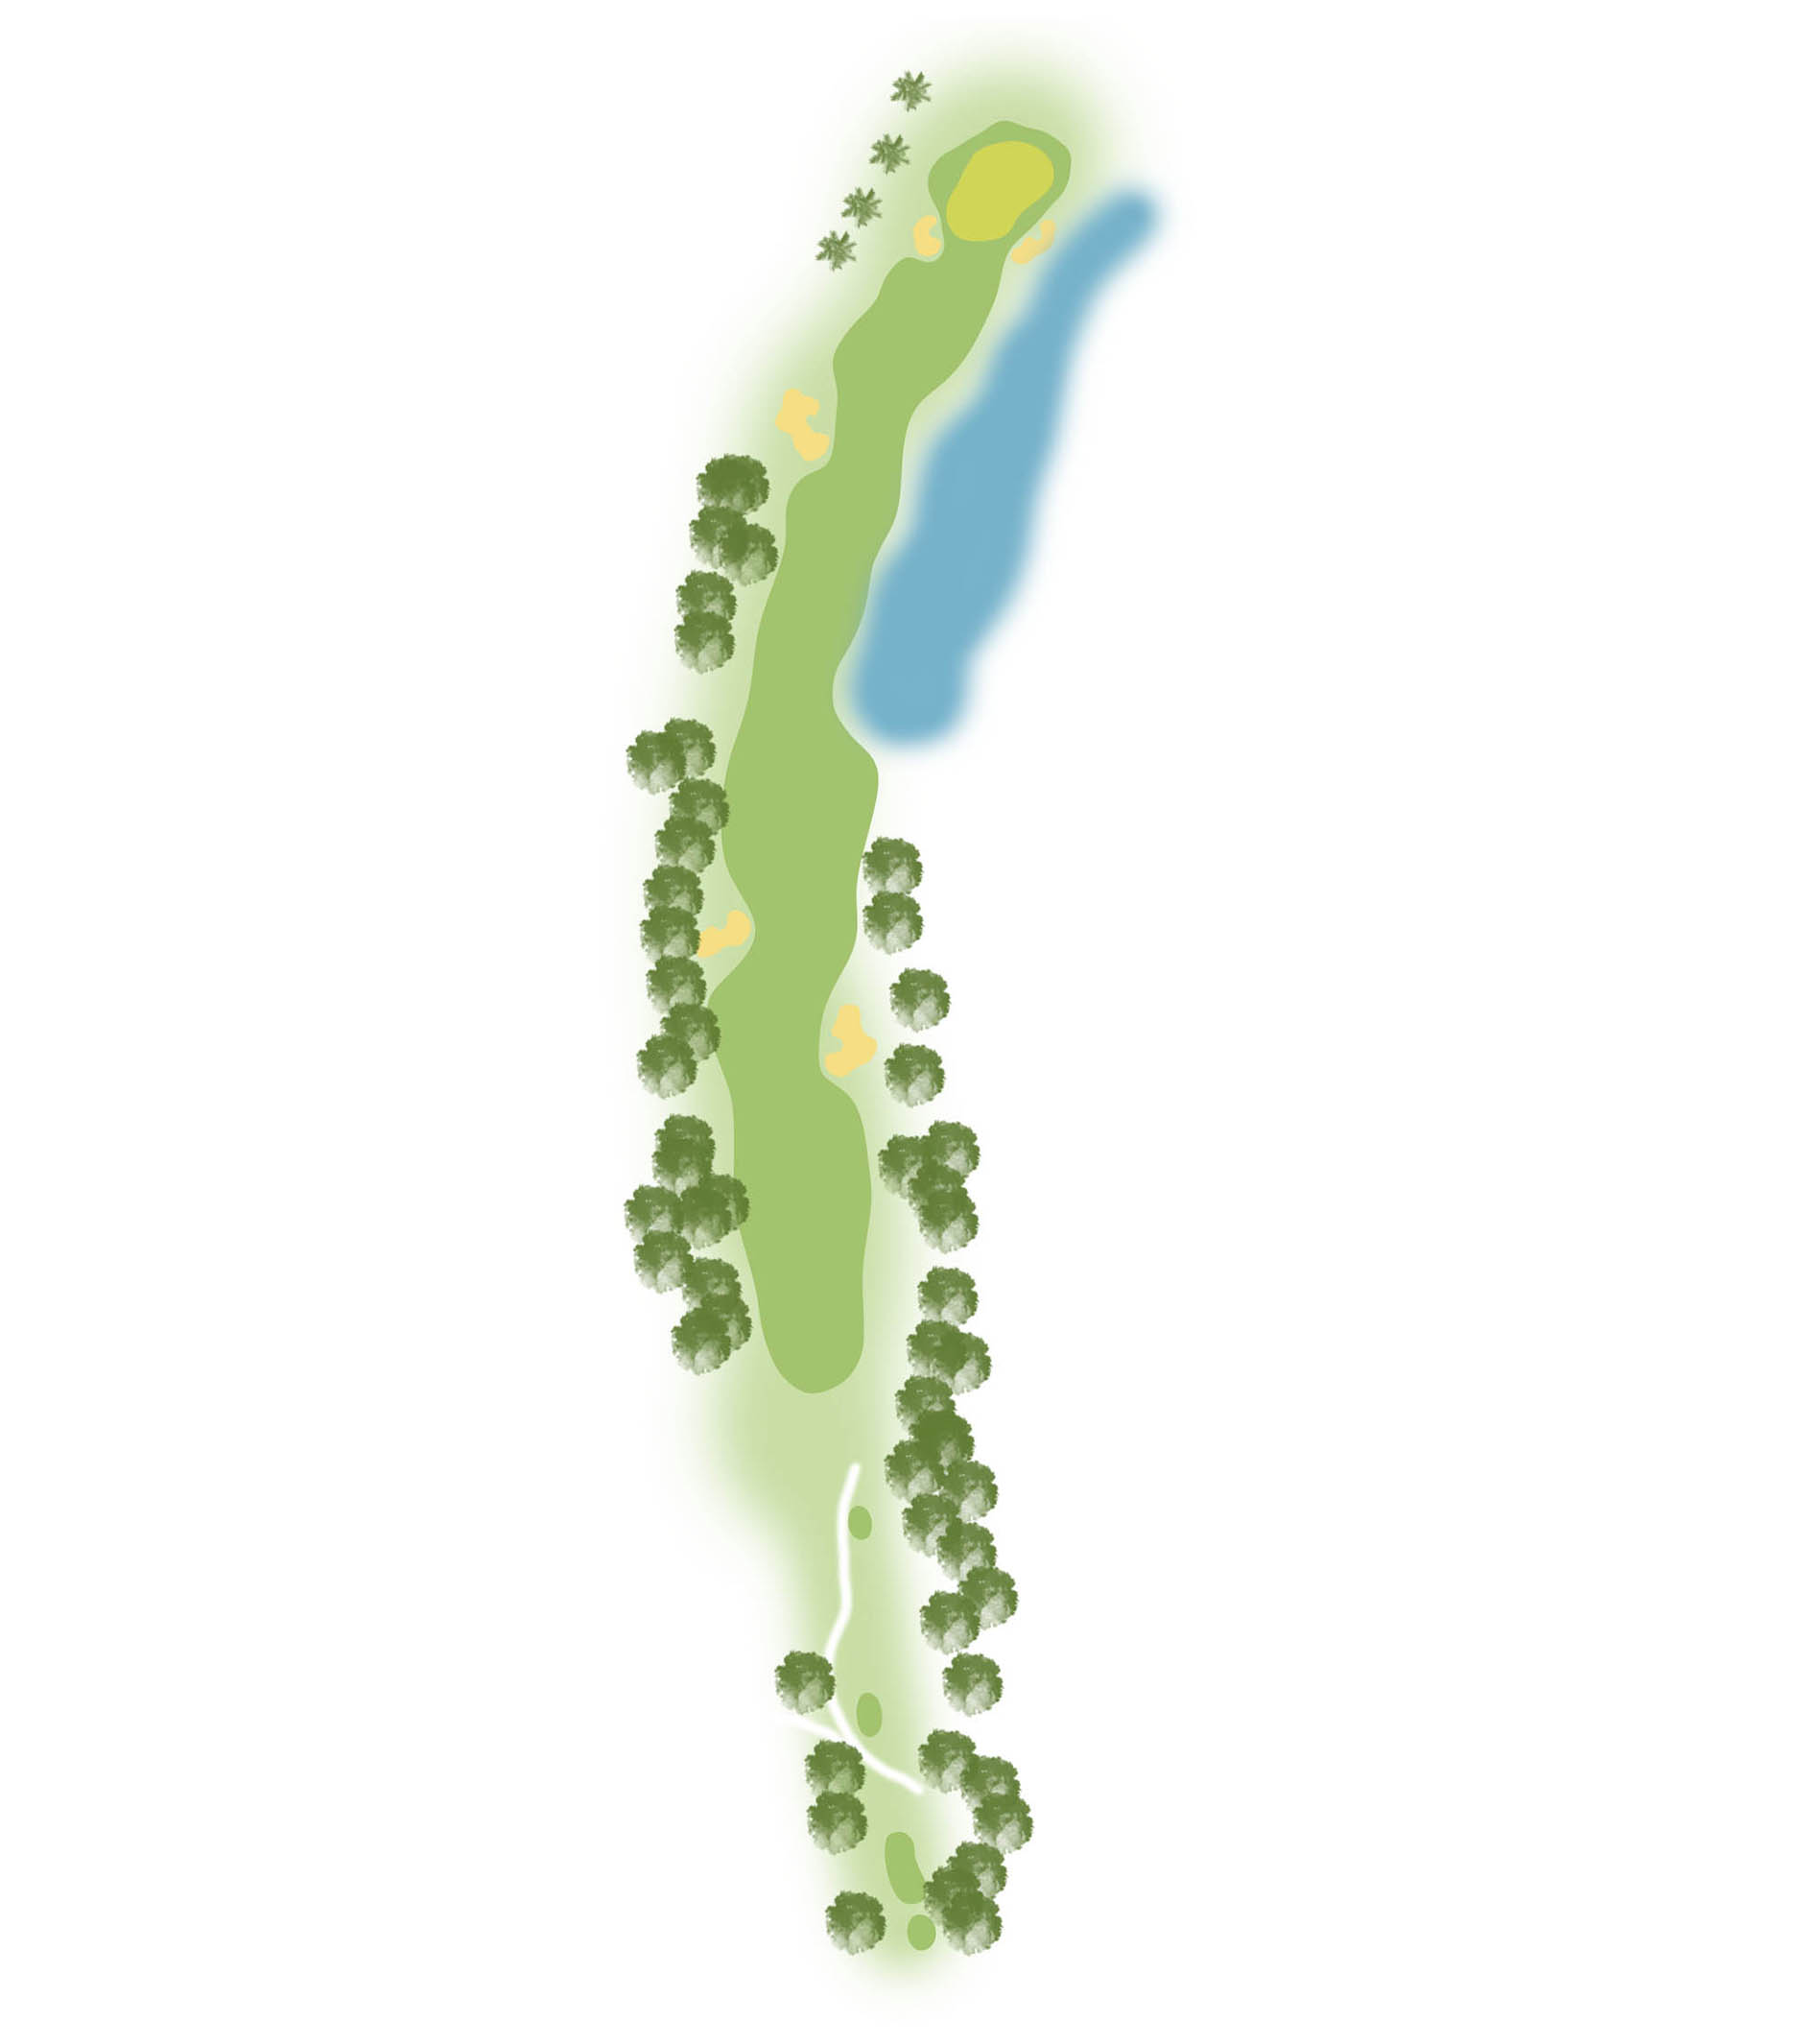
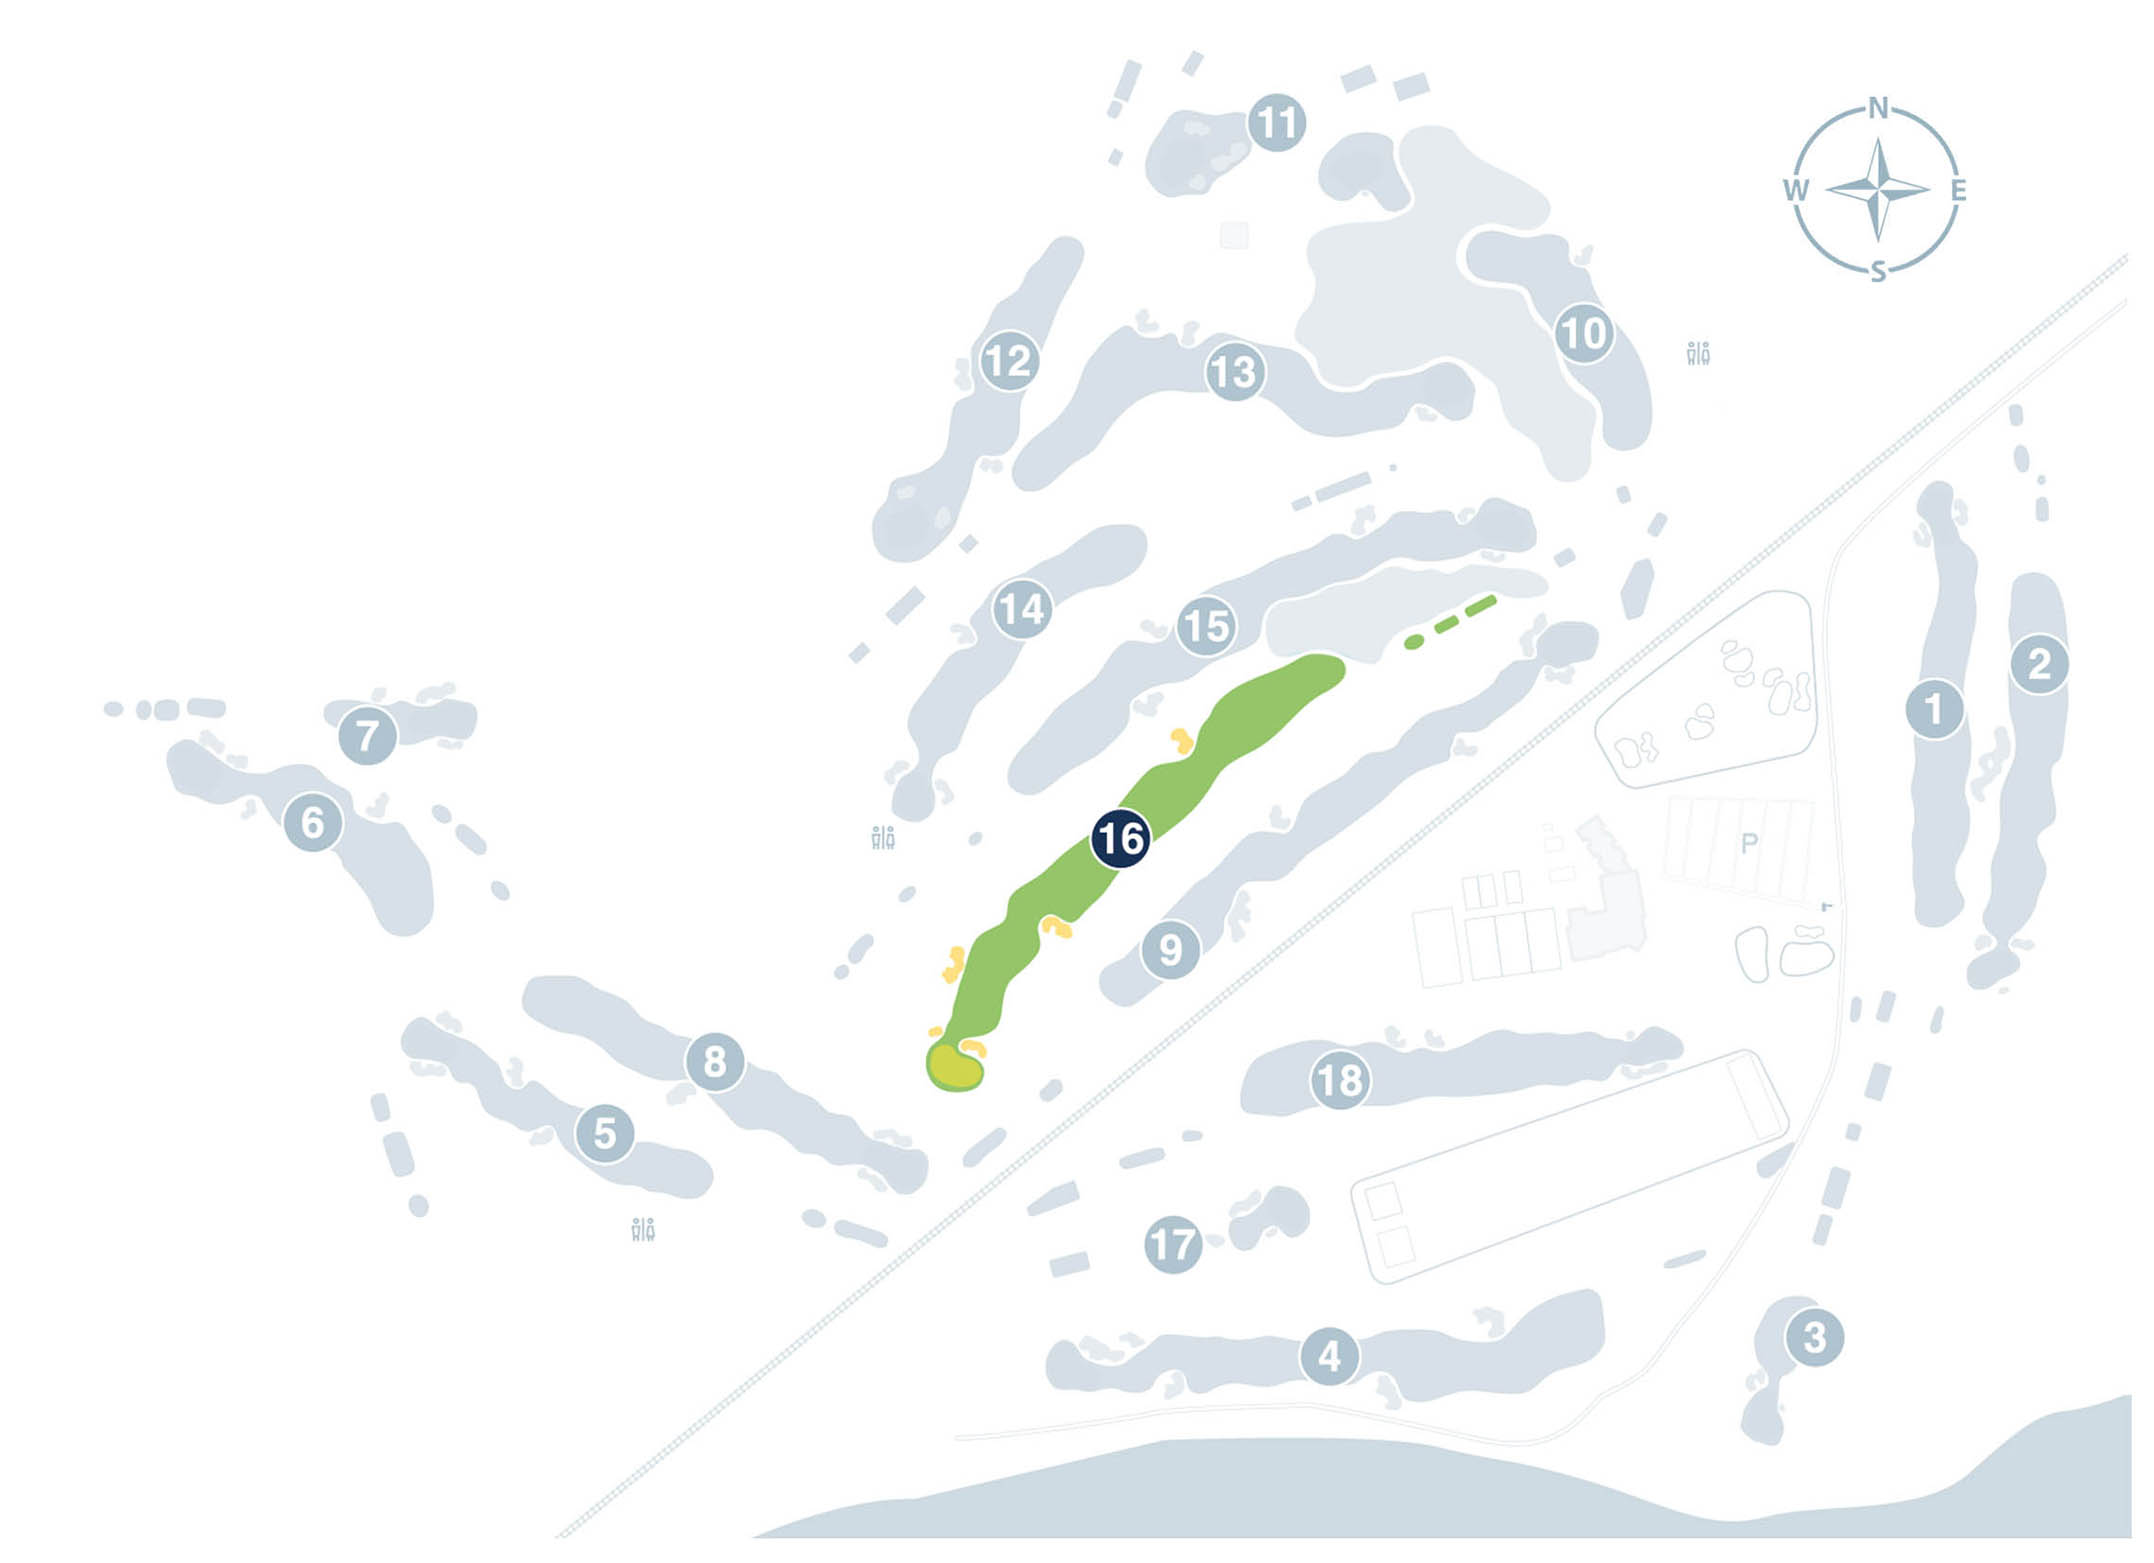
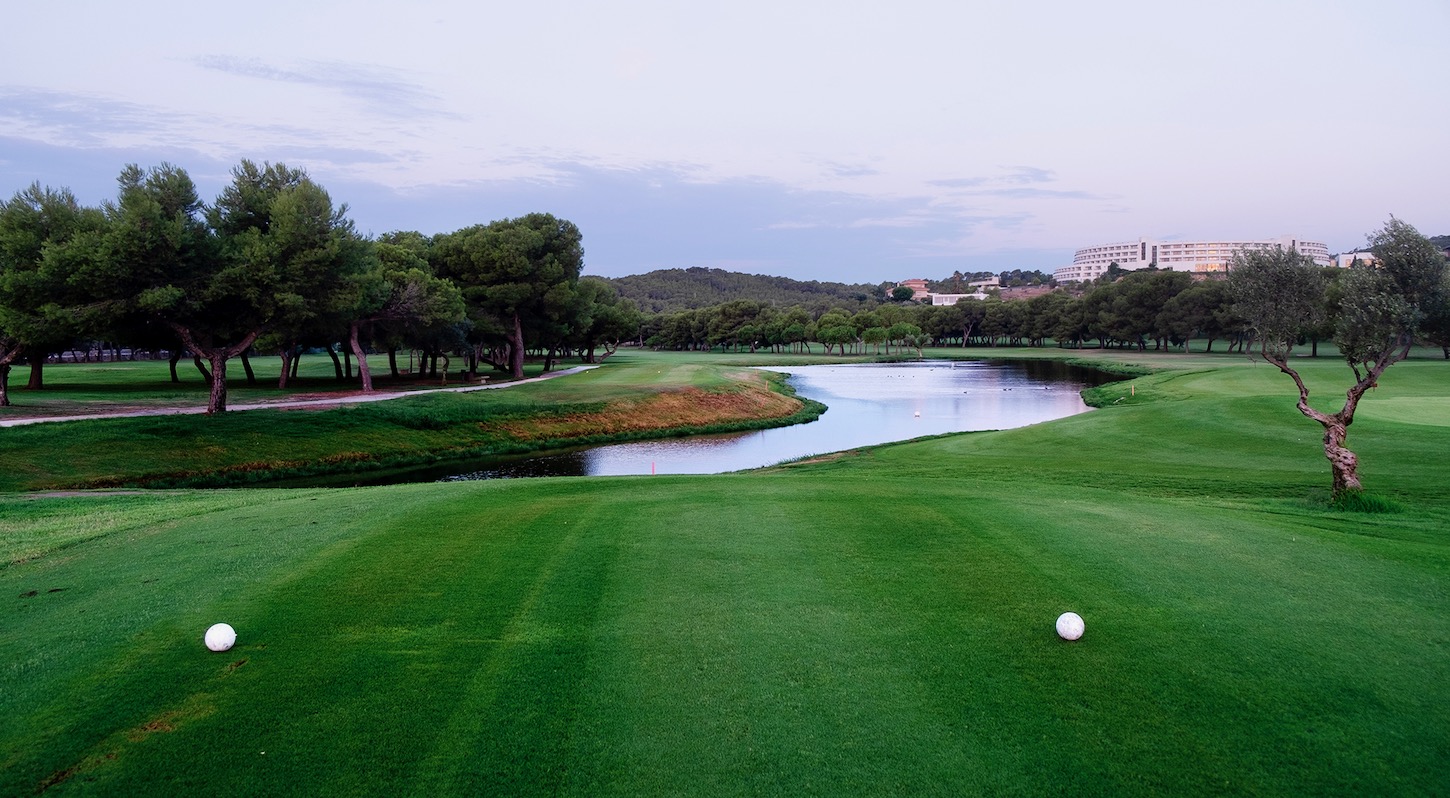
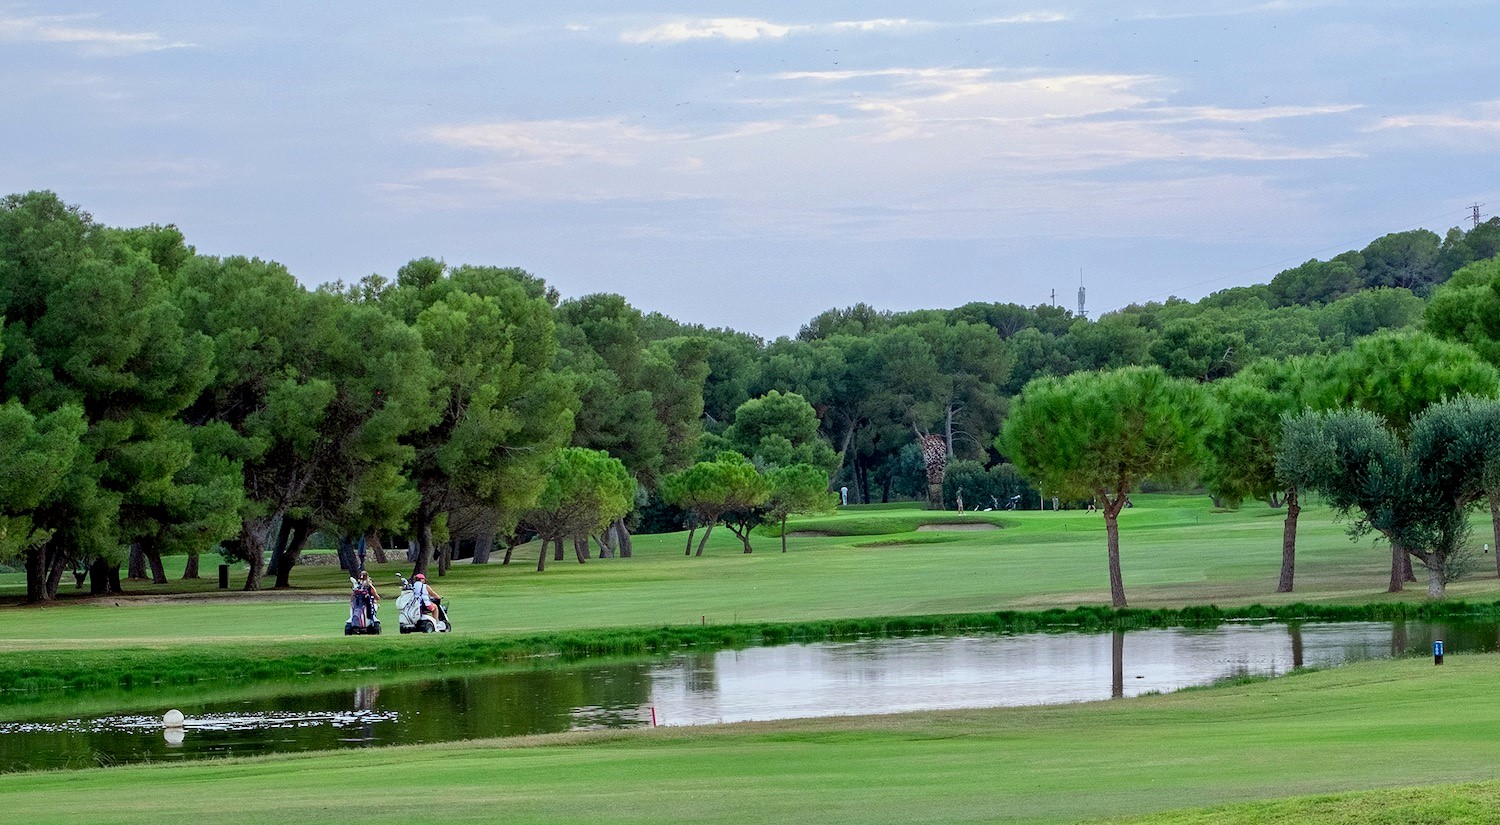
A visually intimidating hole due to the huge lake. From the tee, we will have to hit a shot of, maximum, the distance to the bunker on the right. We will try to aim towards the right side of the fairway, to avoid the water hazard. For those who can reach the green in two shots, searching for the center of the green will always be a good option. Those who cannot reach the green in two shots, should lay-up short of the water hazardo in order to have a shorter and easier shot to the green.


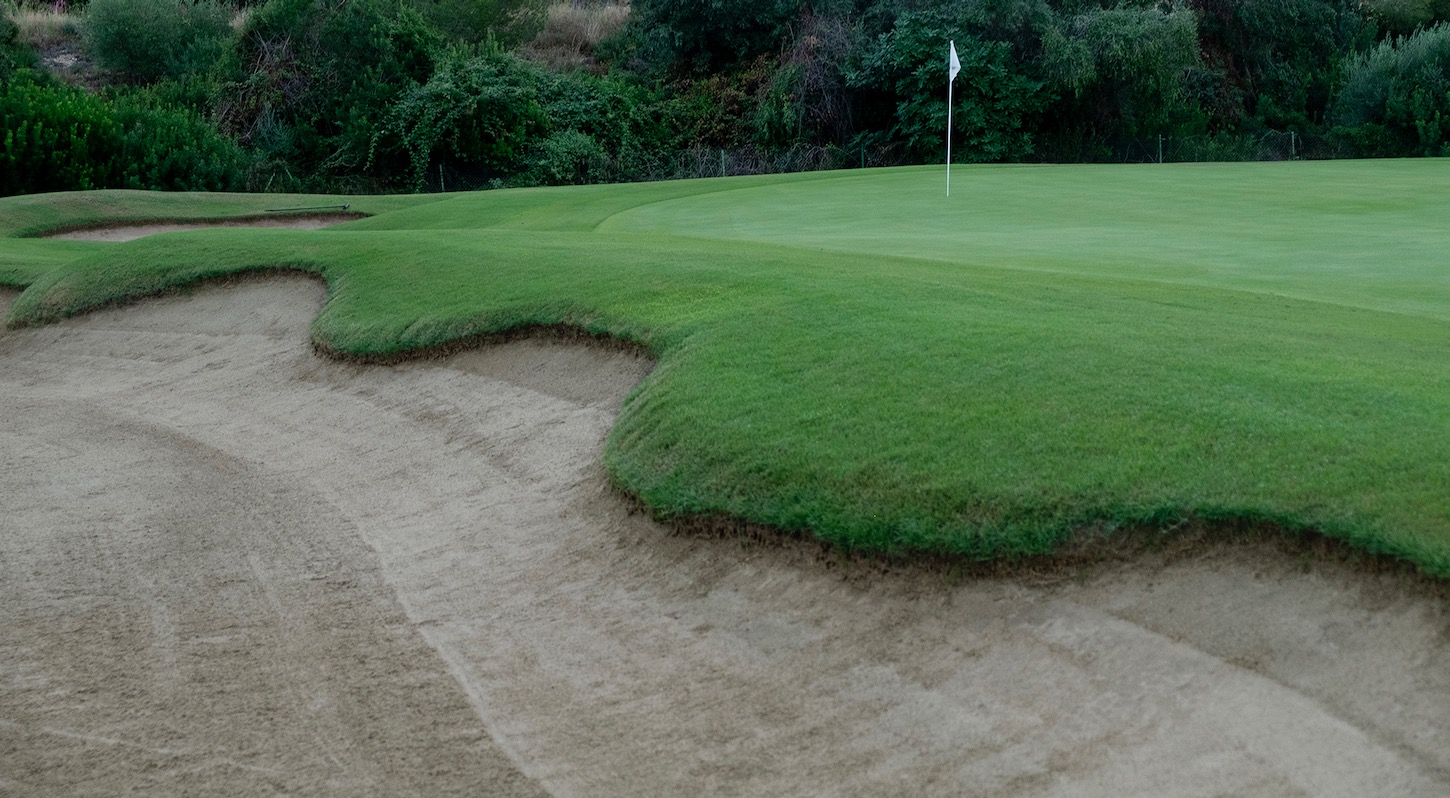
Handicap: 17
Whites: 151
Yellows: 144
Blues: 123
Reds: 117
Oranges: 109
Par 3 with a slightly elevated green. The green is quite slopy, so we must be precise from the tee. A shot to the center of the green can be very good for all pin positions and will prevent us from getting into trouble since accomplishing an up and down can be difficult.
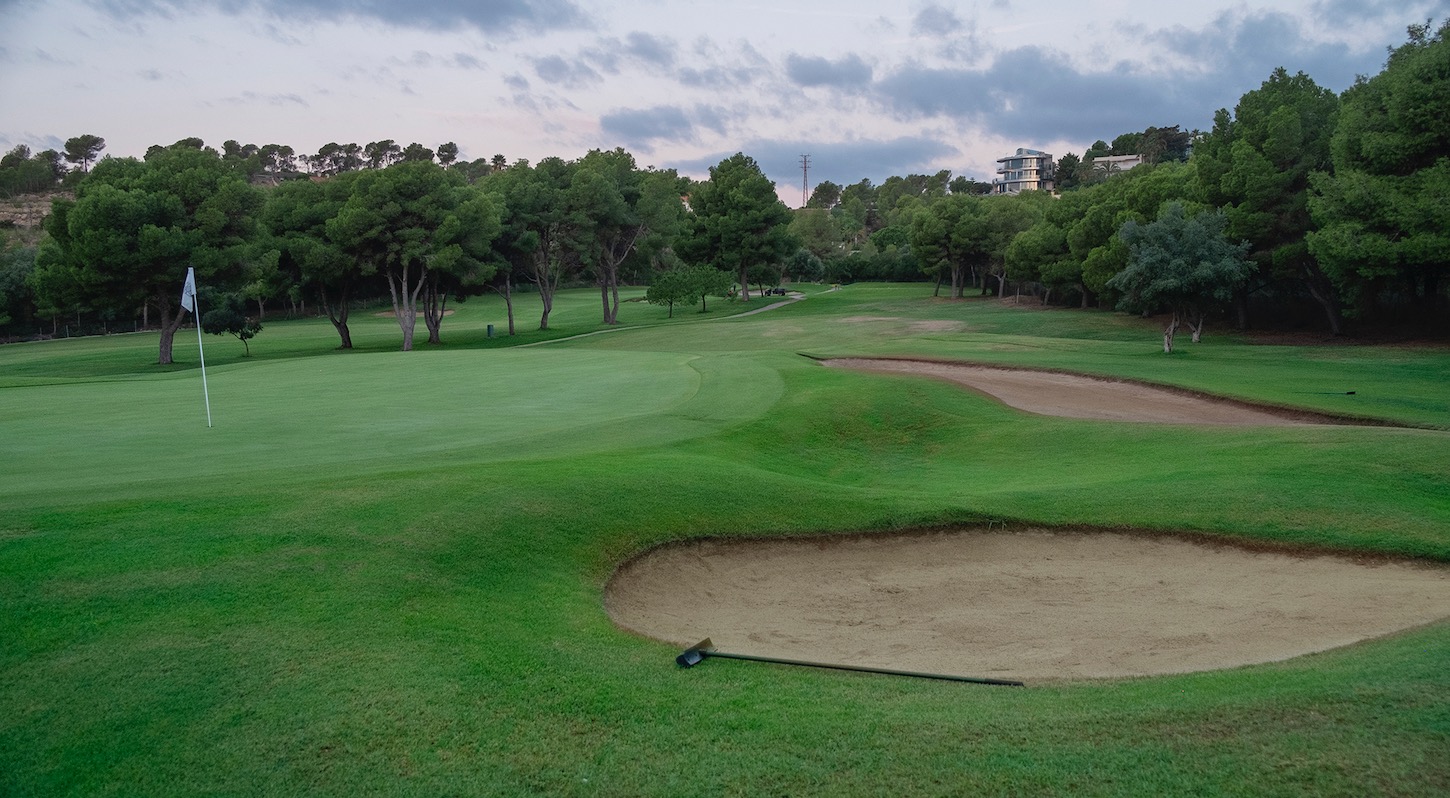
Handicap: 13
Whites: 358
Yellows: 316
Blues: 295
Reds: 282
Oranges: 200
Short par 4, but not easy, since it has both a slopy fairway and green, so we must plan our strategy well. From the tee we must search the left side of the fairway to avoid the deep bunker on the right. The second shot will be short, but to an elevated green with a lot of movement. We must make sure we take enough club to avoid the bunkers that protect the entrance of the green, and the slight uphill.

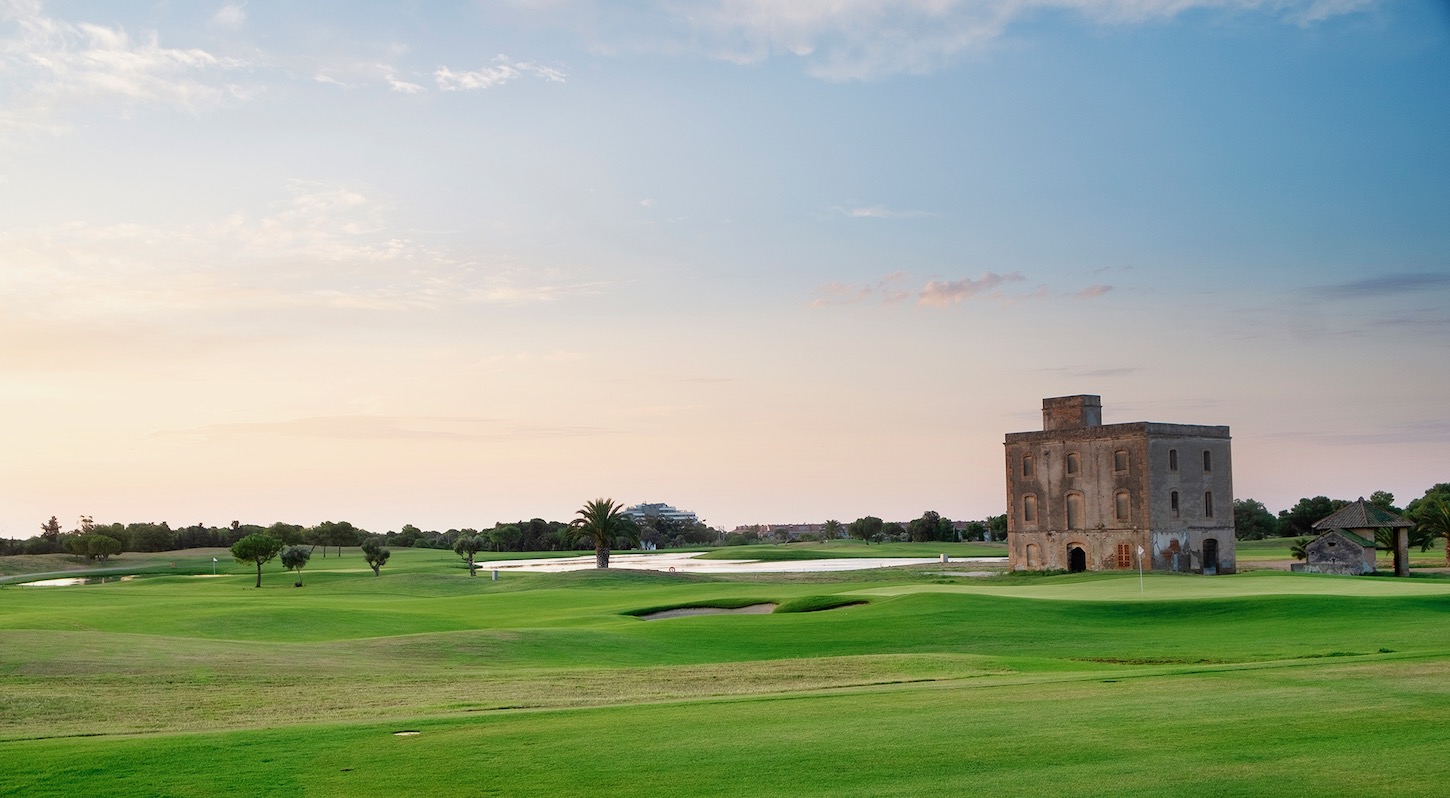
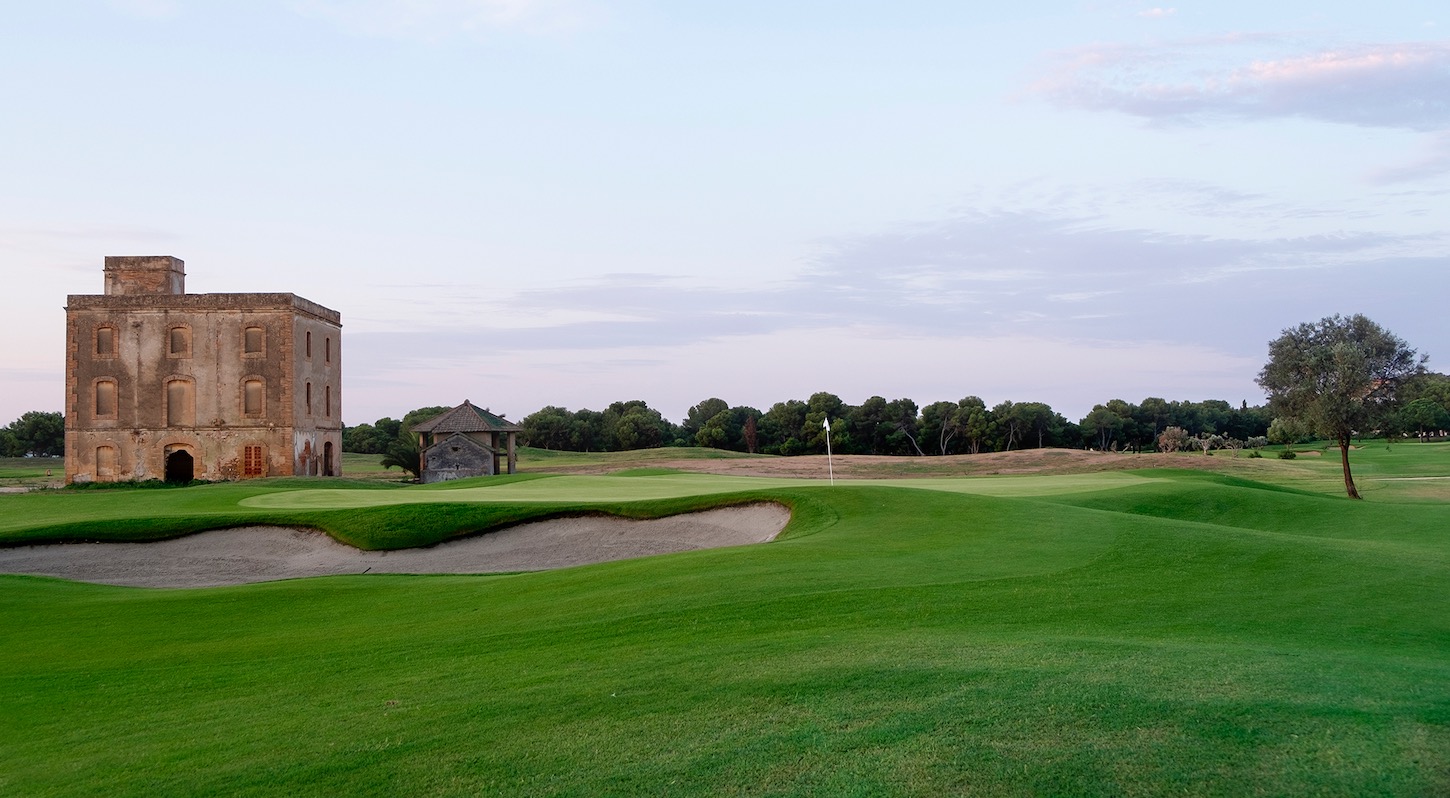
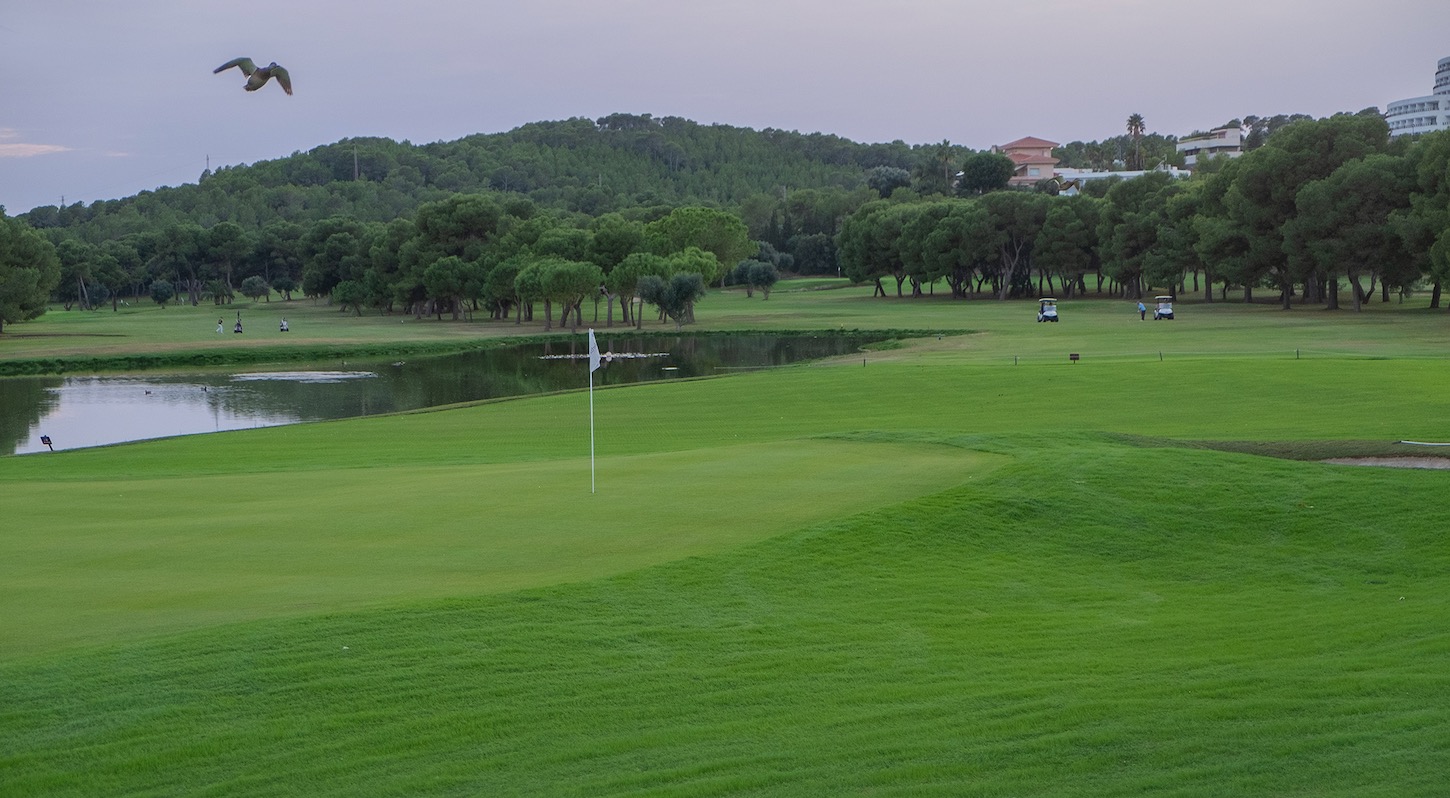
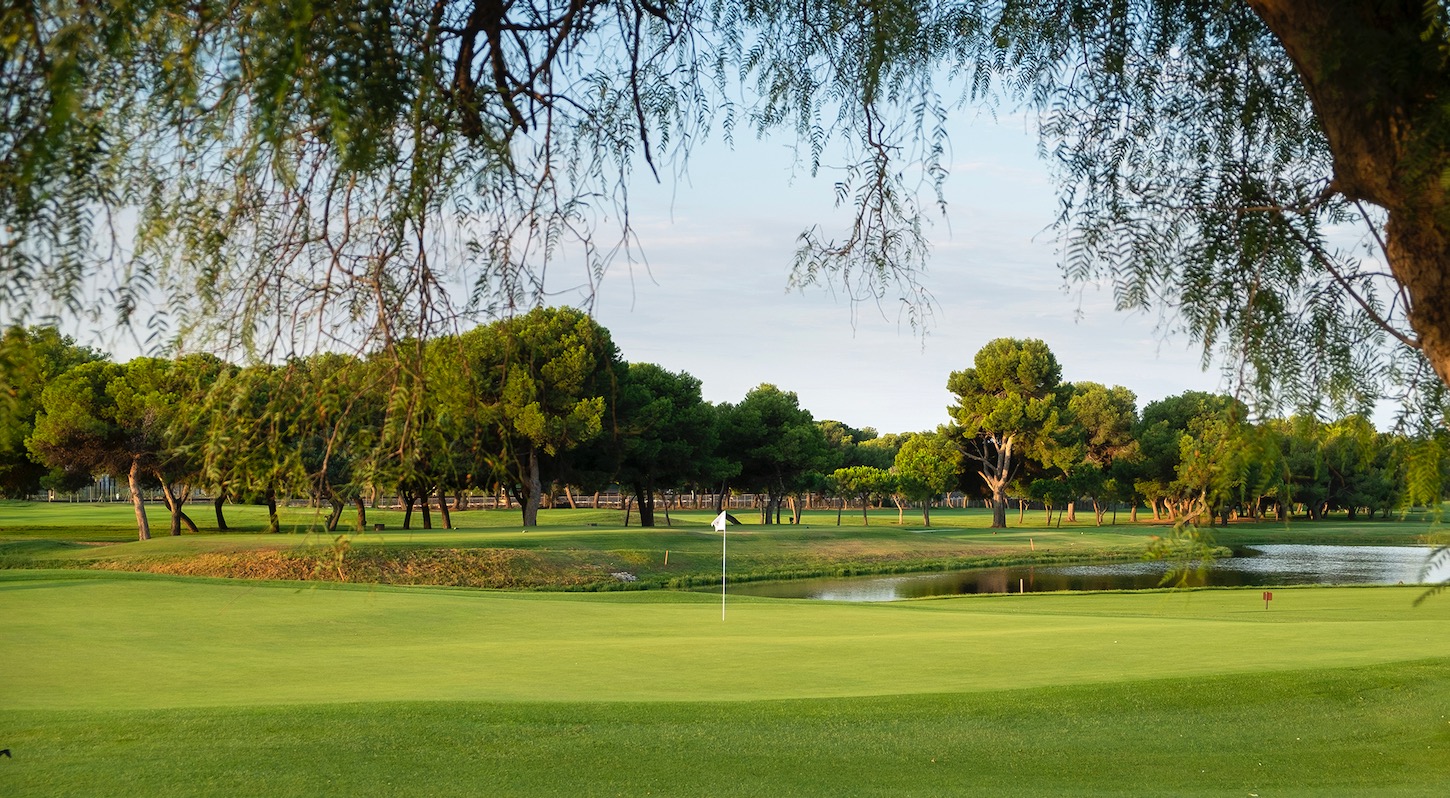
Handicap: 3
Whites: 424
Yellows: 388
Blues: 374
Reds: 329
Oranges: 259
Long par 4 protected by some dunes on the right, which we must avoid from the tee. We should try and hit the right side of the fairway in order to make the hole a little shorter. On the approach shot into the green, we will try to stay on the right side to avoid the water hazard that protects the entire left area of the green.

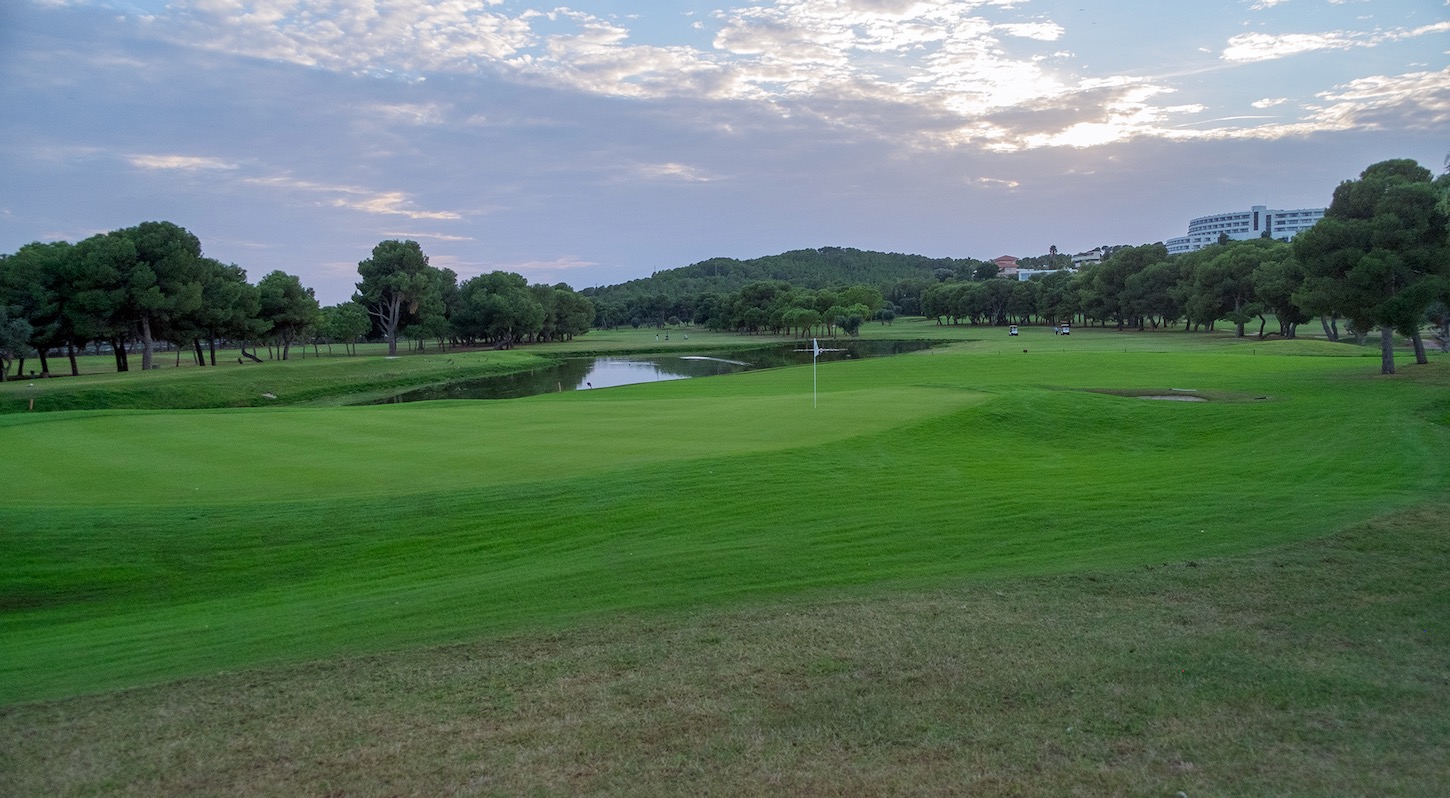
Handicap: 9
Whites: 368
Yellows: 340
Blues: 321
Reds: 312
Oranges: 213
Demanding par 4 with a slight dogleg to the left. The left side of the hole is very well protected with trees and we have two bunkers on the right of the fairwell that make it dificult for the hardest hitters. From the tee, we must always stay on the right side of the fairway to have a good entrance to the green with the second shot. The green is slightly elevated and protected by bunkers on both sides. A shot to the center of the green will always be keep us safe.


Handicap: 7
Whites: 484
Yellows: 465
Blues: 423
Reds: 370
Oranges: 326
This par 5 is characterized by the good location of its bunkers, which we must avoid from the tee, since it will make the hole very difficult not being on the fairway. On our second shot we must stay on the left side of the fairway to avoid the water hazard on the right. The green has several platforms, so we will try to be precise on our approach shot to the green to try to leave the ball on the corresponding platform.

Handicap: 11
Whites: 492
Yellows: 436
Blues: 410
Reds: 390
Oranges: 318
Short par 5 with a wide fairway, protected by pine trees and two bunkers on the right side. The big hitters will have the opportunity to reach the green in two shots. Those who can’t reach in two shots, will have to lay-up short of the bunkers. We will be able to be more aggressive on the approach shot depending on the pin position; It is a very wide but short green in which you should not miss either long or to the left.


Handicap: 15
Whites: 158
Yellows: 153
Blues: 134
Reds: 130
Oranges: 124
Par 3 of medium distance that has a wide green, although not very long. The green is protected by bunkers on both sides, so a shot to the center of the green is always a good option. In case of doubt, a short shot is always better than a long one, since the chip from the front of the green is much easier than from the back. The green is not very complicated as it is quite flat.

Handicap: 5
Whites: 392
Yellows: 384
Blues: 349
Reds: 325
Oranges: 283
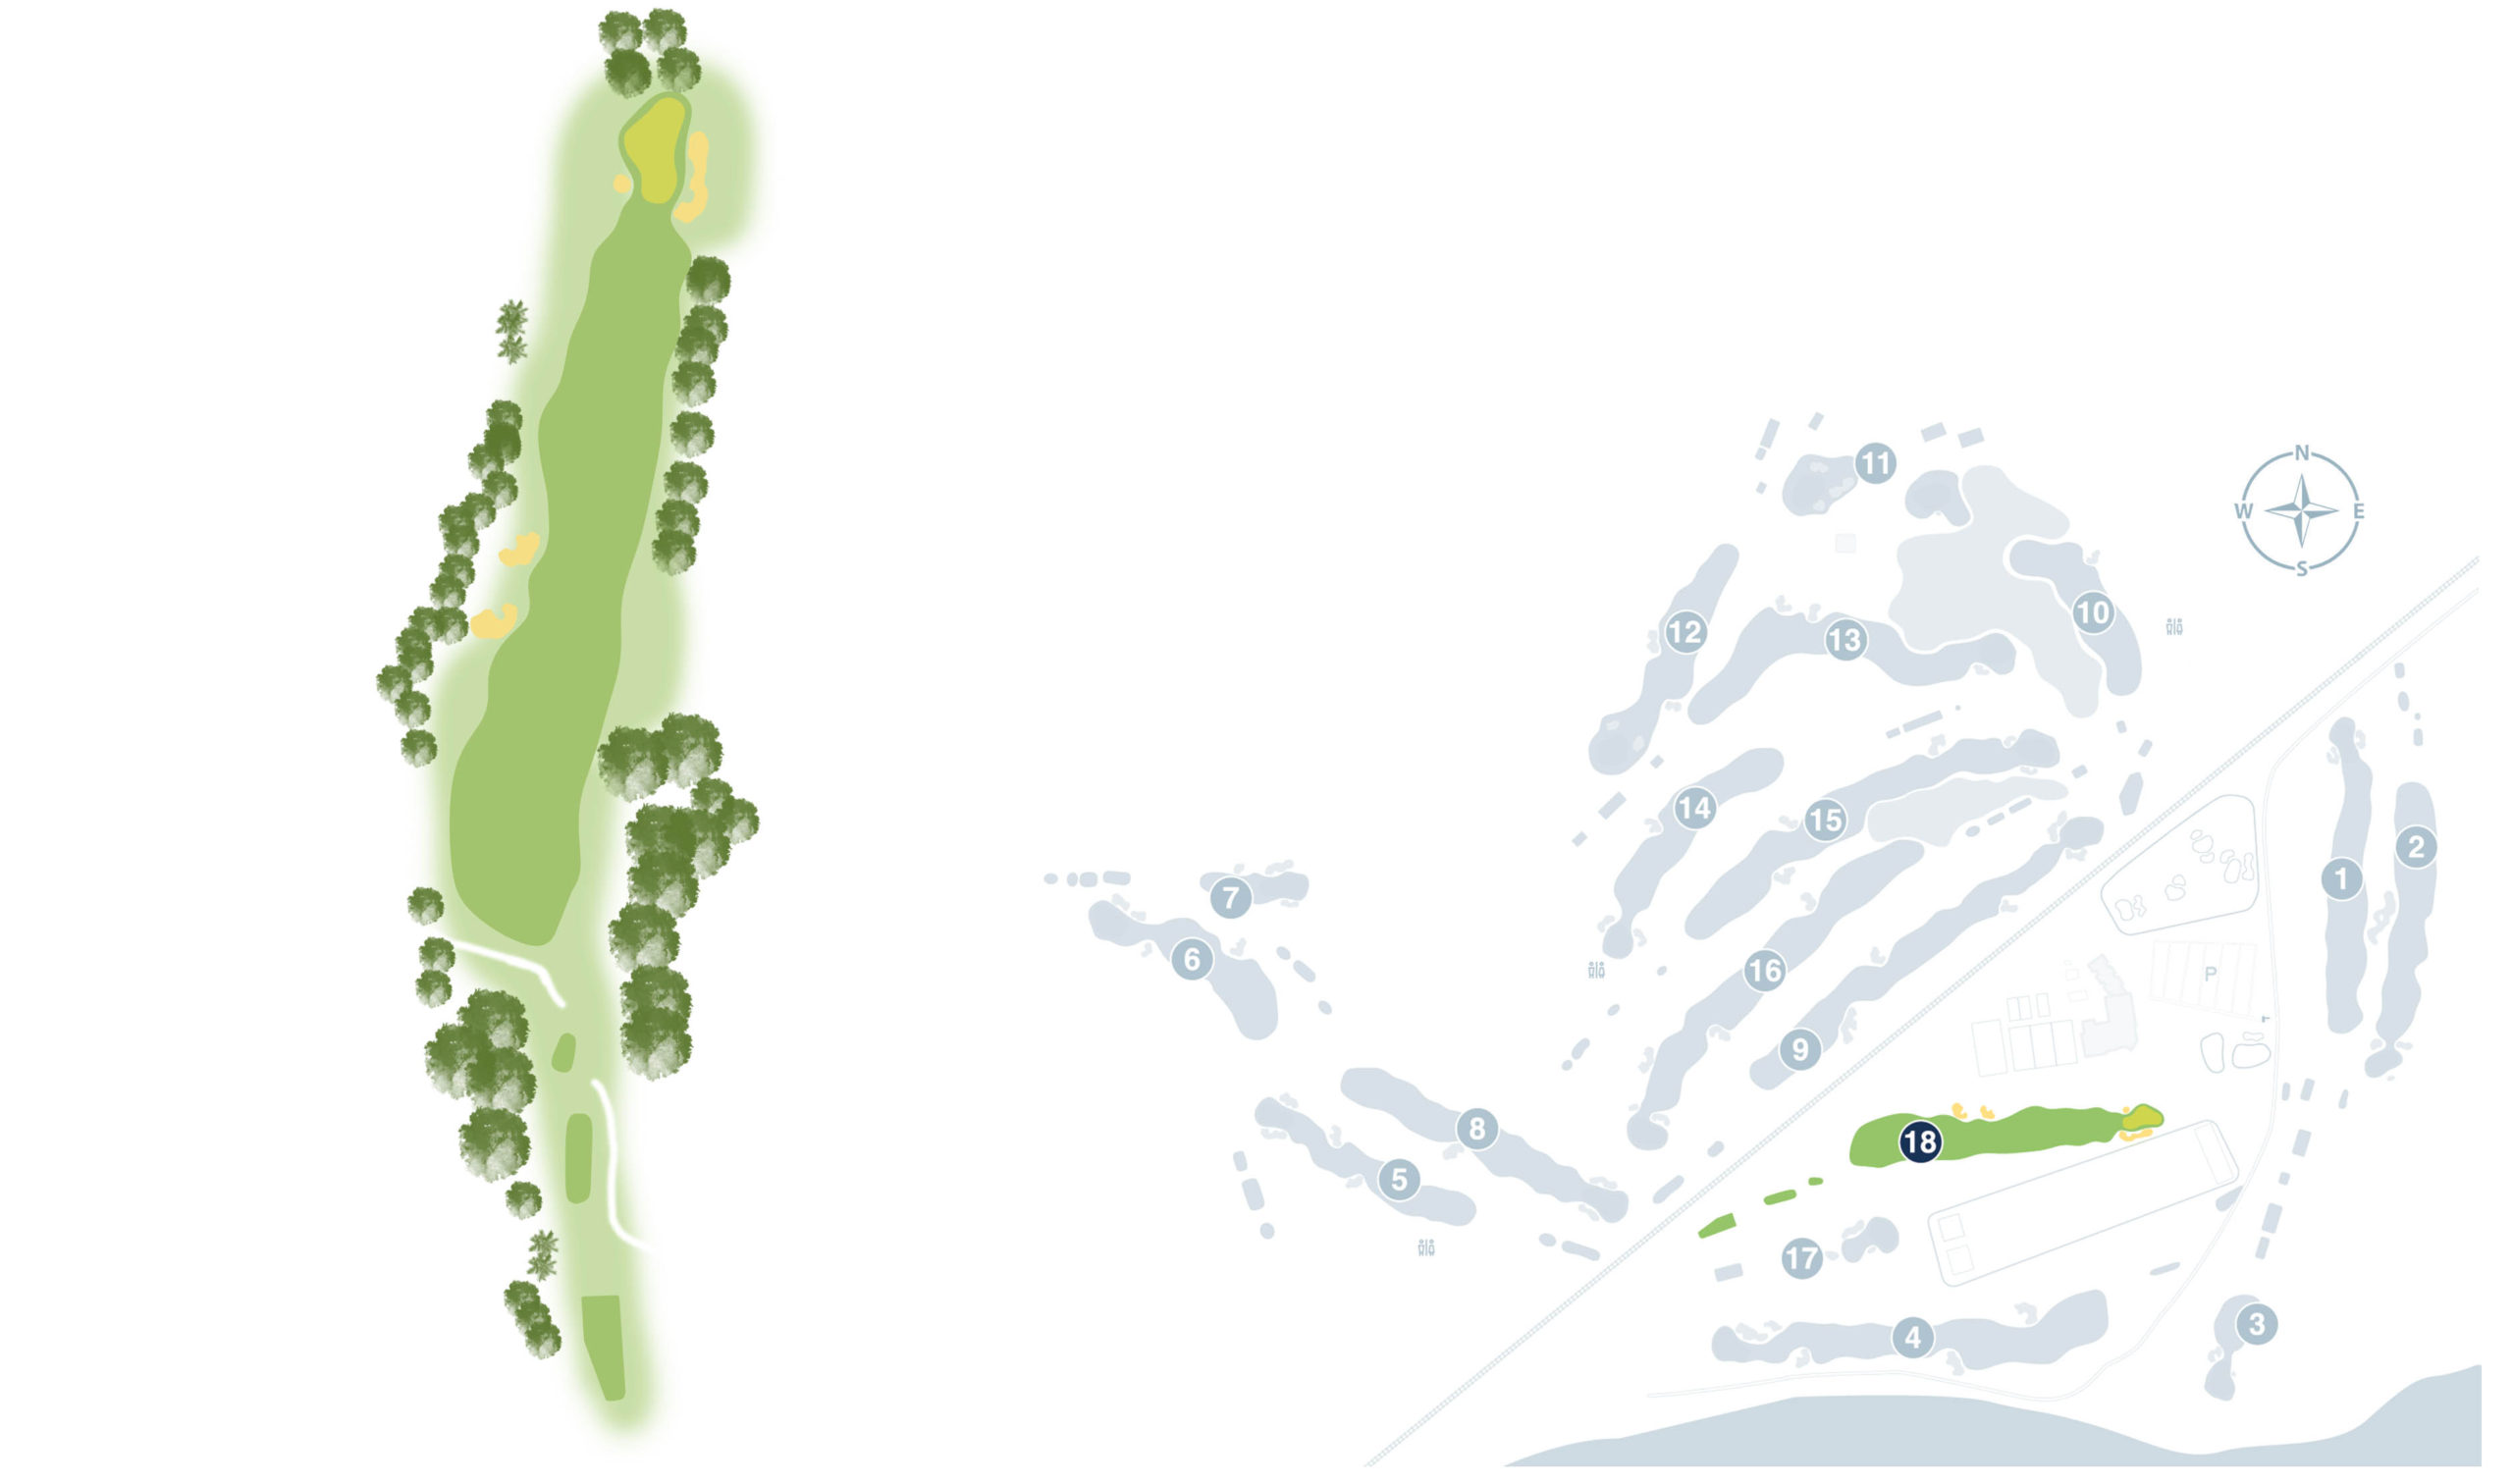
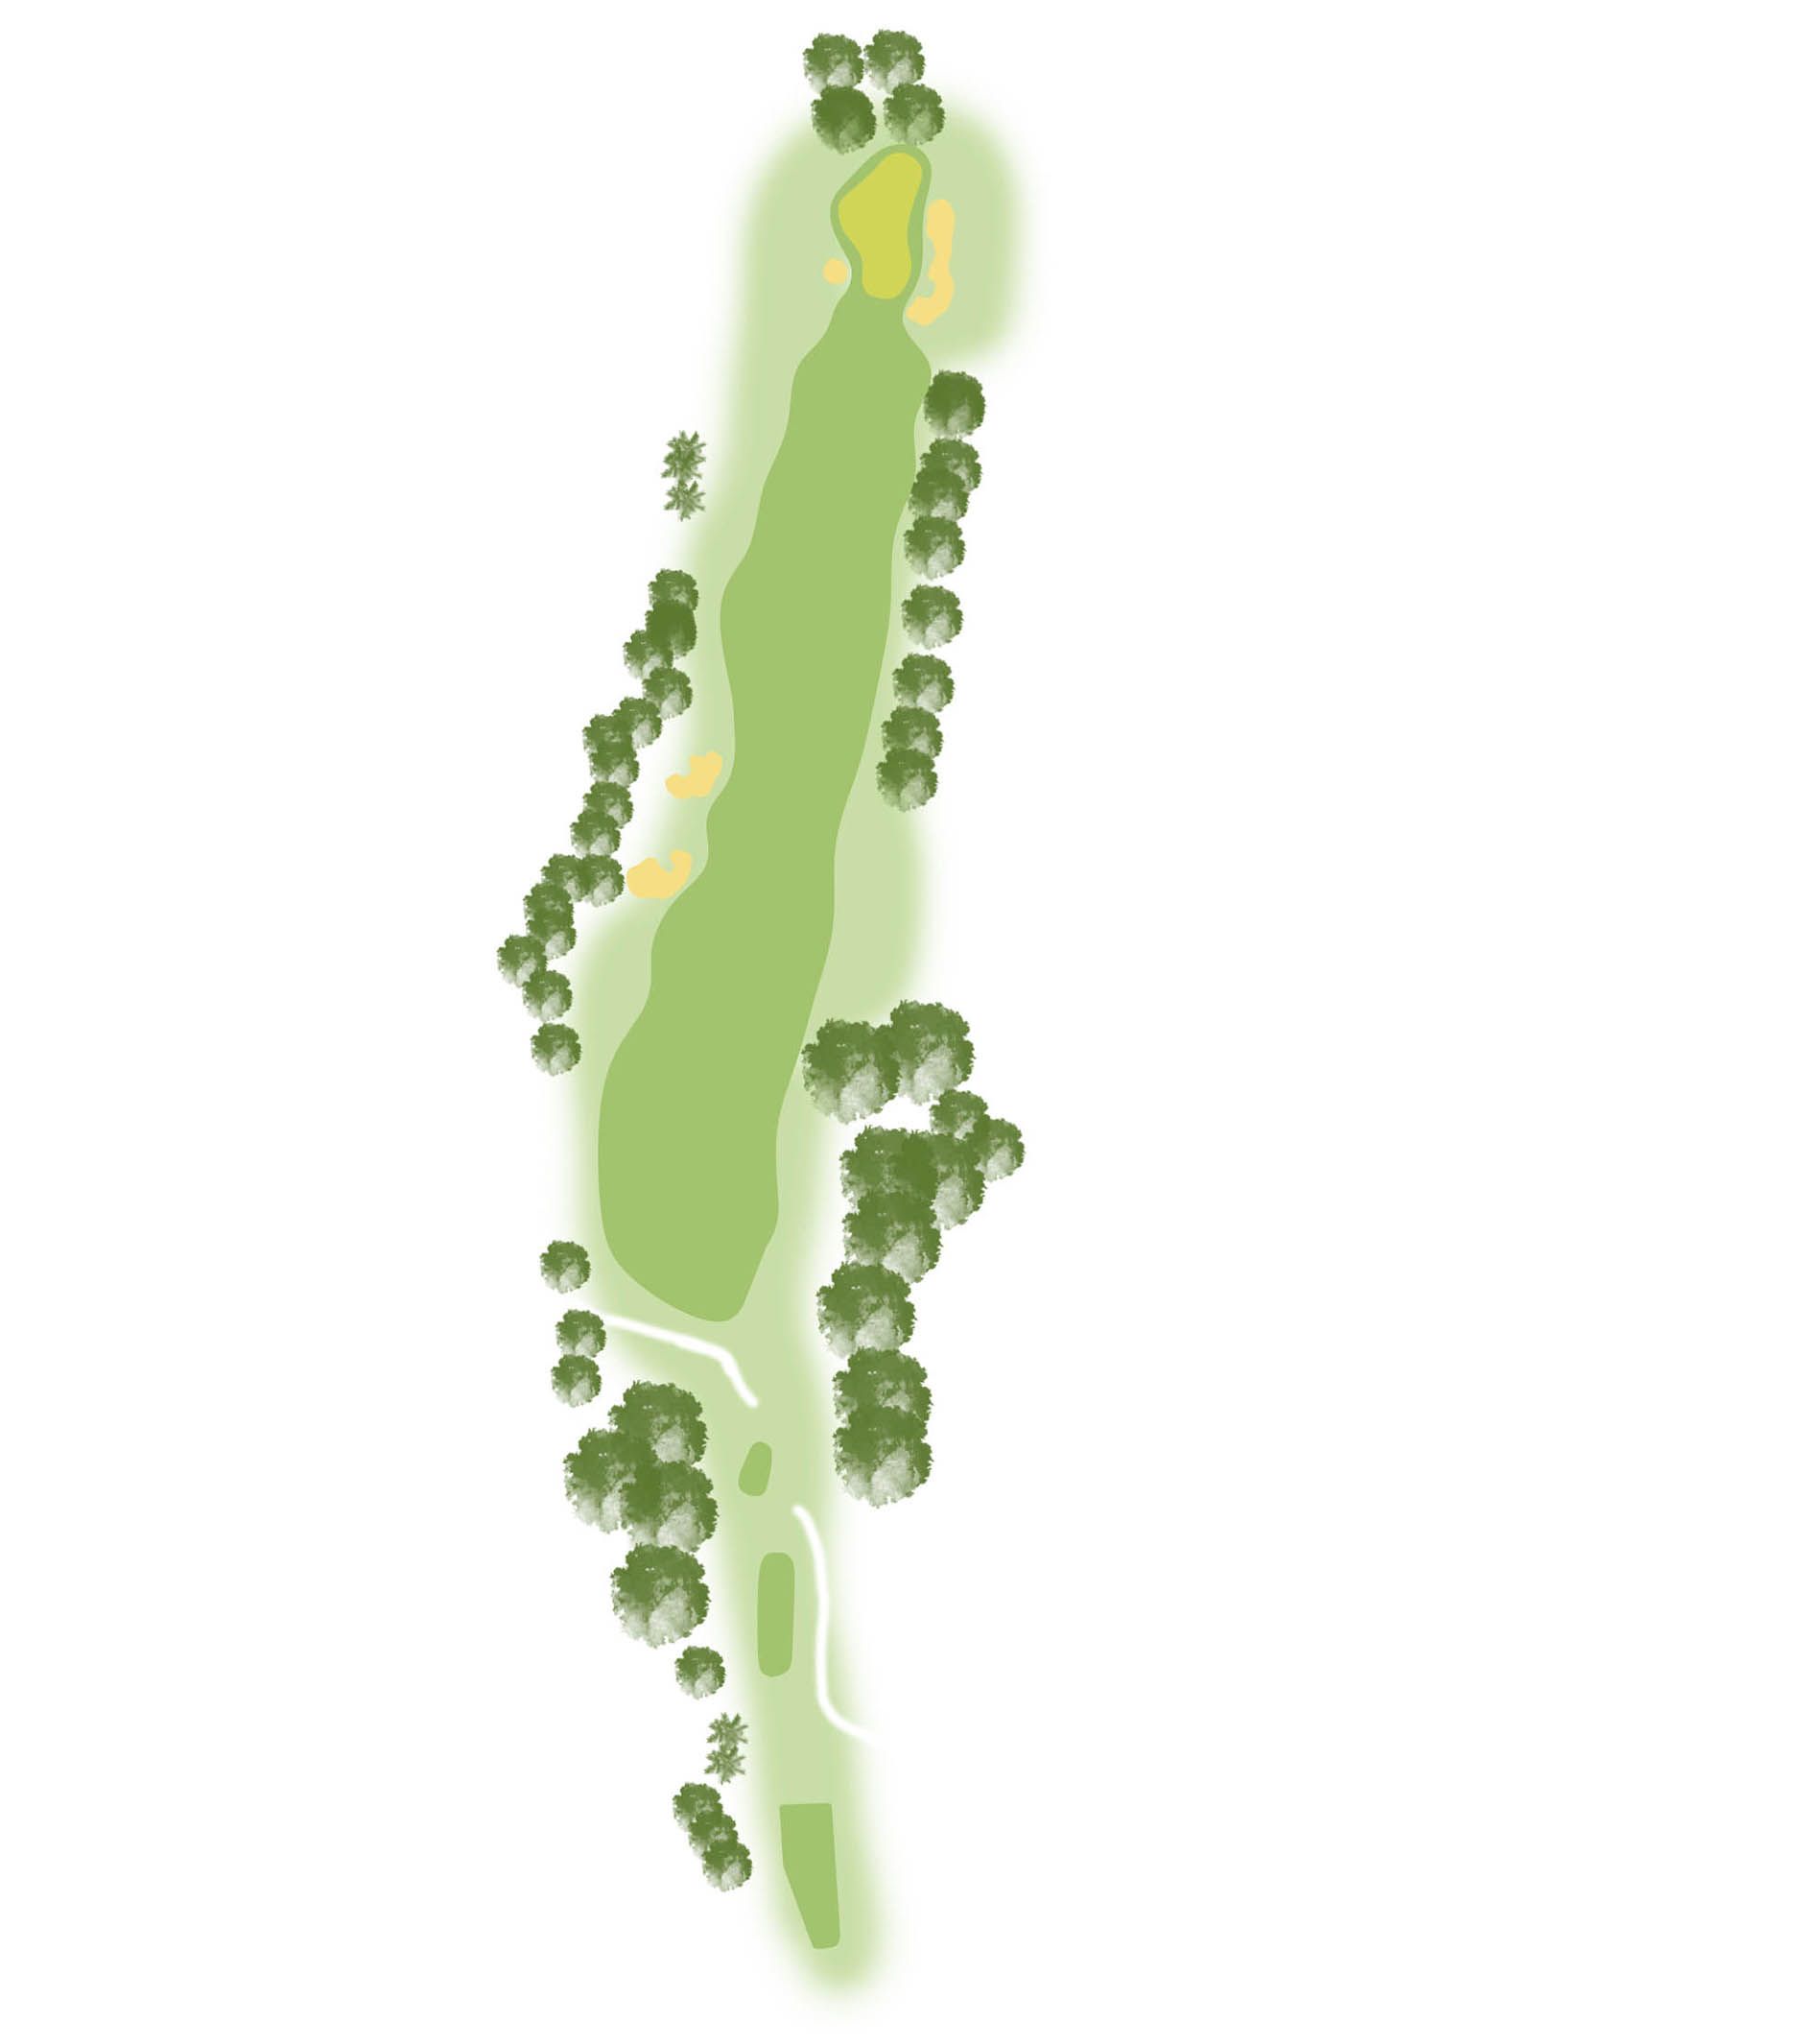
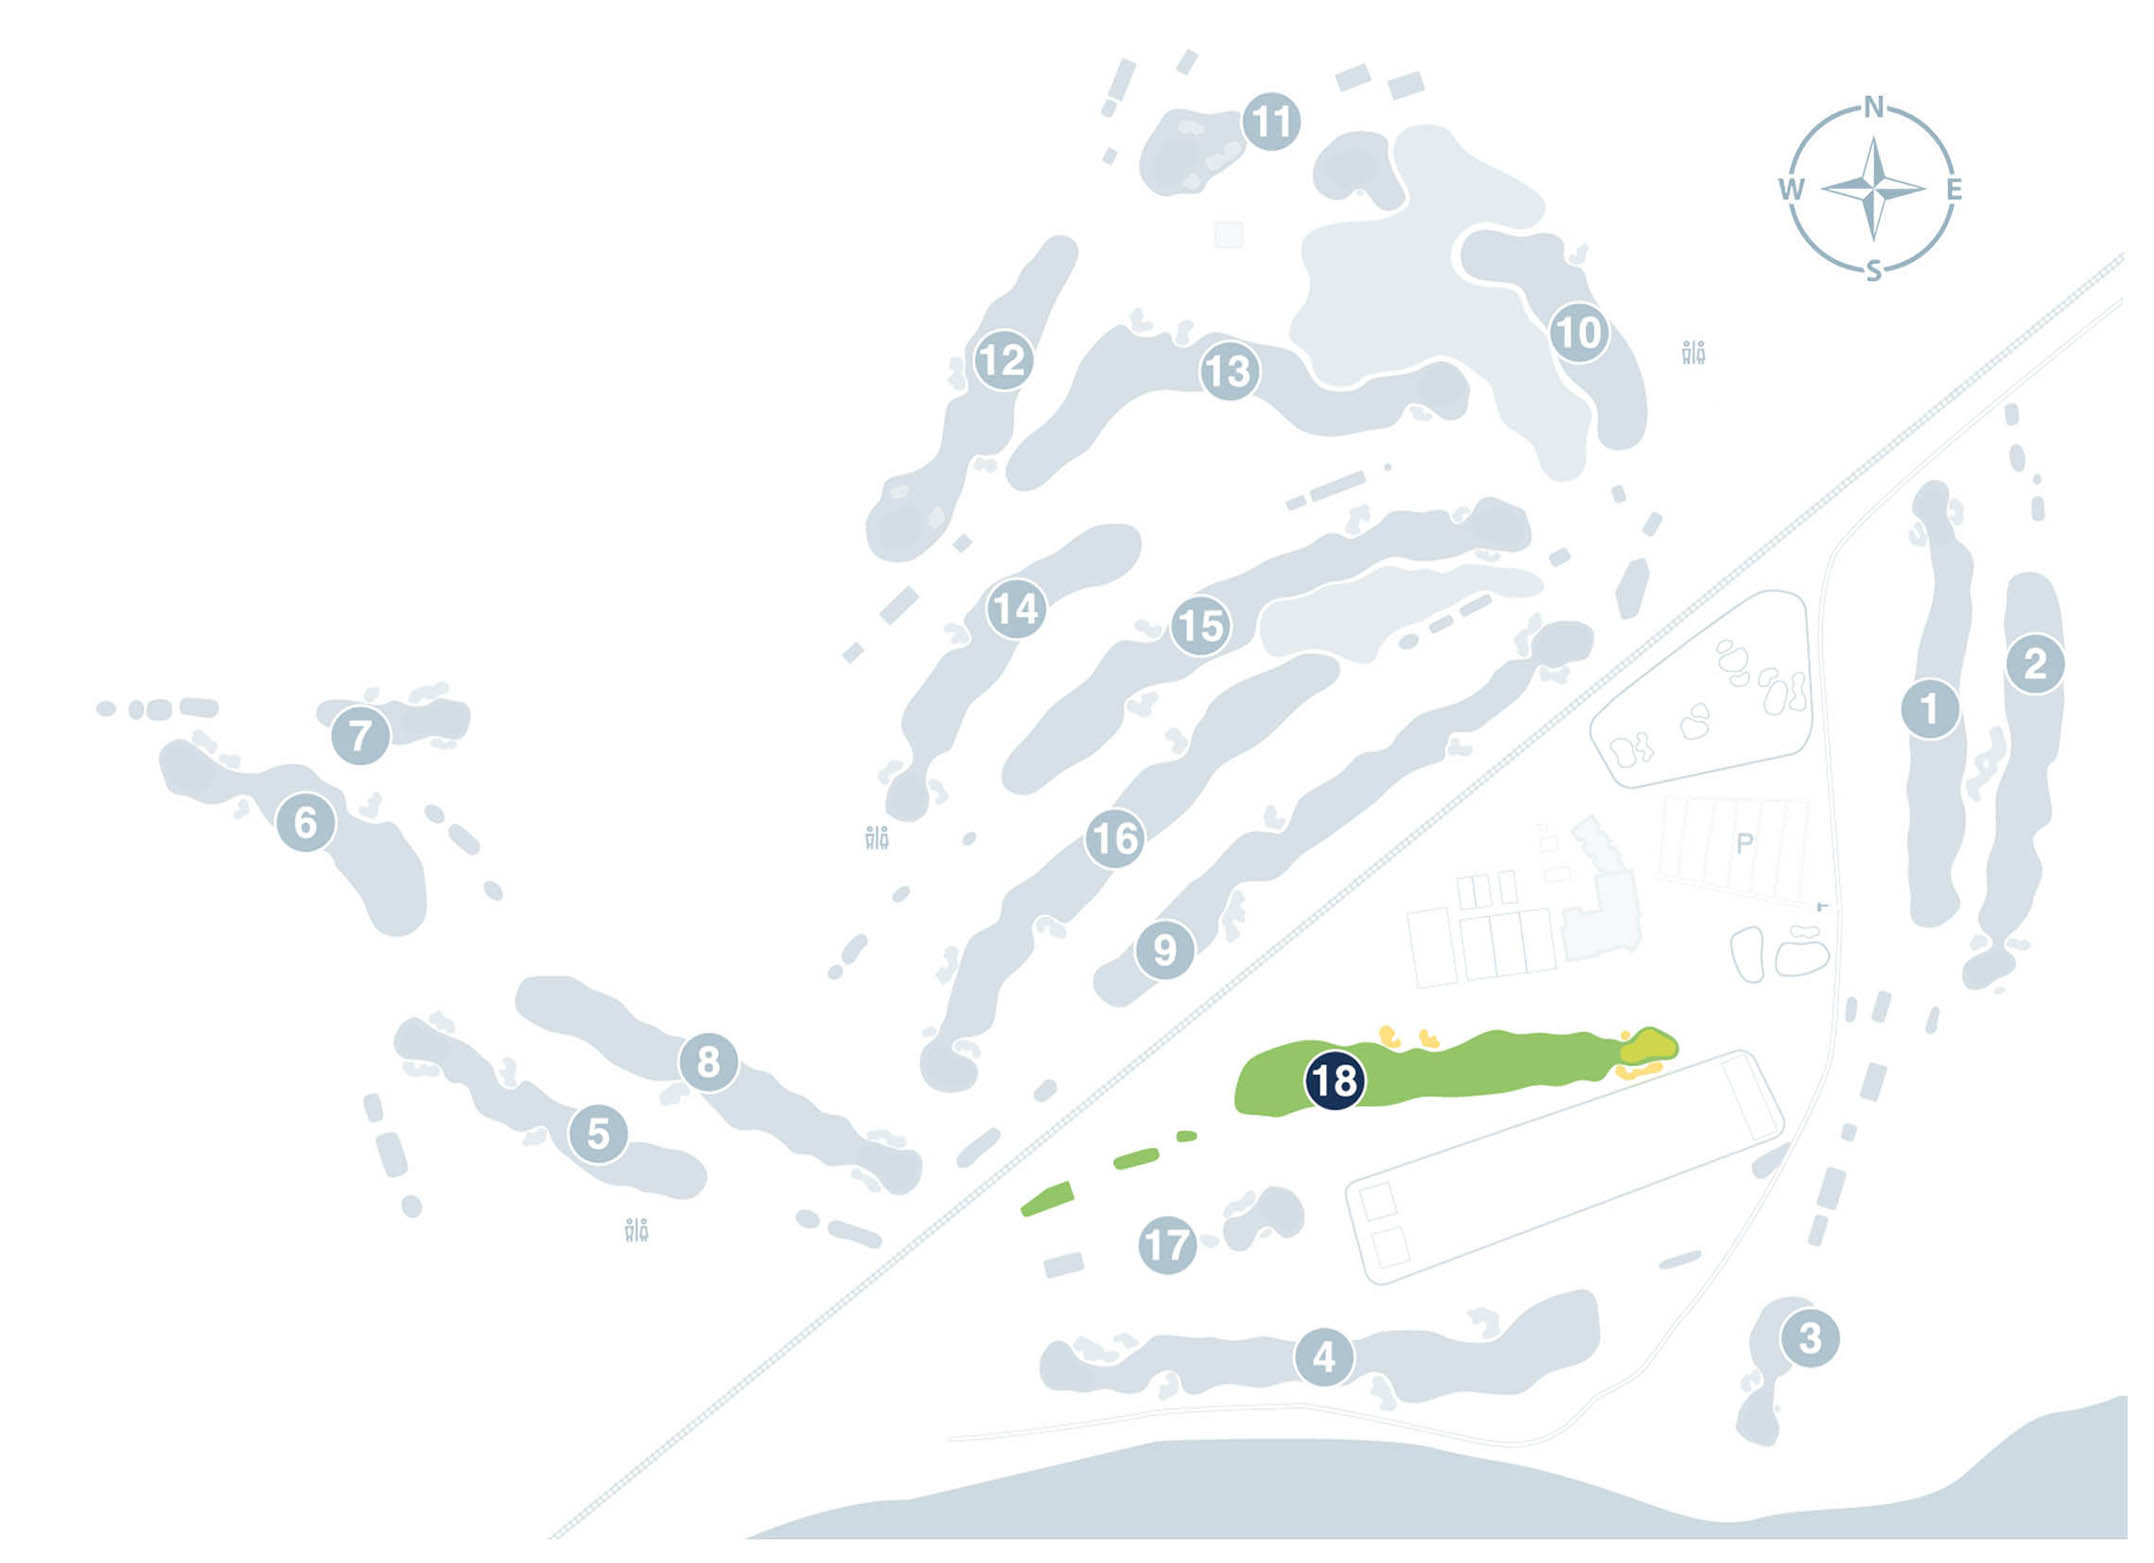
The last hole of the course will require two good shots to finish the round well. The shot from the tee is protected by out of bounds on both sides, as well as pine trees on the right side and two tricky bunkers on the left side of the fairway. It is important to be able to place the ball on the fairway to have the opportunity to reach the green in two strokes. The shot to the green requires a medium or long club to a narrow green protected by bunkers on both sides and out of bounds to the right. It will always be better to slightly try to stay on the left side. The green is long and has multiple slopes, so we must keep our concentration until the end.